
The number of Linux distributions available just keeps getting bigger. In fact, in the time it took me to write this sentence, another one may have appeared on the market. Many Linux flavors have trouble standing out in this crowd, and some are just a different combination of puzzle pieces joined to form something new: An Ubuntu base with a KDE desktop environment. A Debian base with an Xfce desktop. The combinations go on and on.
Robolinux, however, does something unique. It’s the only distro, to my knowledge, that makes working with Windows alongside Linux a little easier for the typical user. With just a few clicks, it lets you create a Windows virtual machine (by way of VirtualBox) that can run side by side with Linux. No more dual booting. With this process, you can have Windows XP, Windows 7, or Windows 10 up and running with ease.
And, you get all this on top of an operating system that’s pretty fantastic on its own. Robolinux not only makes short work of having Windows along for the ride, it simplifies using Linux itself. Installation is easy, and the installed collection of software means anyone can be productive right away.
Let’s install Robolinux and see what there is to see.
Installation
As I mentioned earlier, installing Robolinux is easy. Obviously, you must first download an ISO image of the operating system. You have the choice of installing a Cinnamon, Mate, LXDE, or xfce desktop (I opted to go the Mate route). I will warn you, the developers do make a pretty heavy-handed plea for donations. I don’t fault them for this. Developing an operating system takes a great deal of time. So if you have the means, do make a donation.
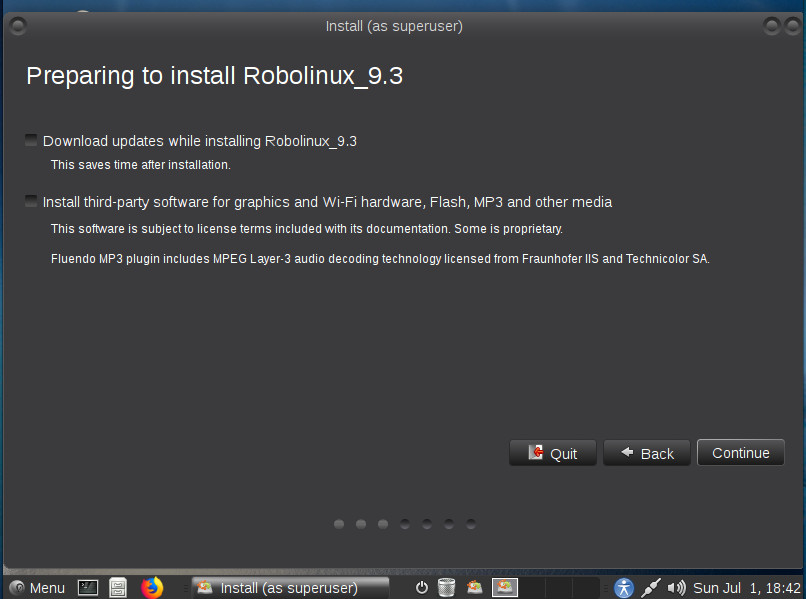
Once you’ve downloaded the file, burn it to a CD/DVD or flash drive. Boot your system with the media and then, once the desktop loads, click the Install icon on the desktop. As soon as the installer opens (Figure 1), you should be immediately familiar with the layout of the tool.
Once you’ve walked through the installer, reboot, remove the installation media, and login when prompted. I will say that I installed Robolinux as a VirtualBox VM and it installed to perfection. This however, isn’t a method you should use, if you’re going to take advantage of the Stealth VM option. After logging in, the first thing I did was install the Guest Additions and everything was working smoothly.
Default applications
The collection of default applications is impressive, but not overwhelming. You’ll find all the standard tools to get your work done, including:
-
LibreOffice
-
Atril Document Viewer
-
Backups
-
GNOME Disks
-
Medit text editor
-
Seahorse
-
GIMP
-
Shotwell
-
Simple Scan
-
Firefox
-
Pidgen
-
Thunderbird
-
Transmission
-
Brasero
-
Cheese
-
Kazam
-
Rhythmbox
-
VLC
-
VirtualBox
-
And more
With that list of software, you shouldn’t want for much. However, should you find a app not installed, click on the desktop menu button and then click Package Manager, which will open Synaptic Package Manager, where you can install any of the Linux software you need.
If that’s not enough, it’s time to take a look at the Windows side of things.
Installing Windows
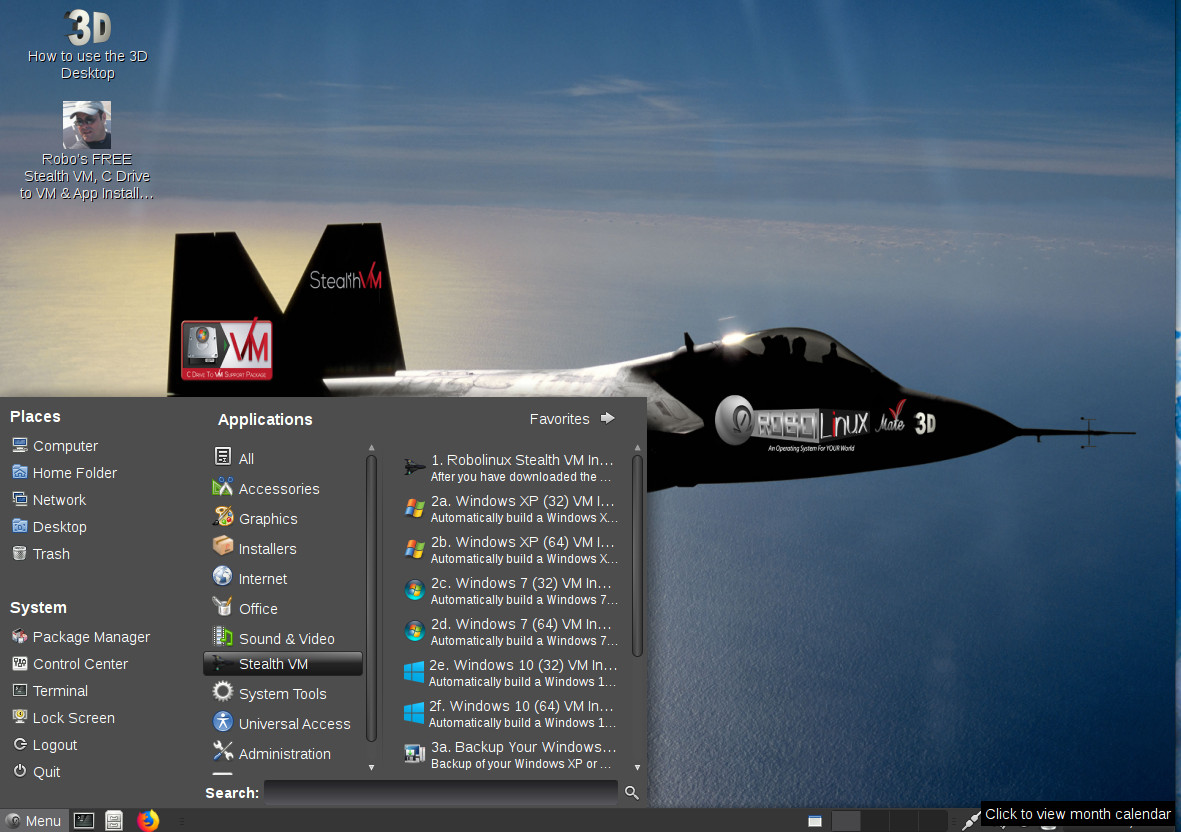
This is what sets Robolinux apart from other Linux distributions. If you click on the desktop menu button, you see a Stealth VM entry. Within that sub-menu, a listing of the different Windows VMs that can be installed appears (Figure 2).
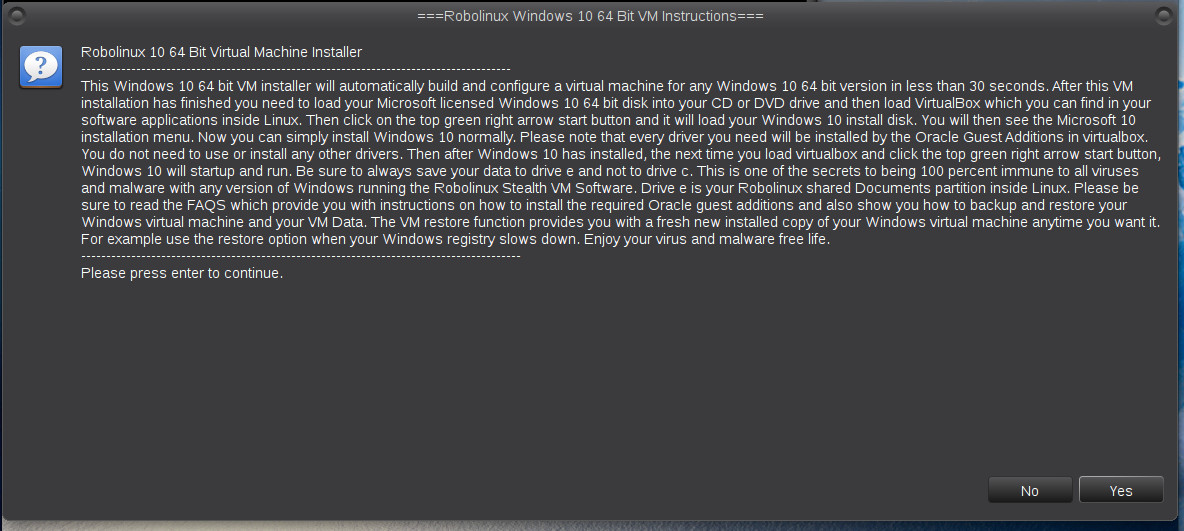
Before you can install one of the VMs, you must first download the Stealth VM file. To do that, double-click on the desktop icon that includes an image of the developer’s face (labeled Robo’s FREE Stealth VM). You must save that file to the ~/Downloads directory. Don’t save it anywhere else, don’t extract it, and don’t rename it. With that file in place, click the start menu and then click Stealth VM. From the listing, click the top entry, Robolinx Stealth VM Installer. When prompted, type your sudo password. You will then be prompted that the Stealth VM is ready to be used. Go back to the start menu and click Stealth VM and select the version of Windows you want to install. A new window will appear (Figure 3). Click Yes and the installation will continue.
Next you will be prompted to type your sudo password again (so your user can be added to the vboxusers group). Once you’ve taken care of that, you’ll be prompted to configure the RAM you want to dedicate to the VM. After that, a browser window will appear (once again asking for a donation). At this point everything is (almost) done. Close the browser and the terminal window.
You’re not finished.
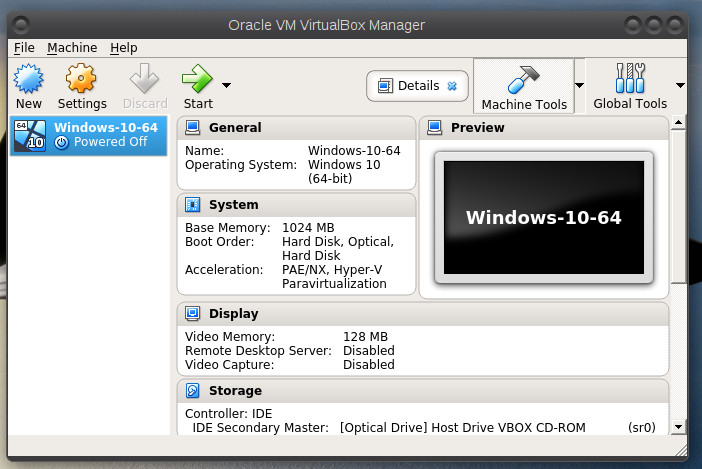
Next you must insert the Windows installer media that matches the type of Windows VM you installed. You then must start VirtualBox by click start menu > System Tools > Oracle VM VirtualBox. When VirtualBox opens, an entry will already be created for your Windows VM (Figure 4).
You can now click the Start button (in VirtualBox) to finish up the installation. When the Windows installation completes, you’re ready to work with Linux and Windows side-by-side.
Making VMs a bit more user-friendly
You may be thinking to yourself, “Creating a virtual machine for Windows is actually easier than that!”. Although you are correct with that sentiment, not everyone knows how to create a new VM with VirtualBox. In the time it took me to figure out how to work with the Robolinux Stealth VM, I could have had numerous VMs created in VirtualBox. Additionally, this approach doesn’t happen free of charge. You do still have to have a licensed copy of Windows (as well as the installation media). But anything developers can do to make using Linux easier is a plus. That’s how I see this—a Linux distribution doing something just slightly different that could remove a possible barrier to entry for the open source platform. From my perspective, that’s a win-win. And, you’re getting a pretty solid Linux distribution to boot.
If you already know the ins and outs of VirtualBox, Robolinux might not be your cuppa. But, if you don’t like technology getting in the way of getting your work done and you want to have a Linux distribution that includes all the necessary tools to help make you productive, Robolinux is definitely worth a look.


