
Learn how to easily check Linux logs in this article from our archives.
At some point in your career as a Linux administrator, you are going to have to view log files. After all, they are there for one very important reason…to help you troubleshoot an issue. In fact, every seasoned administrator will immediately tell you that the first thing to be done, when a problem arises, is to view the logs.
And there are plenty of logs to be found: logs for the system, logs for the kernel, for package managers, for Xorg, for the boot process, for Apache, for MySQL… For nearly anything you can think of, there is a log file.
Most log files can be found in one convenient location: /var/log. These are all system and service logs, those which you will lean on heavily when there is an issue with your operating system or one of the major services. For desktop app-specific issues, log files will be written to different locations (e.g., Thunderbird writes crash reports to ‘~/.thunderbird/Crash Reports’). Where a desktop application will write logs will depend upon the developer and if the app allows for custom log configuration.
We are going to be focus on system logs, as that is where the heart of Linux troubleshooting lies. And the key issue here is, how do you view those log files?
Fortunately there are numerous ways in which you can view your system logs, all quite simply executed from the command line.
/var/log
This is such a crucial folder on your Linux systems. Open up a terminal window and issue the command cd /var/log. Now issue the command ls and you will see the logs housed within this directory (Figure 1).

Now, let’s take a peek into one of those logs.
Viewing logs with less
One of the most important logs contained within /var/log is syslog. This particular log file logs everything except auth-related messages. Say you want to view the contents of that particular log file. To do that, you could quickly issue the command less /var/log/syslog. This command will open the syslog log file to the top. You can then use the arrow keys to scroll down one line at a time, the spacebar to scroll down one page at a time, or the mouse wheel to easily scroll through the file.
The one problem with this method is that syslog can grow fairly large; and, considering what you’re looking for will most likely be at or near the bottom, you might not want to spend the time scrolling line or page at a time to reach that end. Will syslog open in the less command, you could also hit the [Shift]+[g] combination to immediately go to the end of the log file. The end will be denoted by (END). You can then scroll up with the arrow keys or the scroll wheel to find exactly what you want.
This, of course, isn’t terribly efficient.
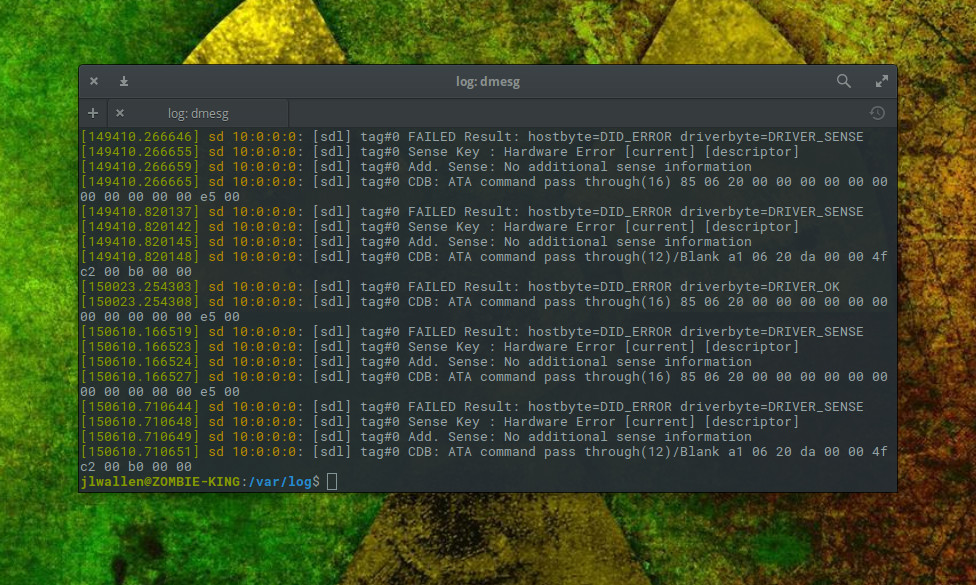
Viewing logs with dmesg
The dmesg command prints the kernel ring buffer. By default, the command will display all messages from the kernel ring buffer. From the terminal window, issue the command dmesg and the entire kernel ring buffer will print out (Figure 2).
Fortunately, there is a built-in control mechanism that allows you to print out only certain facilities (such as daemon).
Say you want to view log entries for the user facility. To do this, issue the command dmesg –facility=user. If anything has been logged to that facility, it will print out.
Unlike the less command, issuing dmesg will display the full contents of the log and send you to the end of the file. You can always use your scroll wheel to browse through the buffer of your terminal window (if applicable). Instead, you’ll want to pipe the output of dmesg to the less command like so:
dmesg | less
The above command will print out the contents of dmesg and allow you to scroll through the output just as you did viewing a standard log with the less command.
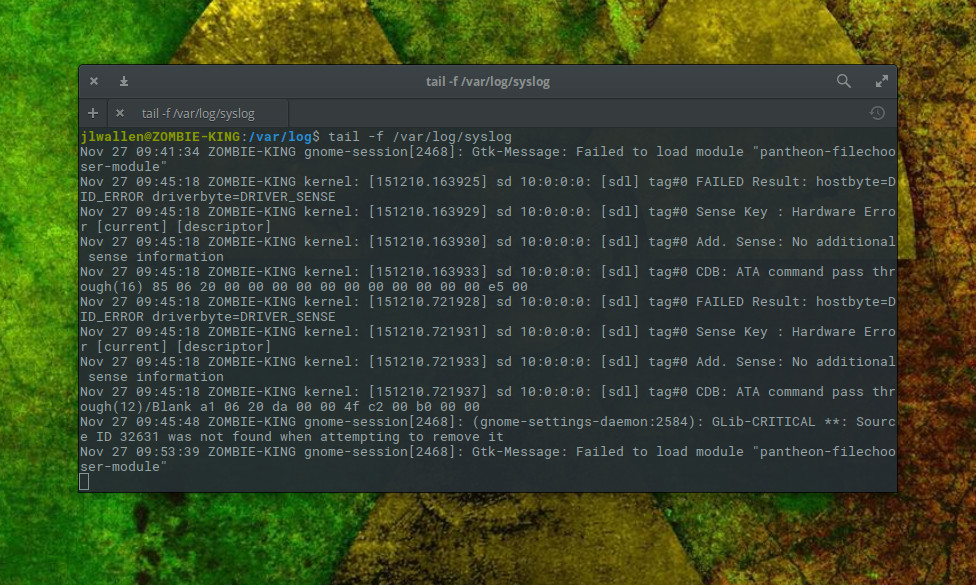
Viewing logs with tail
The tail command is probably one of the single most handy tools you have at your disposal for the viewing of log files. What tail does is output the last part of files. So, if you issue the command tail /var/log/syslog, it will print out only the last few lines of the syslog file.
Using tail in this manner is invaluable for troubleshooting issues.
To escape the tail command (when following a file), hit the [Ctrl]+[x] combination.
You can also instruct tail to only follow a specific amount of lines. Say you only want to view the last five lines written to syslog; for that you could issue the command:
tail -f -n 5 /var/log/syslog
The above command would follow input to syslog and only print out the most recent five lines. As soon as a new line is written to syslog, it would remove the oldest from the top. This is a great way to make the process of following a log file even easier. I strongly recommend not using this to view anything less than four or five lines, as you’ll wind up getting input cut off and won’t get the full details of the entry.
There are other tools
You’ll find plenty of other commands (and even a few decent GUI tools) to enable the viewing of log files. Look to more, grep, head, cat, multitail, and System Log Viewer to aid you in your quest to troubleshooting systems via log files.
Advance your career with Linux system administration skills. Check out the Essentials of System Administration course from The Linux Foundation.


