
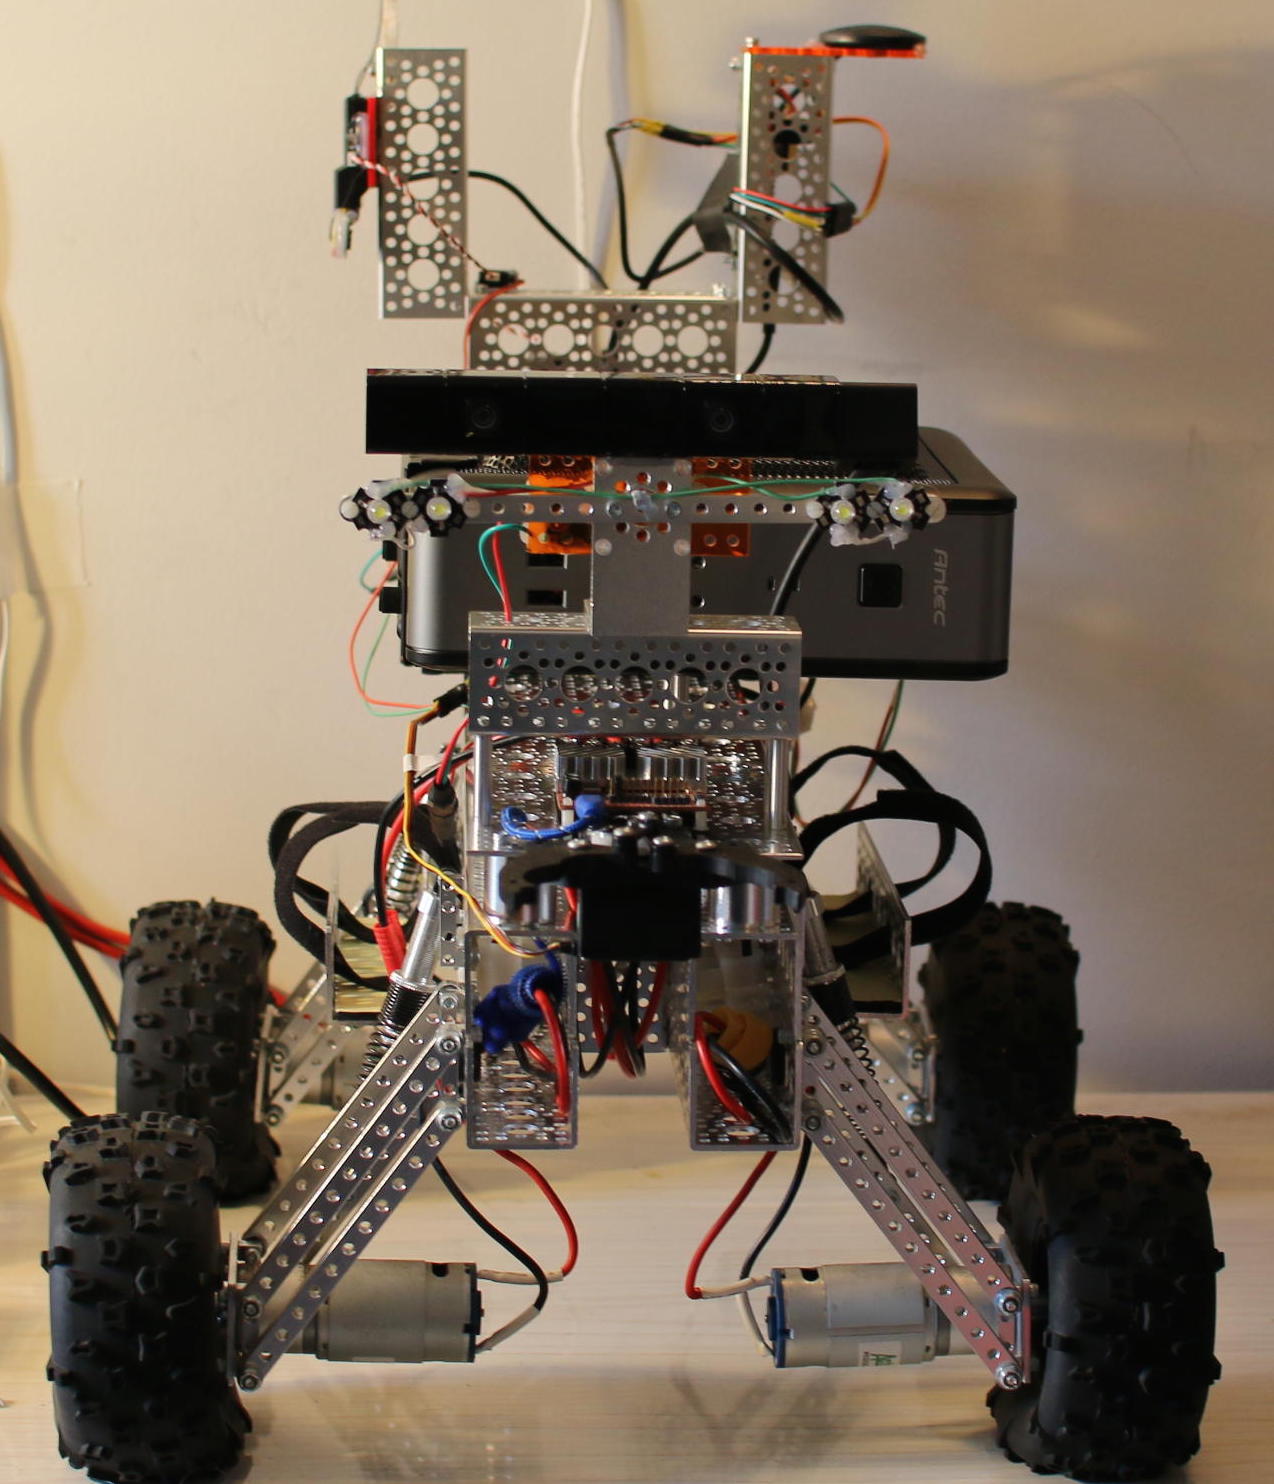
The first three parts of this series (see links below) have shown the building of the Mantis robot (Figure 1), how to control things with the RoboClaw motor controller, and operation of the robot using the keyboard. Before you start thinking about self-driving robots, it is useful to be able to control the robot more accurately with a portable wireless controller. This time, I’ll show how to use a PS3 joystick over Bluetooth to control the robot.
The PS3 joystick is much easier to carry around than a keyboard and provides more natural adjustment of the speed and heading of the robot. No longer do you have to tap keys multiple times to steer the robot; just move the joystick a little more to the left or the right if you want to move more or less in each direction.
PS3 Controller Robot Drive
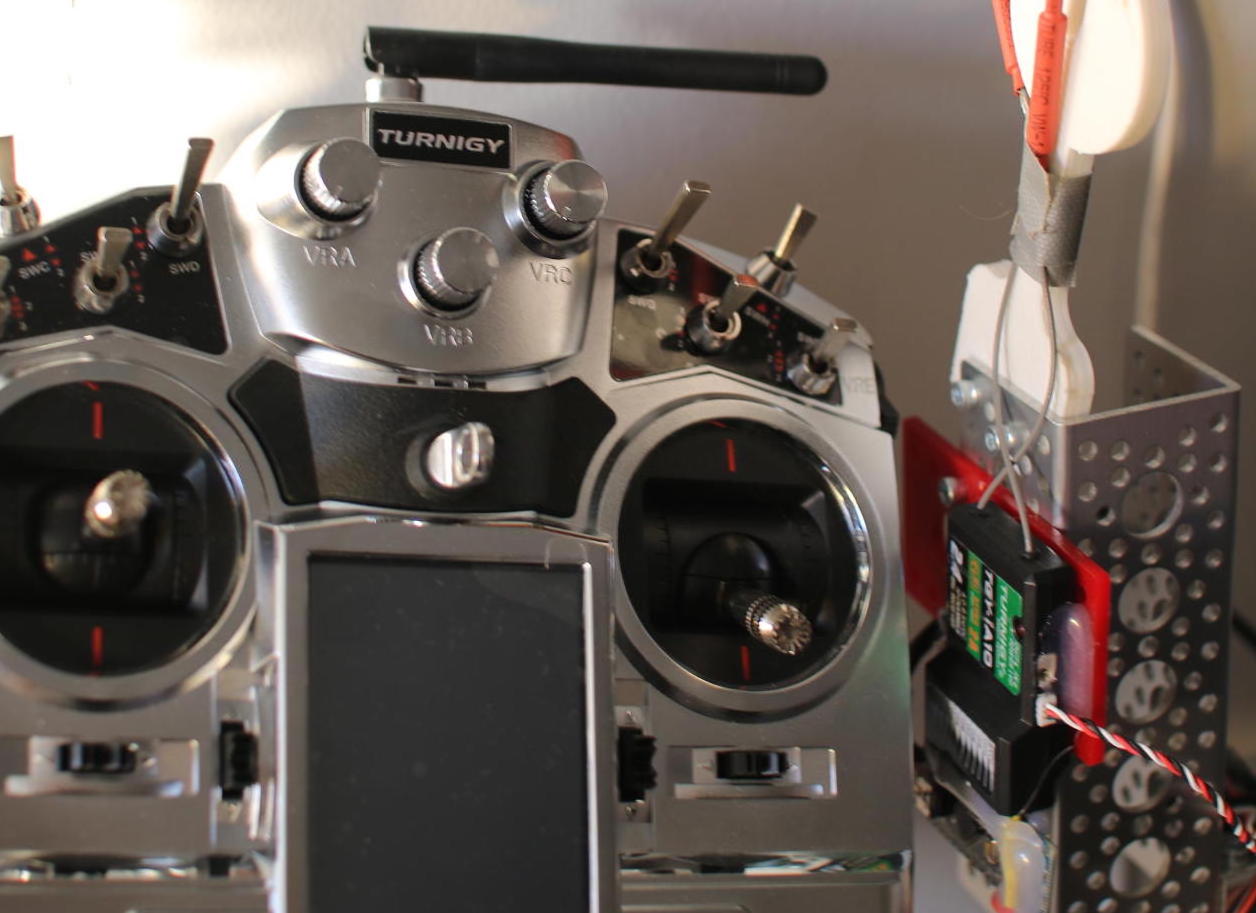
The PS3 controller has four analog inputs, two as joysticks near the center of the controller and two analog buttons around the top left and top right of the controller. You can also get additions for the PS3 controller that give you a greater physical movement space for the same input range. This can be very useful when trying to control a robot with a controller that’s designed for video games. If you have a little more budget, a hobby radio control transmitter and receiver will give you longer range control than the PS3 controller (Figure 2).
Then, you can run the six-axis controller daemon (sixad) on the Raspberry Pi and press the “ps” button in the middle of the controller. It should indicate that it has connected as controller “1”. To test this out run the jstest program and you should see changes on the screen as you move the joystick around and press buttons.
A joydrive command can then control the motors using input from the PS3 controller. This is much like the simpledrive command shown previously, which controlled the robot from the keyboard. The joystick is opened in non-blocking mode as shown below.
int joyfd = open ("/dev/input/js0", O_RDONLY | O_NONBLOCK);
To read from the joystick, you use the struct js_event type. The js_event contains information about a single event, such as a button being pressed or where an axis of input is located. For example, if you press one of the input joysticks upwards then you will get events of type JS_EVENT_AXIS with a number of perhaps 3 (for that axis) and a value that ranges from 0 in the middle to +/-32767.
The one trap for young players here is not maintaining state for the axis that you are using. For example, when the joystick is moved forward, it is possible that another button or axis changes state, too. If you want to track where the axis that you’re using for forward and backward is located at the moment, you have to cache the last value sent by the Linux joystick API for that axis. This is why the ev_forwardback and ev_leftright variables exist in the program.
struct js_event e;
bzero( &e, sizeof(struct js_event));
struct js_event ev_forwardback;
bzero( &ev_forwardback, sizeof(struct js_event));
struct js_event ev_leftright;
bzero( &ev_leftright, sizeof(struct js_event));
In the main loop, if a new joystick event can be read without blocking, we update the timeoutHandler and then inspect the new event that we read. If it is for the triangle button, then we assume the user is no longer interested in driving the robot. So, we stop it and exit the program. Movements on axis that are interesting are cached to local variables.
struct js_event ne;
if( ::read (joyfd, &ne,
         sizeof(struct js_event)) == sizeof(struct js_event) )
{
   timeoutHandler.update();
   e = ne;

   if( e.type == JS_EVENT_BUTTON )
   {
#define PS3_BUTTON_TRIANGLE 12
       if( e.number == PS3_BUTTON_TRIANGLE )
       {
           std::pair< float, float > d = mm.getActiveDuty();
           rc.rampDown( d.first, d.second );
           break;
       }
   }

   if( e.type == JS_EVENT_AXIS )
   {
       switch( e.number )
       {
           case 3:
               ev_forwardback = ne;
               break;
           case 0:
               ev_leftright = ne;
               break;
       }
   }
}
The gain of having a cached value for the axis that we are interested in is that we can update the robot speed and direction once every iteration, regardless of whether any changes are received from the joystick itself.
There are many ways to do this update, I have found that treating the speed adjustment as an acceleration and the heading adjustment as a direct adjustment works fairly well. This means that you can hold the joystick forward to speed up the robot, then release the joystick, and the robot will continue to hold the current speed. If you move the joystick for axis control left, then the heading is directly modified to the current joystick value. This seems to work fairly well, as adjustments to how the robot is turning are made fairly quickly; whereas, you might like to have the robot keep moving without having to hold a joystick at any specific angle for a prolonged period.
The main task is to convert the joystick value that the Linux kernel gave us from the range [-32767,+32767] to [-1,1] that the MantisMovement class expects. I found the axis that I was using for forward and backward was in reverse to what I expected, so I inverted the sign on that axis.
const float incrSpeed = 1;
const float incrHeading = 0.01;

float v = ev_forwardback.value;
v /= 32767.0;
v *= -1;
mvwprintw( w,1,1,"FWD/BACK   %f   %d", v, iter );
mm.adjustSpeed( incrSpeed * v );

v = ev_leftright.value;
v /= 32767.0;
v *= 1.0;
mvwprintw( w,1,1,"LEFT/RIGHT %f ", v );
mm.setHeading( v );
Final Words
The combination of a Mantis kit, RoboClaw motor controller, Raspberry Pi, battery, WiFi and Bluetooth dongles, and a PS3 controller give you are powerful robot base that can easily move outdoors. This is a great base platform to start playing with perception and semi-autonomous robot control.
For improvement, you might want to add a feedback mechanism to the wheels of your Mantis so that you know how far you have traveled. Or, you could run a robotics platform, such as ROS, on top of an Ubuntu Linux installation on your Mantis. Maybe your Mantis robot will end up competing for fame and fortune in a NASA autonomous robot challenge.
For longer range wireless control, you might like to use a dedicated transmitter and receiver pair designed for radio-controlled hobbies. The range of these controllers is much greater, and they are much less likely to drop signal due to interference. These controllers emit a signal for multiple channels that can be read using an Arduino and turned into a serial stream over USB.
The code I have given here is all open source and available on GitHub. Note that this is really a very minimal example of control and improvements to emergency stop conditions and battery voltage monitoring, and stop should really be added to the code.
I want to thank ServoCity and ION Motion Control for supplying the Mantis 4WD Robot Kit and RoboClaw Motor Controller used in these articles. ServoCity also provided a Raspberry Pi Channel mount and RoboClaw mount to help complete the build quickly.
Check out this short video of the Mantis in action:
Read the previous articles in this series:
Build an Off-Road Raspberry Pi Robot: Part 1
Build an Off-Road Raspberry Pi Robot: Part 2
Build an Off-Road Raspberry Pi Robot: Part 3


