
Introduction
Back again with a new episode of my favorite saga: Creating a custom live distro for a special appliance, if you’ve read all the introduction articles (this link goes to the summary) you may know that now it’s time to go deep with some serious stuff. As I told you before in previous episodes I’ve taken SLAX as my base due to its marvelous features if you need to deal with custom distro like me.
What I’ll do now it’s to create “the building machine”, from there you’ll create new distros and explore its powerful features: create new packages, install them, do some custom stuff and so on.
Download
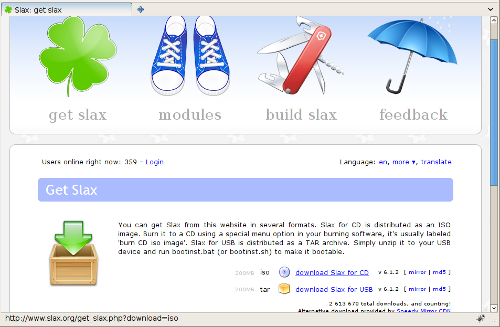
The first thing to do is obviously download an ISO from their site (http://www.slax.org), you may add or remove your favorite software from the basic installation, if you visit the site for a while you’ll notice how simple is to get something from them, for this example and this custom build machine it’s not necessary to download additional software, just grab the ready made slax machine as it is, it’s about 200Mb so it’s not that big. In the download area get the ISO image, we’ll use it to install our machine.
Create the Machine
Now to work in a clean environment I’ll create a virtual build machine and I’ll install Slax there, you don’t need to worry about your host operating system, this build machine is a virtual appliance so you may move or use it wherever you want. I’ve used VMWare because that’s what I use more often, obviously you may create your own machine with your favorite virtualization software. If you’re lazy and you don’t even want to create your machine, you may ask me a clean Slax build machine. I don’t have a web space online for 200Mb, if you can supply me something I’ll publish this machine for free in that area
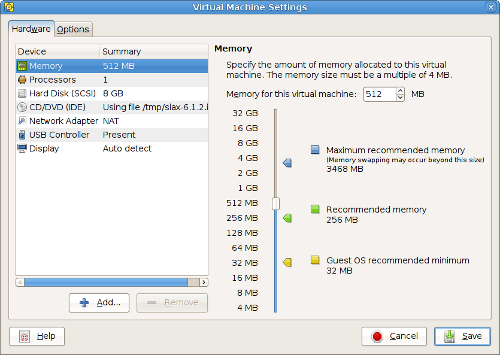
Now this virtual machine has just basic components: CPU, memory (512Mb), CD-ROM, hard disk, nothing more is required for a basic startup.
- Memory is not an huge problem, our Slax will run even on memory constrained systems, my choice is to use 512Mb of ram
- CD-ROM needs to be mapped to your fresh ISO just downloaded from Slax site, you don’t need to burn a CD for a virtual machine (even if is up to you to decide what to do), after your final installation you may remove the CD-ROM device, we’ll install Slax in a virtual hard drive
- Hard Disk, just take a standard 8Gb virtual disk, even if Slax will never use it all
Here’s a screenshot from my VMWare Player with my basic startup configuration
First Boot
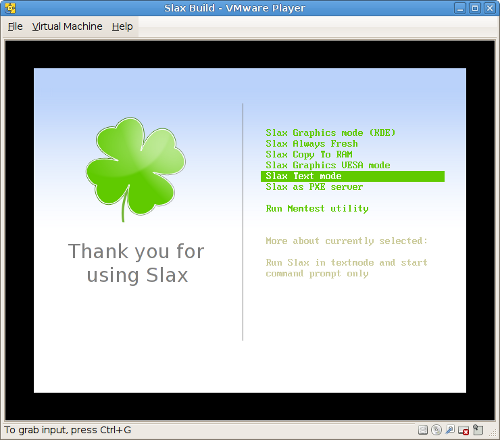
Now power on your virtual machine, we’ll install the exact image contained into the CD-ROM in our hard drive. After the boot you’ll see Slax splash screen, just select “text only boot mode”, we don’t need XWindow now
Wait for a while until you’ll see your login and type “root” as username and password “toor” as reported in the welcome message; now you’ll see the prompt and you’re ready for your clean install.
In the next page there’s the installation process


