
Start exploring Linux Security Fundamentals by downloading the free sample chapter today. DOWNLOAD NOW
In last week’s tutorial, we tried out tcpdump and wireshark, two of the most useful tools for troubleshooting what is happening as network traffic is transmitted and received on the system.
nmap is another essential tool for troubleshooting and discovering information about the network and services available in an environment. This is an active tool (in contrast to tcpdump and wireshark) which sends packets to remote systems in order to determine information about the applications running and services offered by those remote systems.
Be sure to inform the network security team as well as obtain written permission from the owners and admins of the systems which you will be scanning with the nmap tool. In many environments, active scanning is considered an intrusion attempt.
The information gleaned from running nmap can provide clues as to whether or not a firewall is active in between your system and the target. nmap also indicates what the target operating system might be, based on fingerprints of the replies received from the target systems. Banners from remote services that are running may also be displayed by the nmap utility.
Set up your system
Access to the Linux Foundation’s lab environment is only possible for those enrolled in the course. However, we’ve created a standalone lab for this tutorial series to run on any single machine or virtual machine which does not need the lab setup to be completed. The best results are obtained by using “bridging” rather than “NAT” in your virtualization manager. Consult the documentation for your virtualization type (i.e., Oracle VirtualBox, VMware Workstation, and others ) to verify or alter the networking connection type.
Start the exercise
First, let’s install nmap on your Linux machine.
For Red Hat, Fedora and Suse machines:
$ sudo yum install nmap
For Debian and Ubuntu machines:
$ sudo apt-get install nmap
Next, explore the nmap man page.
$ man nmap
For the best results, run nmap as root or use sudo with the nmap command.
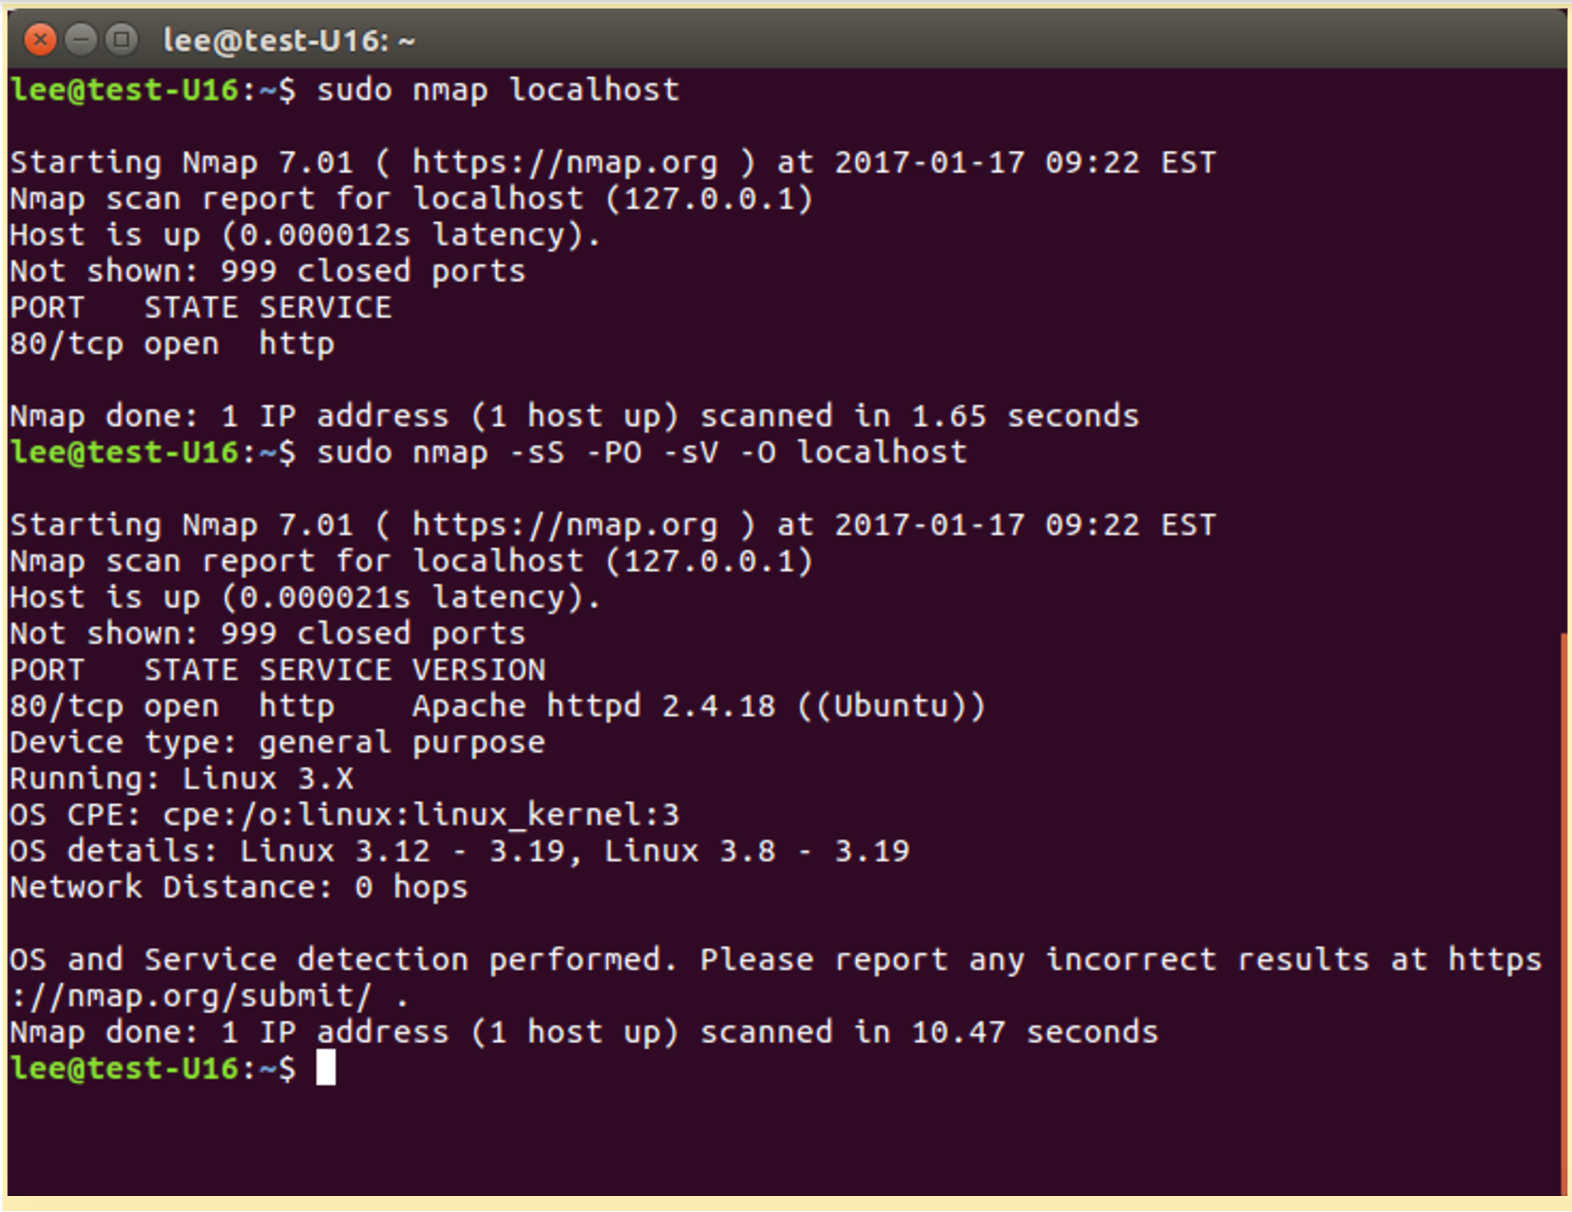
Now, we will run nmap on the localhost:
# nmap localhost
Increase the information nmap acquires:
# nmap -sS -PO -sV -O localhost
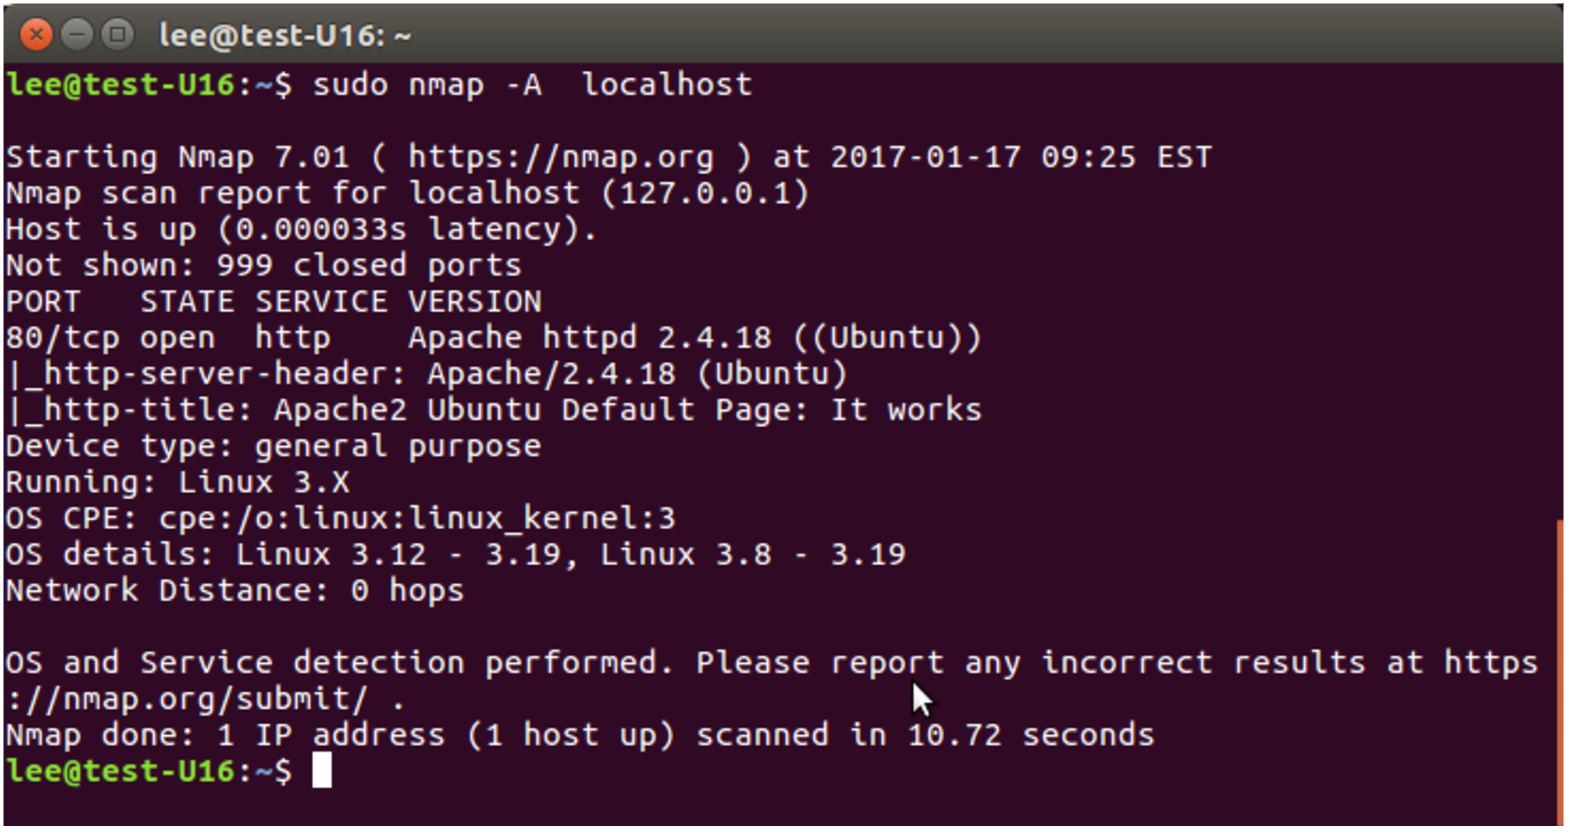
By adding the -A option to the nmap program, we can see the OS fingerprint detection capabilities of nmap:
# nmap -A localhost
A common usage for nmap is to perform a network ping scan; basically, ping all possible IP addresses in a subnet range in order to discover what IP addresses are currently in use. This is also sometimes referred to as network discovery.
# nmap -sP 192.168.0.0/24
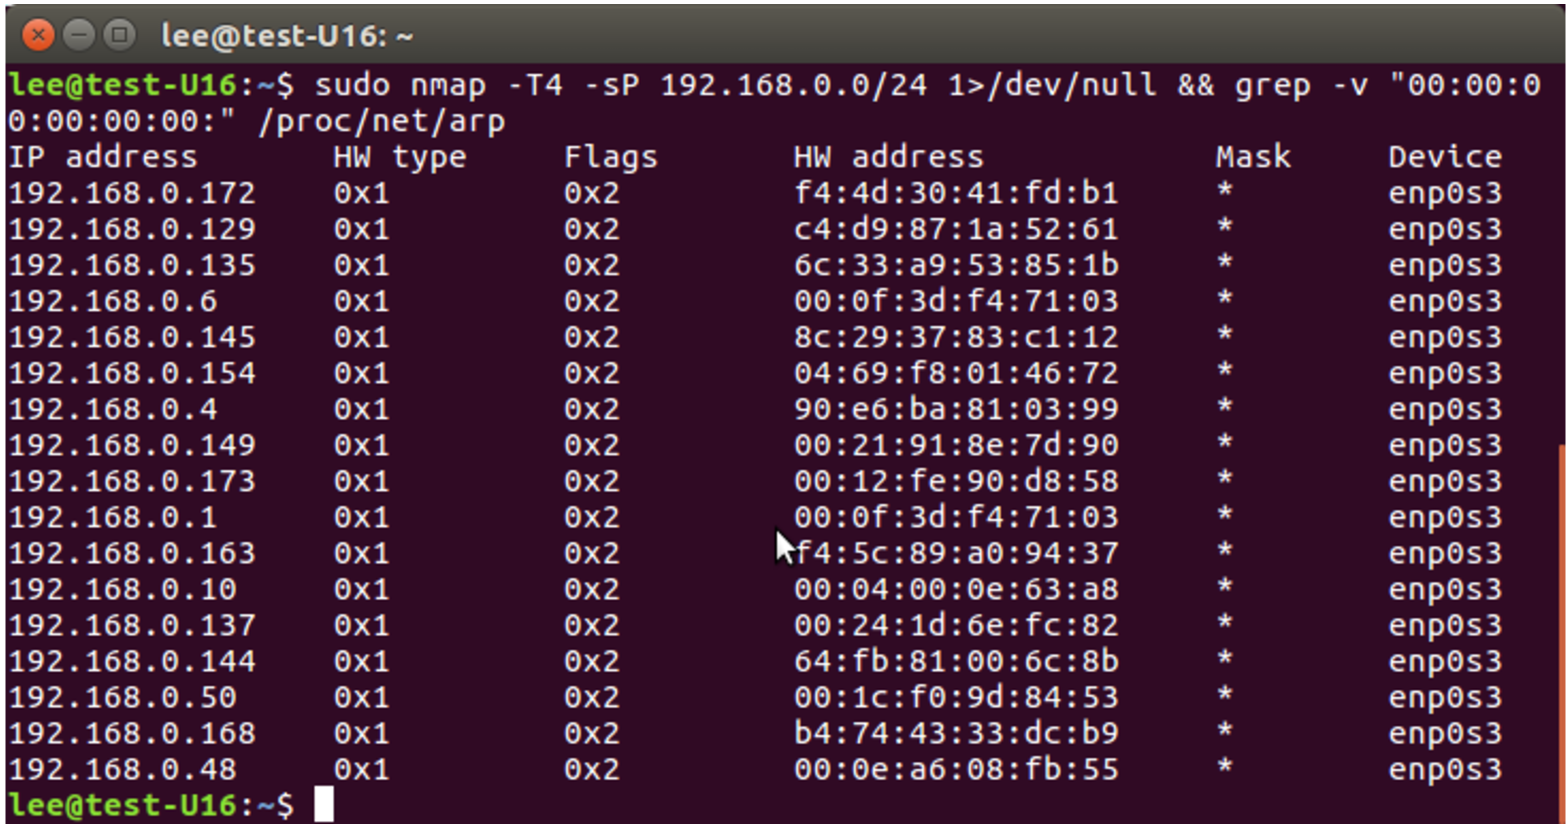
Another interesting nmap command to find all the active IP address on a locally attached network:
#nmap -T4 -sP 192.168.0.0/24 1>/dev/null && grep -v “00:00:00:00:00:00” /proc/net/arp
Addressing for nmap is very flexible DNS names can be used, IP addresses, IP ranges are all acceptable, consult the nam page for additional details.
We cover more uses for this tool later in the course. For now, have fun exploring the tool!
This concludes our six-part series on Linux Security Fundamentals. Download the entire sample chapter for the course or re-visit previous tutorials in this series, below.
Stay one step ahead of malicious hackers with The Linux Foundation’s Linux Security Fundamentals course. Download a sample chapter today!
Read the other articles in the series:
Linux Security Threats: The 7 Classes of Attackers
Linux Security Threats: Attack Sources and Types of Attacks
Linux Security Fundamentals Part 3: Risk Assessment / Trade-offs and Business Considerations
Linux Security Fundamentals: Estimating the Cost of a Cyber Attack
Linux Security Fundamentals Part 5: Introduction to tcpdump and wireshark


