
Start exploring Essentials of OpenStack Administration by downloading the free sample chapter today. DOWNLOAD NOW
DevStack is a GitHub-based deployment of OpenStack, provided by OpenStack.org, that allows for easy testing of new features. This tutorial, the last in our series from The Linux Foundation’s Essentials of OpenStack Administration course, will cover how to install and configure DevStack.
While DevStack is easy to deploy, it should not be considered for production use. There may be several configuration choices for new or untested code used by developers, which would not be appropriate for production.
DevStack is meant for developers, and uses a bash shell installation script instead of a package-based installation. The stack.sh script runs as a non-root user. You can change the default values by creating a local.conf file.
Should you make a mistake or want to test a new feature, you can easily unstack, clean, and stack again quickly. This makes learning and experimenting easier than rebuilding the entire system.
Setting up the Lab
One of the difficulties of learning OpenStack is that it’s tricky to install, configure and troubleshoot. And when you mess up your instance it’s usually painful to fix or reinstall it.
That’s why Linux Foundation Training introduced on-demand labs which offer a pre-configured virtual environment. Anyone enrolled in the course can click to open the exercise and then click to open a fully functional OpenStack server environment to run the exercise. If you mess it up, simply reset it. Each session is then available for up to 24 hours. It’s that easy.
Access to the lab environment is only possible for those enrolled in the course. However, you can still try this tutorial by first setting up your own AWS instance with the following specifications:
Deploy an Ubuntu Server 14.04 LTS (HVM), SSD Volume Type – ami-d732f0b7
with a m4.large (2 vcpus, 8GiB ram) instance type, increase the root disk to 20G, and open up all the network ports.
See Amazon’s EC2 documentation for more direction on how to set up an instance.
Verify the System
Once you are able to log into the environment verify some information:
1. To view and run some commands we may need root privilege. Use sudo to become root:
ubuntu@devstack-cc:~$ sudo -i
2. Verify the Ubuntu user has full sudo access in order to install the software:
    root@devstack-cc:~# grep ubuntu /etc/sudoers.d/*

    /etc/sudoers.d/90-cloud-init-users:# User rules for ubuntu

    /etc/sudoers.d/90-cloud-init-users:ubuntu ALL=(ALL) NOPASSWD:ALL
3. We are using a network attached to eth2 for our cloud connections. You will need the public IP, eth0, to access the OpenStack administrative web page after installing DevStack. From the output find the inet line and make note of the IP Address. In the following example the IP address to write down would be: 166.78.151.57 Your IP address will be different. If you restart the lab the IP address may change.
 root@devstack-cc:~# ip addr show eth0

    2: eth0: <BROADCAST,MULTICAST,UP,LOWER_UP> mtu 1500 qdisc pfifo_fast state UP group default qlen 1000

        link/ether bc:76:4e:04:b5:9b brd ff:ff:ff:ff:ff:ff

        inet 166.78.151.57/24 brd 166.78.151.255 scope global eth0

           valid_lft forever preferred_lft forever

        inet6 2001:4800:7812:514:be76:4eff:fe04:b59b/64 scope global

           valid_lft forever preferred_lft forever

        inet6 fe80::be76:4eff:fe04:b59b/64 scope link

           valid_lft forever preferred_lft forever


     root@devstack-cc:~# ip addr show eth2

    4: eth2: <BROADCAST,MULTICAST,UP,LOWER_UP> mtu 1500 qdisc pfifo_fast state UP group default qlen 1000

        link/ether bc:76:4e:06:10:32 brd ff:ff:ff:ff:ff:ff

        inet 192.168.97.1/24 brd 192.168.97.255 scope global eth2

           valid_lft forever preferred_lft forever

        inet6 fe80::be76:4eff:fe06:1032/64 scope link

           valid_lft forever preferred_lft forever
Public IP eth0
Internal IP eth2
4. When the previous command finishes return to being the Ubuntu user:
    root@devstack-cc:~# exit

    logout

    ubuntu@devstack-cc:~$
Install the git command and DevStack software
DevStack is not typically considered safe for production, but can be useful for testing and learning. It is easy to configure and reconfigure. While other distributions may be more stable they tend to be difficult to reconfigure, with a fresh installation being the easiest option. DevStack can be rebuilt in place with just a few commands.
DevStack is under active development. What you download could be different from a download made just minutes later. While most updates are benign, there is a chance that a new version could render a system difficult or impossible to use. Never deploy DevStack on an otherwise production machine.
1. Before we can download the software we will need to update the package information and install a version control system command, git.
    ubuntu@devstack-cc:~$ sudo apt-get update

    <output_omitted>

    ubuntu@devstack-cc:~$ sudo apt-get install git

    <output_omitted>

    After this operation, 21.6 MB of additional disk space will be used.

    Do you want to continue? [Y/n] y

    <output_omitted>
2. Now to retrieve the DevStack software:
    ubuntu@devstack-cc:~$ pwd

    /home/ubuntu

    ubuntu@devstack-cc:~$ git clone https://git.openstack.org/openstack-dev/devstack -b stable/liberty

    Cloning into ’devstack’...

    <output_omitted>
3. The newly installed software can be found in a new sub-directory named devstack. Installation of the script is by a shell script called stack.sh. Take a look at the file:
    ubuntu@devstack-cc:~$ cd devstack

    ubuntu@devstack-cc:~/devstack$ less stack.sh
4. There are several files and scripts to investigate. If you have issues during installation and configuration you can use theunstack.sh and clean.sh script to (usually) return the system to the starting point:
    ubuntu@devstack-cc:~/devstack$ less unstack.sh

    ubuntu@devstack-cc:~/devstack$ less clean.sh
5. We will need to create a configuration file for the installation script. A sample has been provided to review. Use the contents of the file to answer the following question.
ubuntu@devstack-cc:~/devstack$ less samples/local.conf
6. What is the location of script output logs? _____________
7. There are several test and exercise scripts available, found in sub-directories of the same name. A good, general test is the run_ tests.sh script.
Due to the constantly changing nature of DevStack these tests are not always useful or consistent. You can expect to see errors but be able to use OpenStack without issue. For example missing software should be installed by the upcoming stack.sh script.
Keep the output of the tests and refer back to it as a place to start troubleshooting if you encounter an issue.
ubuntu@devstack-cc:~/devstack$ ./run_tests.sh
While there are many possible options we will do a simple OpenStack deployment. Create a ~/devstack/local.conf file. Parameters not found in this file will use default values, ask for input at the command line or generate a random value.
Create a local.conf file
1. We will create a basic configuration file. In our labs we use eth2 for inter-node traffic. Use eth2 and it’s IP address when you create the following file.
    ubuntu@devstack-cc:~devstack$ vi local.conf

    [[local|localrc]]

    HOST_IP=192.168.97.1

    FLAT_INTERFACE=eth2

    FIXED_RANGE=10.10.128.0/20 #Range for private IPs

    FIXED_NETWORK_SIZE=4096

    FLOATING_RANGE=192.168.100.128/25 #Range for public IPs

    MULTI_HOST=1

    LOGFILE=/opt/stack/logs/stack.sh.log

    ADMIN_PASSWORD=openstack

    MYSQL_PASSWORD=DB-secret

    RABBIT_PASSWORD=MQ-secret

    SERVICE_PASSWORD=SERVICE-secret

    SERVICE_TOKEN=ALongStringUsuallyHere

    enable_service rabbit mysql key
Install and Configure OpenStack
The following command will generate a lot of output to the terminal window. The stack.sh script will run for 15 to 20 minutes.
1. Start the installation script:
    ubuntu@devstack-cc:~devstack$ ./stack.sh

    <output_omitted>
2. View the directory where various logs have been made. If the logs are not present you may have an issue with the syntax of the local.conf file:
ubuntu@devstack-cc:~devstack$ ls -l /opt/stack/logs
3. Review the output from the stack.sh script:
ubuntu@devstack-cc:~devstack$ less /opt/stack/logs/stack.sh.log
DevStack runs under a user account. There used to be a rejoin.sh script can be used to attach to the ongoing screen session after a reboot. DevStack is not meant to be durable, so the script was removed late in the Liberty release. Due to lab environment issues if you reboot the node you may have to start the lab again.
Log into the OpenStack Browser User Interface
The Horizon software produces a web page for management. By logging into this Browser User Interface (BUI) we can configure almost everything in OpenStack. The look and feel may be different than what you see in the book. The project and vendor updates change often.
1. Open a web browser on your local system. Using the output of the ip command, find the IP address of the eth0 interface on your devstack-cc node. Type that IP into your browser URL.
    ubuntu@devstack-cc:~devstack$ ip addr show eth0

    ...

    inet 104.22.81.13

    ...
2. Log into the BUI with a username of admin and a password of openstack.You should be viewing the Overview and Usage Summary page. It should look something like the following:
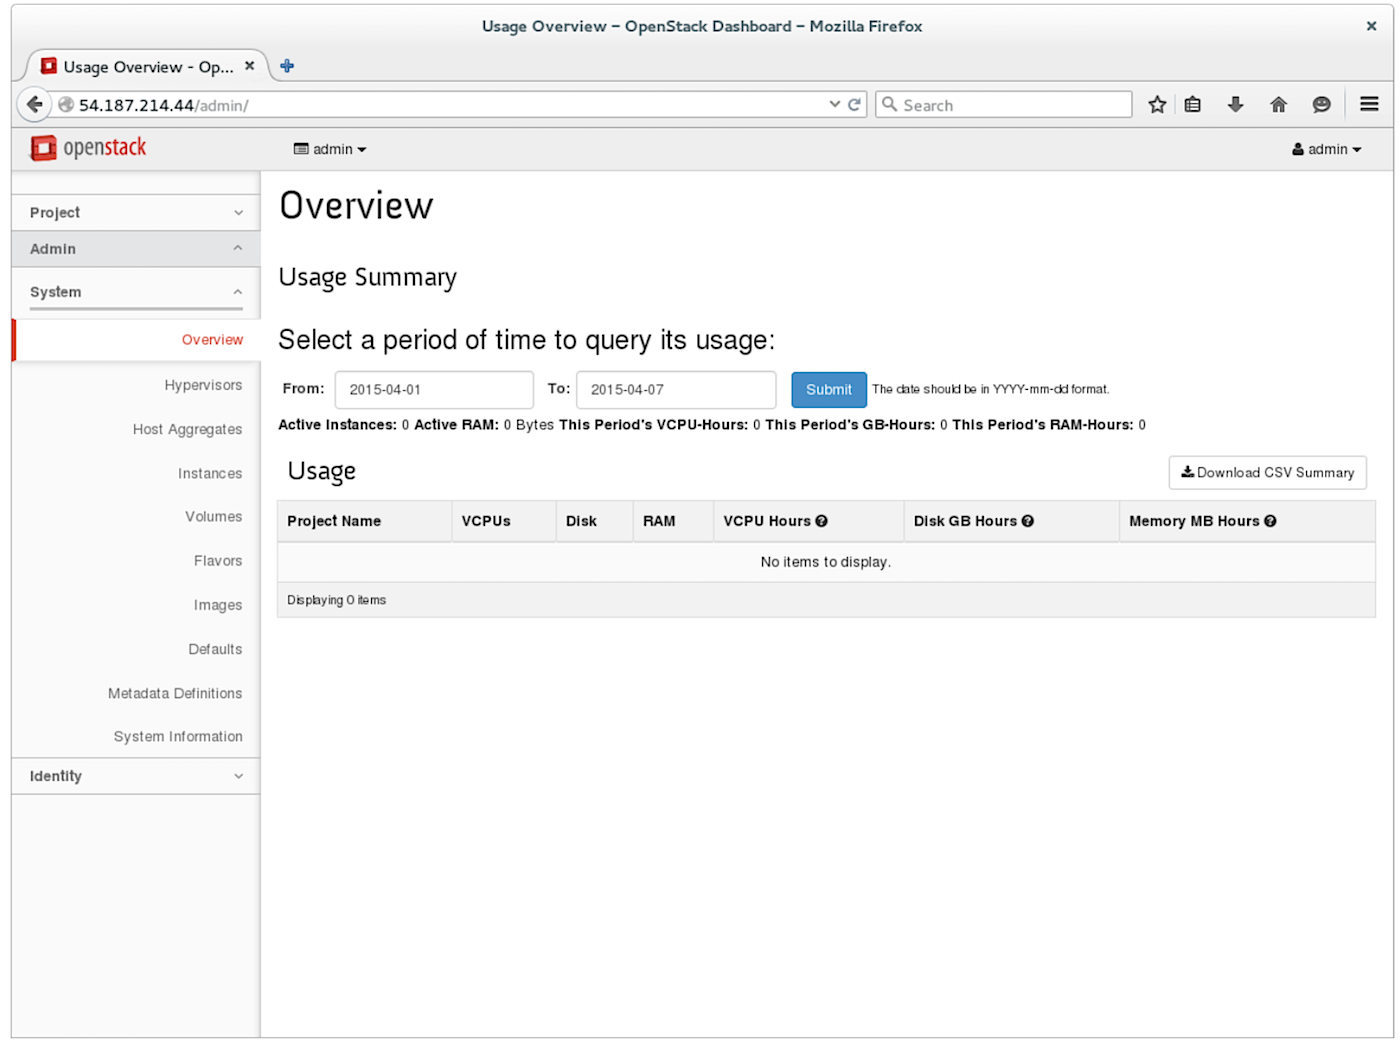
3. Navigate to the System -> Hypervisors page. Use the Hypervisor and Compute Host sub-tabs to answer the following questions. a. How many hypervisors are there?
b. How many VCPUs are used?
c. How many VCPUs total?
d. How many compute hosts are there?
e. What is its state?
4. Navigate to the System -> Instances page.
a. How many instances are there currently?
5. Navigate to the Identity -> Projects page.
a. How many projects exist currently?
6. Navigate through the other tabs and subtabs to become familiar with the BUI.
Solutions
Task 2
6. $DEST/logs/stack.sh.log
Task 5
3. a. 1 b. 0 c. 2 d. 1 e. up
4. a. 0 5. a. 6
The Essentials of OpenStack Administration course teaches you everything you need to know to create and manage private and public clouds with OpenStack. Download a sample chapter today!
Read the other articles in the series:
Essentials of OpenStack Administration Part 1: Cloud Fundamentals
Essentials of OpenStack Administration Part 2: The Problem With Conventional Data Centers
Essentials of OpenStack Administration Part 3: Existing Cloud Solutions
Essentials of OpenStack Administration Part 4: Cloud Design, Software-Defined Networking and Storage
Essentials of OpenStack Administration Part 5: OpenStack Releases and Use Cases


