The latest version of Linux Mint is out and it’s a major improvement over the previous releases (see my recent review). Linux Mint developers do a lot of additional work, on top of its Ubuntu base, which leaves users with comparatively less work to do after installation. For example, Linux Mint comes pre-loaded with restricted drivers and codecs. It also comes with VLC so users don’t have to worry about media playback.
That said, like any other operating system, depending on your needs, you may have to do some extra work to get your Linux Mint system ready. While some of the changes in this article are optional, a few are mandatory: such as keeping your system up-to-date.
Here are 10 things to do after you install Mint 17.2.
First of all you need to update the system
Even if you downloaded the brand new Linux Mint, from the time it was packaged and uploaded to the server and you downloaded it a lot of Open Source code has been written. The first thing you must do is run a system update before installing any new package. There are two steps involved with a system update: first, you refresh the repositories so they can pull information about the latest packages and then upgrade any package. You can do so by running this command (you must refresh your repositories before installing any package):
sudo apt-get update
Once all the info is refreshed, run the update:
sudo apt-get upgrade
I would also recommend running “sudo apt-get dist-upgrade” which can upgrade packages that the simple ‘upgrade’ command can’t (you can read more about the difference between two commands here).
sudo apt-get dist-upgrade
Install additional drivers
Ubuntu based systems have made it really easy to manage drivers (both open source and non-free) for various hardware. Open the Driver Manager tool which will scan your system and detect the supported hardware which may need non-free drivers. It will then offer appropriate drives for it and you can install the desired drivers for your hardware.
Install Google Chrome?
Looking at the vulnerabilities that Adobe’s Flash player has (one was disclosed and fixed this week), I would suggest staying away from the Flash plugin and instead use Google Chrome which comes with Flash support. You can download Google Chrome from their site and install it the way you would install any binary package, just make sure to choose the right architecture (32bit or 64bit for Ubuntu). There are additional benefits of using Chrome: it will also allow you to access services like Netflix which are not available for Firefox. On top of that, you will also gain access to the supported Chrome Apps from the Web Store.
Install Cloud services
Google Drive is still not available for Linux, but there is a third-party solution called inSync which can be used to integrate Google Drive with your Linux Mint system. It’s a nifty solution which, unlike Google Drive, does have a one-time fee. You can easily install inSync by downloading either the binary or by adding its repository to the system from the official download page. I would strongly suggest to never install any software from unofficial or third-party sites.
These are not the only solutions for Linux users. Almost all major cloud services (except for Microsoft OneDrive) are available for Linux users. You can easily install Dropbox, ownCloud or Seafile on your system by downloading the binaries from the official sites.
Change search engine to Google
The Linux Mint team has commercial deals with several search providers which share revenues with the project. These search engines have been integrated with the Firefox browser, Yahoo! being the default one. That doesn’t mean you are locked into the default search engine Yahoo! which is powered by Microsoft Bing.
In my experience I found that the option to switch to Google has been buried down deep, making it a tad difficult for a new user to switch. After struggling with it for a while I settled down with an easier solution and that’s what I would recommend others. Open Firefox and visit ‘www.google.com‘; you will notice a blue ribbon offering to change your search engine to Google.
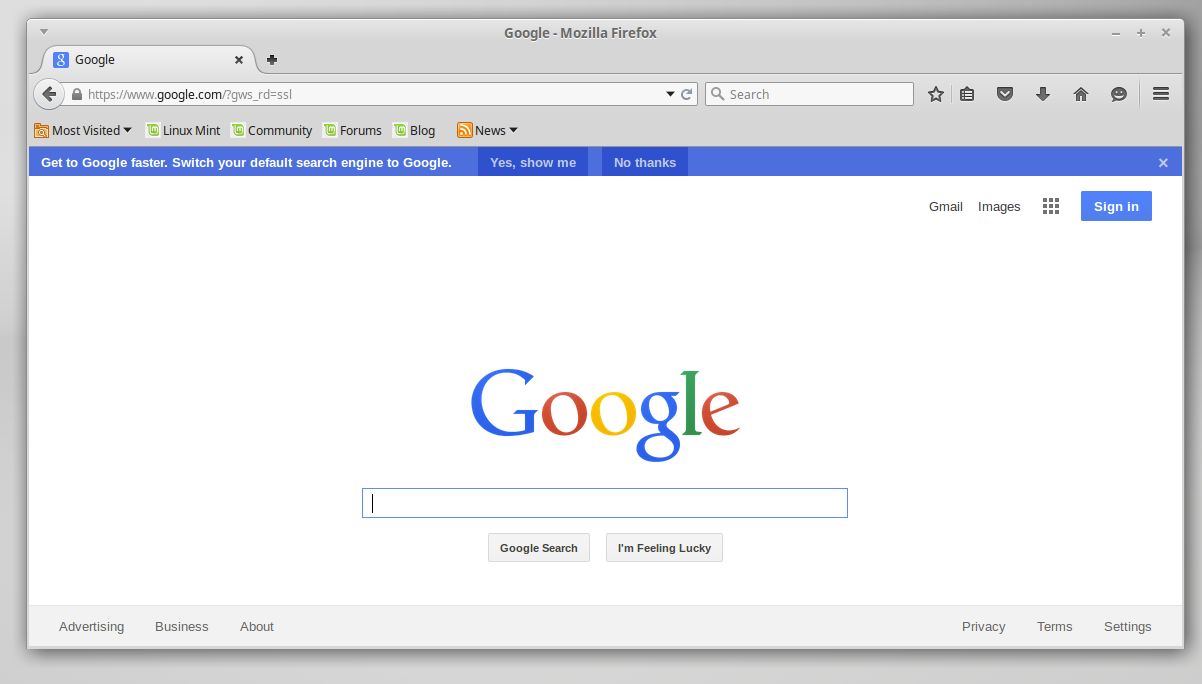
Click on ‘Yes, show me’ from the ribbon. Next click on the + icon on the search box and add Google.
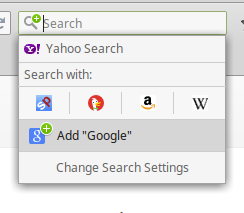
Then click on ‘Change Search Settings’ and choose Google from the list.
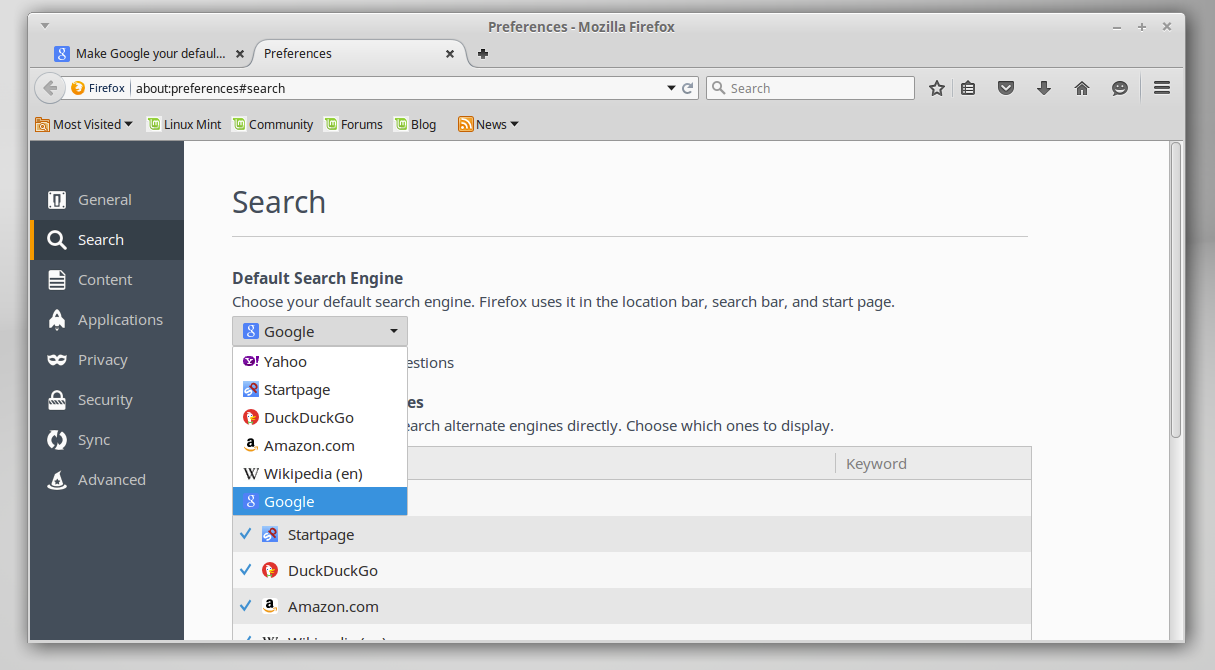
You may also want to un-check ‘provide search suggestions’ so that your search box is clean and clutter free.
Now all your searches belong to Google.
Sync and protect your password with Firefox
There is now a built-in feature of Firefox which can save your passwords (and much more) securely on their servers so you won’t have to write them down or remember them. Open Firefox and then click on the three bars on the right.
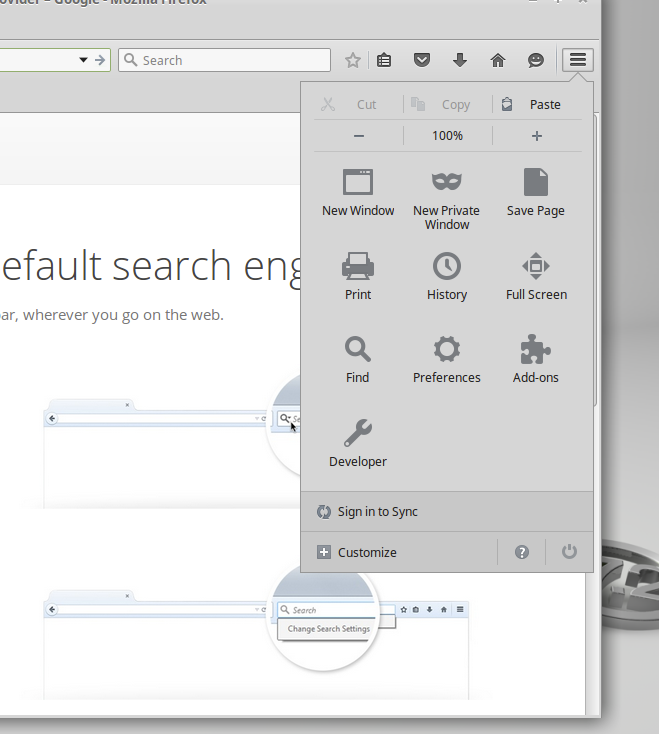
There you will see the option ‘sign in to sync‘. Follow the instructions and you are all set. You can choose what kind of stuff you want to be synced, which includes passwords, bookmarks, Tabs, History, Addons and preferences. The good news is you won’t have to reinstall all add-ons and change preferences when you change OS or move between systems. Once you log into the Firefox account, everything will be synced across machines.
Use Thunderbird Profile
I am a heavy Thunderbird user and use it to its full potential; thanks to add-ons like calendar. One of the lesser known, but most interesting, features of Thunderbird is the ability to easily change the location of data on the system. Now the question would be: why would I need it? I multi-boot with different distributions and it’s a waste of time to set-up Thunderbird in each distro and then waste precious space on the ‘home’ of each distro, only to have multiple copies of the same data on the same system.
I keep all of my data on a separate hard drive, outside ‘home’ directories. This drive is accessible by all distros, which makes it easier to work on the same files irrespective of the OS I am currently running. And that’s where I keep my Thunderbird data; so the same data is accessible across all distros eliminating duplication.
I use the ‘Profile’ feature of Thunderbird to achieve this. It also comes in handy when you hop from one distro to another as you won’t have to reconfigure your Thunderbird on each new distro.
It’s recommended to setup profile before you run Thunderbird for the first time. To configure Thunderbird Profile, open Terminal and run this command:
thunderbird -p
You will be greeted by this window.
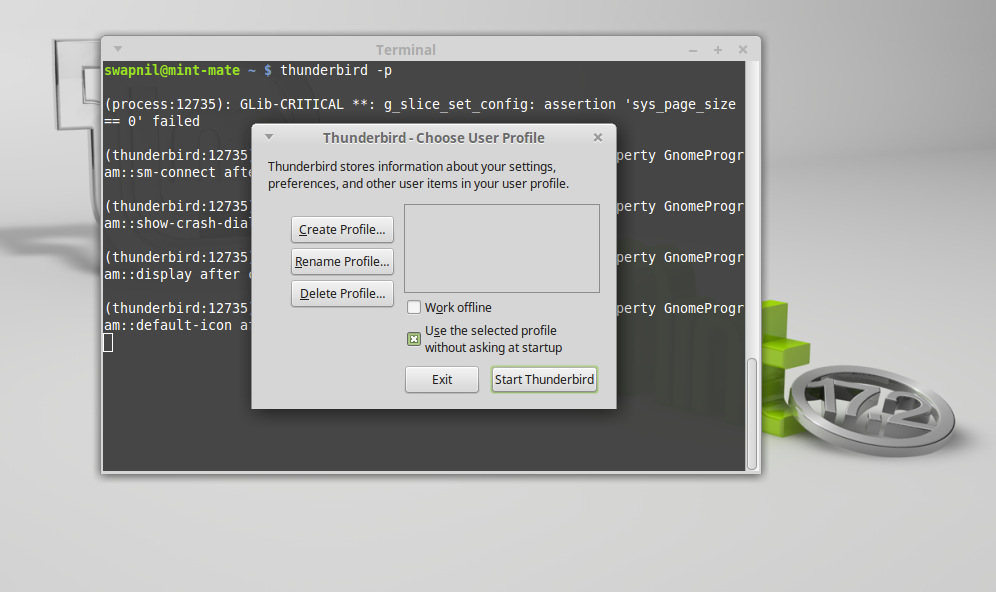
Click on ‘Create Profile ‘, give it a name and then ‘Choose Folder’. This will be the directory where all of your Thunderbird data will be saved. Once done, click on ‘finish’ and you are set. Next time when you boot into another system, run the same command, create the profile and then point it to the folder you created previously. All your email accounts, settings, and add-ons will be there, automatically. If you run multiple distros, just create a profile on each distro and point it to the same directory.
Setting up Trackpad
I did find it a bit frustrating to connect the Magic Trackpad to Linux Mint 17.2. Linux Mint asks you to enter a PIN when you try to connect devices like Trackpad; a task you can’t perform from a trackpad. What you need to do is choose the PIN option and try with ‘0000’ which ‘might’ connect the device. I had to make several attempts because the moment the device was detected it would switch to the default ‘enter PIN’ option. I think Linux Mint and should make it easy to connect such devices. When I tried it on Mac OS X, it detected that it was a Trackpad and instead of offering to enter PIN defaulted to ‘0000’ and paired with the device immediately.
Configuring the trackpad
Another issue I faced with Trackpad was that scrolling was not working out of the box. To enable that, open System Settings and go to TouchPad settings and select ‘vertical Scrolling’ (it should be selected by default).
Once you enabled that, you find that it’s not working on Firefox. To get it to work, open a Firefox browser and type ‘about:config‘ in the address bar. Firefox will throw a warning at you – ignore it and proceed. Then search for ‘gesture.swipe‘ and you will come across four results. Click on each, one by one, and delete the ‘value‘ field; scrolling will start working on Firefox.
How to upgrade from the previous version
If you are still on Linux Mint 17.1, then you won’t have to re-format your system and run a fresh install of Linux Mint 17.2. Now you can easily upgrade between major releases. Before running such an upgrade make sure to back-up your data so that, in case of a failed update, you don’t lose it. Run a system update to ensure all your packages are up-to-date. If there are applications that you don’t need, uninstall them to keep your system lean and mean.
Let’s start the major upgrade: Open ‘Update Manager’, refresh it, and install all the checked packages there.
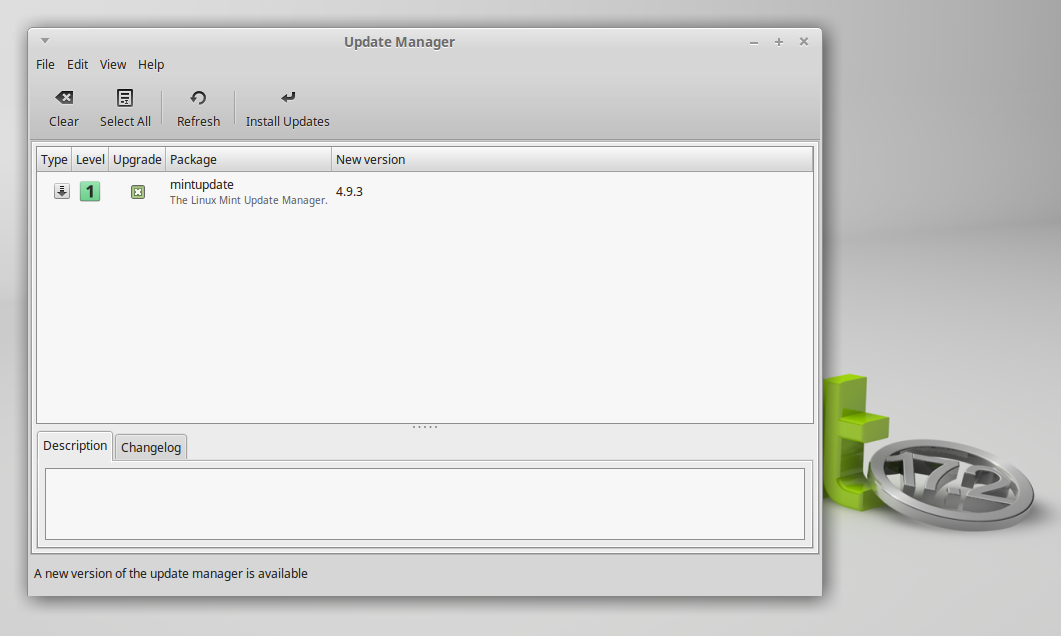
Once everything is up-to-date, click on the ‘Edit’ menu and choose the third option (if available) to upgrade to the next release.
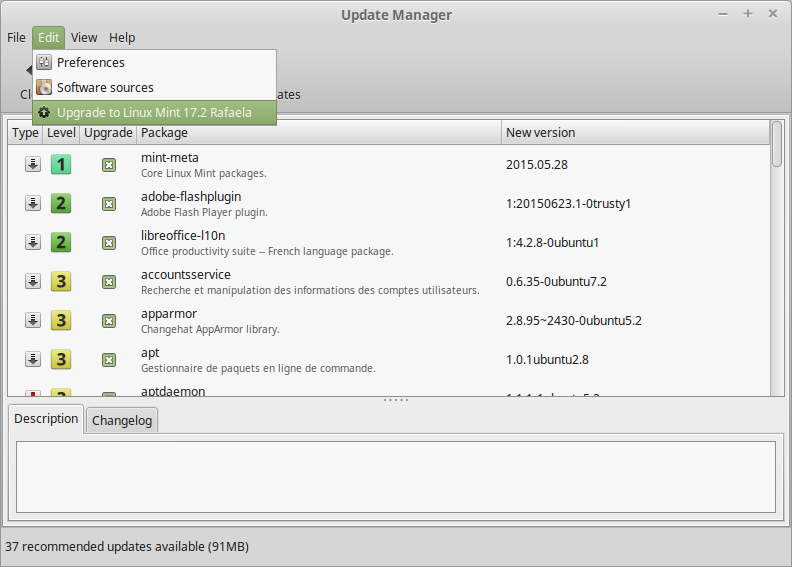
Then just follow the instructions and enjoy the latest version of Linux Mint.
That’s pretty much all that you need to do on Linux Mint to get most out of this great Linux distribution. There used to be a long list of things ‘to do’ after installing Linux Mint, but these days most things, such as configuring printers, work out of the box.
Now it’s your turn, let us know what are the things that you do after installing Linux Mint!


