
When I first started on my journey with Linux, back in the late 1990s, there was one inevitability: the terminal. You couldn’t escape it. The command line was a part of your daily interaction with the open source platform and that was that. Today’s Linux is a much different beast. New and seasoned users alike can work with the platform and never touch the command line or terminal.
But, on the off-chance you do want to take advantage of the power that is the command line, it’s good to know there are numerous options available, some of which offer unique takes on the task. Those are the terminals I want to highlight today—the ones that offer more than just the ability to enter a command. If you’re looking for a far more efficient interaction with your terminal and OS, or you’re looking for more flexibility with your terminal, one of these will certainly fit your needs.
Technically speaking, these are actually terminal emulators. What they do is create a windowed terminal environment (so you don’t have to log out of your desktop and work from within a real terminal). With that said, let’s take a look at some really cool (and unique) examples of the Linux terminal window. I’ll be demonstrating these terminals on Elementary OS Freya and Ubuntu 16.04.
Guake
Guake is my terminal window of choice. The primary reason for this is that I use the terminal quite a bit throughout the day and don’t want to have to clutter up an already cluttered dock with yet another tool. Guake makes this easy. With the simple click of a hot key, the Guake terminal will drop down from the top of the window (as an overlay), ready to use (Figure 1).

Installing Guake can be done from standard repositories. Issue the command sudo apt-get install -y guake and the app and its dependencies will be added to your system. Once installed, you must run the Guake application before you can call the terminal with the hot key. To start up Guake, either find the Guake entry in your desktop menu or issue the command guake. When you run the command, you should get a desktop notification that Guake is running. To call up the terminal overlay, hit the hotkey (by default this is F12) and you’re ready to work.
You can configure Guake from with the Guake properties app (it can be found in your desktop menu) or by issuing the command guake-prefs. From within the Guake properties window (Figure 2), you can set a number of options.
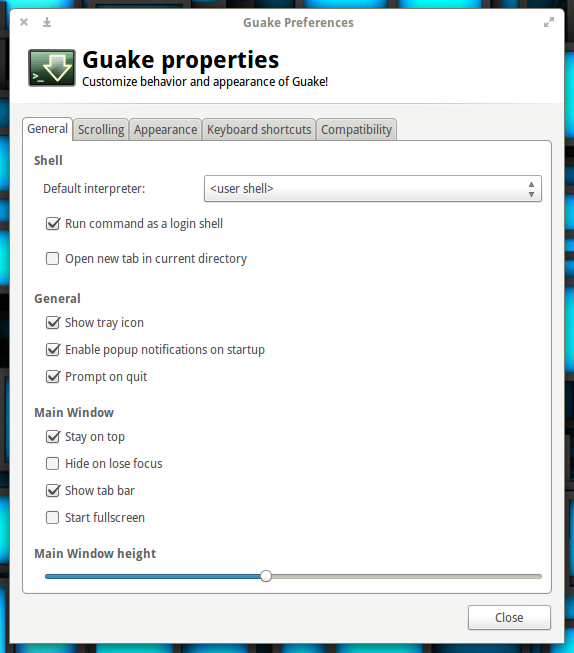
One thing you will not find is the ability to auto-start Guake at login. Because of this, you will have to make use of your desktop’s startup applications tool to ensure Guake is running at login (otherwise the hotkey will not work). For example: In Elementary OS Freya, I go to System Settings > Applications > Startup and add Guake to the list of apps to start at login.
Once running, to call up my terminal, all I have to do is hit F12.
Terminator
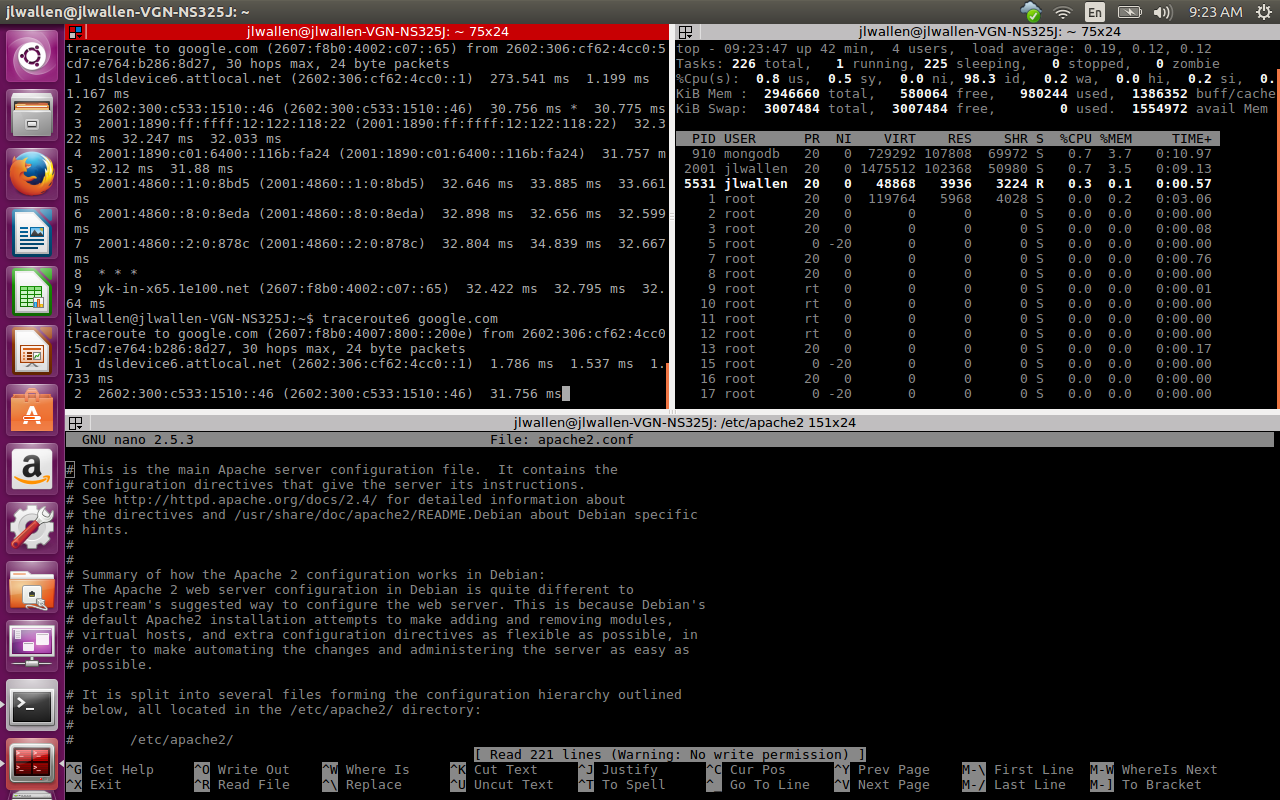
If you’re a system admin, network admin, or a developer, you probably live with multiple terminals open. This can sometimes be a logistical and confusing nightmare. That’s where terminal emulators like Terminator come into play. Terminator allows you to open a terminal window and then split it (horizontally and vertically) into as many terminals as you need. This means, from a single window, you can set up a terminal for each of your tasks (Figure 3).
Terminator is also available from the standard repository and can be installed with the command sudo apt-get install -y terminator. Once installed, you can run the app from either your desktop menu or with the command terminator.
Let’s say you want Terminator displaying the same layout as you see in Figure 3. To do this, follow these steps:
-
Open Terminator
-
Right-click in the terminal window and select Split Horizontally
-
Right-click in the upper terminal and select Split Vertically
You should now have two terminals in the top pane and one in the bottom. But what if you want to give a little more space to that upper right terminal? Easy. Click and drag the vertical bar separating the two until you have the desired size for each terminal.
ROXTerm
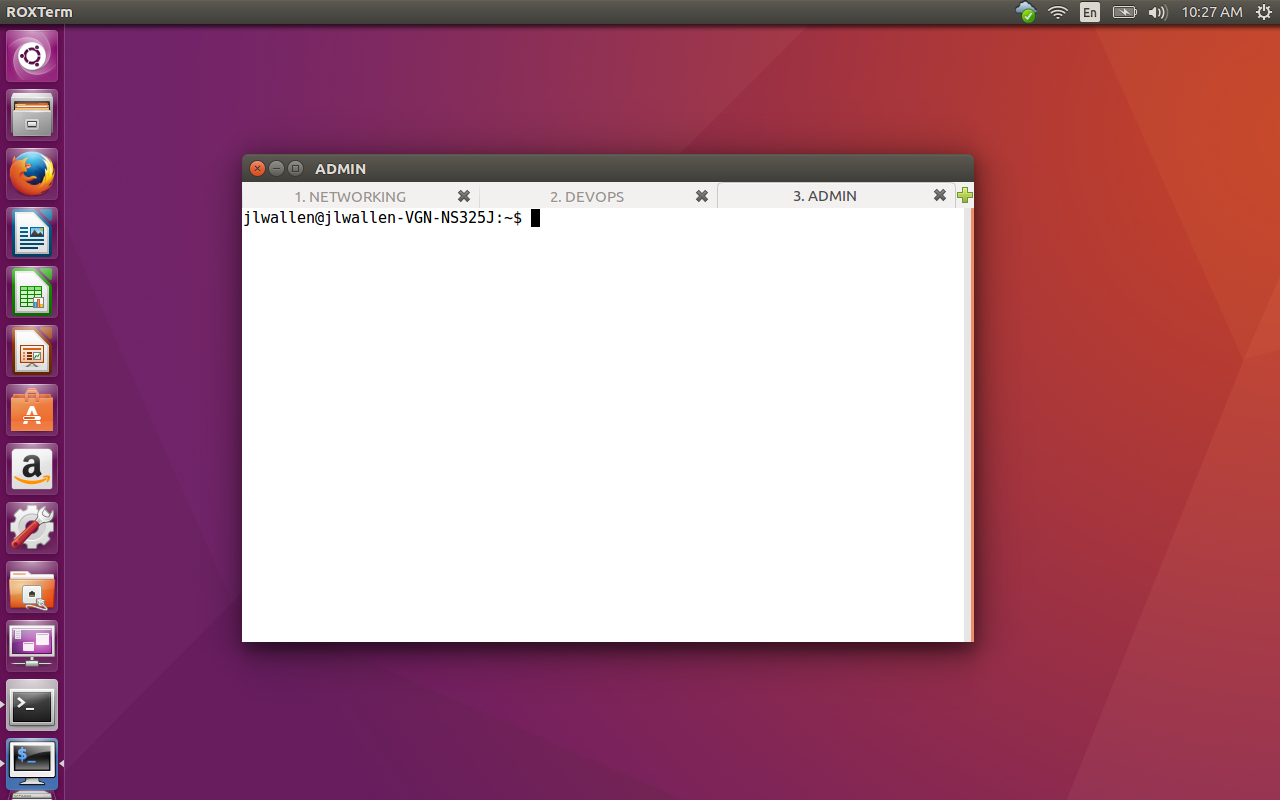
How many times have you been using a terminal that supports tabs, but wound up lost on which tab you had open, which tab you needed, and what work was where? If that describes something you’ve experienced, you might want to give ROXTerm a try. ROXTerm won’t blow you away with bells and whistles; in fact, it really has only three features that set it apart from other terminals. Those features, however, are pretty helpful.
The first feature is the ability to name your tabs. This means you could have tabs for, say, NETWORKING, DEVOPS, and ADMIN (Figure 4).
ROXTerm can be installed from the standard repositories. To do so, issue the command sudo apt-get install -y roxterm. Once installed, you can find the app in your desktop menu or issue the command roxterm.
To rename a tab, do the following:
-
Open ROXTerm
-
Click the + button to open as many tabs as needed
-
Right-click on a tab and select Name Tab
-
Give the tab a name
-
Click Apply
Another incredibly handy feature of ROXTerm is the ability to drag and drop items into the terminal. Don’t get too excited. You cannot drag, say, a configuration file into ROXTerm and have it automatically open it into your favorite editor. What the drag and drop feature does is allow you to drag an item into a terminal and ROXTerm will automatically copy the direct path into the prompt. Say, for instance, you want to edit /etc/apache2/sites-available/000-default.conf. If you drag and drop that file from your file manager into ROXTerm, the direct path will automatically copy to the prompt. All you have to do (for this example) is prepend sudo nano to the prompt and hit Enter. In this case, the nano editor will open to edit the 000-default.conf file.
The final feature that sets ROXTerm apart from the standard terminal app is it’s GUI configuration tool (Figure 5) that offers plenty of options.
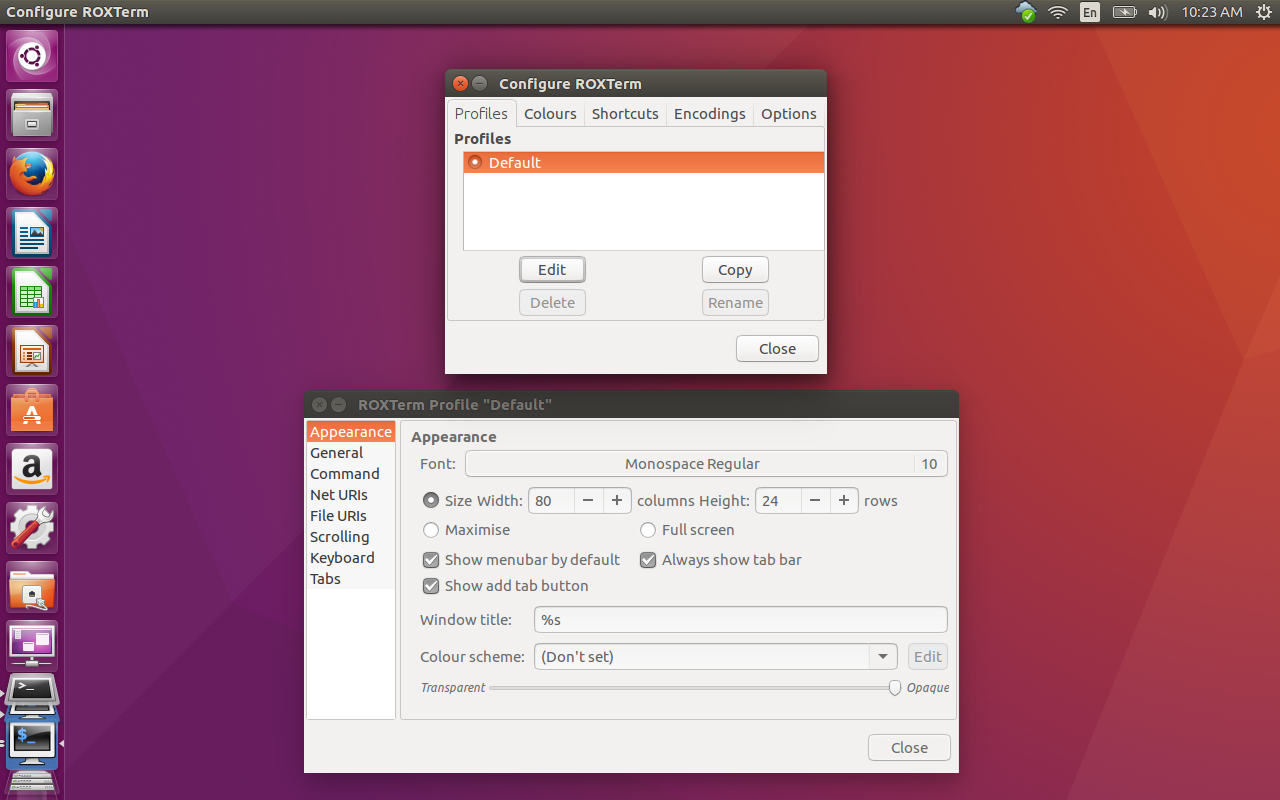
To open the ROXTerm configuration tool, issue the command roxterm-config. With this tool you can edit the default profile, keyboard shortcuts, file URIs, scrolling, command, and more. Although ROXTerm might look, on the surface, like a standard terminal, it’s much, much more.
Take your pick
Many different terminal emulators are available on Linux, each of which offers its own features. You may be someone who can get by with the default tool on your distribution/desktop of choice. If, however, you need more power, more efficiency, and more flexibility, give one of these three a chance and see if it doesn’t wind up your go-to terminal for all your Linux command line needs.
Advance your career in Linux System Administration! Check out the Essentials of System Administration course from The Linux Foundation.


