If you are a user of OpenOffice.org or LibreOffice you might be familiar with styles and formatting. These are pre-defined text formats that you can select from in order to change various aspects of your text. With both OpenOffice.org and LibreOffice you have the ability to create custom styles and formats that can be used, and re-used, easily. And best of all, this is all done without a single bit of scripting or coding. Thanks to the Styles and Formatting tool, you can become a LibreOffice power-user in no time.
The Tool vs The Drop-down
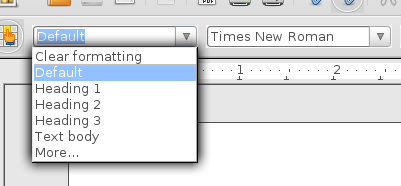
 Most users select their document styles from the style drop-down (see Figure 1). From this drop-down you can select some of the more popular styles available. By selecting the text you want the style to apply to and then selecting the style from the drop-down, your text will automatically reformat according to your selection.
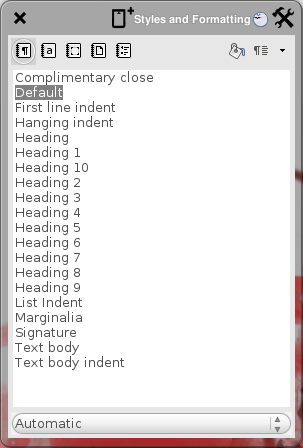
But what most users do not know is that there are numerous other styles available. If you were to click the “More…” entry in the drop-down the Styles and Formatting window will open up. The Styles and Formatting window is where the serious user does their formatting work.
 As you can see (in Figure 2), with very little interaction, you have more styles to choose from. What you are seeing in this window, however, is only one category of style. The bottom drop-down of this window allows you to select from numerous categories for styles and formatting. There are twelve different categories in all to select from. One of those categories is “Custom” and this is where your own, user-created, styles and formats will live. Let’s create our first style.
Creating a custom style
When creating a custom style you will have a lot of options available to you. Any type of formatting that can be applied to text in LibreOffice (font, size, color, alignment, tabs, numbering, drop caps, background, etc.), can be used in the creation of your custom style. So the combinations are seemingly limitless.
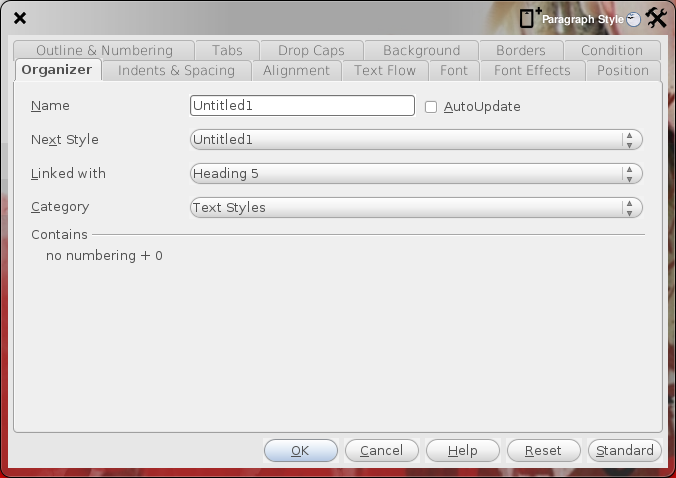
In order to begin the process of creating your own style you first want to right-click a blank area in the Styles and Formatting window and select “New.” When the Paragraph Style window opens (see Figure 3) you can begin the process of creation. Of course there are particular areas you want to pay close attention to. Let’s examine those areas.
The organizer tab allows you to configure the specifics of how the style will work within the Styles and Formatting window. In this tab you will want to be sure you give your style a unique name, select what style should be applied after your custom style (after you hit return when using your custom style), and what Category it should live in. Note: For Category, I would suggest “Custom.”
You can also link a style to another style. This is useful if you are basing a style off of another. When you do this, if you make a change to one style that change is always reflected in all styles linked to that. Linking styles comes in handy if you are creating a number of similar styles with, maybe, one variation (like font size). Using Linked Styles ensures when you make a change that change is reflected across the board.
You might notice, as you go through the bulk of the tabs in the Paragraph Styles window, that the bulk of these configuration options are very straight-forward. That is because they are simply font/paragraph formatting that you have most likely used since you began using a word processing applications. The Paragraph Styles tabs are:
- Indents & Spacing: Configure such things as indenting for before text, after text, and first line. You can also configure paragraph and line spacing here.
- Alignment: Set up the alignment of your style. This also includes “Text-to-text” alignment which configures the horizontal alignment between your style and other styles (or non-formatted text).
- Text Flow: This tab allows you to configure hyphenation, breaks, and paragraph splits.
- Font: As you would expect, this tab allows you to configure the font (including size) of your style.
- Font Effects: In this tab you configure the font color, the relief of the text (embossed or raised), over-lining, strike-through, underlining, and shadow. Note that both the Font and Font Effects tab have a real-time preview of what your text will look like.
- Position: If you need Super/Sub script, Rotation, and non-default spacing of your text, this is the tab that handles those options.
- Condition: More on this in a moment.
- Borders: Does your style need a border? If so, this is where you can configure the spacing of the border, the style of the border, the color, and shadow of the border.
- Background: This tab allows you to create a background color for your style.
- Drop Caps: Some leading styles might call for drop caps. If so, this is where you can configure how drop caps are handled in your style.
- Tabs: Configure the type of tab, the fill character, and the position of tabs.
- Outline and numbering: This allows you to apply an outline numbering hierarchy for your style.
Conditional Styles
Conditional styles are very helpful as they work to format your text differently based on where they are applied in your text. The most obvious example is font color. Let’s say you want to use a specific style of text with a font color of black. However, if that same formatting should be used within a style that contains a black filled background, that color of that text wold automatically turn to white. In other words: When typing in X use style 1, but if you are typing in Y use style 2. That is how Conditional Styles work.
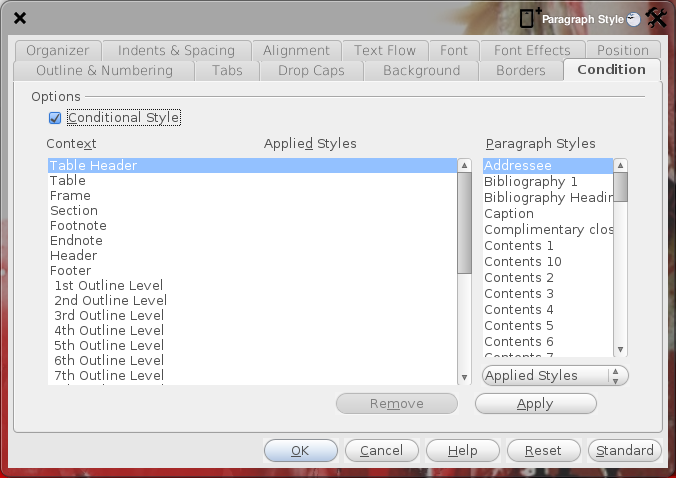
 To create conditions for your styles click on the Conditions tab (see Figure 4) and check the box marked “Conditional Style.” Once that box is checked you can access the conditions. What you want to do is first select the context condition from the left pane and then select the conditional paragraph you want applied when associated with the selected context.
What will then happen is your new style will be formatted exactly as you have created it unless it happens to fall within the context you have selected in the conditional styling tab. Should the style fall within the selected context, the style will then be modified to match the paragraph style associated with the context.
Now, say you want the paragraph style associated with the context to be similar to your custom style with minimal exception. For that you might need to create a second custom style to match what is required for the context. When you have done that you can then select the new custom style (from the Paragraph styles) to associate with the context.
It might seem confusing at first, but once you’ve created your first conditional style you will understand how it works perfectly.
Save That Style
Now that you’ve created your custom style, click OK and it’s ready to use. To access your custom style you will need to open the Styles and Formatting window, select the category you saved your style to, and select it for you. Congratulations, you have taken a huge step towards becoming a LibreOffice power user!


