I do a good deal of promotion for my fiction. One means of promotion I have found incredibly effective is video promos. With these quick videos I can say things in ways a static ad or standard social networking post cannot. I can add music, effects, effect mood… you name it. But video editing isn’t always a skill that anyone can pick up as if they were using a WYSIWYG editor. In fact, with some tools, creating a short video can be downright challenging.
Unless you use OpenShot. Of all the editors I’ve worked with, OpenShot offers the easiest work flow, without compromising features. Even with this incredibly shallow learning curve, there are aspects of OpenShot that could trip up new users. With that in mind, I want to walk you through the process of creating a short promo video with the flagship, open source video editor.
What you’ll need
-
OpenShot installed.
-
Blender installed (necessary for animated titles).
-
Video clips: You can’t create a quality video without these.
-
Sound clips: If you choose to add sounds (highly recommended).
-
Still images: It’s easy to integrate still images into OpenShot videos.
-
Creativity.
Before we get started, I want to make mention of using still images. Sometimes the titles offered with OpenShot (both standard and animated) aren’t enough. When I have a very specific need for an image (especially text), I defer to The Gimp. What I will do is create a 640×480 image with a transparent background and add the necessary text to that. With that image (saved as a .png) I can create much more flexible and powerful credits, intros, and such.
Still images can also be placed for a Picture In Picture effect. I’ll demonstrate that in a moment.
Adding clips to the timeline
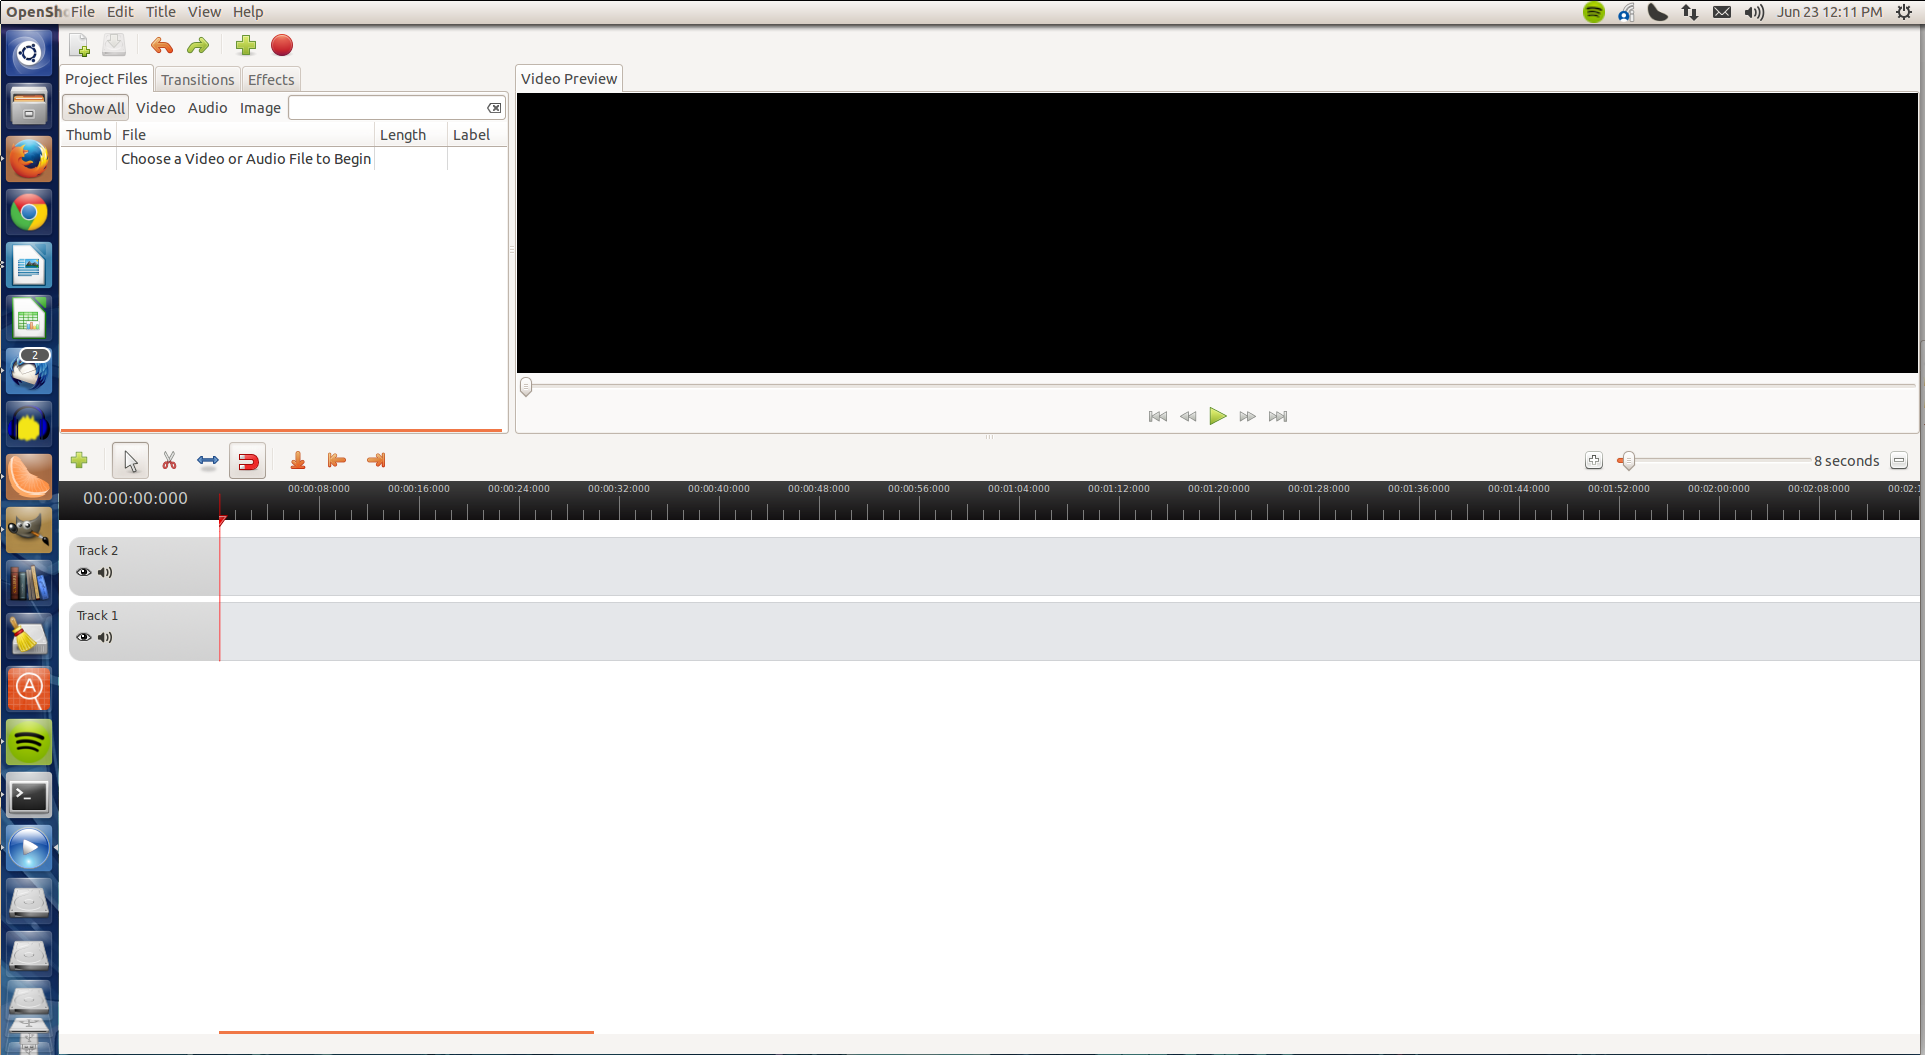
This is the easiest aspect of OpenShot. From the OpenShot main window (Figure 1), click on the + button, navigate to the files to be added, and then click Add.

By default, there are only two tracks in the time line. To really fine-tune your video, you will want to have multiple tracks. This makes moving clips, for effects like transition fades, much easier. In some cases, you won’t know how many tracks a project will require, so I tend to add them as needed. To add tracks to the timeline right-click the dark gray portion at the left edge of an existing track. Select either Add Track Below or Add Track Above to add an additional track. You can also rename tracks by right-clicking a track and selecting Rename Track.
Once you’ve added sufficient tracks to get you started, it’s time to drag clips to the timeline. This is where creativity comes into play. Starting with the intro clip, click and drag the clip from the project files to the time line. You’ll eventually find that clips will have to be dragged around on their track to get them in exactly the right moment in the video. With the clips in place, it’s time to adjust placement, add transitions, and much more.
Tweaking the position
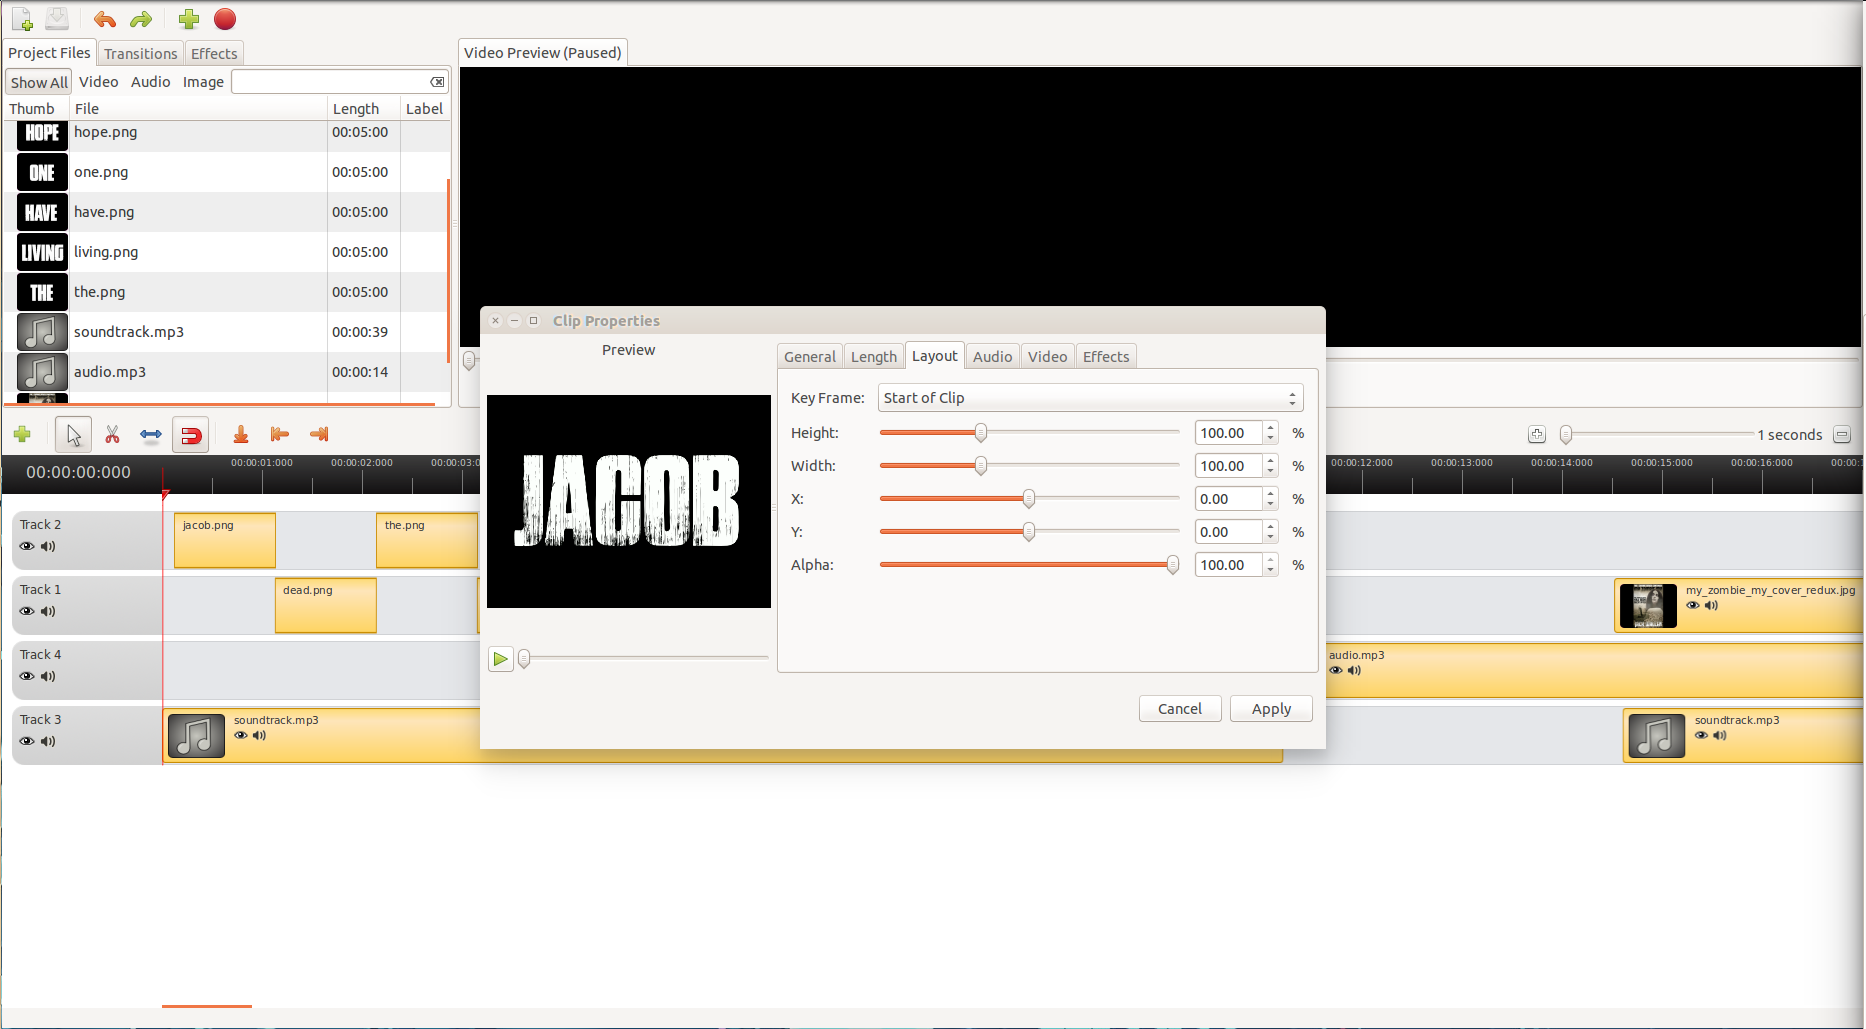
Say, for example, you use images for an opening segment and want a non-standard placement for the images (or you want to add a Picture-In-Picture effect). This is actually really simple. If you right-click a clip in the timeline and select Properties, you can access the Layout tab (Figure 2). This tab allows you to adjust the position of the clip as well as the alpha (think “opacity”) of the clip.

You will notice an X and a Y slider. The X setting is the right-left position of the clip and the Y setting is the up-down position. You must adjust the Start of Clip and End of Clip positions (from the Key Frame dropdown). If you only adjust one, the clip will move either from or to the default X=0 and Y=0 position. If you’re looking ahead of the game, this does, in fact, mean you can make a clip move along the X and Y axis from start to end of the clip.
But say you want the clip to live on the left side of the frame. To accomplish this you’ll want to adjust the Start of Clip and End of Clip X position to a negative number. You’ll have to play with the number, according to the clip to be moved, to get it right. Once you make an adjustment, click Apply and test the position by clicking play in the preview window.
In this same tab, you can adjust the transparency of the clip by sliding the Alpha setting to the right or left. If the Alpha is set too 100% there will be no transparency.
Adding transitions
One of the best transitions you can use is the fade. With each clip you can add:
-
Fade in (fast)
-
Fade out (fast)
-
Fade in/out (fast)
-
Fade in (slow)
-
Fade out (slow)
-
Fade in/out (slow)
To do this, right-click a clip and then click Fade and select the type of fade you want.
You can also animate a clip. If you right-click a clip, you’ll see the Animate menu that includes:
-
Various zooms
-
Various types of moves
The moves include:
-
Top to bottom
-
Bottom to top
-
Right to left
-
Left to right
-
Top to center
-
Bottom to center
You can also rotate a clip 90 degrees to the right or left of 180 degrees.
One of the best things about fades is that you can then have a clip fading in as the previous clip is fading out. This creates an amazingly seamless look for the video. If your cuts between clips seem jumpy, add fades.
Adding effects
There are a number of good effects you can use to really enhance your work. Click on the Effects tab and then scroll through the entire listing. To add an effect to a click, locate the effect you want, click on it, and then drag it down to a clip in the timeline to apply. My favorite effect combination is Gray Scale, Old Film, and Old Lines. This gives an outstanding old black and white movie feel.
Saving and exporting
Make sure, as you work, to save your project. When you first save the project, you are asked to name the project, select a folder to house the project, and select a project profile. The project profile is crucial to the end result. The profile defines:
-
Width
-
Height
-
Aspect Ratio
-
Frame Rate
-
Pixel Ratio
-
Progressive
Once you’ve saved a project, you cannot change the Profile, so make sure you chose this option wisely.
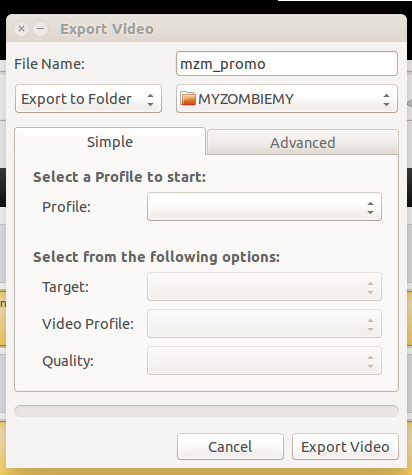
When the project is complete, it’s time to export. With the project open, click File > Export. In the resulting window (Figure 3) give the file a name and select the folder for the export.

The next section requires you to select a profile for the export. You have five format options:
Blueray/AVCHD
DVD
Device
Web
If you’re looking to upload the video to the likes of YouTube, you’ll want to select Web and then select:
-
Target: Youtube (or Youtube-HD)
-
Video Profile: Leave as default (auto selected by Target selection)
-
Quality: Low, Med, or High.
Click Export Video and allow the rendering process to work. Depending upon the length of your video, and the power of your machine, this can take a good amount of time.
OpenShot is an incredibly powerful video editing tool, that also happens to have one of the more shallow learning curves of all the video editors. Give OpenShot a try and see if you can’t whip up a professional-quality video with much less frustration than you thought possible.


