| Article Index |
|---|
| Getting Your Feet Wet with Blender: A Short Guide to Understanding Blender |
| Page 2 |
| All Pages |
Two weeks ago we took a peek at the 3D studio Blender‘s revamped user interface and found a lot to like. Still, that doesn’t make it the kind of application you can fire up and run away with your first time through. It is clear that talented artists can get amazing results out of Blender — just look at the Sintel animated featurette for the latest example — but what are we mere mortals to do? Let’s take a look at the best places to dive in, and at what resources you’ll need to shorten the learning curve.
The Things We Blend
The first key to getting started with Blender is divining precisely which of its features you are interested in. Blender can perform almost the entire 3D animated workflow, but that is really a discrete set of tasks. It starts with creating 3D solid models. The simplest use case is designing a 3D object to serve as the basis of a still picture — you will need to create its geometry, skin its surface, add lighting, and render the result.
Another use case is designing immersive scenes composed out of 3D models, including full backgrounds. They could be used in a virtual reality situation, rendered to video in a fly-by, or created as an environment for a video game. Blender includes a full game-engine creation engine, which incorporates physics simulation and other “world building” tools, so that usage probably constitutes yet another distinct use case.
Probably the best well-known scenario is animating a 3D movie. This adds the steps to “rig” models so that they can be manipulated, building simulations for fluids, smoke, cloth, hair, and other complex substances, and animating the actual movement of all of the pieces in each sequence. It probably also includes video editing: although Blender can render animations directly, each scene constitutes a separate file, so the Blender team built in the editing tools needed to cut and transition between them, and even to “composite” or blend multiple source images into a seamless whole.
You could also render each shot as a separate video file and assemble them in a separate non-linear editing app (NLE), but the Blender team didn’t think any of the existing open source NLEs were reliable enough. Blender’s video editing features are among the most high-end in the open source NLE world; it can even do things like motion capture and camera tracking that are useful for animation projects but far outside the scope of any basic video editing tool.
Modeling is the first step in all of these tasks, so if you are completely new to Blender it is where you should begin. You will get a chance to grow familiar with Blender’s interface, and you can start with a basic subset of its functionality and build out from there if you so desire.
Object Lessons
Blender’s toolbox provides multiple ways to construct objects — assembling them out of primitive solids, extruding and transforming meshes, drawing shapes with 3D bezier curves, even “sculpting” existing parts as if they were clay. Step one is getting familiar with Blender’s modes — because the screen itself is two-dimensional, the app has to offer a separate mode for moving and manipulating the models within the scene, and for moving and manipulating the faces, edges, and vertices of the objects. Otherwise, there is no clear way to distinguish between clicking the cursor on an object and clicking the cursor on the face of the object.
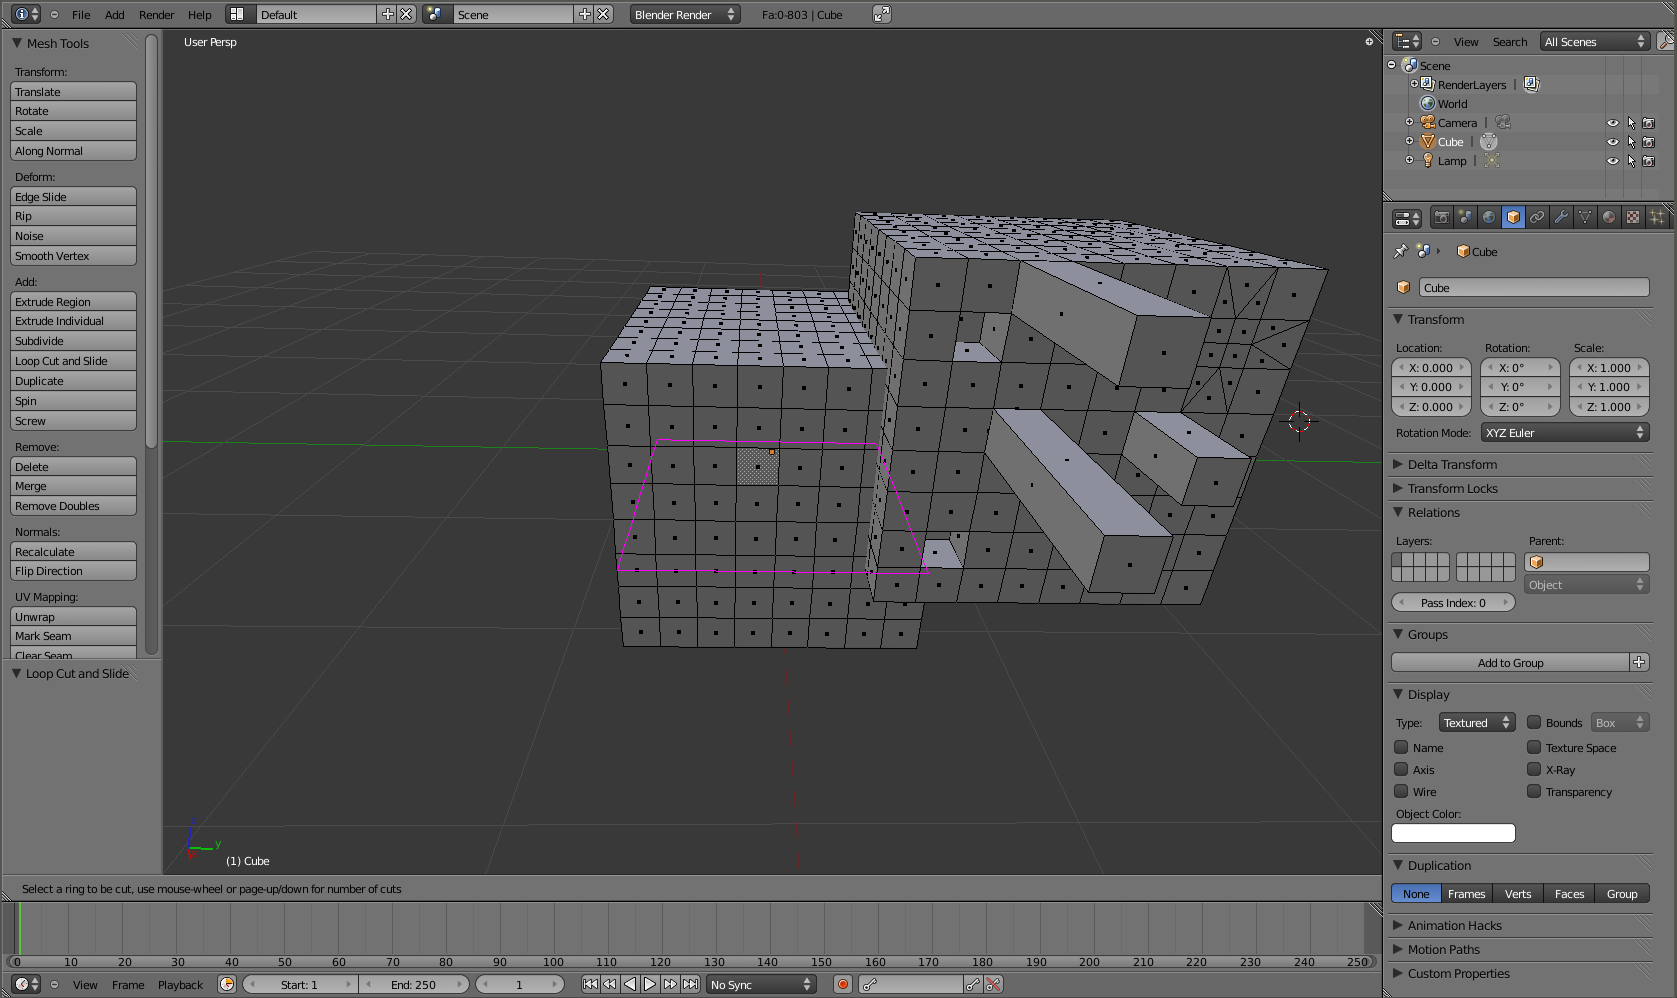
When you launch Blender for the first time, it plants a generic cube right at the origin in a new editing session — you can add other objects from the “Add” menu. You’ll see “Object mode” selected at the bottom of the viewport. In this mode, holding down the middle mouse button allows you to rotate your viewing angle on the scene without altering the objects within it, while holding down the right mouse button allows you to move individual objects. The wireframe grid shows you the X-Y plane, and the red/green/blue arrow shows you the origin and its orientation. In addition to free-form movement, you can use the numeric keypad to switch between 3D perspective and straight-on-edge views of the scene.
You can move objects in object mode, but you can’t reshape them without switching to edit mode in the drop-down selector. When you’re in edit mode, you’ll notice new buttons appearing to the right of the mode-selector. The three cubes side-by-side allow you to toggle between selecting vertices, edges, and faces with the right mouse button. Whenever you select one, you can transform it with any of the mesh tools listed in the left-hand column. Some are obvious — translate, rotate, scale, subdivide, etc. — but other require some thinking to understand, or even consulting the official Blender documentation.
For my money, the best place to learn how to use the mesh editing tools is the Wikibook Blender 3D: Noob to Pro. It is frequently revised (unlike printed guides), so it is rarely out-of-date, and it contains very focused tutorials on how each of the basic editing tools functions. The down side is that it is never quite finished; the further you get into the advanced tutorials, the more “lessons” are incomplete or just stubs. But the Basic Modeling unit about tools is very good. They start with the simplest approach: constructing complex objects out of cubes, cylinders, and spheres, reshaping the basic primitives by subdividing and smoothing them.
More advanced modeling tutorials are linked to from the Blender site. For example the Building a Spiral Stair tutorial uses basic animation techniques to move and rotate a rectangular block through space, forming “procedural objects” — each one is a duplicate of the original block, but in a different location. Rather than animating them, however, the tutorial shows you how to change them back into “real” objects, so you have rapidly created a smoothly-spiraled set of identical stairs.
 Most of the time, you will be building models out of meshes, but constructing them out of primitives is not the only technique. A very different approach involves drawing curves, then extruding them into three-dimension space. They are called non-uniform rational b-splines or NURBs. Organic-looking objects and highly complex curvature is often easier to create with NURBs. The Fun With nurbs tutorial is a good starting place to learn about this alternative; in the tutorial you learn hoe to draw a wireframe “hoop model” of the final object via a set of NURBs, which you then join together into a surface.
If neither of those techniques feels intuitive, at the other end of the spectrum you will find Blender’s sculpting tools. Sculpt Mode is yet another mode that you must switch into (in addition to Object Mode and Edit Mode) because the cursor takes on yet another set of operations. Sculpting lets you manipulate mesh objects by deforming them as if they were clay, simply by shaping them with your mouse clicks. A good intro to sculpting is Jeff McGrew’s guide, written when the feature was new in 2006/2007. A more recent tutorial is Benjamin Bailey’s video demo from 2010, which is about an hour and a half long.
Paint it Not-Black
With the geometry of an object set, you then worry about painting its appearance, using textures, materials, or wrapping 2-D image files around its surface. In Blender-speak, a material is a set of properties that define how an object interacts with light from the scene: its reflectivity, translucence, basic color and so forth. You can define materials separately from objects, so that you can re-use them for multiple objects.
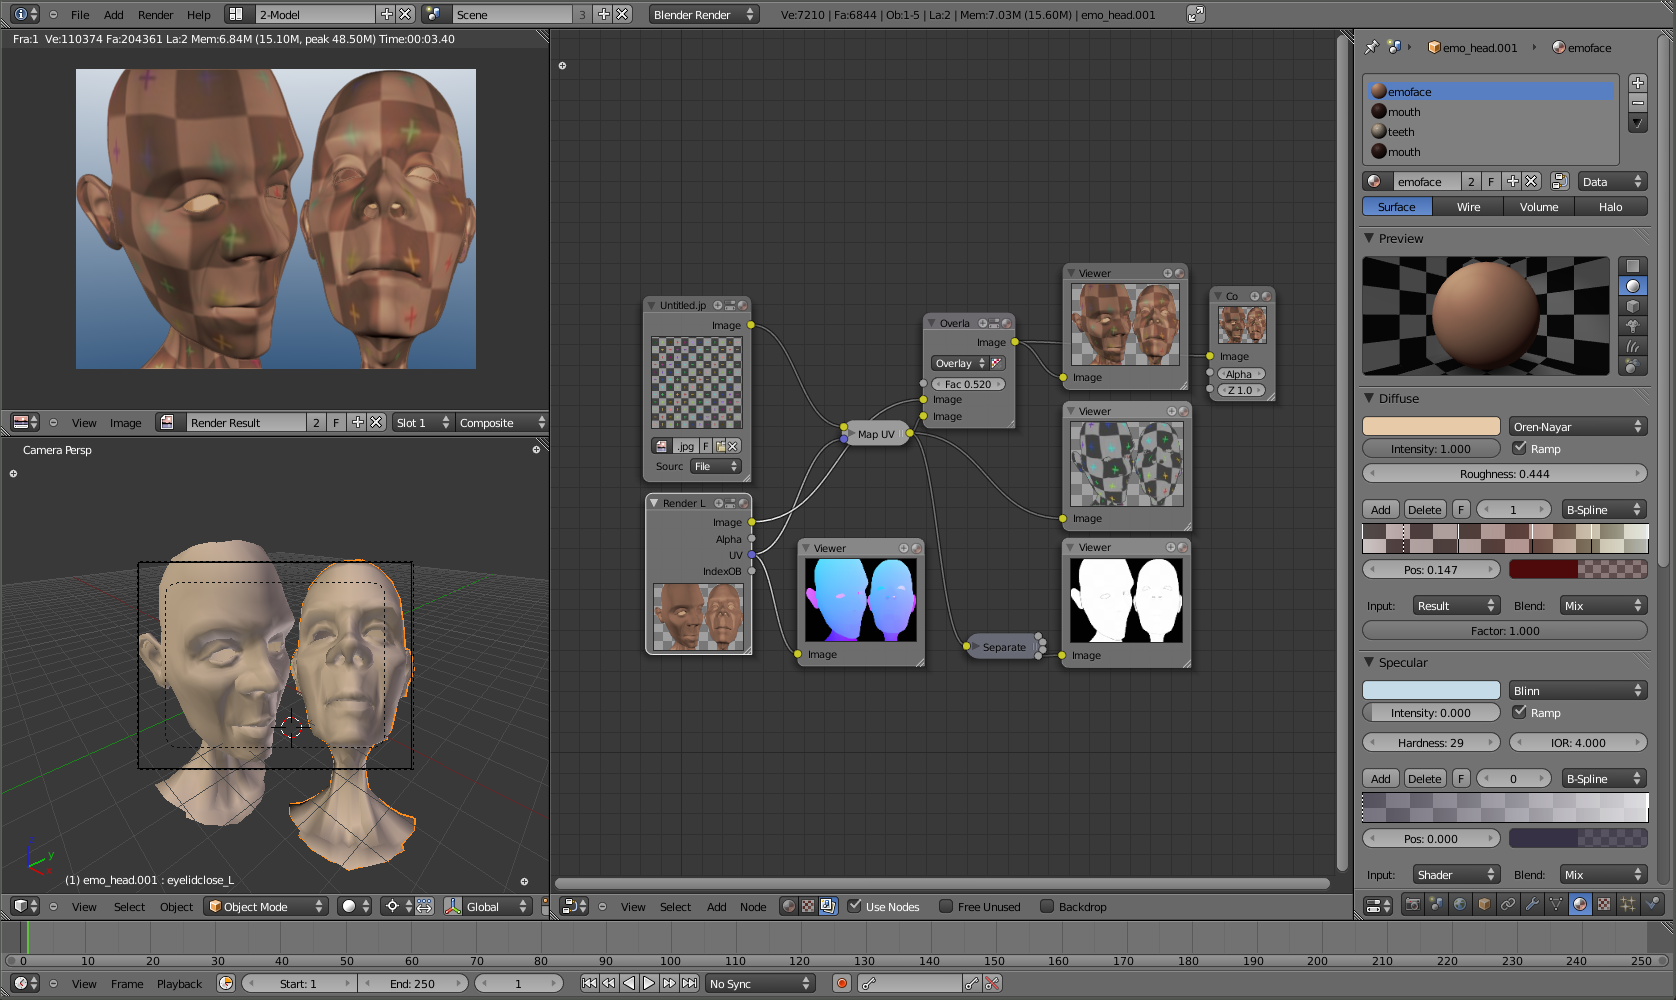
In the Blender interface, you’ll find the Materials Editor denoted by the beachball-like sphere icon; it is docked on the right hand side of the main viewport in the current release. There you can select any object in the current scene and view its materials properties. The collapsible window panes allow you to inspect the current material’s properties: transparency, color, etc., and a small preview window that displays a fast-and-dirty rendering of the material on a generic shape.
The tab next to the Materials Editor is the Texture Editor (with the checkerboard icon). Textures are normally images mapped onto the surface of an object, and although they can be a simple 2-D pattern, you can also stack several together for additional nuance, and they can even have an effect on materials — such as depth information provided by a bump-map texture.


