Chromebooks are becoming extremely popular among users – both individuals and enterprises. These inexpensive devices are capable of doing almost everything that one can do on a full fledged desktop PC.
I know it because my wife has become a full-time Chromebook user (she used to be on Mac OS X and then moved to Ubuntu, before switching to Chromebook full time). I myself am a Chromebook user and use it often – mostly to write my stories; which also require serious image editing. If you are a Chromebook user, this article will help you in becoming a pro at image editing on your Chromebook.
Chrome’s native image editing tool
There is no dearth of image editing applications for Chrome OS powered devices. However, like any other image editing software, these apps are a bit resource intensive so if you are looking for a decent experience you should be running the latest Chromebooks with a faster processor and as much RAM as possible.
It’s a lesser known fact that Chrome OS comes with a built-in image editor which allows one to do basic image editing. It’s a perfect tool for me when I adjust images for my articles.
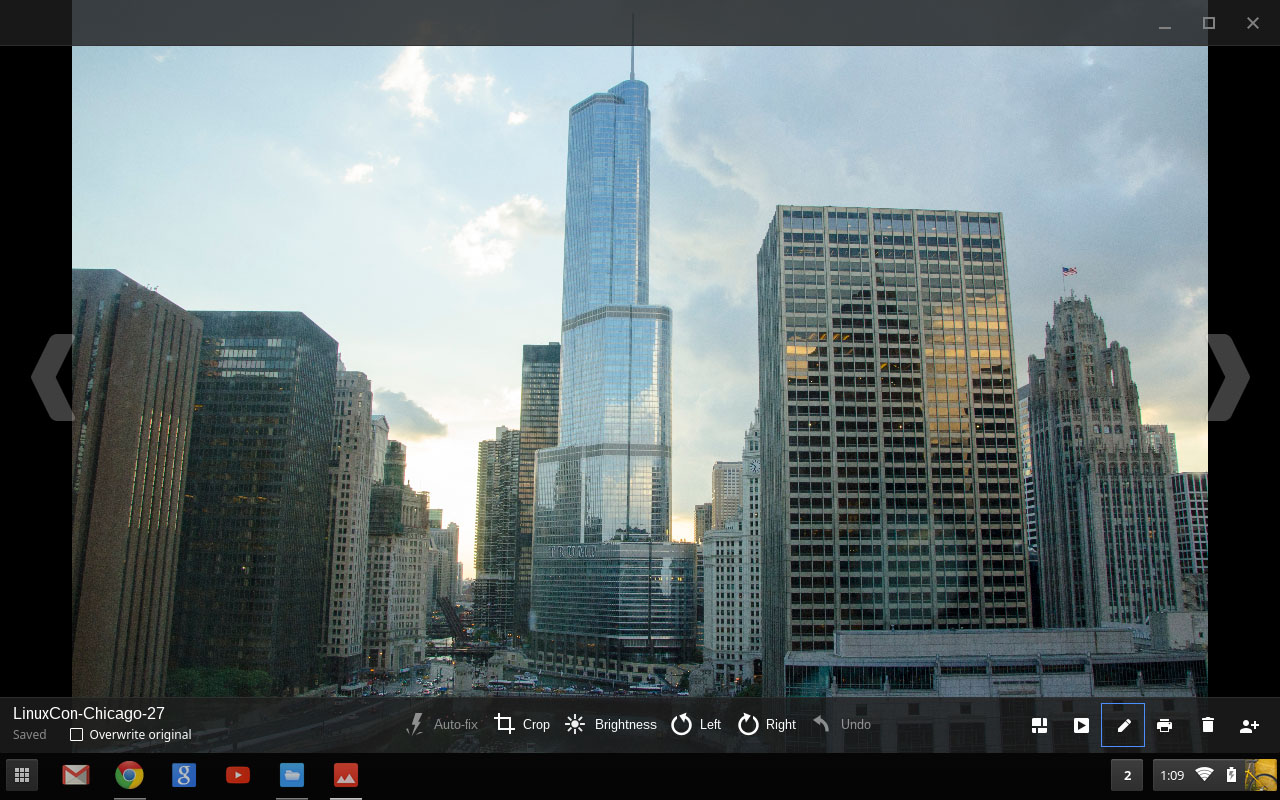
Open ‘Files’ and then click on the image that you want to edit. Once the image is open, you will notice an edit icon; click on it to enter the edit mode. In the edit mode you will see several editing actions; there is a checkbox which says ‘overwrite original’, if you don’t want to make any changes to the original image (and that’s heavily recommended), uncheck the box and the editor will work on a copy leaving the original image intact.
The first option is autofix, where the editor will try to adjust the image; I never do that. I trust my artistic skills more than I trust some algorithm. Other options are: cropping, brightness/contrast control, rotate and undo/redo. Here are some useful shortcuts for each action:
a -autofix
c – crop
b – brightness and contrast
r/l – rotate the image right or left
e – toggle between view and edit mode
Ctrl+z – undo changes
Ctrl+y – redo changes
If you made any mistake you can always undo the changes. The tool bar has some nifty preview options which allow you to see all images in a ‘Mosaic’ layout or as a slideshow. If you want to rename any of the images you are currently working on, click on the image name and give it the new name.
3rd party image editing tools
If the built-in image editor doesn’t suffice, there are many third-party applications to do the job.
1. Pixlr
One tool that comes closest to offering a Photoshop-like experience on Chromebook is AutoDesk’s Pixlr. However they recently became self-destructive and embedded a wide skyscraper advertisement which leaves very little space for image editing.
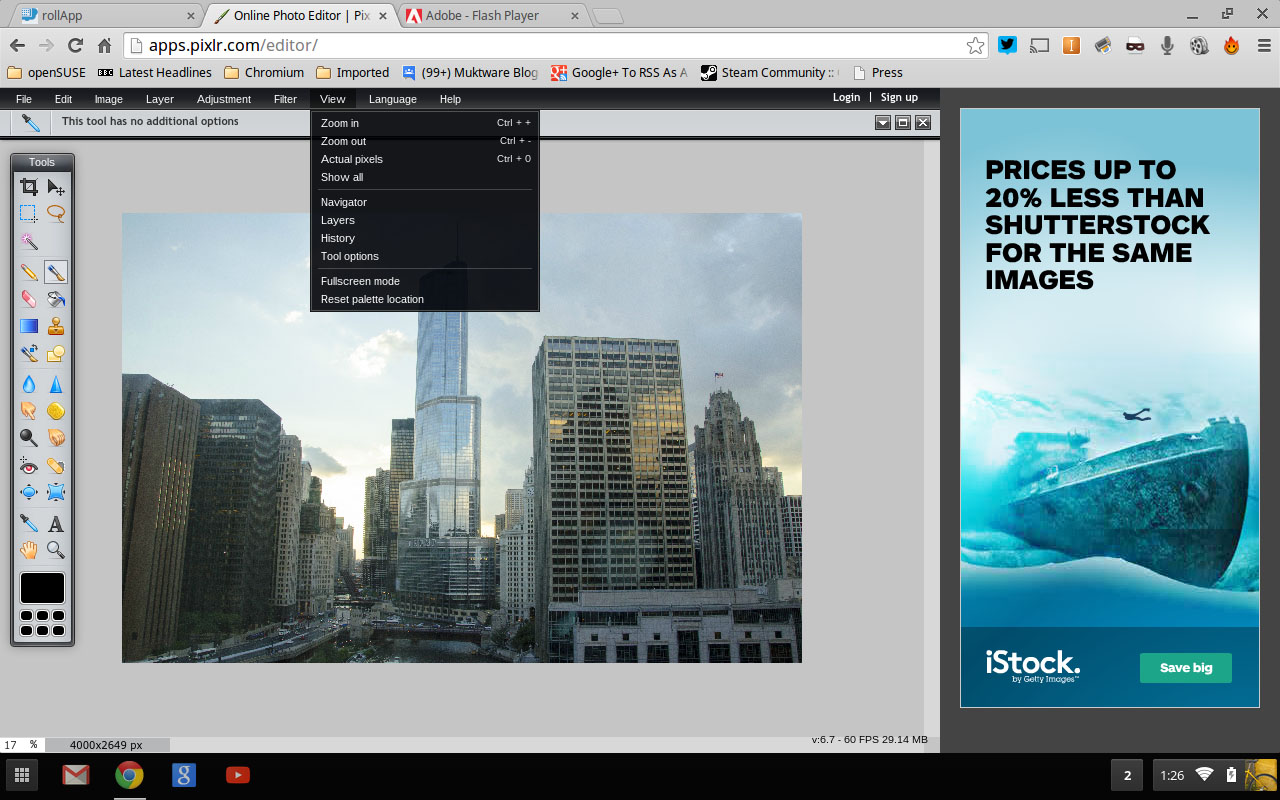
Autodesk may offer a paid, ad-free version of Pixlr; I won’t mind paying $5 for a decent image editing tool. However, don’t get too upset about the ad, it doesn’t show up in the full-screen mode. So if you want to focus on your work without being distracted by the ad, go to ‘View > Fullscreen’.
It comes with a plethora of tools and options; the left panel resembles the one from Photoshop or GIMP including – crop, move, marques, lasso, wand tool, pencil, pen quick select, brush, etc. That’s not all, the app comes with quite a good selection of filters and adjustment options.
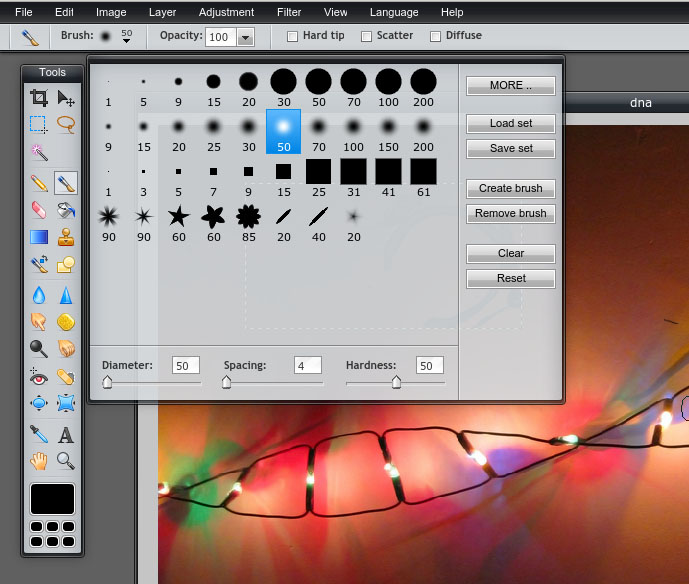
It supports layer, so you can slap layer on layer to work with several images. If you have used GIMP or Photoshop, you won’t struggle to use the app. In most cases you may even be tempted to use this one over GIMP.This is by far the best image editing tool on Chrome OS devices.
2. Sumo Paint
Another neat image editing app is Sumo Paint. This app, unlike Pixlr doesn’t have any ads so you do get more real estate to work. The app has a similar UI, and also features several filters and adjustment layers.
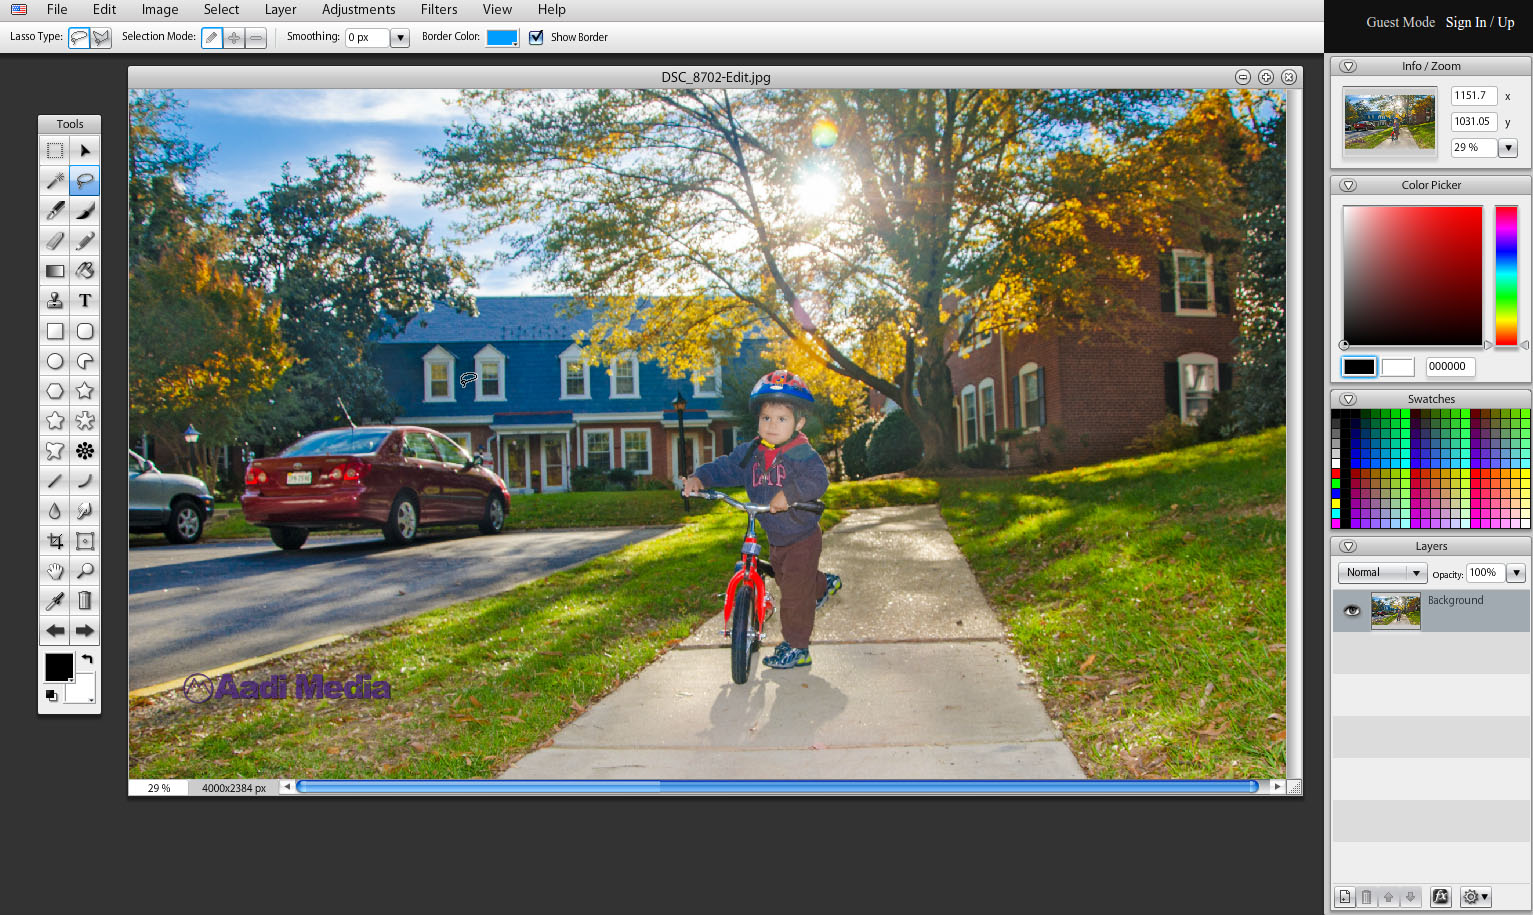
Sumo and Pixlr are neck to neck when it comes to features; I found Sumo to be more useful than Pixlr, but that’s my personal preference. Since both apps are available for free of cost, install both and see which one works best for you.
3. Polarr
As a photographer I depend heavily on LightRoom and Photoshop for my professional work, whereas Darktable and GIMP are deployed for personal projects. The good news for Chromebook users is that there is a nifty app, called Polarr, which can be a great replacement for Lightroom (don’t get me wrong, Lightroom and Photoshop are the best of the breed image editing software and if you are a professional user, you know there is nothing which beats them).
The best part of Polarr is that it also support RAW image format. That’s the format any serious photographer would use – it keeps all the image data from the sensor because the camera does minimal processing of the data. RAW formats like NEF can be directly opened in Polarr – no conversion needed! They are also working on version 2 which has an improved UI (you may mistake it for LightRoom).
Polarr comes with several filters/presets to give your images the desired treatment. The left panel features some of the image ‘effect’ presets – want that ‘Instagram’ look?
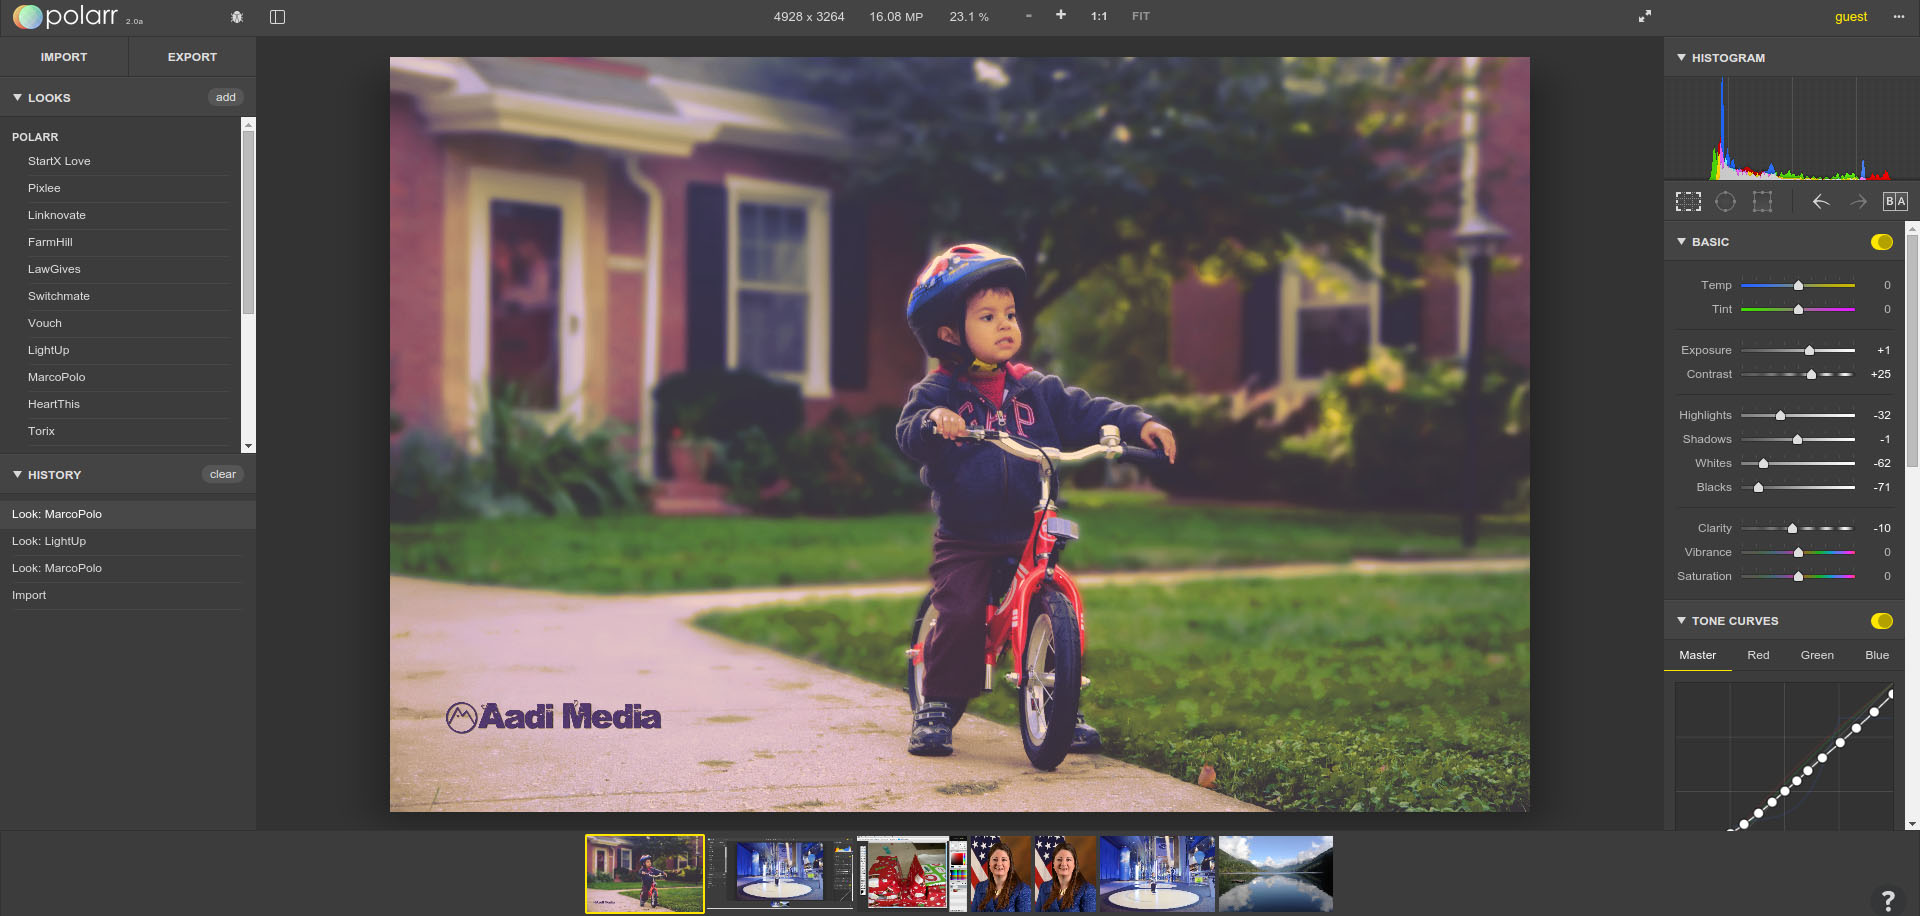
The right panel offer the ‘most important’ tools one need to fine tune an image. Since the camera doesn’t process the RAM images, you increase/decrease the exposure, adjust the temperature and tint. Balance the lighting using Light & Shadow; increase black and white, add clarity, vibrance. That’s not all, there is much more.
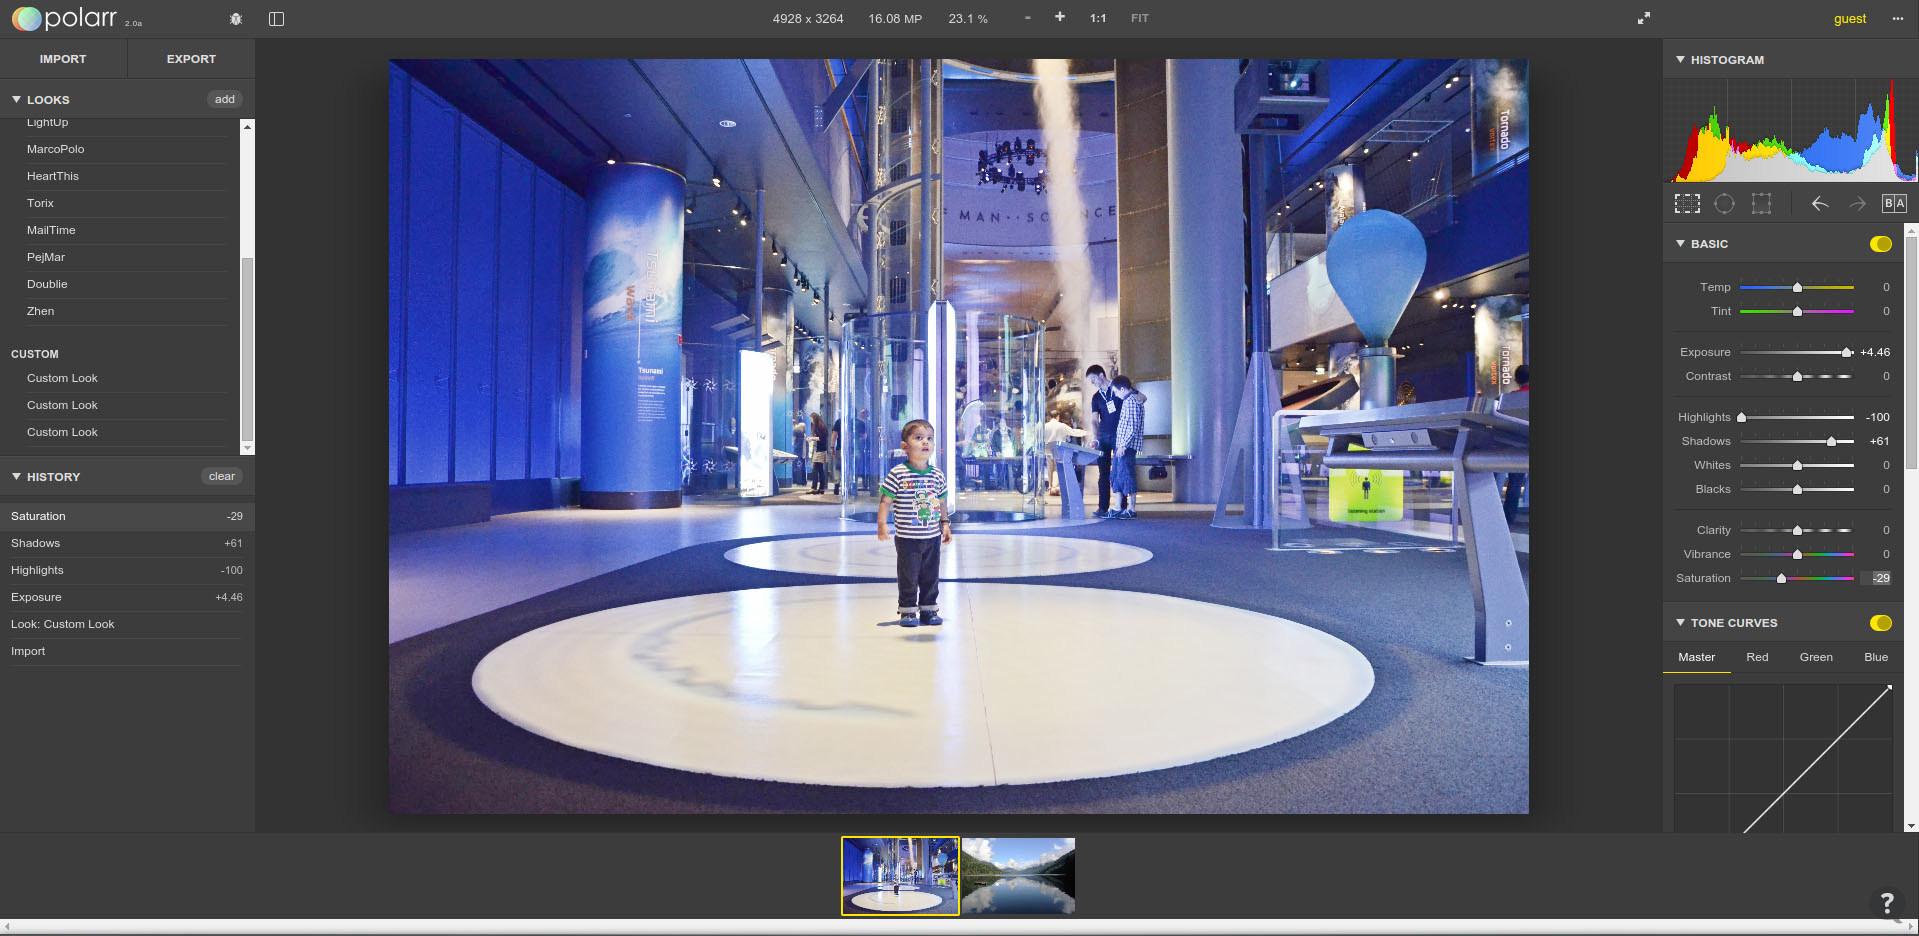
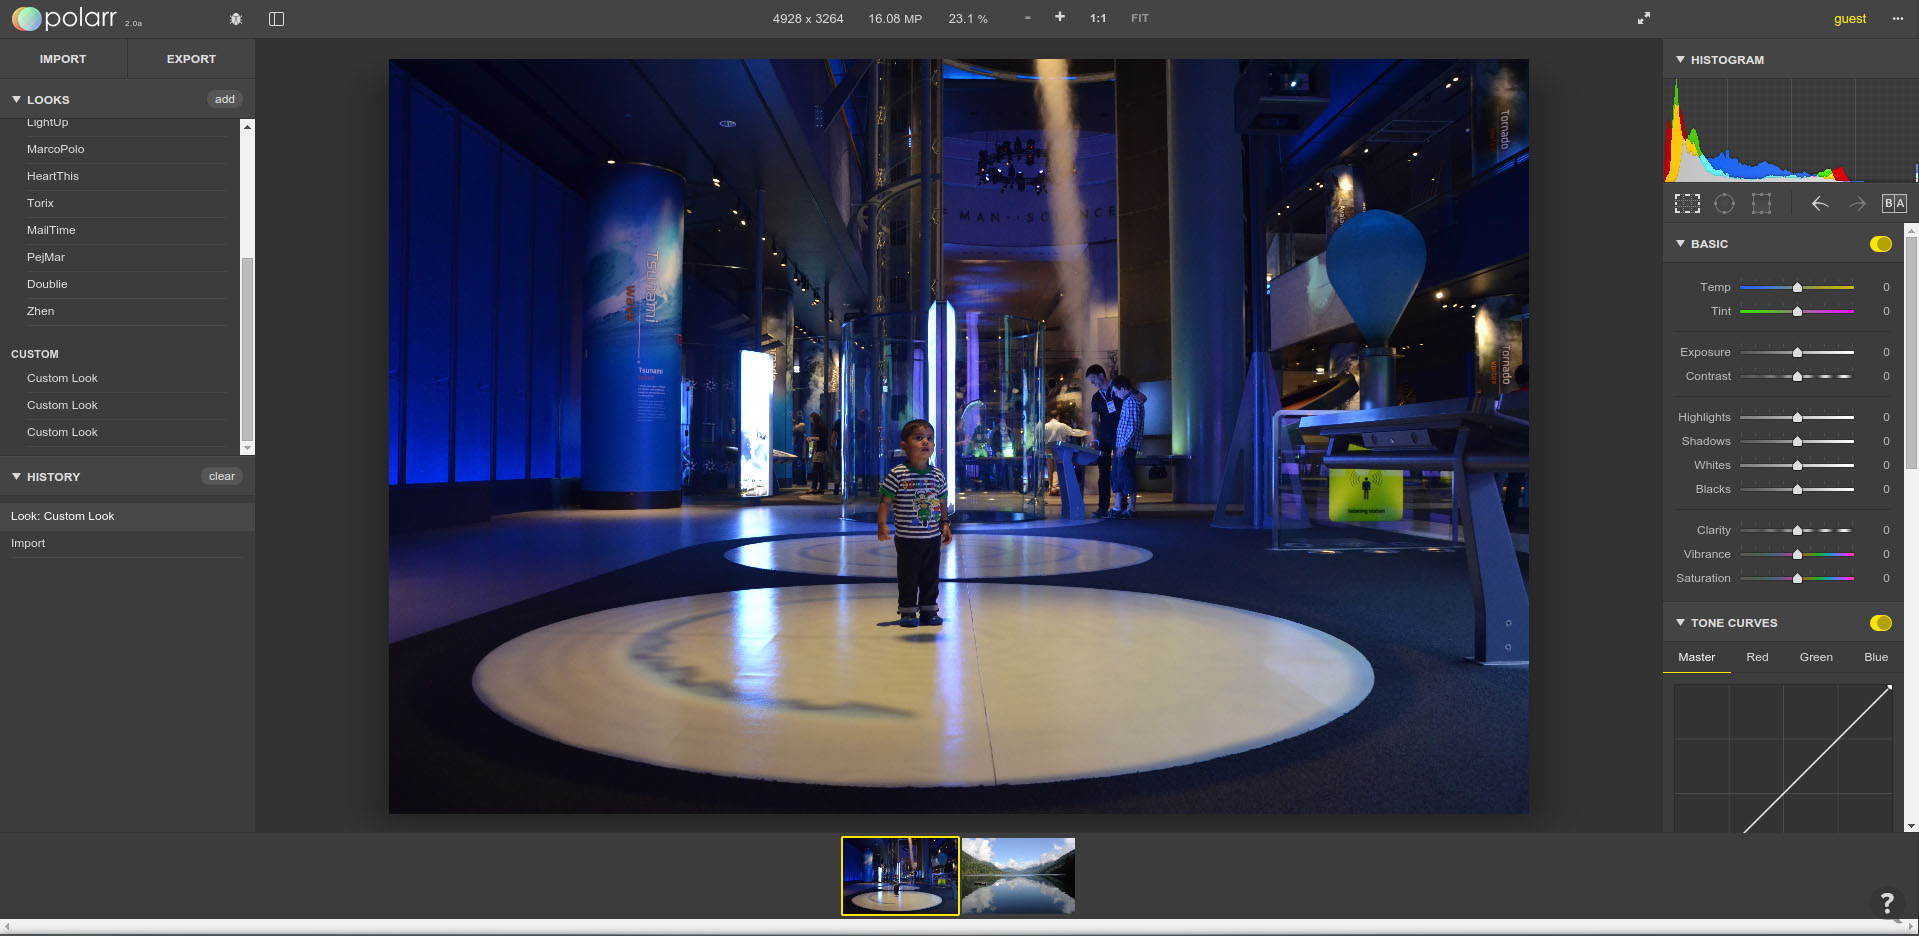
Polarr is by far the best photograph management tool; you can import your entire folder to it and work on your images. Install the app from the Web Store, and try it yourself. If you have ever done any serious work on Lightroom, you will be amazed with this application.
Conclusion
In a nutshell these apps allow me to work on my images without having to go to Linux or Mac OS X boxes. I would not underrate these apps by calling them ‘basic’ image editing tools, they are way too advanced for that category. From the built-in image editing tool to Polarr, Chromebooks cover the entire spectrum of image editing – with Pixlr and Sumo Paint somewhere in middle.
There is only one caveat though. These _are_ image editing apps and thus are quite resource hungry. If you want to do some serious image editing work and are planning to buy a Chromebook, make sure to get the most powerful processor and as much RAM as you can get. Try these apps and let us know which one works best for you.


