
You’ve probably already heard the open source cloud server ownCloud has been forked by its founder and the new company/server Nextcloud has been formed. What you might not know, however, is that Nextcloud has already released a ready-to-install server that offers the same functionality as ownCloud as well as a newfound focus on apps (Calendar, Contacts, Documents, Email, and more). What Nextcloud has to offer is really impressive so far and, by the time you finish reading this post (and walking through the steps), you can have a Nextcloud server on premises.
I will be demonstrating the installation of Nextcloud on a Ubuntu 16.04 desktop installation. This installation will start with installing LAMP and conclude with you logging into your first Nextcloud cloud server. Most of this install will be done from the command line, so get ready to start typing.
Snap install
You should know that there are no DEB packages for Nextcloud. There is, however, a snap package to install. This means you can install Nextcloud with a single command:
sudo snap install nextcloud
You should also know, however, that the snap package is limited in what it can do. You will not be configuring this installation nearly as much as you would the standard installation. Because of this, I will give you the step-by-step for installing Nextcloud manually.
With that said, let’s get to the install.
LAMP
I’m going to assume you’re installing Nextcloud on a machine that doesn’t even include LAMP (Linux Apache MySQL PHP). To install the basic LAMP server, open up a terminal window and issue the following command:
sudo apt-get install lamp-server^
During the above installation, you’ll be prompted to enter (and verify) a password for MySQL. Once that is done, you’re ready to finish up your LAMP server install.
Nextcloud does require a few extra PHP modules to function properly. These modules can be installed with the following command:
sudo apt-get install libxml2-dev php-zip php-dom php-xmlwriter php-xmlreader php-gd php-curl php-mbstring
Next, we need to enable mod_rewrite with the command:
a2enmod rewrite
Now you can restart Apache with the command:
sudo service apache2 reload
Nextcloud will gain significant a performance increase with the use of MariaDB. Install this with the command:
sudo apt-get install mariadb-server
Nextcloud configuration
It’s time to download the stable version of Nextcloud and begin the process of configuration. From the terminal window, issue the following command:
wget https://download.nextcloud.com/server/releases/nextcloud-9.0.50.tar.bz2
Extract the above file with the command:
tar -vxjf nextcloud-9.0.50.tar.bz2
You should now see the folder nextcloud in the current working directory. Move that folder with the command:
sudo mv nextcloud /var/www
The next step is to give the proper permission to the /var/www/nextcloud folder (as well as its contents). Fortunately, Nextcloud has created a script for that very purpose. Copy the following and paste it into a file called nextcloud_permissions.sh.
#!/bin/bash

ocpath='/var/www/nextcloud'

htuser='www-data'

htgroup='www-data'

rootuser='root'


printf "Creating possible missing Directoriesn"

mkdir -p $ocpath/data

mkdir -p $ocpath/assets

mkdir -p $ocpath/updater


printf "chmod Files and Directoriesn"

find ${ocpath}/ -type f -print0 | xargs -0 chmod 0640

find ${ocpath}/ -type d -print0 | xargs -0 chmod 0750


printf "chown Directoriesn"

chown -R ${rootuser}:${htgroup} ${ocpath}/

chown -R ${htuser}:${htgroup} ${ocpath}/apps/

chown -R ${htuser}:${htgroup} ${ocpath}/assets/

chown -R ${htuser}:${htgroup} ${ocpath}/config/

chown -R ${htuser}:${htgroup} ${ocpath}/data/

chown -R ${htuser}:${htgroup} ${ocpath}/themes/

chown -R ${htuser}:${htgroup} ${ocpath}/updater/


chmod +x ${ocpath}/occ


printf "chmod/chown .htaccessn"

if [ -f ${ocpath}/.htaccess ]

then

 chmod 0644 ${ocpath}/.htaccess

 chown ${rootuser}:${htgroup} ${ocpath}/.htaccess

fi

if [ -f ${ocpath}/data/.htaccess ]

then

 chmod 0644 ${ocpath}/data/.htaccess

 chown ${rootuser}:${htgroup} ${ocpath}/data/.htaccess

fi
Once you’ve saved that file, give it the proper execution privileges with the command sudo chmod +x nextcloud_permissions.sh and then run the file with the command sudo ./nextcloud_permissions.sh.
Apache configuration
Because we’re working with Ubuntu and Apache2, you’ll need to create a configuration file for Nextcloud in /etc/apache2/sites-available. Create a new file in that folder called nextcloud.conf with the following contents:
Alias /nextcloud "/var/www/nextcloud/"

<Directory /var/www/nextcloud/>
 Options +FollowSymlinks
 AllowOverride All

<IfModule mod_dav.c>
 Dav off
</IfModule>

SetEnv HOME /var/www/nextcloud
SetEnv HTTP_HOME /var/www/nextcloud

</Directory>
Save that file in /etc/apache2/sites-available and then create a symlink to /etc/apache2/sites-enabled with the command:
ln -s /etc/apache2/sites-available/nextcloud.conf /etc/apache2/sites-enabled/nextcloud.conf
There are some recommended Apache modules to be enabled for Nextcloud. Issue the following commands to do this:
-
sudo a2enmod headers
-
sudo a2enmod env
-
sudo a2enmod dir
-
sudo a2enmod mime
The last thing to do is enable SSL. For this, issue the following commands:
-
a2enmod ssl
-
a2ensite default-ssl
-
service apache2 reload
Finally, restart Apache with the command:
sudo service apache2 reload
MariaDB configuration
Our final command-line configuration step creates the MariaDB database and configures the user for permissions. Here are the necessary commands:
-
sudo mysql -u root -p (You’ll be prompted for your MySQL root user password)
-
CREATE DATABASE nextcloud;
-
CREATE USER nextclouduser@localhost IDENTIFIED BY ‘PASSWORD’; (Where PASSWORD is a password you want to use for the nextcloud database users)
-
GRANT ALL PRIVILEGES ON nextcloud.* TO nextclouduser@localhost;
-
EXIT
Log in to Nextcloud
You’re finally ready to log in to your Nextcloud server. Point a browser to https://IP_OF_SERVER/nextcloud (where IP_OF_SERVER is the actual IP address of the server hosting Nextcloud).
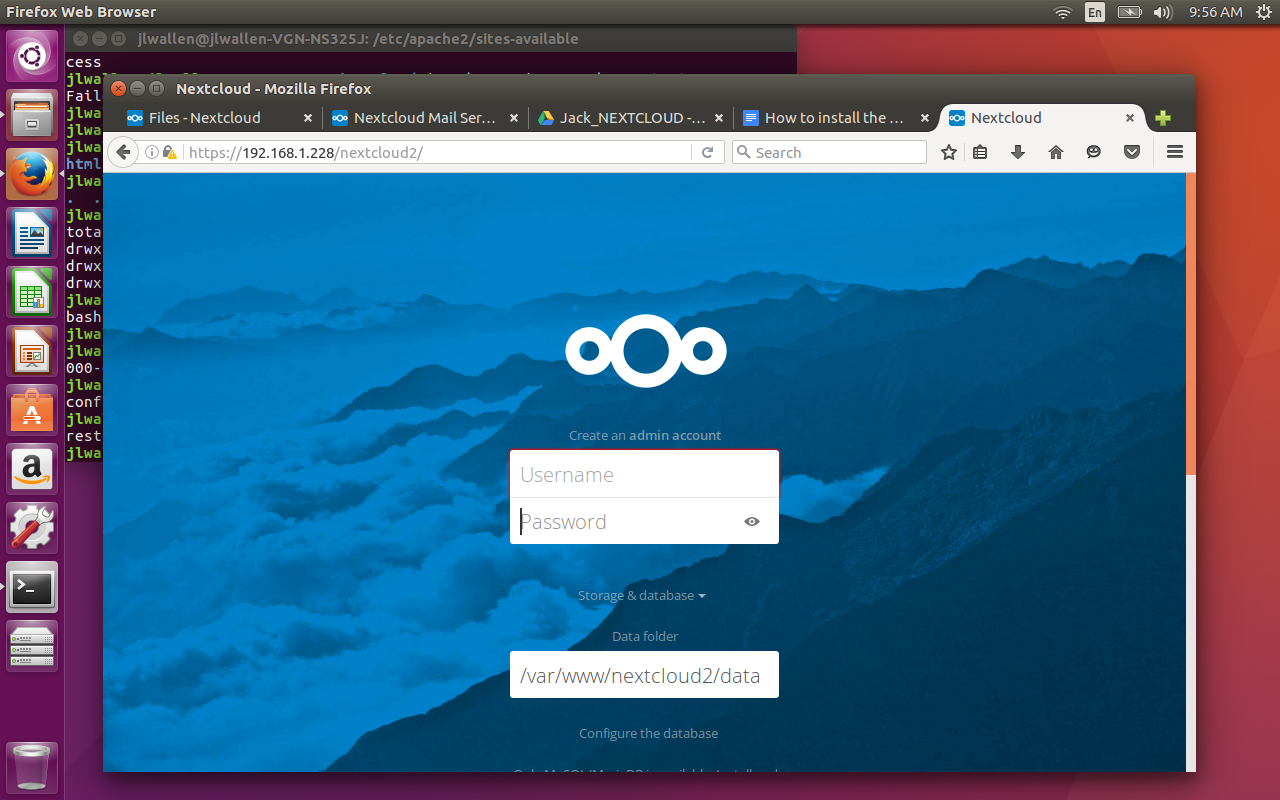
Once logged in, you’re ready to start setting up Nextcloud to your liking!
What’s next?
What you do with Nextcloud is up to you. You can add new modules or just use it as a cloud-based file sync and share. You can install the Android app and even make use of the ownCloud desktop clients (they’ll work fine with Nextcloud). Regardless of what you do, it’s exciting to know that the technology will continue on and, hopefully, expand and grow.


