
So, a few months have passed, and you’ve realized that, wow, you’re not dreaming, and it wasn’t an April Fool’s Joke, but in fact that Ubuntu-on-Windows thing is real! You’re thinking, surely some of the early kinks have been worked out, and it’s ready for a test drive… And you would be correct on both counts!
Let’s take a look at how to get started, running Ubuntu and Linux compiled binaries, natively on a Windows 10 Desktop. For the record, Microsoft’s official instructions are here.
First, you’ll need a 64-bit Windows 10 Desktop. You might already have Windows 10 running natively on your laptop, desktop, or in a virtual machine. If not, you can actually download Windows 10 for free, by creating a Windows Insider account at insider.windows.com. I did so, and downloaded a 4.2GB Win10_1511_1_English_x64.iso.
From my Linux desktop, I partitioned a USB stick using fdisk, creating a single NTFS partition, then formatted it using mkfs.ntfs, and mounted it. After loop mounting the ISO, you can simply rsync all of the contents of the ISO onto the NTFS partition. Finally, unmount, sync the disk, and set the partition as “bootable” using gparted. Now, with the USB stick, you can install Windows 10 onto a 64-bit laptop or desktop machine.
Installing Windows is a much lengthier process than an Ubuntu Desktop installation, so I encourage you to be very patient, through all of its many reboots.
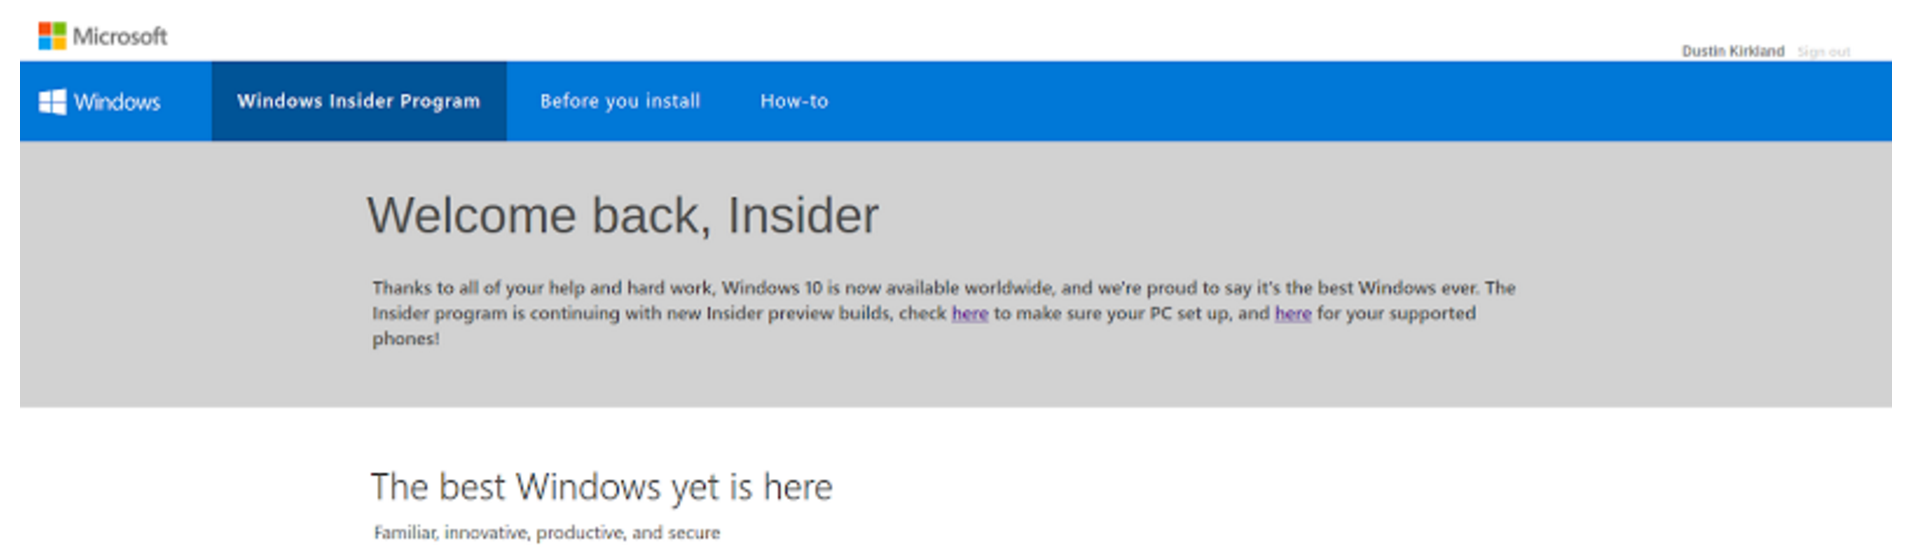
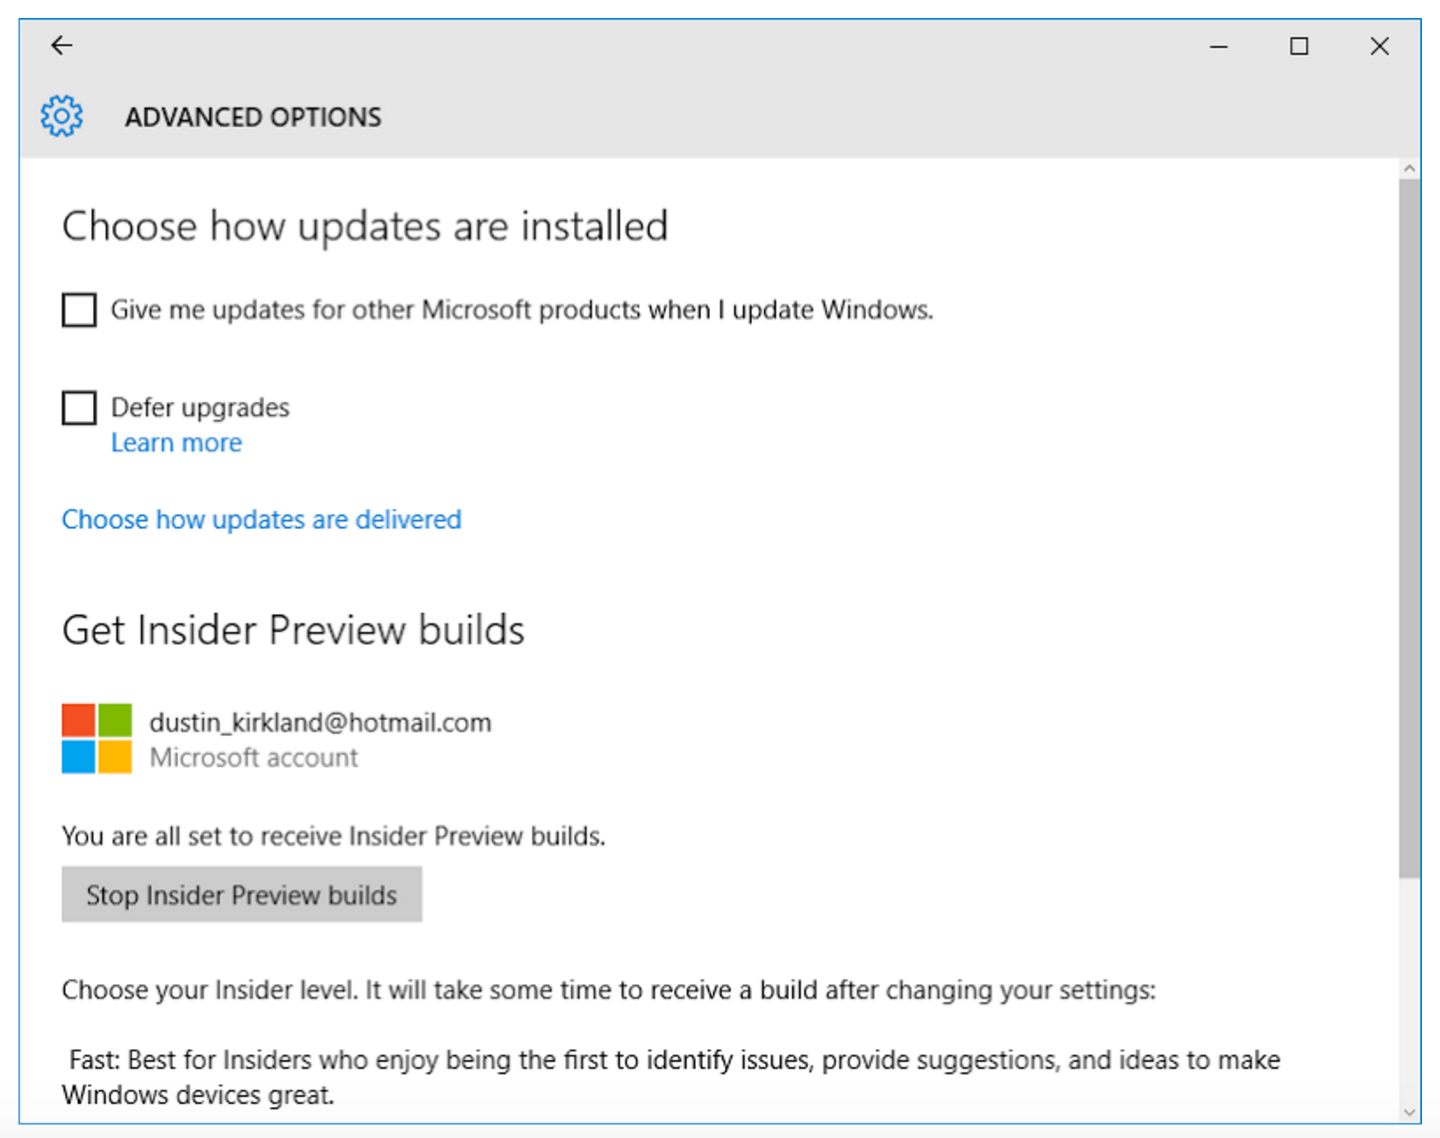
Once you’re installed, you’ll need to tell Windows that you’re a Windows Insider (Figure 1), and log in to your Insider account. You can do this in System Settings → Advanced Windows Update Options (Figure 2).
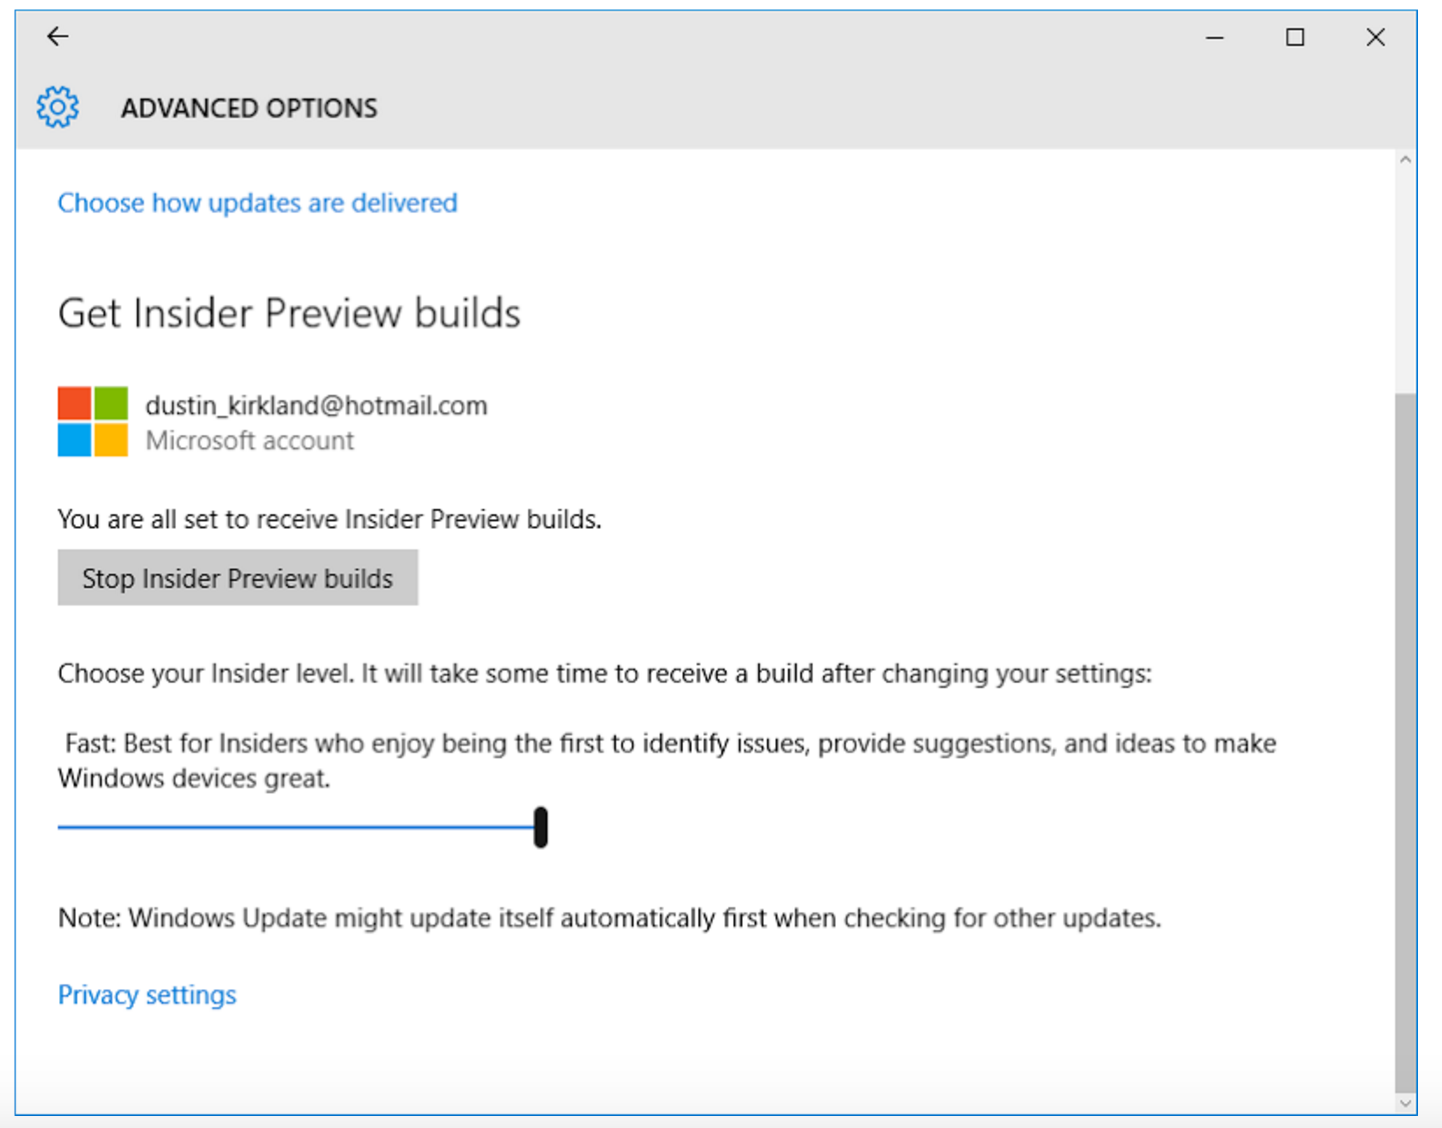
You’ll also need to be in the “fast ring” which gets beta Windows updates, more quickly. Move the slider to the far right (Figure 3).
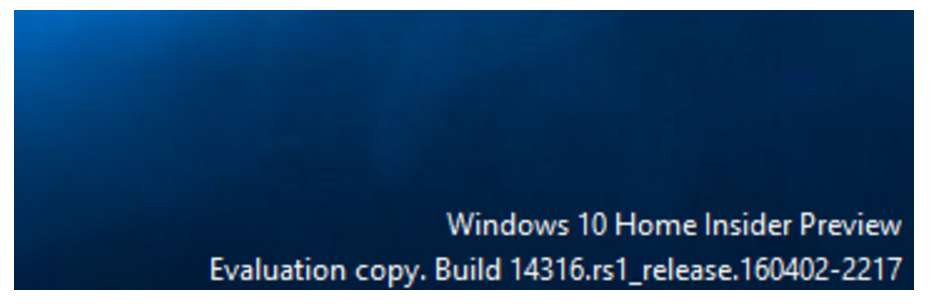
You’ll need to reboot for these changes to take effect, and you may need to update one or more times to get on the latest builds. Eventually, you should ensure that you’re running the Insider Build, which should be at least newer than this (Figure 4):
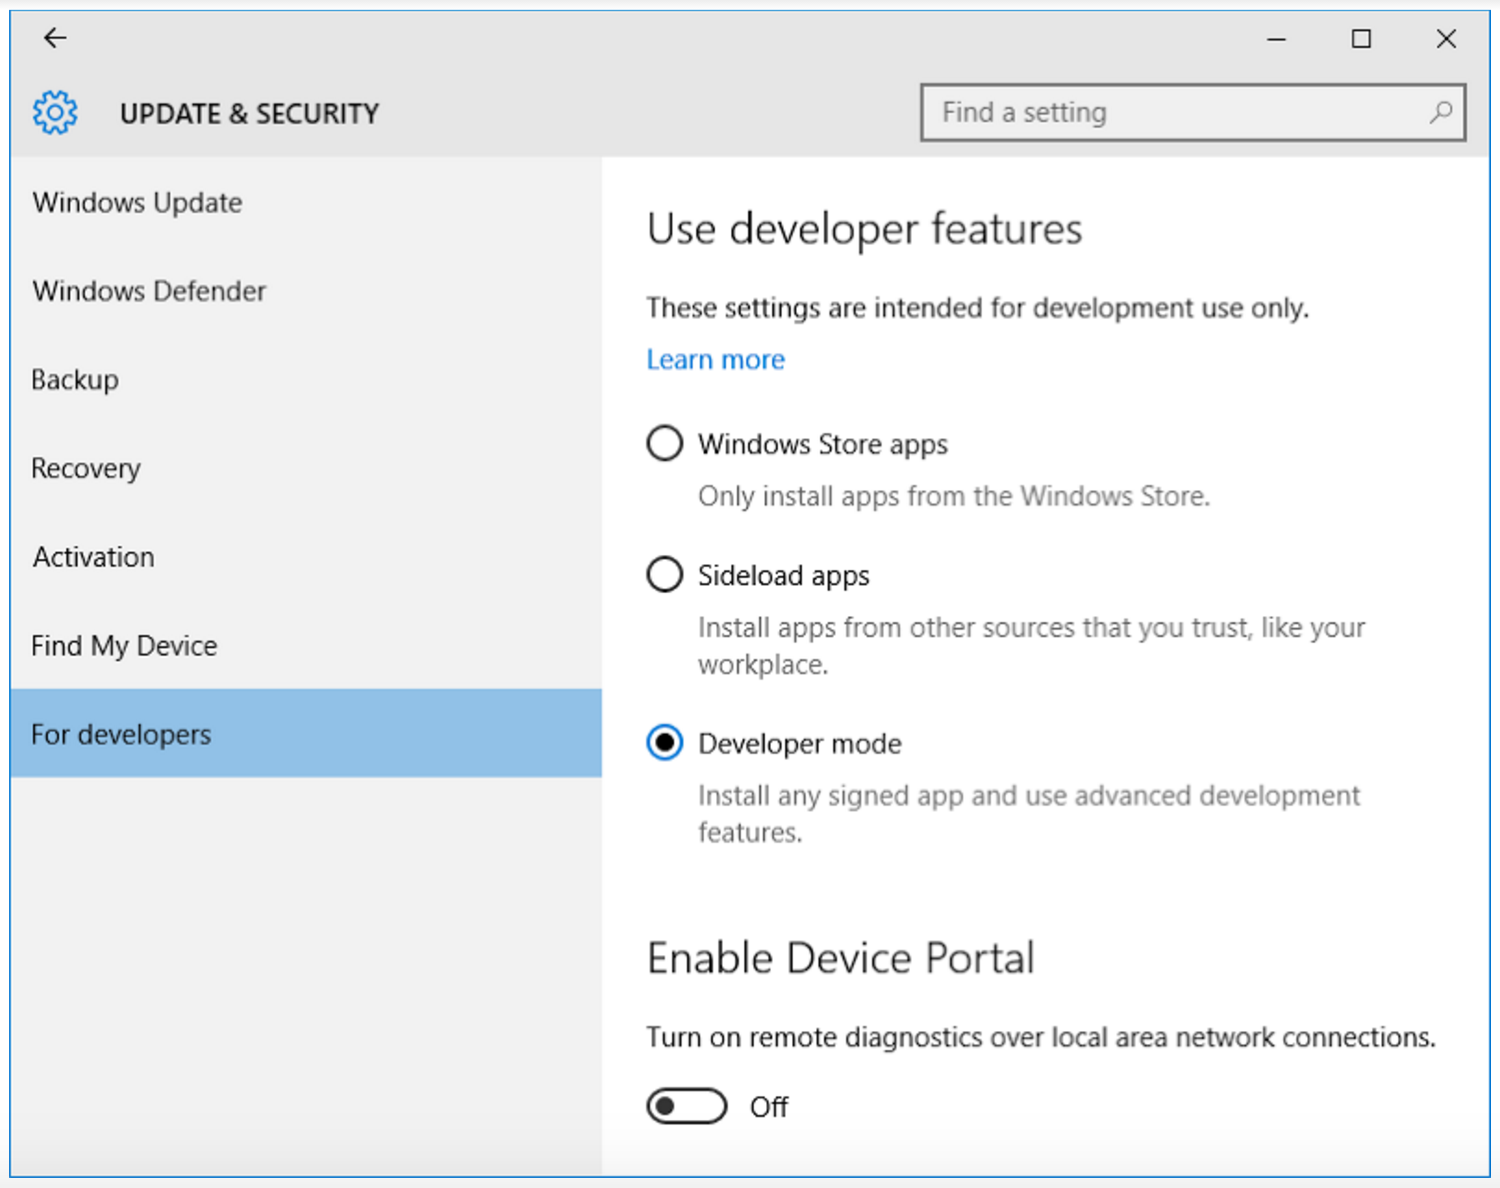
Next, you’ll need to enable “developer mode” (Figure 5), as this feature is very much geared specifically toward developers, rather than general Windows users.
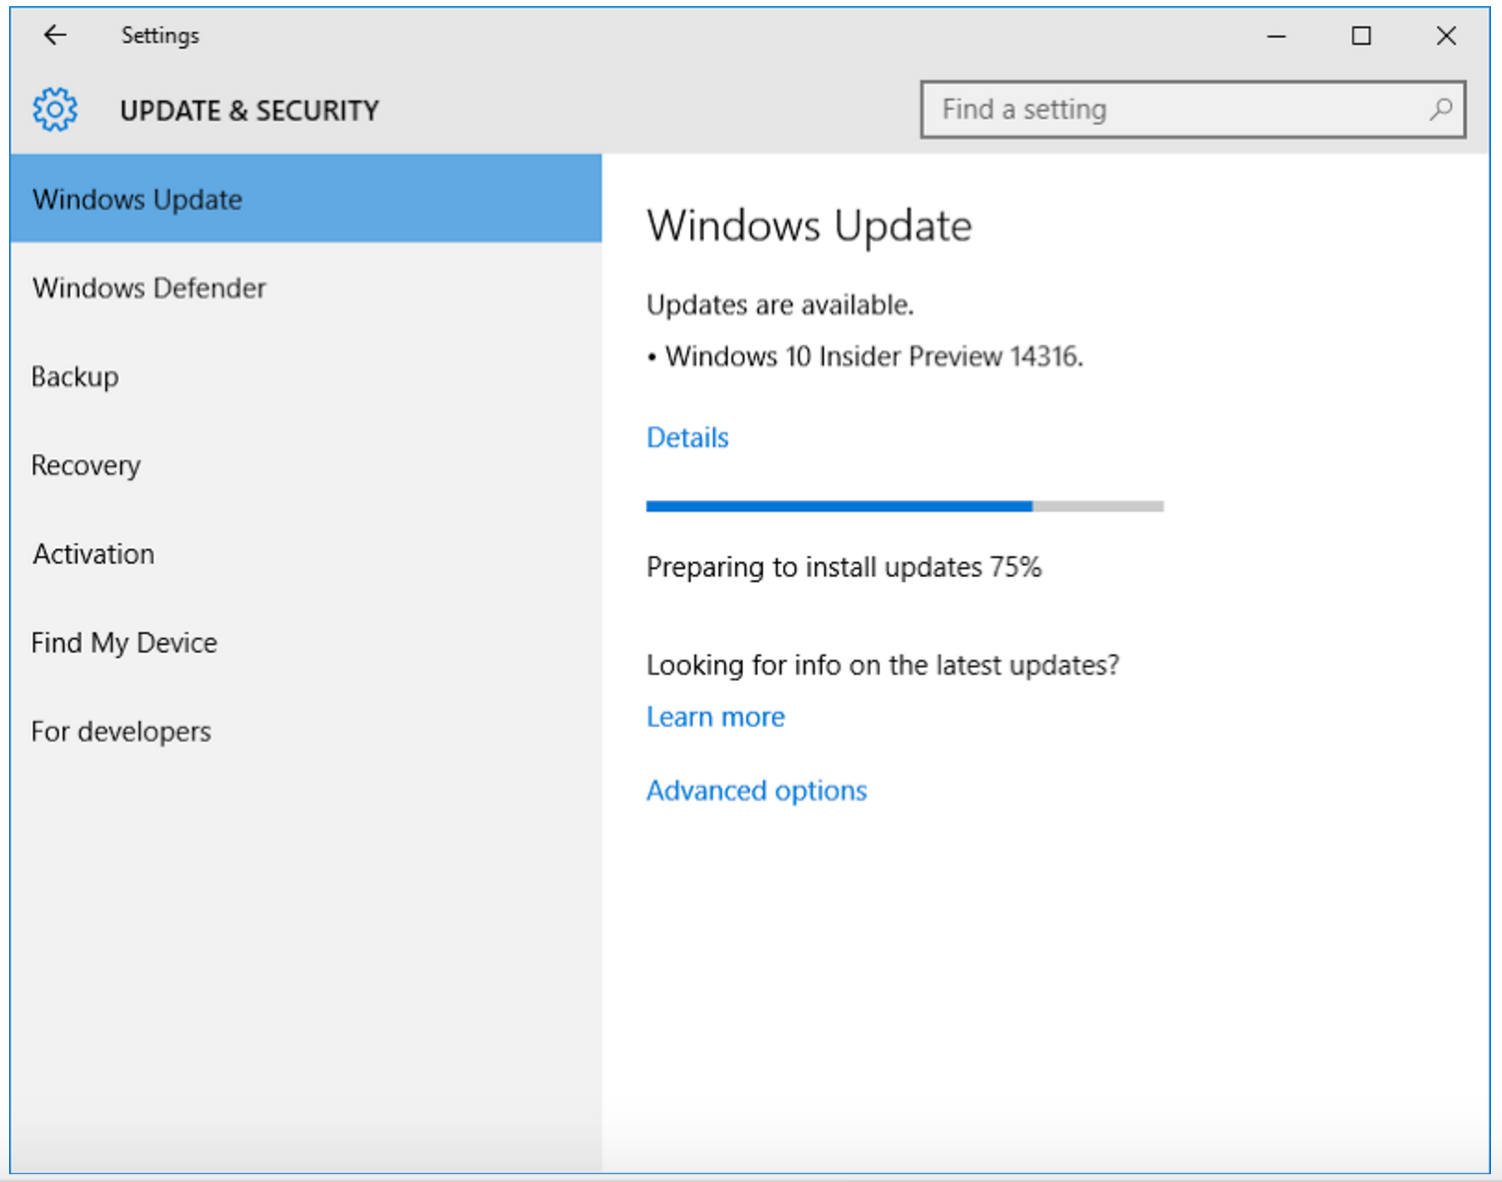
Now, check for updates, apply all of them, and restart (Figure 6). Note that in many users’ experiences, it sometimes takes several days or several hours for Windows to “notice” that updates are available.
Reboot a few more times.
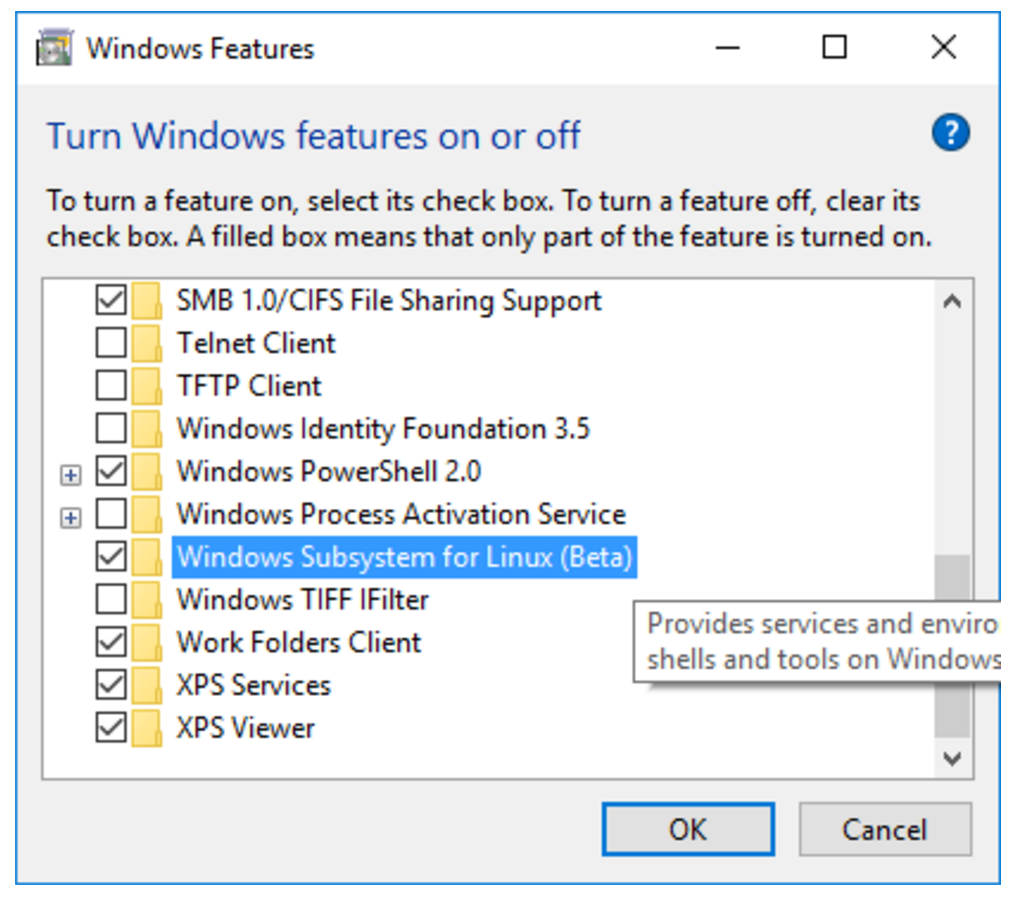
Now you need to enable the “Windows Subsystem for Linux” (Figure 7). Note (again) that you must have the 64-bit version or Windows, or you won’t even see this option.
You guessed it. Reboot again.
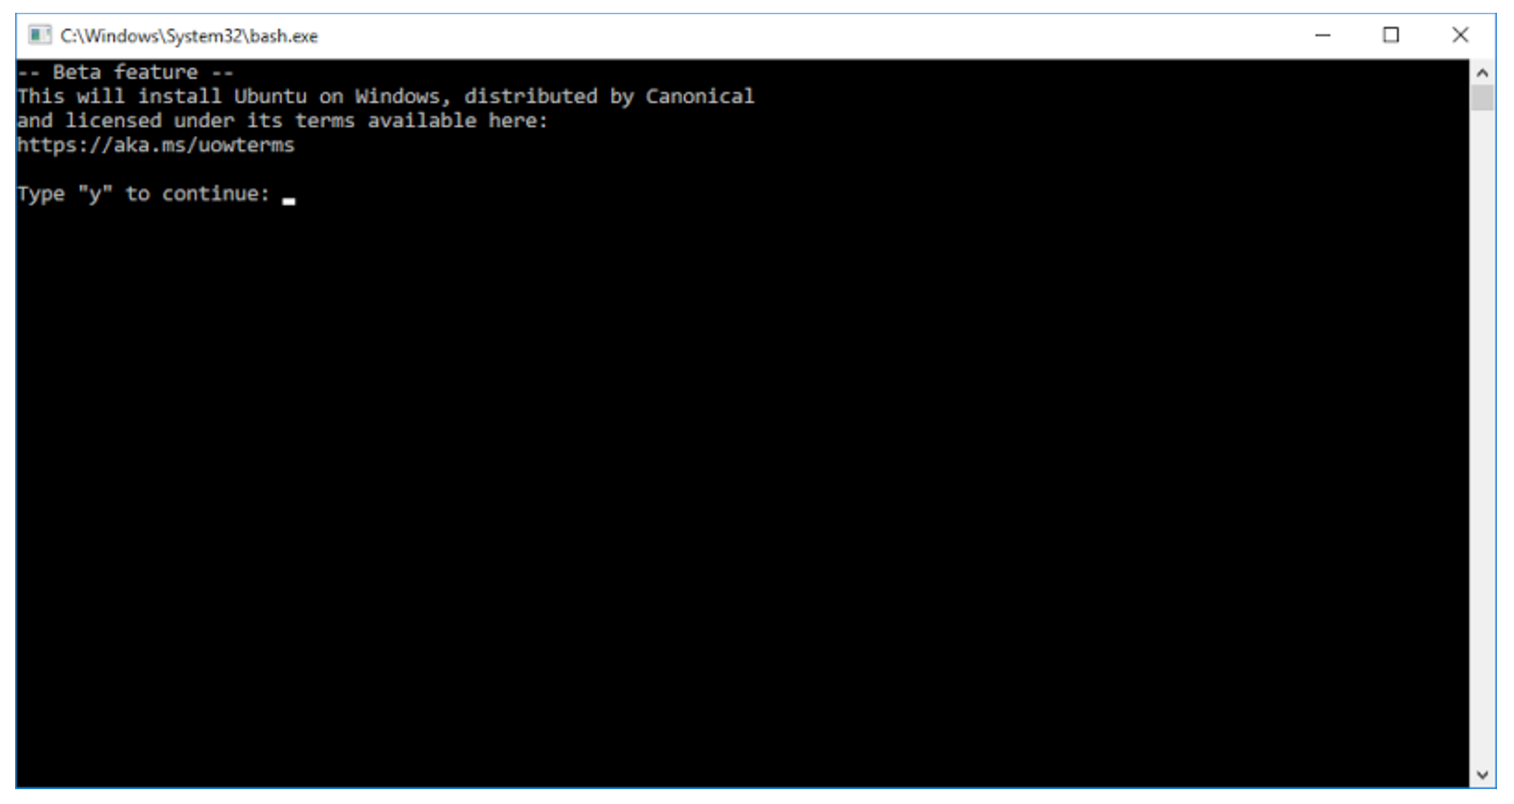
After Windows is back up, press the Windows key, and type “bash”, and hit enter. You’ll be prompted to accept the terms of service (Figure 8) and then Windows will download the Ubuntu root tarball from the Windows store.
After this completes, you should be up and running! You should see the Ubuntu icon in the Windows launcher and task bar (Figure 9).
The latest builds will actually prompt you to create a non-root user, to give you the more secure, more Ubuntu-like experience (Figure 10).
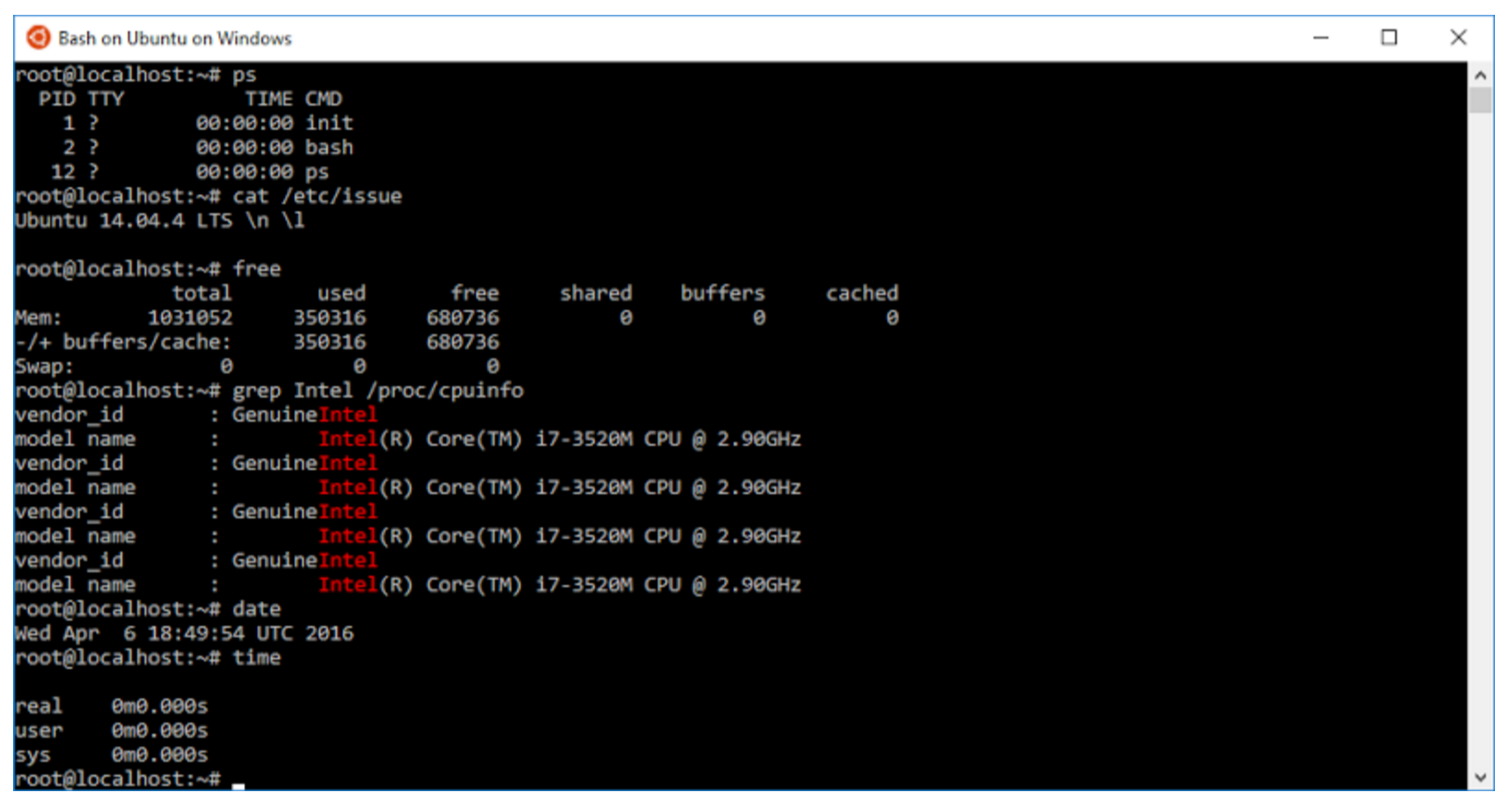
At this point, I encourage you to explore, and have some fun! Try apt installing some of your favorite command line tools. Let us know what works well, and anything that doesn’t, by asking questions at AskUbuntu.com and tweeting to @ubuntu. Explore your Windows files in /mnt/c. Try writing, compiling, and running some code or executing your own scripts. You should also check out the Microsoft blog articles on the Windows Subsystem for Linux.
In case you mess something up, and want to “reset” your Ubuntu environment, simply run the following from a Windows shell: ‘lxrun /uninstall /full’, and then run ‘bash’ again.
Enjoy,
Dustin
Learn more about Running Linux Workloads on Microsoft Azure in this on-demand webinar with guest speaker Ian Philpot of Microsoft. Watch Now >>
Read more about how the Canonical and Microsoft partnership happened in Dustin’s previous article, an Introduction to Ubuntu on Windows.
Read Part 3 of this series: Howdy, Ubuntu on Windows! Ubuntu Commands Every Windows User Should Learn


