
This tutorial will be the first in a series that will help you create continuous integration and deployment (CI/CD) pipelines for your applications.
CI/CD are vital in an Agile organization. We are going to discover how the addition of Docker tools in our toolkit can greatly improve application updates, testing and shipping.
Depending on your resources and constraints, there are of course multiple ways of achieving such a goal. Here, we are going to start simple and discover the free tools that Docker has made available to us.
You are going to create a Dockerfile for a simple web application, build it, get it to run locally, store it online, and create your first automated build on Docker Hub.
Requirements
- A valid account on Docker Hub
- A valid account on either Github or Bitbucket. Both platforms have free plans to get you started.
- Docker toolbox installed and running on your local machine.
Create a local repo for your app
For this tutorial you will use a very simple Flask application, written in python, and create a production ready Docker image.
Create a folder for your application code and initiate a git repo in it with:
mkdir flask-demo-app
cd flask-demo-app
git init
Add the following code in a file named app.py:
from flask import Flask

app = Flask(__name__)
app.debug = True

@app.route('/')
def main():
    return 'Hi ! I'm a Flask application.'

if __name__ == '__main__':
    app.run(host='0.0.0.0')
Docker helps us stay as DRY as possible, by giving us the ability to extend an already existing image. Here, I propose to use the image jazzdd/alpine-flask, as it is based on Alpine Linux, thus very lightweight.
Create a Dockerfile with the following content in it:
FROM jazzdd/alpine-flask
COPY . /app
Build your image locally:
docker build -t demo .
docker run -d --name app demo:latest
Test it by running curl in a temporary container with:
docker run --rm --link app:app byrnedo/alpine-curl http://app
You should see in your terminal something like:
Hi ! I'm a Flask application.
Stop and remove your container with:
docker rm -vf app
Add and commit your files to your local repo:
git add app.py Dockerfile
git commit -a -m "Initial commit"
Upload your repo online
Here, you can choose either Github or Bitbucket. Both are very well supported by Docker Hub. In case it’s the first time you’re doing this, here are the links to their documentation:
- Github
-
Once this is done, upload your code on your platform of choice with:
git remote add origin git@.org:/.git
git push -u origin master
If you navigate through the web interface, you should now see the code of your application.
Create an automated build on Docker Hub
In the top right part of your Docker Hub account web interface, click on the create automatic build button and follow the process, which is really self-explanatory.
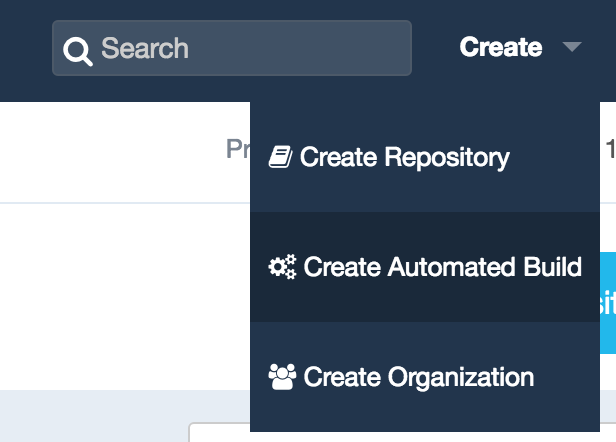
As the documentation is not exactly up to date, you will need to trigger the first build manually by clicking on the Trigger button in the Build settings tab:
Test your Build
Once you’ve created your automatic build and triggered its first run, you should now be able to test it with:
docker run -d --name app -p 80:80 <your_docker_hub_id>/<your_project_name>:latest
Stop and remove this container, once you’re done with it.
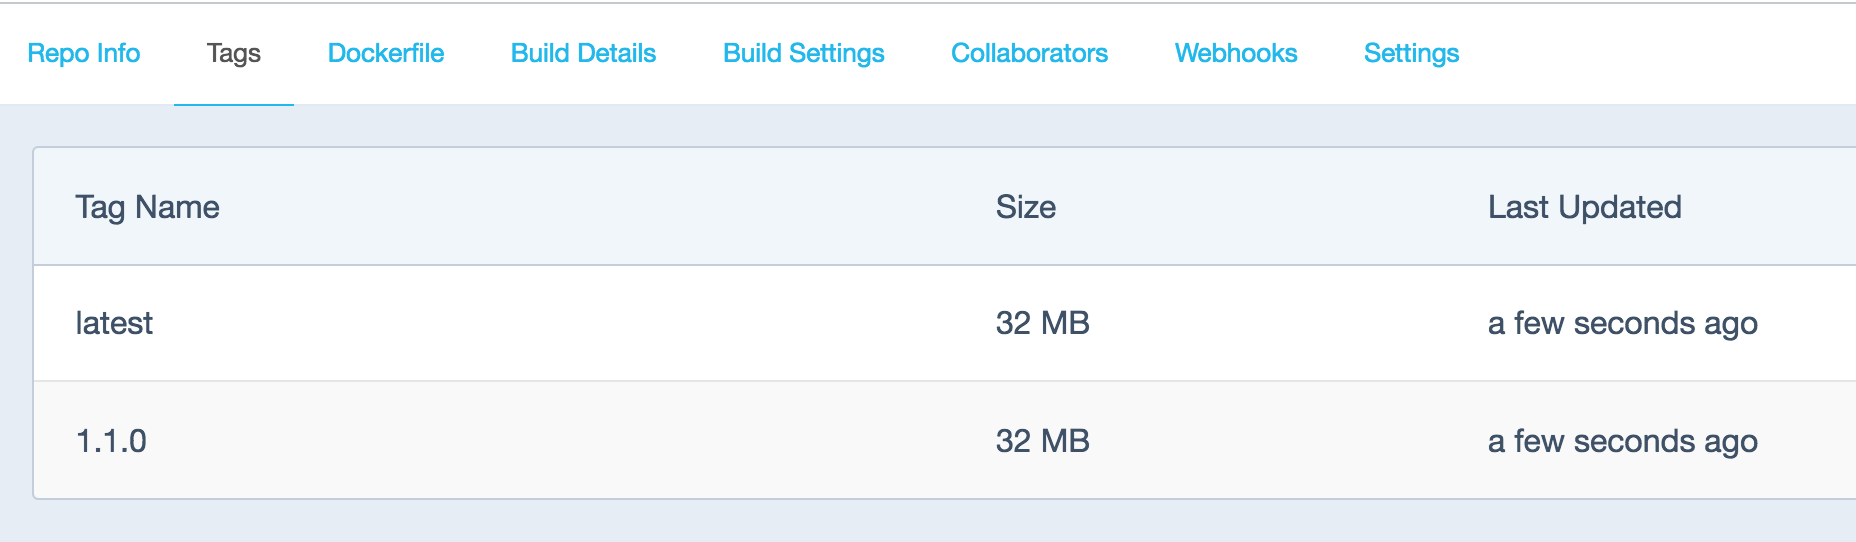
Version tagging
One of the most interesting features of the Hub is the ability to tag your Docker images. This way you can easily differentiate between them and, in the case of a problem with a specific version, perform a rollback.
In most cases the default configuration should suffice. It is very well integrated with Github and Bitbucket repositories.
When using a specific git branch name, Docker Hub will create your images with the matching tags.
Create a branch for a newer version of your code.
git checkout -b 1.1.0
Modify your app.py code with:
def main():
    return 'Hi ! I'm a Flask application in a Docker container.'
Upload your new branch:
git push -u origin 1.1.0
See the new image being built:
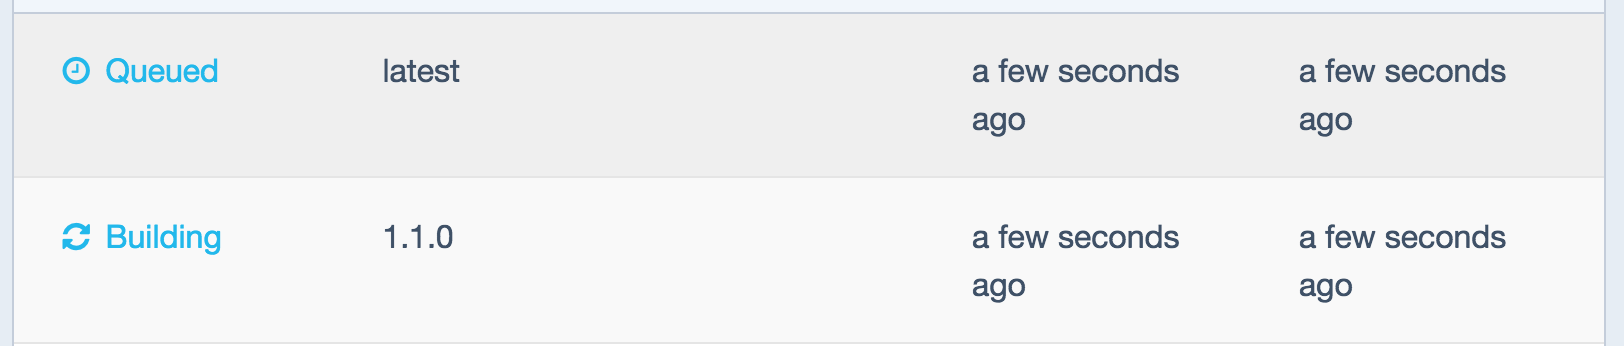
A new tagged build is now available:
Run it with:
docker run -d --name app -p 80:80 <your_docker_hub_id>/<your_project_name>:1.1.0
Bravo, you just connected to the version 1.1.0 of your application!
Conclusion
As I mentioned earlier, using Docker Hub to build your images each time the code is modified and pushed to repository has some limitations. As of today it will build your images at the most every 5 minutes. But it is certainly a very cheap way of doing so as you don’t have to maintain your own repository. Later on, you might want to look into using base images of your making and hosting your own private Docker registry for obvious privacy and performance reasons.
Next time, we will explore how to run unit tests on your application using Travis.


