
Containers are all the rage, and with good reason. As discussed previously, containers allow you to quickly and easily deploy new services and applications onto your network, without requiring too much in the way of added system resources. Containers are more cost-effective than using dedicated hardware or virtual machines, and they’re easier to update and reuse.
Best of all, containers love Linux (and vice versa). Without much trouble or time, you can get a Linux server up and running with Docker and deploying containers. But, which Linux distribution is best suited for the deployment of your containers? There are a lot of options. You could go with a standard Ubuntu Server platform (which makes installing Docker and deploying containers incredibly easy), or you could opt for a lighter weight distribution — one geared specifically for the purpose of deploying containers.
One such distribution is Photon. This particular platform was created in 2005 by VMware; it includes the Docker daemon and works with container frameworks, such as Mesos and Kubernetes. Photon is optimized to work with VMware vSphere, but it can be used on bare metal, Microsoft Azure, Google Compute Engine, Amazon Elastic Compute Cloud, or VirtualBox.
Photon manages to stay slim by only installing what is absolutely necessary to run the Docker daemon. In the end, the distribution comes in around 300 MB. This is just enough Linux make it all work. The key features to Photon are:
-
Kernel tuned for performance.
-
Kernel is hardened according to the Kernel Self-Protection Project (KSPP).
-
All installed packages are built with hardened security flags.
-
Operating system boots with validated trust.
-
Photon management daemon manages firewall, network, packages, and users on remote Photon OS machines.
-
Support for persistent volumes.
-
Project Lightwave integration.
-
Timely security patches and updates.
Photon can be used via ISO, OVA, Amazon Machine Image, Google Compute Engine image, and Azure VHD. I’ll show you how to install Photon on VirtualBox, using an ISO image. The installation takes about five minutes and, in the end, you’ll have a virtual machine, ready to deploy containers.
Creating the virtual machine
Before you deploy that first container, you have to create the virtual machine and install Photon. To do this, open up VirtualBox and click the New button. Walk through the Create Virtual Machine wizard (giving Photon the necessary resources, based on the usage you predict the container server will need). Once you’ve created the virtual machine, you need to first make a change to the settings. Select the newly created virtual machine (in the left pane of the VirtualBox main window) and then click Settings. In the resulting window, click on Network (from the left navigation).
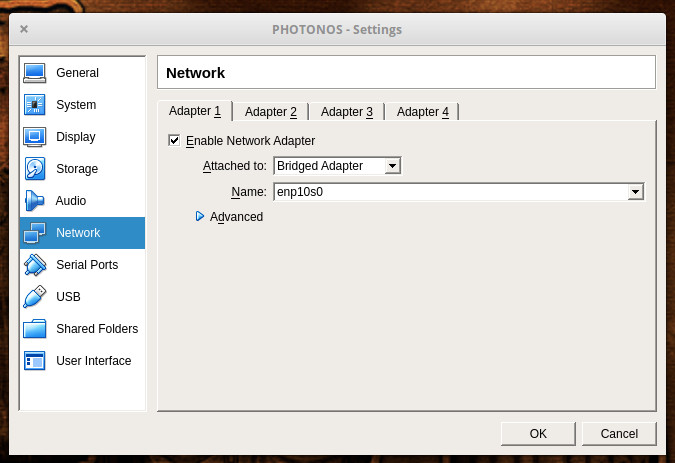
In the Networking window (Figure 1), you need to change the Attached to drop-down to Bridged Adapter. This will ensure your Photon server is reachable from your network. Once you’ve made that change, click OK.
Select your Photon virtual machine from the left navigation and then click Start. You will be prompted to locate and attach the IOS image. Once you’ve done that, Photon will boot up and prompt you to hit Enter to begin the installation. The installation is ncurses based (there is no GUI), but it’s incredibly simple.
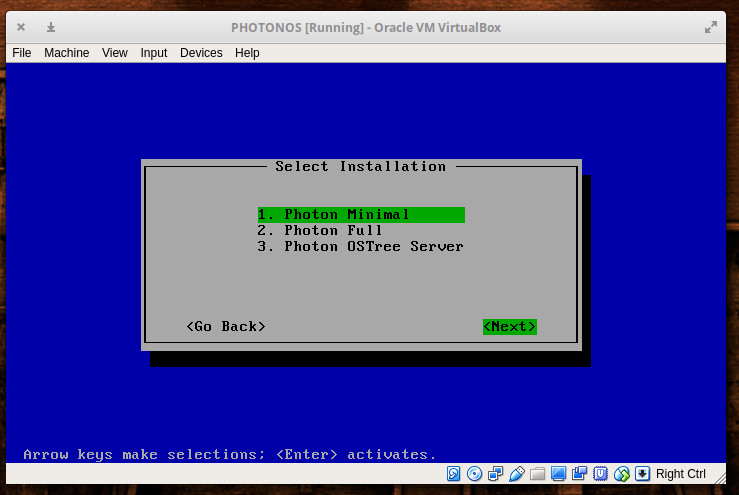
In the next screen (Figure 2), you will be asked if you want to do a Minimal, Full, or OSTree Server. I opted to go the Full route. Select whichever option you require and hit enter.
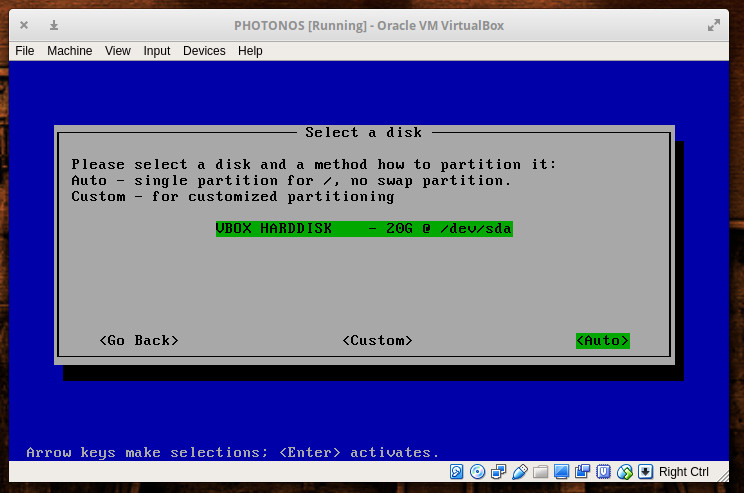
In the next window, select the disk that will house Photon. Since we’re installing this as a virtual machine, there will be only one disk listed (Figure 3). Tab down to Auto and hit Enter on your keyboard. The installation will then require you to type (and verify) an administrator password. Once you’ve done that, the installation will begin and finish in less than five minutes.
Once the installation completes, reboot the virtual machine and log in with the username root and the password you created during installation. You are ready to start working.
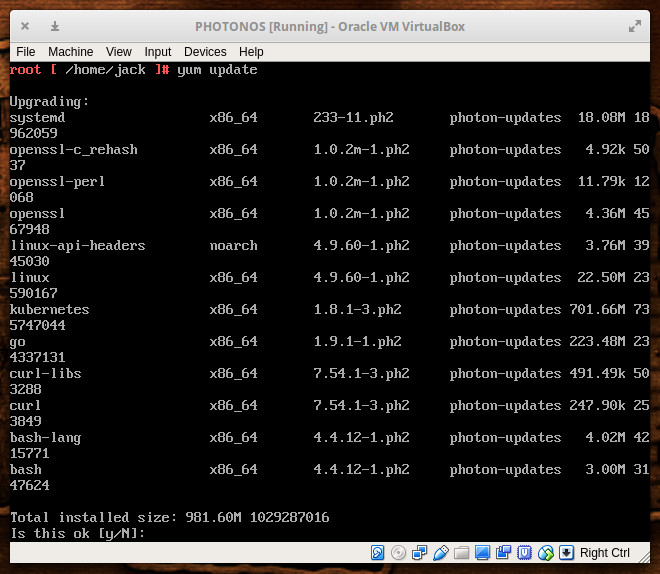
Before you begin using Docker on Photon, you’ll want to upgrade the platform. Photon uses the yum package manager, so login as root and issue the command yum update. If there are any updates available, you’ll be asked to okay the process (Figure 4).
Usage
As I mentioned, Photon comes with everything you need to deploy containers or even create a Kubernetes cluster. However, out of the box, there are a few things you’ll need to do. The first thing is to enable the Docker daemon to run at start. To do this, issue the commands:
systemctl start docker

systemctl enable docker
Now we need to create a standard user, so we’re not running the docker command as root. To do this, issue the following commands:
useradd -m USERNAME

passwd USERNAME
Where USERNAME is the name of the user to add.
Next we need to add the new user to the docker group with the command:
usermod -a -G docker USERNAME
Where USERNAME is the name of the user just created.
Log out as the root user and log back in as the newly created user. You can now work with the docker command without having to make use of sudo or switching to the root user. Pull down an image from Docker Hub and start deploying containers.
An outstanding container platform
Photon is, without a doubt, an outstanding platform, geared specifically for containers. Do note that Photon is an open source project, so there is no paid support to be had. If you find yourself having trouble with Photon, hop on over to the Issues tab in the Photon Project’s Github page, where you can read and post about issues. And if you’re interested in forking Photon, you’ll find the source code on the project’s official Github page.
Give Photon a try and see if it doesn’t make deploying Docker containers and/or Kubernetes clusters significantly easier.
Learn more about Linux through the free “Introduction to Linux” course from The Linux Foundation and edX.


