
It’s no secret that Linux dominates the cloud, whether it’s a private cloud running on OpenStack or if it’s AWS or Microsoft Azure cloud. Microsoft itself admits that one out of three machines run Linux in Azure cloud. However, as more customers were running Linux, they needed the ability to manage their Linux systems, and Windows 10 lacked Linux tools and utilities.
Microsoft tried to add UNIX capabilities to its own PowerShell, but it didn’t work out as expected. Then, they worked with Canonical to create a Windows Subsystem for Linux. This allowed users to install Linux inside Windows 10, offering native integration, which meant users would be literally running Ubuntu command-line tools in Windows.
However, not everyone uses Ubuntu. In the Linux world, different distributions use different tools, utilities and commands to perform the same task. Officially, Microsoft is sticking to Ubuntu, as it’s the dominant cloud OS. But that doesn’t mean you can’t run your choice of distro. There is an open source project on GitHub that allows users to not only install a few supported distros on Windows, but also easily switch between them.
To start, we need to install Windows Subsystem for Linux on Windows.
Install Linux Bash for Windows
First, you need to join the Insider Build program to gain access to pre-release features such as WSL. Open Update Settings and then go to ‘Advanced Windows Update option’. Follow the instructions and join the Insider Build program. It requires you to log into your Microsoft account. Once done, it will ask you to restart the system.
Once you’ve rebooted, go to Advanced Windows Update option page and choose the pre-release update and select the Fast option.

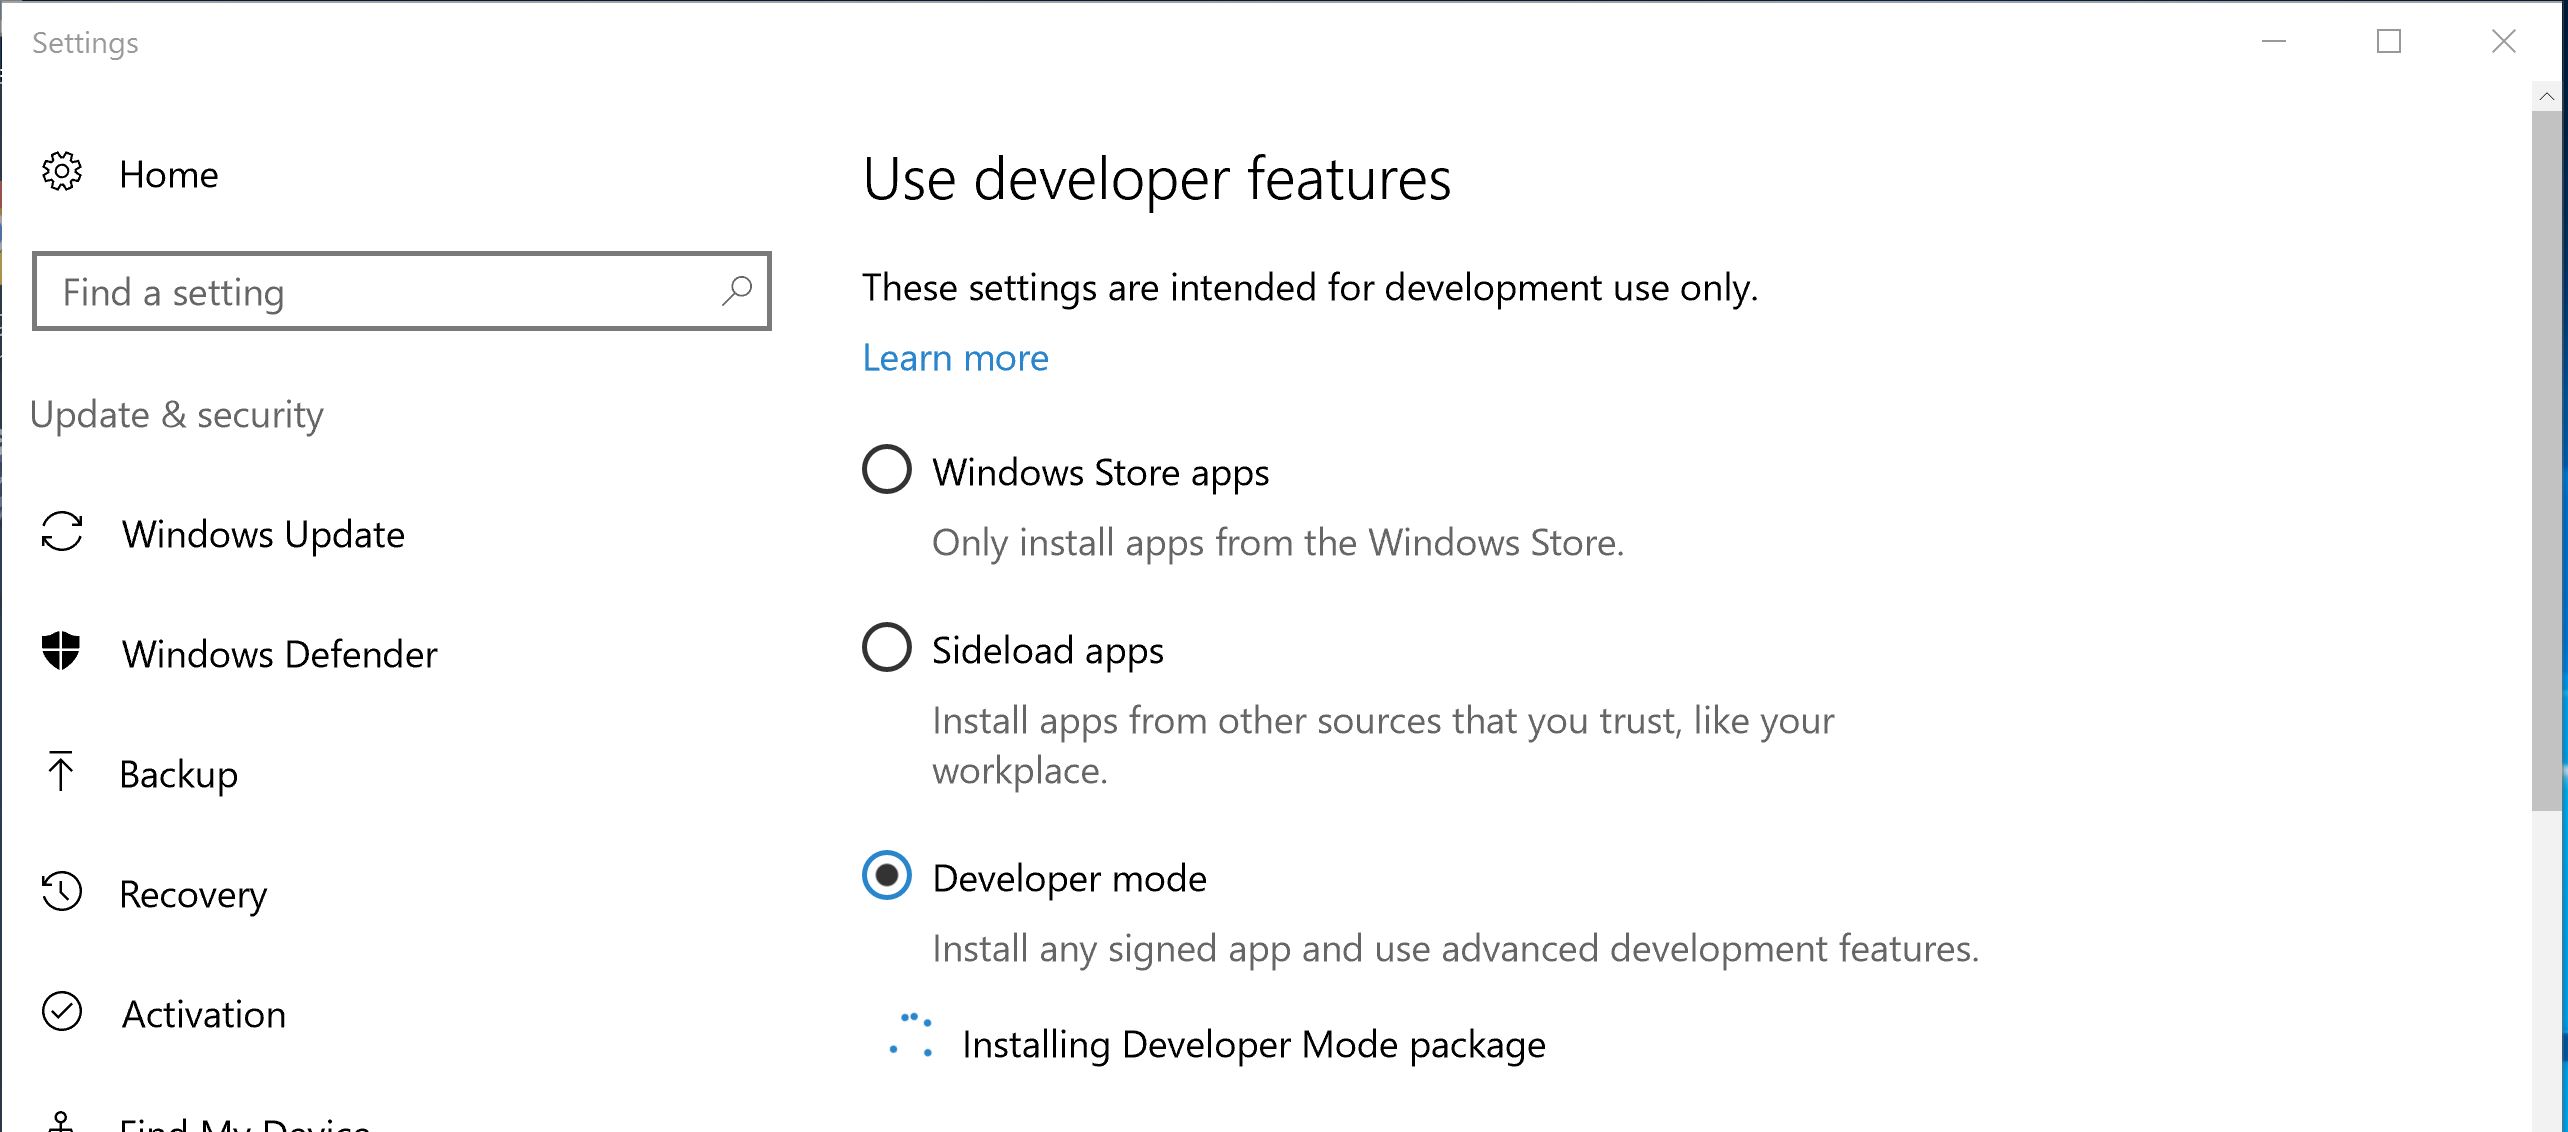
Then, go to Developer Settings and choose Developer mode.
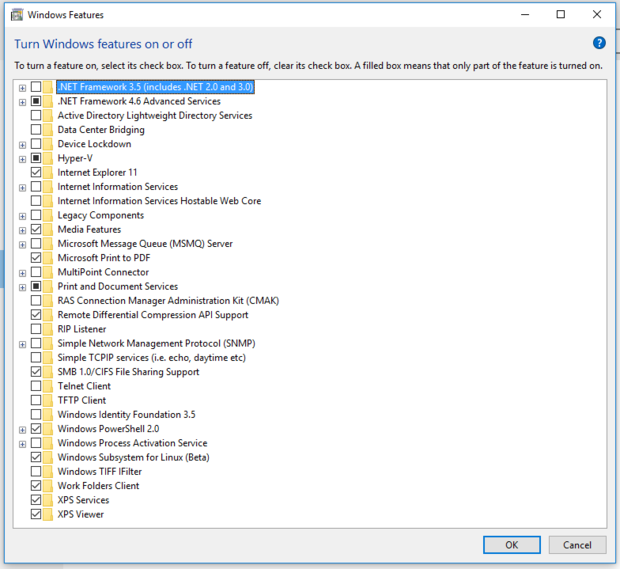
Once done, open ‘turn windows features on and off’ and select Window Subsystem for Linux beta.
You may have to reboot the system. Once rebooted, type ‘bash’ in the Windows 10 search bar, and it will open the command prompt where you will install bash — just follow the on-screen instructions. It will also ask you to create a username and password for the account. Once done, you will have Ubuntu running on the system.
Now every time you open ‘bash’ from the Start Menu of Windows 10, it will open bash running on Ubuntu.
The switcher we are about to install basically extracts the tarball of your chosen Linux distribution into the home directory of WSL and then switches the current rootfs with the chosen one. You can download all desired, and supported, distributions and then easily switch between them. Once you switch the distro and open ‘bash’ from the start menu, instead of Ubuntu, you will be running that distro.
Let’s get started.
Install Windows Subsystem for Linux Distribution Switcher
It’s time to install a switcher that will help us in switching between distributions. First, we need to install the latest version of Python 3 in Windows. Then, download the switcher folder from GitHub. It’s a zip file, so extract the file in the Downloads folder. Now open PowerShell and change the directory to the WSL folder:
cd .DownloadsWSL-Distribution-Switcher-master
Run ‘ls’ command to see all the scripts available. You should see this list:
Directory: C:UsersarnieDownloadsWSL-Distribution-Switcher-master

Mode                LastWriteTime         Length Name
----                -------------         ------ ----
d-----         2/4/2017   3:18 PM                ntfsea
d-----         2/4/2017  10:00 PM                __pycache__
-a----        11/2/2016   2:54 PM           3005 get-prebuilt.py
-a----        11/2/2016   2:54 PM           5018 get-source.py
-a----        11/2/2016   2:54 PM           9907 hook_postinstall_all.sample.sh
-a----        11/2/2016   2:54 PM          16237 install.py
-a----        11/2/2016   2:54 PM           1098 LICENSE.md
-a----        11/2/2016   2:54 PM           7442 ntfsea.py
-a----        11/2/2016   2:54 PM          13824 ntfsea_x64.dll
-a----        11/2/2016   2:54 PM          11264 ntfsea_x86.dll
-a----        11/2/2016   2:54 PM           1161 pyinstaller.spec
-a----        11/2/2016   2:54 PM          17547 README.md
-a----         2/5/2017   1:56 PM        1898755 rootfs_alpine_latest.tar.gz
-a----         2/5/2017   1:40 PM       42632248 rootfs_centos_latest.tar.xz
-a----         2/4/2017   9:59 PM       51361242 rootfs_debian_latest.tar.gz
-a----         2/4/2017   9:56 PM       26488540 rootfs_debian_sid.tar.xz
-a----         2/4/2017  10:00 PM       67973225 rootfs_fedora_latest.tar.gz
-a----         2/4/2017   9:58 PM       38760836 rootfs_fedora_latest.tar.xz
-a----         2/5/2017   1:08 PM       28933468 rootfs_opensuse_latest.tar.xz
-a----         2/4/2017  10:00 PM       50310388 rootfs_ubuntu_latest.tar.gz
-a----        11/2/2016   2:54 PM           4568 switch.py
-a----        11/2/2016   2:54 PM          14962 utils.py
Now we need to download the desired distribution. Let’s try Debian:
py.exe .get-source.py debian
Then, install it:
py.exe .install.py debian
Now, open bash from Start Menu. Then, you can check whether it’s still Ubuntu or it has switched to Debian. Run the following command:
cat /etc/os-release
You should see this output:
PRETTY_NAME="Debian GNU/Linux 8 (jessie)"
NAME="Debian GNU/Linux"
VERSION_ID="8"
VERSION="8 (jessie)"
ID=debian
HOME_URL="http://www.debian.org/"
SUPPORT_URL="http://www.debian.org/support"
BUG_REPORT_URL="https://bugs.debian.org/"
Debian 8 is now installed. Now, let’s start using Debian. If you want to use Fedora, first quit the Debian bash session, by typing exit.
Now go back to PowerShell and enter the WSL directory as explained above:
cd .DownloadsWSL-Distribution-Switcher-master
Let’s download Fedora:
py.exe .get-source.py fedora
And then install it:
py.exe .install.py fedora
When you install a distribution, the ‘bash’ automatically switches to that distribution, so if you open ‘bash’ from Start Menu, you will be logged into Fedora. Try it!
cat /etc/os-release
NAME=Fedora
VERSION="25 (Twenty Five)"
ID=fedora
VERSION_ID=25
PRETTY_NAME="Fedora 25 (Twenty Five)"
ANSI_COLOR="0;34"
CPE_NAME="cpe:/o:fedoraproject:fedora:25"
HOME_URL="https://fedoraproject.org/"
BUG_REPORT_URL="https://bugzilla.redhat.com/"
REDHAT_BUGZILLA_PRODUCT="Fedora"
REDHAT_BUGZILLA_PRODUCT_VERSION=25
REDHAT_SUPPORT_PRODUCT="Fedora"
REDHAT_SUPPORT_PRODUCT_VERSION=25
PRIVACY_POLICY_URL=https://fedoraproject.org/wiki/Legal:PrivacyPolicy
Ok! Now how do we switch between installed distributions? First, you need to quit the existing ‘bash’ and go back to PowerShell, cd to the WSL Switcher directory, and then use ‘switcher’ script to switch to the desired distribution.
py.exe .switch.py NAME_OF_INSTALLED_DISTRO
So, let’s say we want to switch to Debian
py.exe .switch.py debian
Open ‘bash’ from Start and you will be running Debian. Now you can easily switch between any of these distributions. Just bear in mind that WSL itself is a beta software; it’s not ready for production so you will come across problems. On top of that, WSL Distribution Switcher is also an “under development” software so don’t expect everything to work flawlessly.
The basic idea behind this tutorial is to get you started with it. If you have questions, head over to the GitHub page and do as we do in the Linux world: ask, suggest, and contribute.
Learn more about Linux through the free “Introduction to Linux” course from The Linux Foundation and edX.


