
Learn how to get network information using the ss command in this tutorial from the archives.
Linux includes a fairly massive array of tools available to meet almost every need. From development to security to productivity to administration…if you have to get it done, Linux is there to serve. One of the many tools that admins frequently turned to was netstat. However, the netstat command has been deprecated in favor of the faster, more human-readable ss command.
The ss command is a tool used to dump socket statistics and displays information in similar fashion (although simpler and faster) to netstat. The ss command can also display even more TCP and state information than most other tools. Because ss is the new netstat, we’re going to take a look at how to make use of this tool so that you can more easily gain information about your Linux machine and what’s going on with network connections.
The ss command-line utility can display stats for the likes of PACKET, TCP, UDP, DCCP, RAW, and Unix domain sockets. The replacement for netstat is easier to use (compare the man pages to get an immediate idea of how much easier ss is). With ss, you get very detailed information about how your Linux machine is communicating with other machines, networks, and services; details about network connections, networking protocol statistics, and Linux socket connections. With this information in hand, you can much more easily troubleshoot various networking issues.
Let’s get up to speed with ss, so you can consider it a new tool in your administrator kit.
Basic usage
The ss command works like any command on the Linux platform: Issue the command executable and follow it with any combination of the available options. If you glance at the ss man page (issue the command man ss), you will notice there aren’t nearly the options found for the netstat command; however, that doesn’t equate to a lack of functionality. In fact, ss is quite powerful.
If you issue the ss command without any arguments or options, it will return a complete list of TCP sockets with established connections (Figure 1).
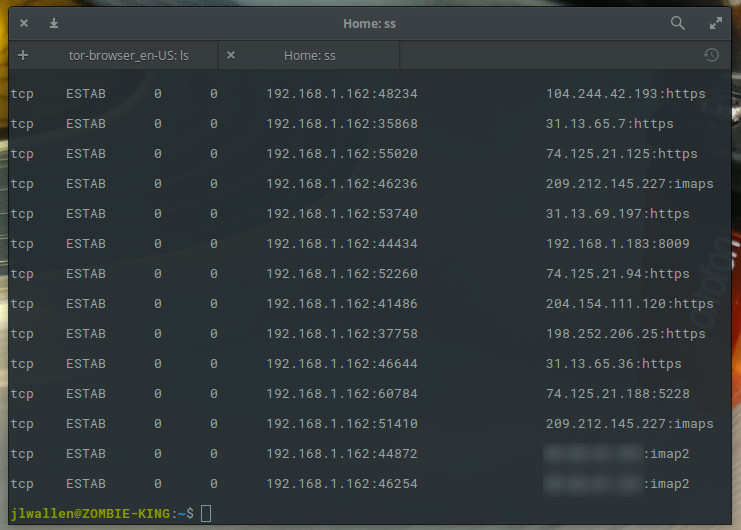
Because the ss command (without options) will display a significant amount of information (all tcp, udp, and unix socket connection details), you could also send that command output to a file for later viewing like so:
ss > ss_output
Of course, a very basic command isn’t all that useful for every situation. What if we only want to view current listening sockets? Simple, tack on the -l option like so:
ss -l
The above command will only output a list of current listening sockets.
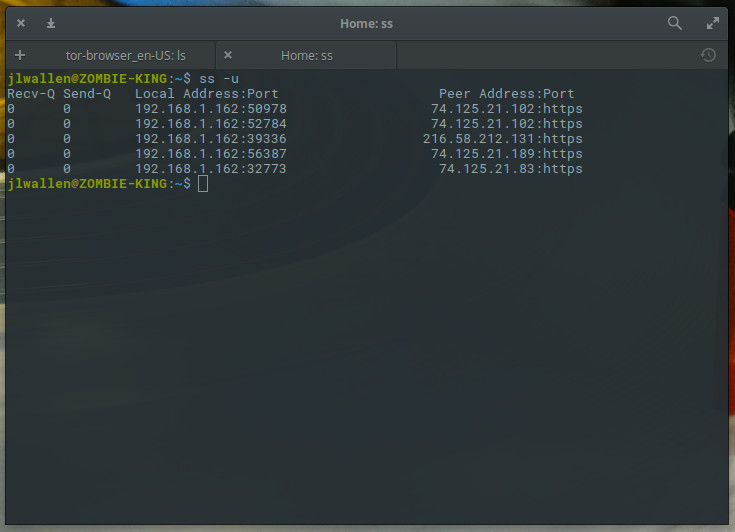
To make it a bit more specific, think of it this way: ss can be used to view TCP connections by using the -t option, UDP connections by using the -u option, or UNIX connections by using the -x option; so ss -t, ss -u, or ss -x. Running any of those commands will list out plenty of information for you to comb through (Figure 2).
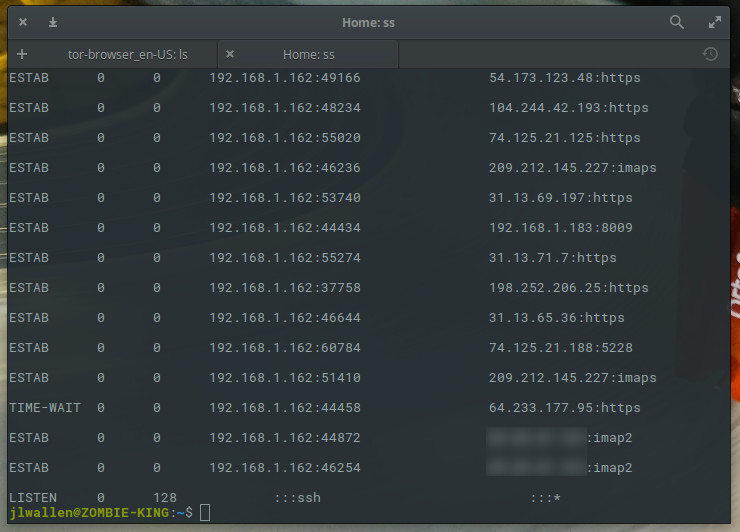
By default, using either the -t, the -u, or the -x options alone will only list out those connections that are established (or connected). If we want to pick up connections that are listening, we have to add the -a option like:
ss -t -a
The output of the above command will include all TCP sockets (Figure 3).
In the above example, you can see that UDP connections (in varying states) are being made from the IP address of my machine, from various ports, to various IP addresses, through various ports. Unlike the netstat version of this command, ss doesn’t display PID and command name responsible for these connections. Even so, you still have plenty of information to begin troubleshooting. Should any of those ports or URLs be suspect, you now know what IP address/Port is making the connection. With this, you now have the information that can help you in the early stages of troubleshooting an issue.
Filtering ss with TCP States
One very handy option available to the ss command is the ability to filter using TCP states (the the “life stages” of a connection). With states, you can more easily filter your ss command results. The ss tool can be used in conjunction with all standard TCP states:
-
established
-
syn-sent
-
syn-recv
-
fin-wait-1
-
fin-wait-2
-
time-wait
-
closed
-
close-wait
-
last-ack
-
listening
-
closing
Other available state identifiers ss recognizes are:
-
all (all of the above states)
-
connected (all the states with the exception of listen and closed)
-
synchronized (all of the connected states with the exception of syn-sent)
-
bucket (states which are maintained as minisockets, for example time-wait and
-
syn-recv)
-
big (Opposite to bucket state)
The syntax for working with states is simple.
For tcp ipv4:
ss -4 state FILTER
For tcp ipv6:

ss -6 state FILTER
Where FILTER is the name of the state you want to use.
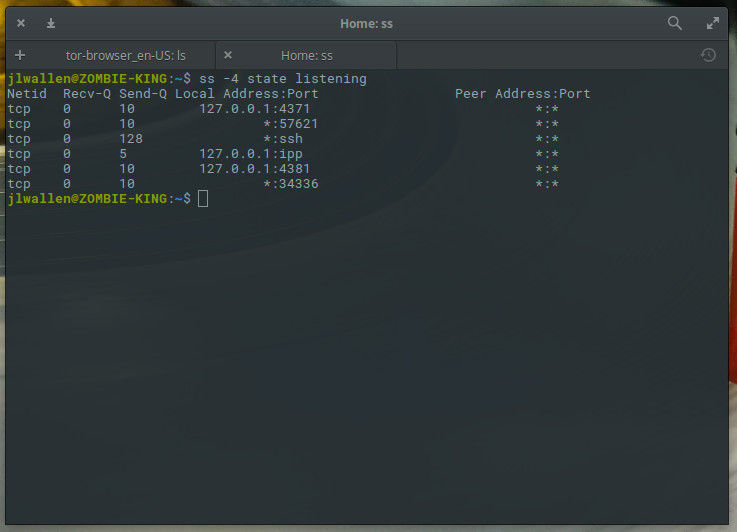
Say you want to view all listening IPv4 sockets on your machine. For this, the command would be:
ss -4 state listening
The results of that command would look similar to Figure 4.
Show connected sockets from specific address
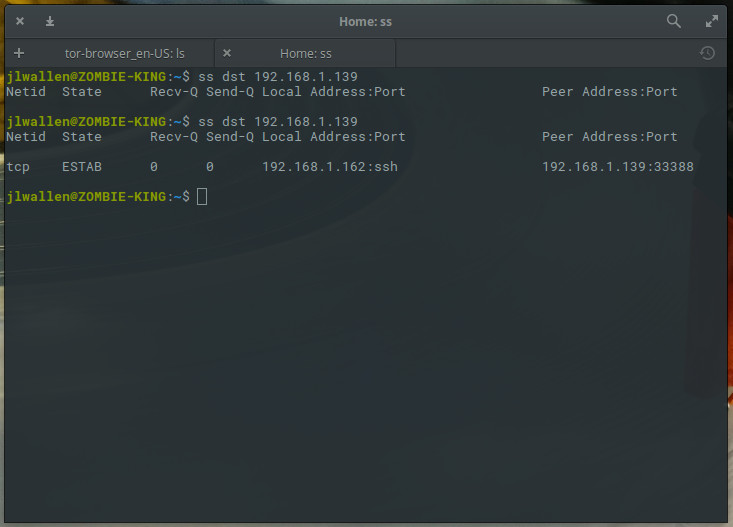
One handy task you can assign to ss is to have it report connections made by another IP address. Say you want to find out if/how a machine at IP address 192.168.1.139 has connected to your server. For this, you could issue the command:
ss dst 192.168.1.139
The resulting information (Figure 5) will inform you the Netid, the state, the local IP:port, and the remote IP:port of the socket.
Make it work for you
The ss command can do quite a bit to help you troubleshoot issues with your Linux server or your network. It would behoove you to take the time to read through the ss man page (issue the command man ss). But, at this point, you should at least have a fundamental understanding of how to make use of this must-know command.
Learn more about Linux through the free “Introduction to Linux” course from The Linux Foundation and edX.


