
Ask a developer to name their most important tools and very often the reply will include Git. There’s a good reason for that: Git is one of the most widely used distributed version control systems. Git can be set up as a local repository, used on a LAN, or used via the official, global service. With Git you can do things like add access control to your code, display the contents of a Git repository (via the web), and manage multiple repositories.
Most users (especially of the Linux variety) work with Git through the command line—with good reason. The Git command-line tools are second nature to Linux users; and considering that most developers working on the Linux platform are already acclimated to the command line, it’s efficient. However, not every user wants to spend all of their Git time working within the terminal. Fortunately, for those users, there are plenty of various GUI tools that can help you get your Git on. Not all of these tools are created equal, so what you use will depend upon your needs.
I want to highlight three such tools—centered on file manager/desktop integration. How you use Git (and how you need it integrated into your desktop) will determine what tool is best for you.
First, we’ll talk about tools that integrate into your file manager. For this, I’m going to focus on the GNOME and KDE desktops (as these two offer the best integration environments). Next, we’ll discuss a very powerful tool that does a great job of integrating into the Linux desktop and connecting with your remote Git account.
With that said, let’s take a look at two very handy tools that integrate into file managers.
RabbitVCS-git
If you use GNOME, chances are you use Nautilus. If you use Nautilus and work with Git, you’re going to want to install one of the best Linux desktop integration tools for Git—RabbitVCS-git. RabbitVCS-git is an SCM client that integrates itself with the Nautilus file manager to manage local Git or SVN repositories.
To install RabbitVCS-git on Ubuntu (or a Ubuntu derivative), issue the following commands from the terminal window:
sudo add-apt-repository ppa:rabbitvcs/ppa
sudo apt-get update
sudo apt-get install rabbitvcs-nautilus
Once installed, logout of GNOME and log back in. Open up Nautilus and navigate to any project folder, and right-click a blank spot to reveal the RabbitVCS-git contextual menu (Figure 1).
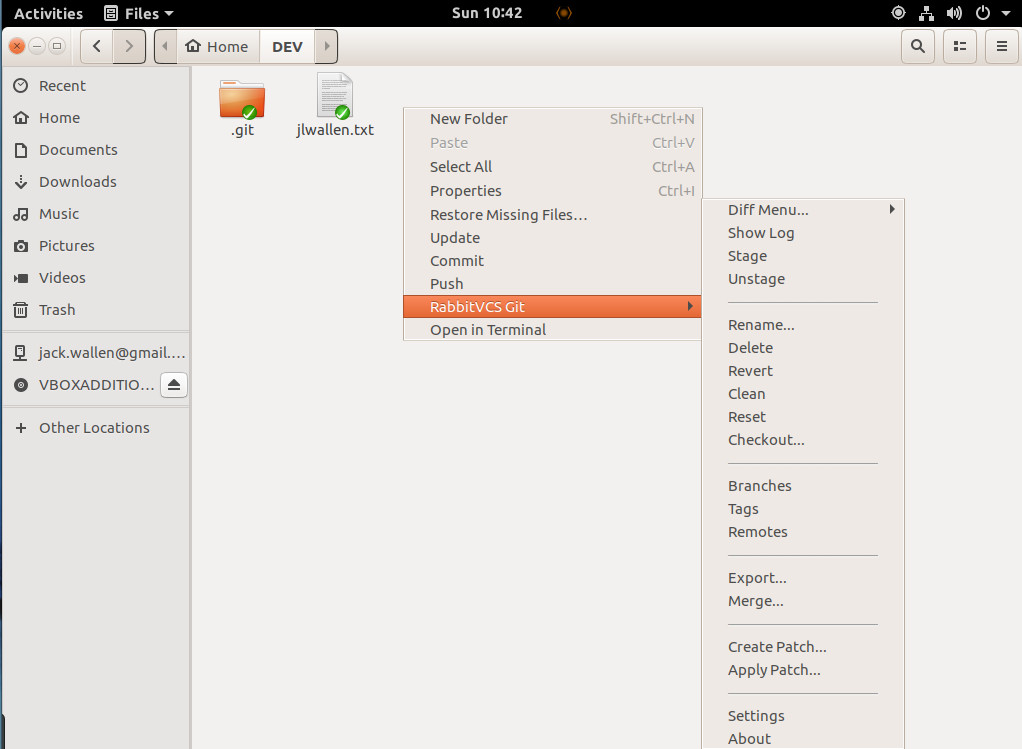
At this point, you can begin to work with a very well done bit of Git integration with Nautilus.
Git in KDE
The KDE file manager, Dolphin, offers Git integration by way of a plugin. Before you attempt to use the plugin, you might have to install it. Open up a terminal window and issue the command:
sudo apt-get install dolphin-plugins
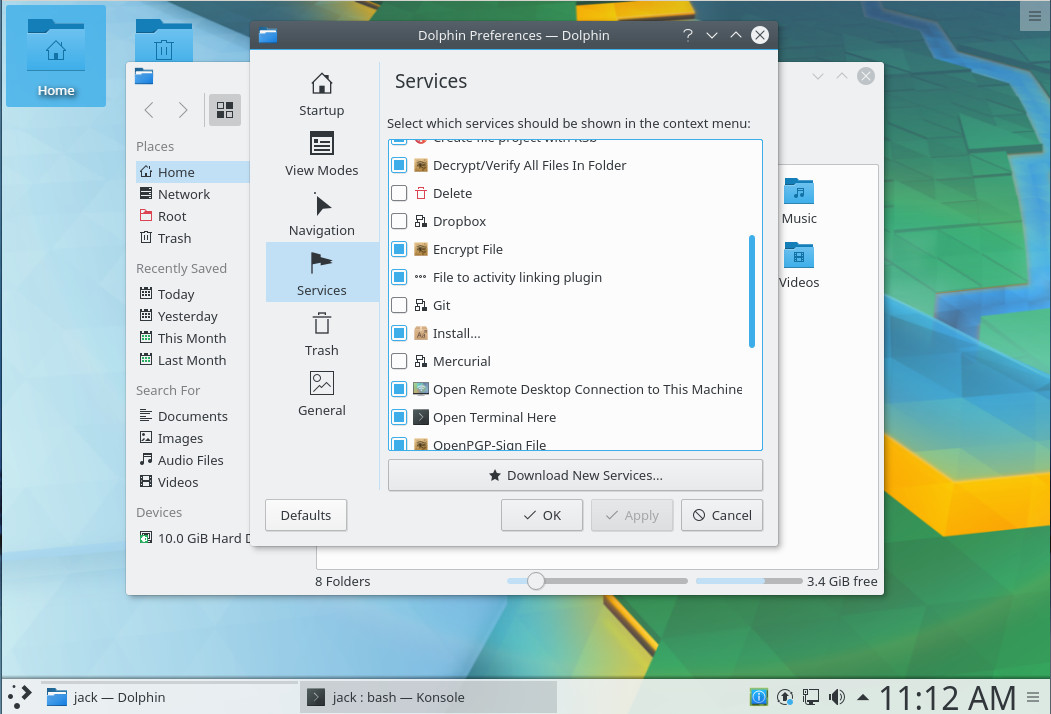
Once that command completes, open up Dolphin and then click the Control button > Configure Dolphin. Click on the Services tab, scroll down until you find Git, and click to enable (Figure 2).
With Git checked, click OK and then, when prompted, click to restart Dolphin. There is one thing to note: Installing the Dolphin plugins package does not install git. If you haven’t installed the git package (which I assume you already have), you’ll need to do so before Dolphin can actually work with Git. You will also have had to create a new repository from the command line and do a first commit. Once you’ve taken care of that, you will see the Git-related right-click context menu entries in Dolphin (Figure 3).
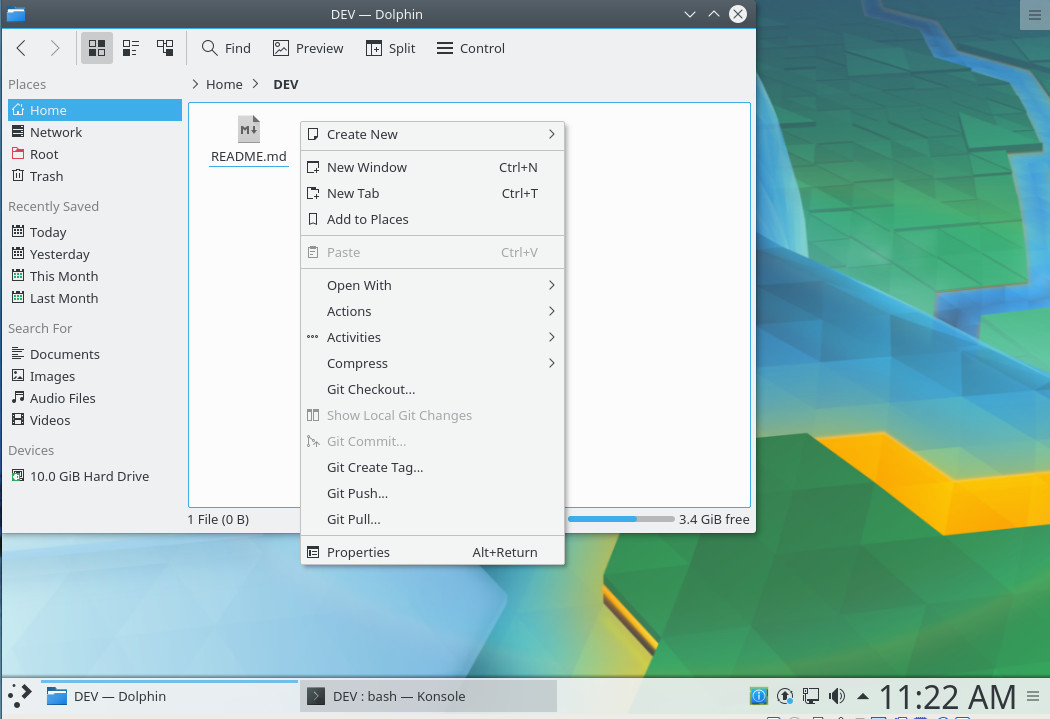
From that context menu, you can checkout, show local changes, commit, create tags, push, and pull.
SparkleShare
Now we’re going to venture into the realm of something a bit more powerful than simple file manager integration. The tool I want to demonstrate is SparkleShare, a unique self-hosted service that allows you to do file syncing/sharing, as well as version control, client-side encryption, and (to the point) connect and sync with your GitHub account.
SparkleShare is available from within the standard repositories, so to install (I’ll be demonstrating this on Linux Mint, using the Cinnamon desktop), the following steps will do the trick:
-
Open a terminal window.
-
Update apt with the command sudo apt-get update.
-
Type your sudo password and hit Enter.
-
Once the update completes, issue the command sudo apt-get install -y sparkleshare.
-
Allow the installation to finish.
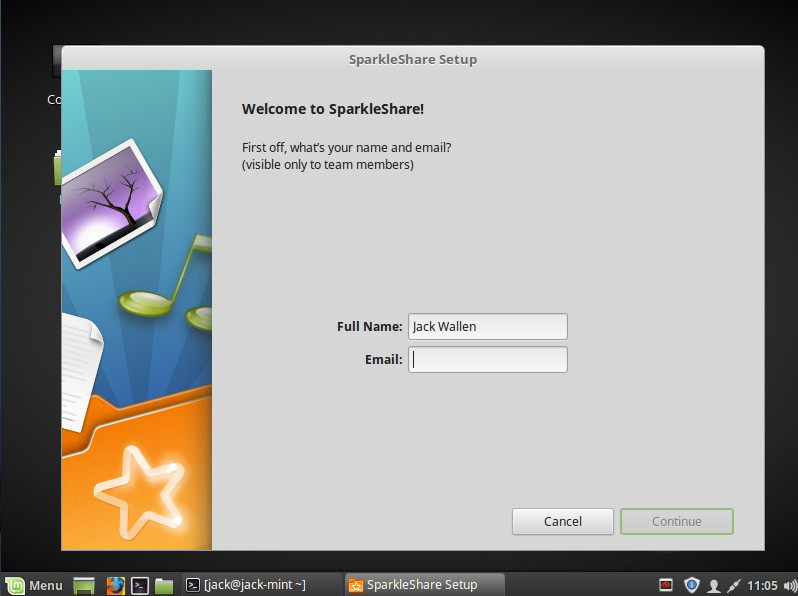
Once the installation is done, go to your desktop menu and search for the SparkleShare entry. Upon first run, you will be prompted for a name and email address (Figure 4).
Click Continue and then either view the tutorial or click to skip. You will be given a unique Client ID (an ssh-rsa key). Copy and save that key. Click the Finish button. Before you continue on with the SparkleShare GUI setup tool, you need to configure your GitHub account with your SparkleShare ssh-rsa pub key. To do this, follow these steps:
-
Open a terminal window.
-
Issue the command cd ~/.config/sparkleshare.
-
Find the name of your .pub key with the command ls (it will end in .pub).
-
Open the pub key with a text editor and copy the contents.
-
Open your GitHub account in your desktop browser.
-
Go to Settings | SSH and GPG keys.
-
Click New SSH Key.
-
Title the key SparkleShare.
-
Copy the contents of your SparkleShare pub key into the Key text area (Figure C).
-
Click Add SSH Key.
With the key in place, you can finish up the SparkleShare GitHub connection. You will see a new icon in your system tray; click that icon and then select SparkleShare > Add Hosted Project. Select GitHub from the list and then fill out the Remote Path section in the form /gitusername/repository (Figure 5).
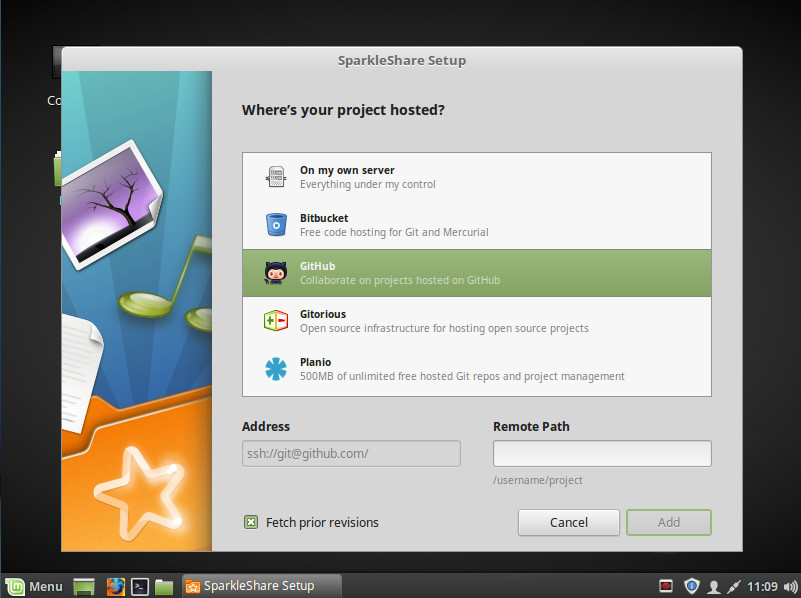
SparkleShare will automatically sync the repository to your desktop, where you can start to work locally on your project, knowing the files will seamlessly sync back to your GitHub account.
Git integration made easy
And there you have it, Git integration into your Linux desktop made easy. If you’re a developer who works on the Linux desktop, and you use Git, you’ll want to try one of these three tools. Yes, there are full-blown Git GUIs for Linux (such as Giggle, Git GUI, Git-Cola, Smart Git, and many more), but if you’re looking for easy file manager or desktop integration, look no further than these options.
Learn more about Linux through the free “Introduction to Linux” course from The Linux Foundation and edX.


