
Most Linux distributions are simply that: A distribution of Linux that offers a variation on an open source theme. You can download any of those distributions, install it, and use it. Simple. There’s very little mystery to using Linux these days, as the desktop is incredibly easy to use and server distributions are required in business.
But not every Linux distribution ends with that idea; some go one step further and create both a distribution and a platform. Such is the case with AryaLinux. What does that mean? Easy. AryaLinux doesn’t only offer an installable, open source operating system, they offer a platform with which users can build a complete GNU/Linux operating system. The provided scripts were created based on the instructions from Linux From Scratch and Beyond Linux From Scratch.
If you’ve ever attempted to build you own Linux distribution, you probably know how challenging it can be. AryaLinux has made that process quite a bit less stressful. In fact, although the build can take quite a lot of time (up to 48 hours), the process of building the AryaLinux platform is quite easy.
But don’t think that’s the only way you can have this distribution. You can download a live version of AryaLinux and install as easily as if you were working with Ubuntu, Linux Mint, or Elementary OS.
Let’s get AryaLinux up and running from the live distribution and then walk through the process of building the platform, using the special builder image.
The Live distribution
From the AryaLinux download page, you can get a version of the operating system that includes either GNOME or Xfce. I chose the GNOME route and found it to be configured to include Dash to dock and Applications menu extensions. Both of these will please most average GNOME users. Once you’ve downloaded the ISO image, burn it to either a DVD/CD or to a USB flash drive and boot up the live instance. Do note, you need to have at least 25GB of space on a drive to install AryaLinux. If you’re planning on testing this out as a virtual machine, create a 30-40 GB virtual drive, otherwise the installer will fail every time.
Once booted, you will be presented with a login screen, with the default user selected. Simply click the user and login (there is no password required).
To locate the installer, click the Applications menu, click Activities Overview, type “installer” and click on the resulting entry. This will launch the AryaLinux installer … one that looks very familiar to many Linux installers (Figure 1).
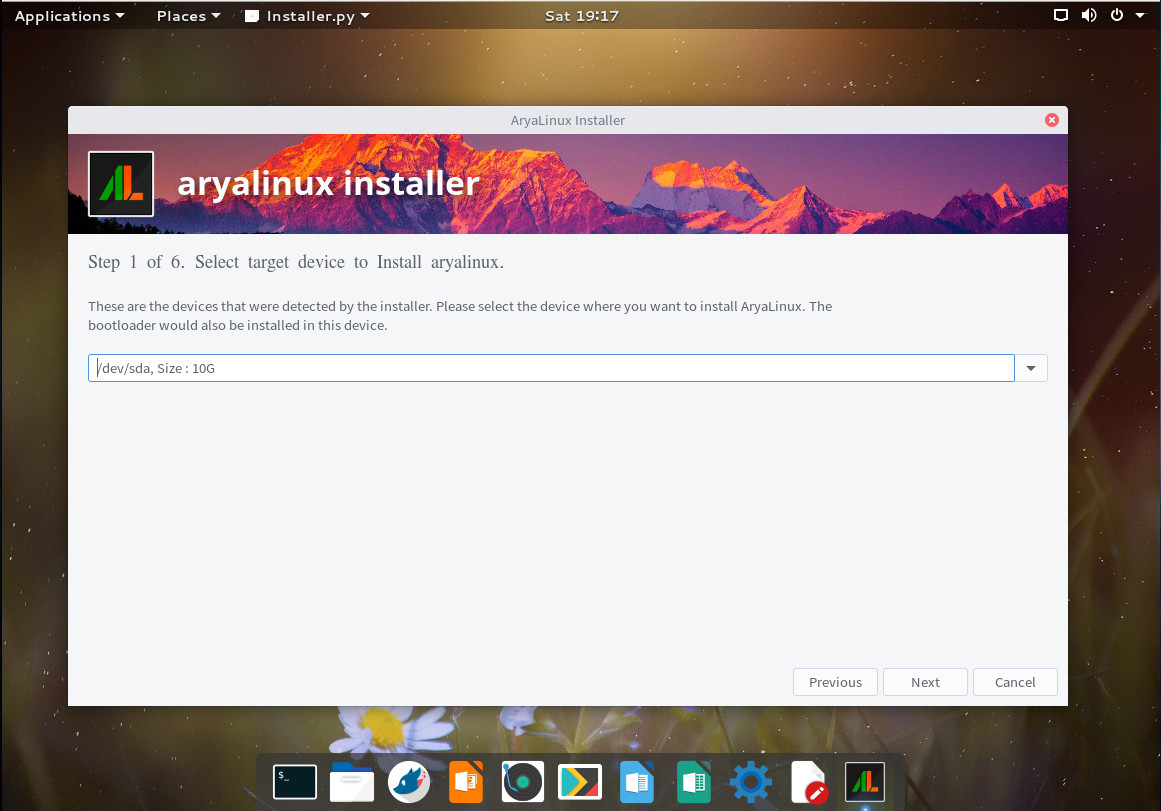
In the next window (Figure 2), you are required to define a root partition. To do this, type “/” (no quotes) in the Choose the root partition section.
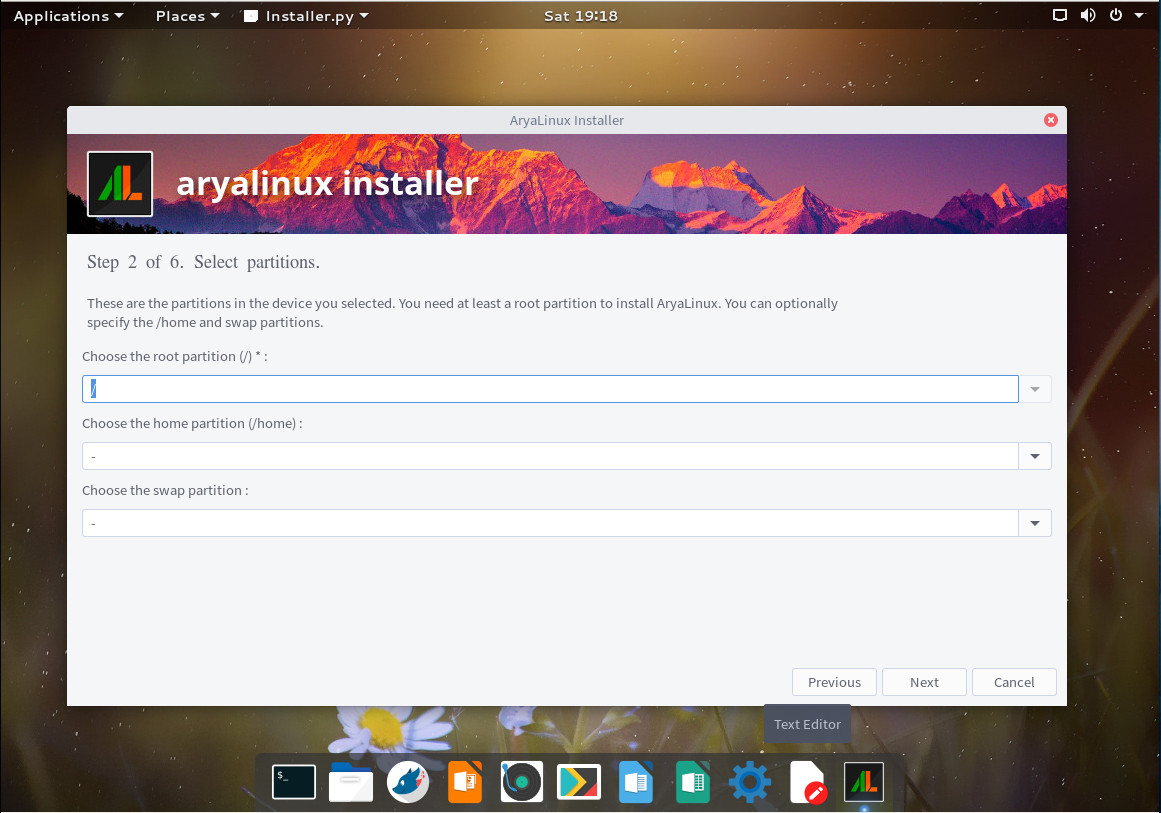
If you don’t define a home partition, it will be created for you. If you don’t define a swap partition, none will be created. If you have a need to create a home partition outside of the standard /home, do it here. The next installation windows have you do the following:
-
Create a standard user.
-
Create an administrative password.
-
Choose locale and keyboard.
-
Choose your timezone.
That’s all there is to the installation. Once it completes, reboot, remove the media (or delete the .iso from your Virtual Machine storage listing), and boot into your newly-installed AryaLinux operating system.
What’s there?
Out of the box, you should find everything necessary to use AryaLinux as a full-functioning desktop distribution. Included is:
-
LibreOffice
-
Rhythmbox
-
Files
-
GNOME Maps
-
GIMP
-
Simple Scan
-
Chromium
-
Transmission
-
Avahi SSH/VNC Server Browser
-
Qt5 Assistant/Designer/Linguist/QDbusViewer
-
Brasero
-
Cheese
-
Echomixer
-
VLC
-
Network Tools
-
GParted
-
dconf Editor
-
Disks
-
Disk Usage Analyzer
-
Document Viewer
-
And more
The caveats
It should be noted that this is the first official release of AryaLinux, so there will be issues. Right off the bat I realized that no matter what I tried, I could not get the terminal to open. Unfortunately, the terminal is a necessary tool for this distribution, as there is no GUI for updating or installing packages. In order to get to a bash prompt, I had to use a virtual screen. That’s when the next caveat came into play. The package manager for AryaLinux is alps, but its primary purpose is working in conjunction with the build scripts to install the platform. Unfortunately there is no included man page for alps on AryaLinux and the documentation is very scarce. Fortunately, the developers did think to roll in Flatpak support, so if you’re a fan of Flatpak, you can install anything you need (so long as it’s available as a flatpak package) using that system.
Building the platform
Let’s talk about building the AryaLinux platform. This isn’t much harder than installing the standard distribution, only it’s done via the command line. Here’s what you do:
-
Download the AryaLinux Builder Disk.
-
Burn the ISO to either DVD/CD or USB flash drive.
-
Boot the live image.
-
Once you reach the desktop, open a terminal window from the menu.
-
Change to the root user with the command sudo su.
-
Change directories with the command cd aryalinux/base-system
-
Run the build script with the command ./build-arya
You will first be asked if you want to start a fresh build or resume a build (Figure 3). Remember, the AryaLinux build takes a LOT of time, so there might be an instance where you’ve started a build and need to resume.
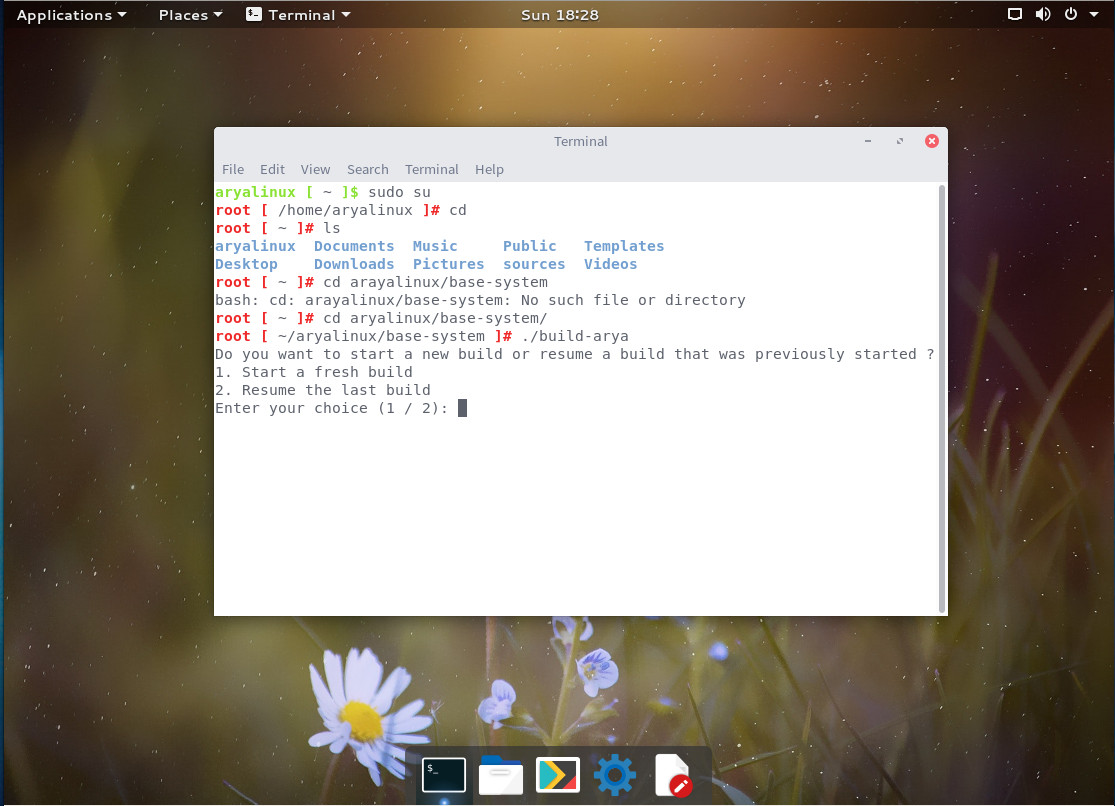
To start a new build, type “1” and then hit Enter on your keyboard. You will now be asked to define a number of options (in order to fulfill the build script requirements). Those options are:
-
Bootloader Device
-
Root Partition
-
Home Partition
-
Locale
-
OS Name
-
OS Version
-
OS Codename
-
Domain Name
-
Keyboard Layout
-
Printer Paper Size
-
Enter Full Name
-
Username
-
Computer Name
-
Use multiple cores for build (y/n)
-
Create backups (y/n)
-
Install X Server (y/n)
-
Install Desktop Environment (y/n)
-
Choose Desktop Environment (XFCE, Mate, KDE, GNOME)
-
Do you want to configure advanced options (y/n)
-
Create admin password
-
Create password for standard user
-
Install bootloader (y/n)
-
Create Live ISO (y/n)
-
Select a timezone
After you’ve completed the above, the build will start. Don’t bother watching it, as it will take a very long time to complete (depending upon your system and network connection). In fact, the build can take anywhere from 8-48 hours. After the build completes, reboot and log into your newly built AryaLinux platform.
Who is AryaLinux for?
I’ll be honest, if you’re just a standard desktop user, AryaLinux is not for you. Although you can certainly get right to work on the desktop, if you need anything outside of the default applications, you might find it a bit too much trouble to bother with. If, on the other hand, you’re a developer, AryaLinux might be a great platform for you. Or, if you just want to see what it’s like to build a Linux distribution from scratch, AryaLinux is a pretty easy route.
Even with its quirks, AryaLinux holds a lot of promise as both a Linux distribution and platform. If the developers can see to it to build a GUI front-end for the alps package manager, AryaLinux could make some serious noise.
Learn more about Linux through the free “Introduction to Linux” course from The Linux Foundation and edX.


