
At some point in your life as a Linux administrator, you’re going to have to work with a database. And because you’re working with the Linux platform, chances are high that database will be MySQL. In some cases, you’ll only need to interact with MySQL long enough to create an empty database to be used for a web-based tool, such as OrangeHRM, WordPress, Drupal, or Nextcloud. You might also be on track to learn the open source database tool, in hopes of someday serving as a database administrator for a company.
Regardless of why, you need to get up to speed with MySQL…and that very well might mean starting from the very beginning. That’s exactly what we’re here for: to install MySQL and learn how to use it, without having to depend upon a GUI tool for all the heavy lifting.
I’ll be demonstrating on a fresh install of Ubuntu 16.10. Let’s kick this off by installing MySQL.
Installation
There are a number of ways to install MySQL. You can install it as a standalone server from the command line, you can install it from the GUI package manager (as in Ubuntu Software), or you can install it alongside a full-blown LAMP (Linux Apache MySQL PHP) server. Because, more often than not, you’ll be using MySQL on a LAMP server, let’s go that route. Why? Because it tends to be the most reliable method of installing MySQL on a Debian-based distribution.
The installation of a LAMP server will differ from distribution to distribution. For Ubuntu, that goal can be achieved with a single command:
sudo apt-get install lamp-server^
The above command will install all the necessary dependencies for your LAMP server. During the installation, you’ll be prompted to enter (and verify) a password for the MySQL “root” user (Figure 1).
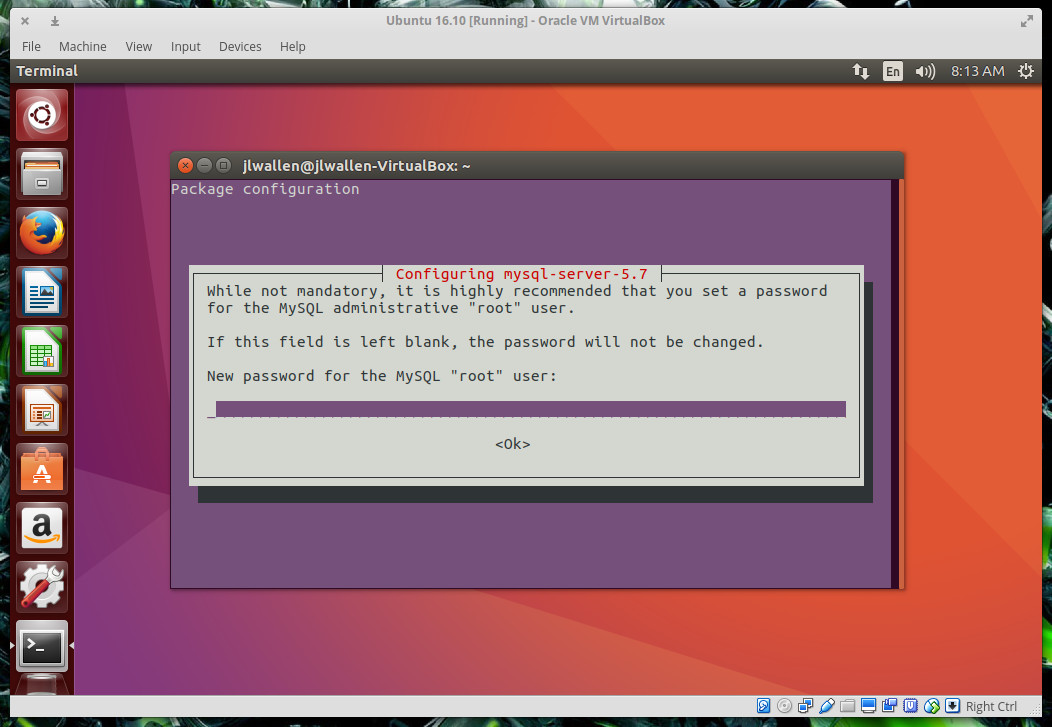
Do not leave this blank. Enter a strong password for the MySQL root user and tab down to OK, hit Enter on your keyboard, and then retype the new password. The installation will continue to completion. You are now ready to begin working with MySQL.
Logging into MySQL
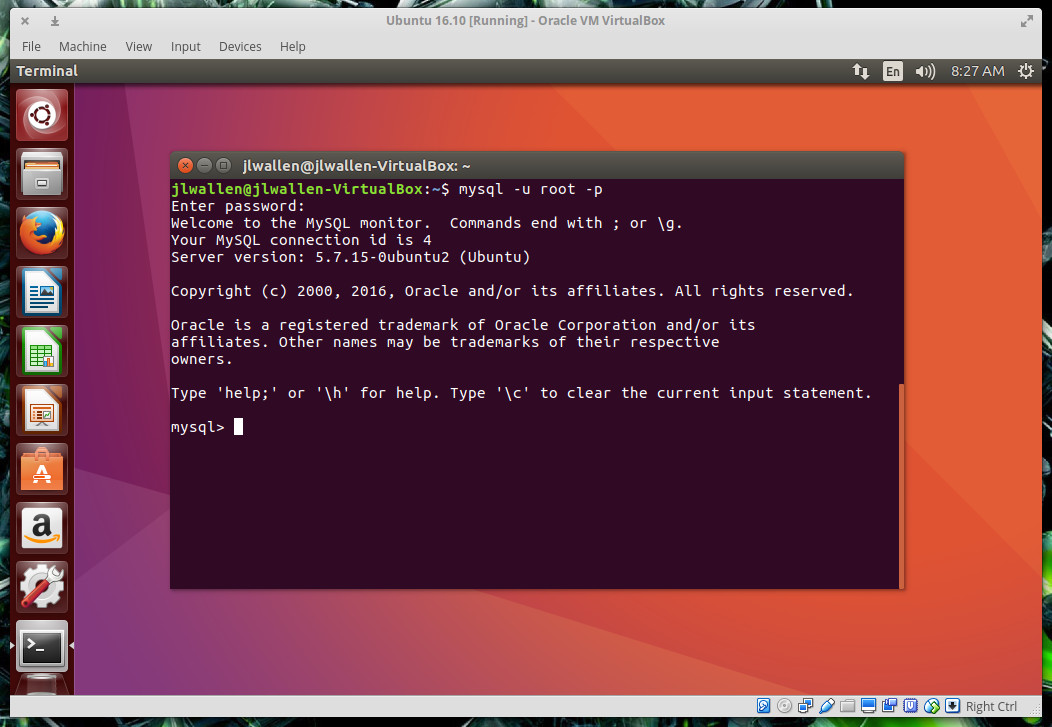
To work with MySQL, you have to log into what is called the MySQL Shell. This is quite different from your normal bash shell, and you are limited to MySQL-only commands. When you log into MySQL use the root user and the password you just created (during installation).
When logging in, you can specify not only which user to work with but also which database to use. We haven’t created a database yet, so we will only be specifying a user. To log in, open up a terminal window, and issue the command:
mysql -u root -p
The -u option indicates what user you will log in with and the -p option tells MySQL to require a password. When prompted, enter the password you created during installation and you will be greeted with the MySQL Shell (Figure 2).
Creating a new database
The first thing to do is create a new database. Let’s say we want to create a new database called clients. To do this, you’d issue the command:
CREATE DATABASE clients;
Notice the ending “;” character. This is important, as it instructs MySQL of the command end. You could issue that command as:
CREATE DATABASE clients
And MySQL would return a > prompt. If there were more to that command, you could enter it there. Once you’d completed the command, type ; and hit the Enter key on your keyboard. I prefer to enter my commands all at once (to avoid confusion).
When you issue the complete command, MySQL will return:
Query OK, 1 row affected (0.00 sec)
Your database has been created. As it stands, you cannot work with that database, because you’re not using it. To use the newly created clients database, you must issue the command:
USE clients;
MySQL will return:
Database changed

mysql>
You can now work with the newly created database.
Creating a table
Unless you are simply creating the database to be used by a third-party application (and the installation of said third-party software will populate the database with the necessary information), your database needs data. For a database, data starts with tables. Let’s say we want to create a table for our new client database that will contain the following information:
-
Name
-
Email
-
Phone
To do this, you first must know what kind of characters will be necessary for each entry. The three basic types available are:
-
CHAR (alphanumeric entry must contain a fixed length)
-
VARCHAR (alphanumeric entry can contain up to the maximum length)
-
INT (numeric entry)
All three points of information for our table (name, email, phone) will be VARCHAR. Why?
-
Not all names and emails will be the same length
-
For clarity, phone numbers are broken into 123-456-7890 and the “-” character is not an integer.
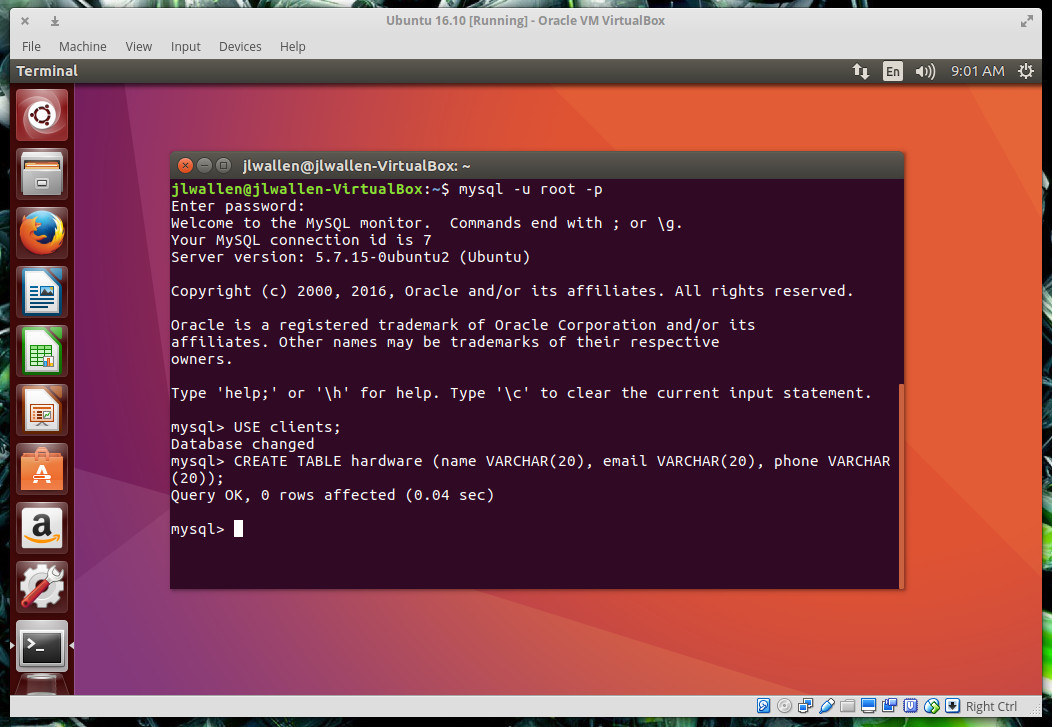
Let’s create a table for the clients database, called hardware. To do so, enter the command (from the MySQL Shell):
CREATE TABLE hardware (name VARCHAR(20), email VARCHAR(20), phone VARCHAR(20));
The table will be created (Figure 3), and you will be returned to the MySQL prompt.
Now that you have a database and a table, all that remains is to add data to the newly created table.
Adding data to tables
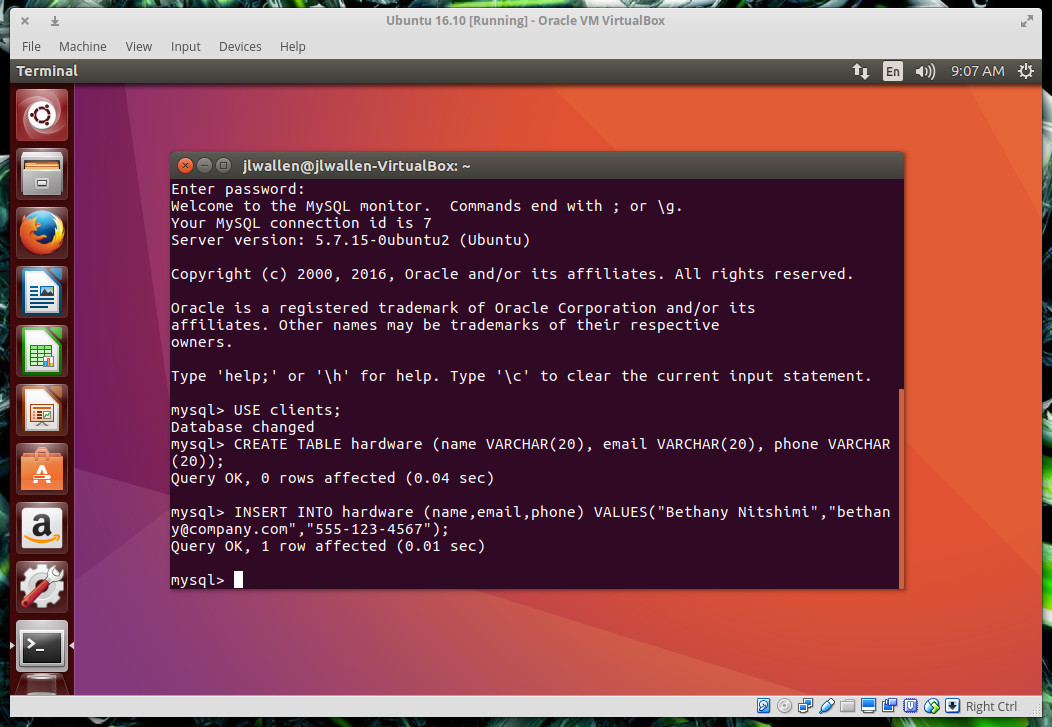
We’re going to add our first entry to the hardware table (which could be a list of clients that sell or buy hardware). The entry will be:
Name: Bethany Nitshimi

Email: bethany@company.com

Phone: 555-123-4567
Here’s what the MySQL command will look like:
INSERT INTO hardware (name,email,phone) VALUES ("Bethany Nitshimi","bethany@company.com",”555-123-4567”);
The data will be added to the table and MySQL will return you back to the prompt (Figure 4).
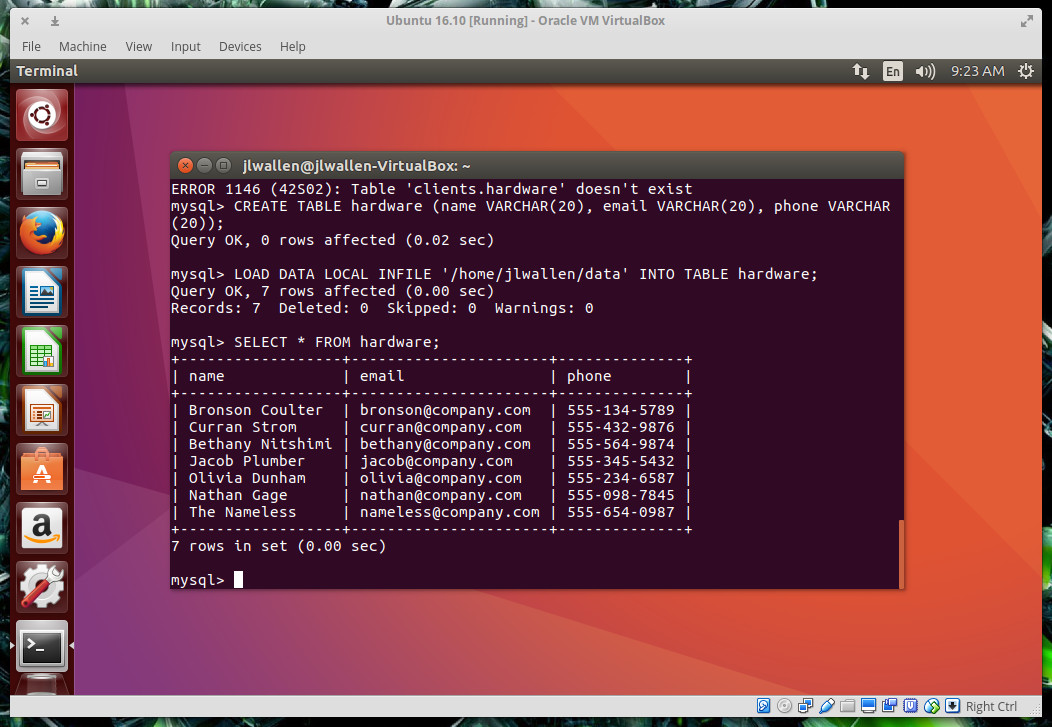
If you don’t want to manually enter the data one row at a time, you can always import it from a text file. The text file in question would have to formatted similarly as was in the above command. So, to import data into the hardware table, each entry of the text file would have to be (one per line):
name email phone
As in:
Bronson Coulter bronson@company.com 555-987-6543
NOTE: The data must be delineated by a tab.
Once you have that file created (we’ll call it data), go back to the MySQL Shell (make sure to use the clients database), and issue the command:
LOAD DATA LOCAL INFILE '/path/data' INTO TABLE hardware;
Where path is the exact path to the data file.
You can view the contents of the hardware table with the command:
SELECT * FROM hardware;
MySQL will issue a report on all the data contained with that table (Figure 5).
Your database is ready
Once you’ve added all the tables and data to your database, you can issue the command exit to leave the MySQL Shell. Your database is ready to be used. Although this will only serve as an introduction to MySQL, you should now have a solid understanding of how to install MySQL, log in, create a database, create a table, and fill the table with data. When you’re ready to move onto more advanced topics, you can always check out the official MySQL documentation.
Want to learn more about database administration? Check out the Essentials of System Administration course from The Linux Foundation.


