
Data loss is one of those things we never want to worry about. To that end we go to great lengths to find new techniques and software packages to ensure those precious bits of data are safely backed up to various local and remote media.
Backups come in many forms, each with their benefits. One such form is deduplication. If you’re unsure what this is, let me explain. Data deduplication is a specialized technique — used for data compression — to eliminate the duplication of data. This technique is used to improve storage utilization and lessen the amount of data transmitted over a network. In a nutshell, deduplication works like this:
-
Data is analyzed
-
During the analysis, byte patterns are identified and stored
-
When a duplicate byte pattern is found, a small reference point is put in place of the redundancy
What this process effectively does is save space. In some instances, where byte patterns can show up frequently, the amount of space a deduplicated backup saves can be considerable.
Naturally, Linux has plenty of backup solutions that will do deduplication. If you’re looking for one of the easiest, look no further than Attic. Attic is open source, written in Python, and can even encrypt your deduplicated backup for security. Attic is also a command-line only backup solution. Fear not, however…it’s incredibly easy to use.
I will walk you through the process of using Attic. Once you have a handle on the basics, you can take this solution and, with a bit of creativity, make it do exactly what you want.
Installation
I’ll be demonstrating the use of Attic on Ubuntu GNOME 16.04. Attic can be found in the standard repositories, so installation can be taken care of with a single command:
sudo apt-get install attic
That’s it. Once Attic is installed, you have only a couple of tasks to take care of before kicking off your first backup.
Initializing a repository
Before you can fire off a backup, you must first have a location to store a repository, and then you must create a repository. That repository will serve as a filesystem directory to house the deduplicated data from the archives. To initialize a repository, you will use the attic command with the init argument, like so:
attic init /PATH/my-repository.attic
where /PATH is the complete path to where the repository will be housed. You can also create a repository on a remote location by using the attic command:
attic init user@host:my-repository.attic
where user@host is your username and the host where the repository will be housed. For example, I have a Linux box set up at IP address 192.168.1.55 with a user jack. For that, the command would look like:
attic init jack@192.168.1.55:my-repository.attic
Attic also allows you to encrypt your repositories at initialization. For this, you use the command:
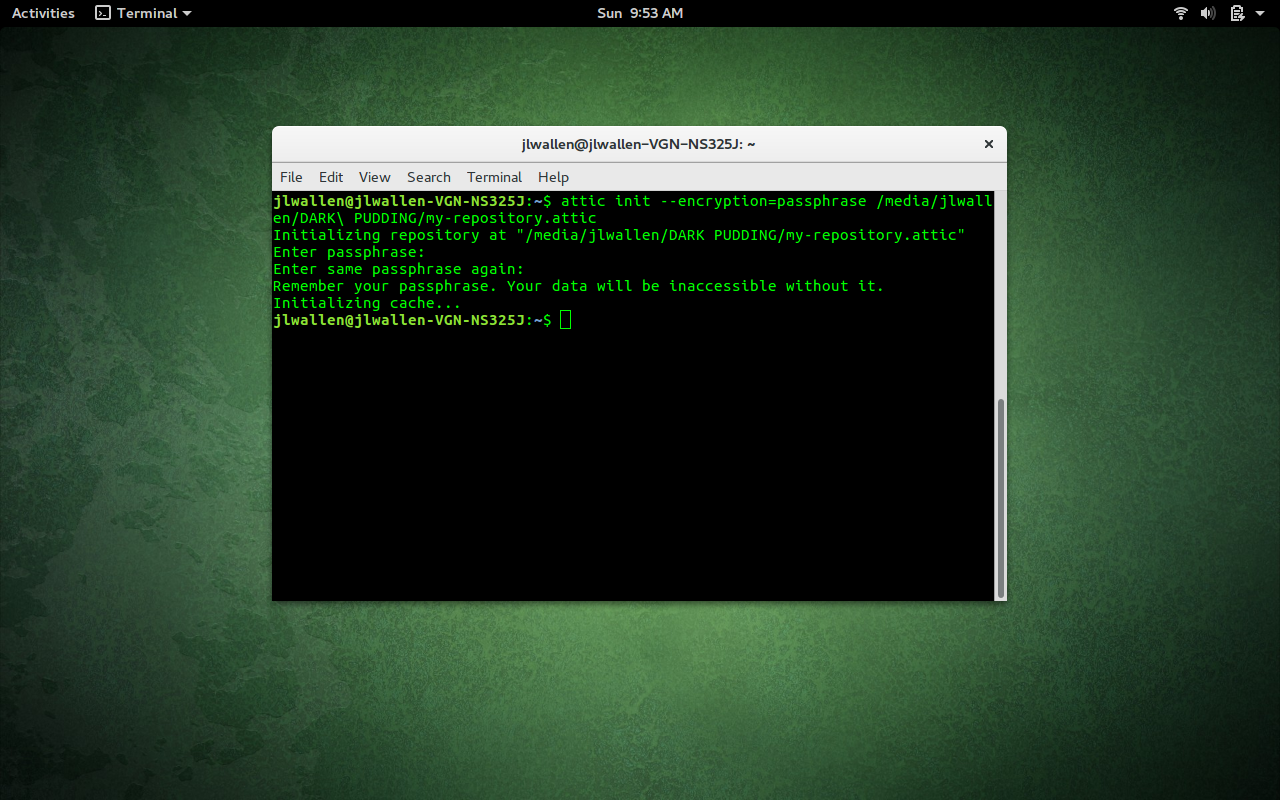
attic init --encryption=passphrase /PATH/my-repository.attic
For the encryption, you can use none, passphrase, or keyfile. Attic will, by default, go with none. When you use the passphrase option, you will be prompted to enter the passphrase to be used for encryption (Figure 1).
You can also use encryption when initializing a remote repository, like so:
attic init --encryption=passphrase jack@192.168.1.55:my-repository.attic
That’s the gist of creating a repository for housing your deduplicated backup.
Creating a backup
Let’s create a simple backup of the ~/Documents directory. This will use the my-repository.attic repository we just created. The command to create this backup is simple:
attic create /PATH/my-repository.attic::my-documents ~/Documents
where PATH is the direct path to the my-repository.attic repository.
If you’ve encrypted the repository, you will be prompted for the encryption passphrase before the backup will run. That’s pretty nondescript. What if you plan on using Attic to create daily backups of the ~/Documents folder? Easy:
attic create /PATH/my-repository.attic::MONDAY-my-documents ~/Documents
You can then run that same command, daily, replacing MONDAY with TUESDAY, WEDNESDAY, THURSDAY, etc. You could also use a variable to create a specific date and time like so:
attic create /PATCH/my-repository.attic::$(date +%Y-%m-%d-%H:%M:%S) ~/Documents
The above command would use the current date and time as the archive name.
Each attic command will always traverse the folder directory and backup any child directories within.
Attic also isn’t limited to backing up only one directory, however. Say, for instance, you want to backup both ~/Documents and ~/Pictures. That command would look like:
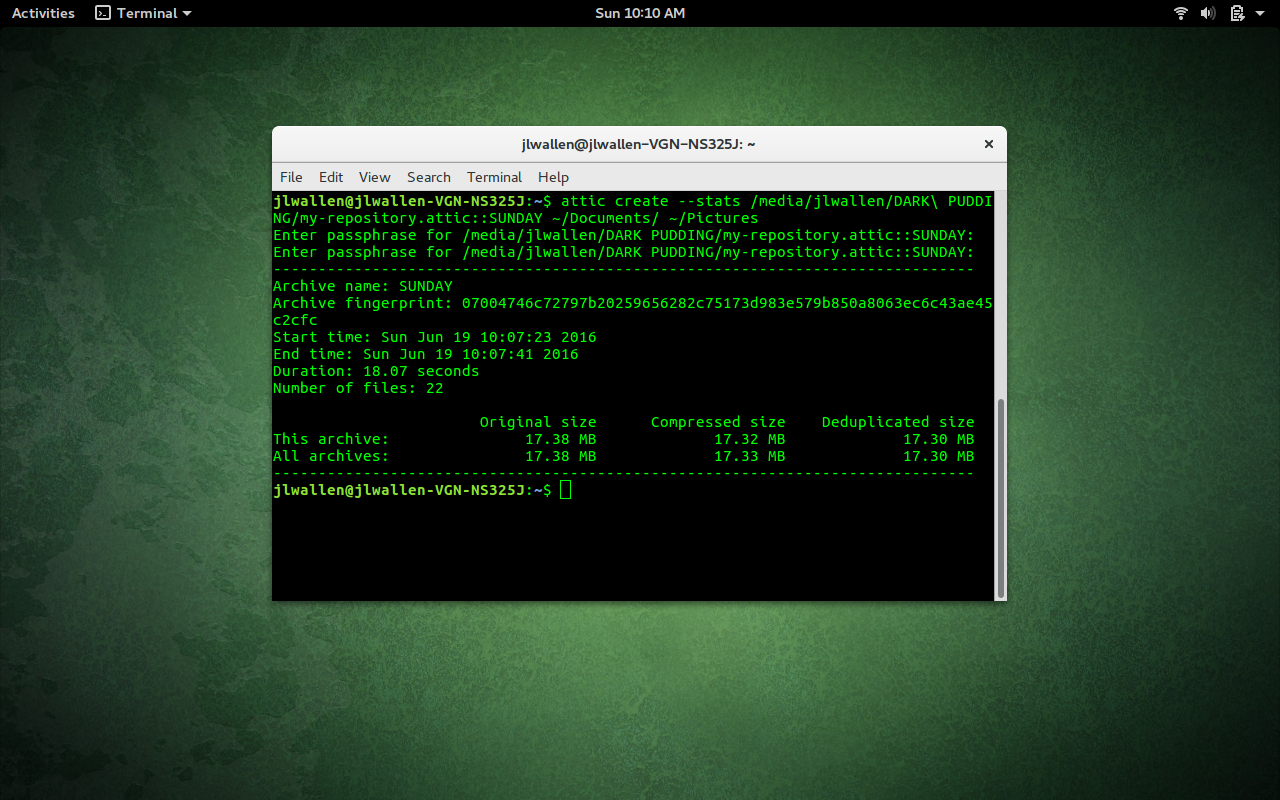
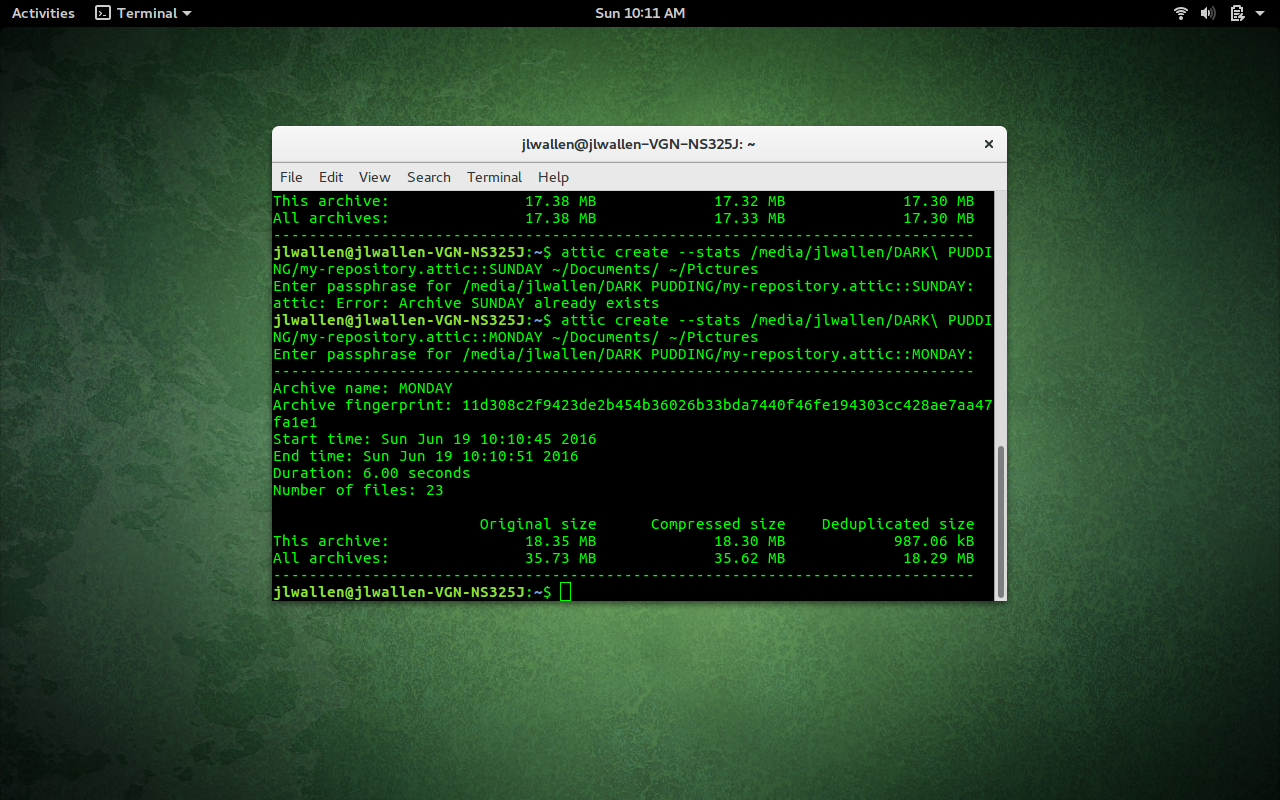
attic create /PATH/my-repository.attic::SUNDAY ~/Documents ~/Pictures
If you want Attic to output the statistics of the backup, you can add the –stats option. That command would look like:
attic create --stats /PATH/my-repository.attic::SUNDAY ~/Documents ~/Pictures
The output of the command would show when it was run, how long it took, and information on archive size (Figure 2).
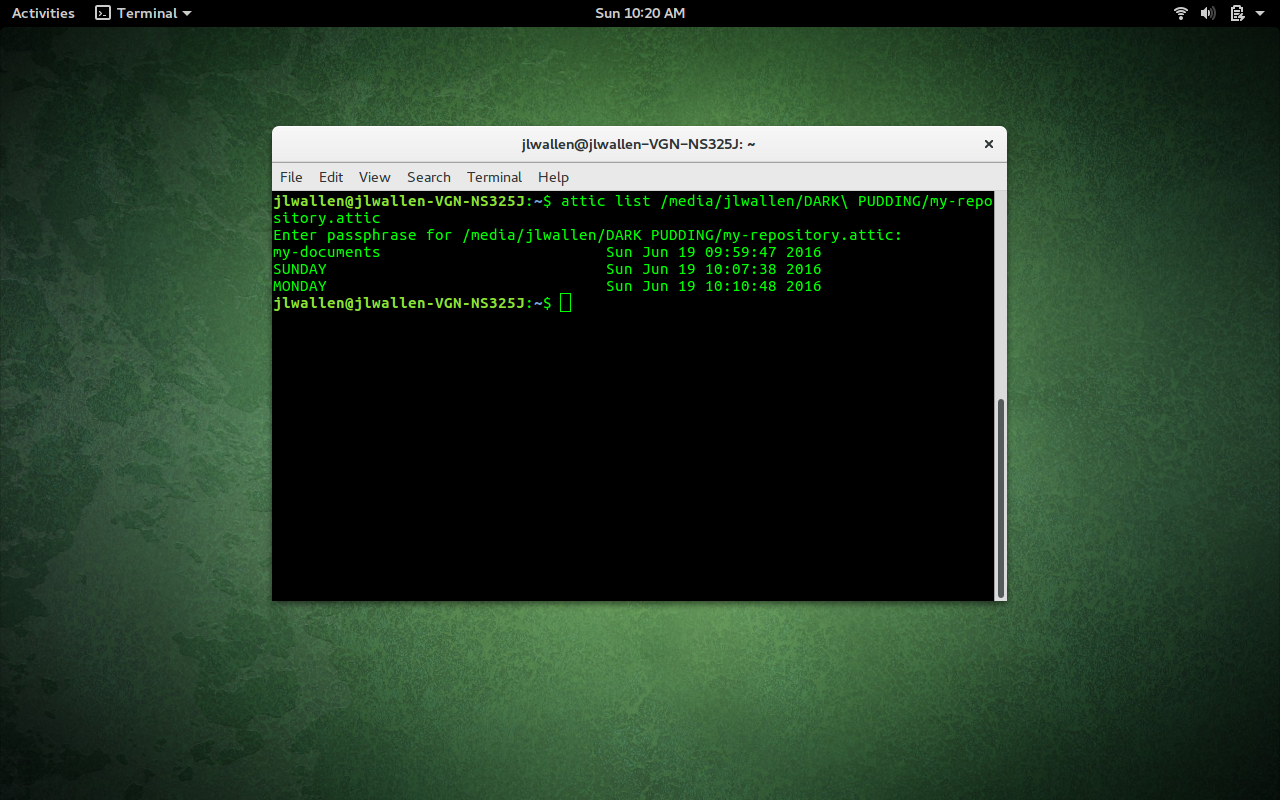
attic list /PATH/my-repository.attic
where PATH is the direct path to the repository.
attic list /PATH/my-repository.attic::SUNDAY
This command will output all files within the SUNDAY archive.
Extracting data from an archive
There may come a time when you have to extract data from an archive. This task is just as easy as creating the archive. Let’s say you need to extract the contents of the ~/Pictures directory from the SUNDAY archive. To do this, you will employ the extract argument, like so:
attic extract /PATH/my-repository::SUNDAY Pictures
where PATH is the direct path to the repository. Should any of the files be missing from the Pictures directory, they’ll be returned, thanks to Attic. The one caveat is that I have seen, in a couple of instances, when files aren’t extracted back to their original path. For example, after removing all files from the ~/Pictures directory, I ran Attic with the extract argument only to see the files extracted to ~/home/Pictures. The difference should be obvious. When you run the extract command, you do not want the leading /. Otherwise, it will create it for you. So, running it with ~/Pictures, will create a new direct path to the folder. Instead of extracting to /home/jack/Pictures, extracting with the leading ~/ will extract to /home/jack/home/jack/Pictures.
This and so much more
There are plenty of other tricks to be done with Attic (pruning, checking, and more). And because Attic is a command-line tool, you can easily work it into shell scripts to create automated deduplicated backups that can even work with encryption. For even more helpful information, check out the Attic Users Guide.


