Although Skype is owned by Microsoft, it is still one of the most popular VOIP clients/services available. And with good reason. You can use Skype on nearly every platform on the market, it makes for an outstanding interview platform, and it’s incredibly easy to use. Of course, using Skype means you must be okay with proprietary software. If you meet that criteria, you’re good to go. If not, you’ll want to turn to alternatives, such as Firefox Hello.
If you’re okay with proprietary software, let’s continue on with instructions on how to install Skype, how to manage your Skype-aware hardware, as well as how to install the Skype call recorder software. I will be demonstrating on the Ubuntu-based Elementary OS Freya distribution. The instructions will work for nearly all Ubuntu derivatives and should also work with most recent Debian releases.
Installation of Skype
As of Ubuntu 10.04, Skype has been included in the Canonical Partner Repository. By default, however, this repository is not enabled. You can enable the Partner repository two ways: Command line or GUI. To enable the repository via command line, open up a terminal window and issue the command:
sudo add-apt-repository “deb http://archive.canonical.com/ $(lsb_release -sc) partner”
Now issue the command:
sudo apt-get update
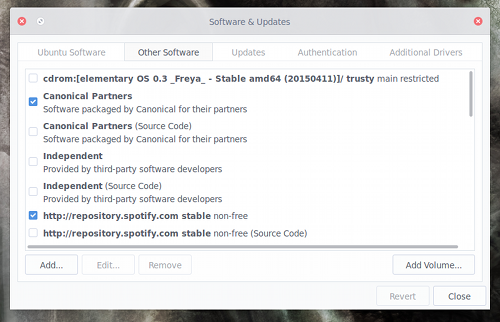
If you prefer the GUI way, open up the Software & Updates tool, click on the Other Software tab, and click to enable Canonical Partners (see Figure 1 above).
If you’re using a 64-bit machine, you will have to take one extra step before the actual installation of Skype. As of this writing, Microsoft only offers a 32-bit version of the Skype software for Linux. To be able to install the 32-bit Skype on your 64 bit machine, you must add MultiArch to your system. To do this, open up a terminal window and issue the following command:
sudo dpkg --add-architecture i386
At this point, you can install Skype by issuing the following command:
sudo apt-get update && sudo apt-get install skype pulseaudio:i386
If you’re installing on 32-bit architecture (once you’ve added the Canonical Partner repository), you will only need issue the command:
sudo apt-get install skype
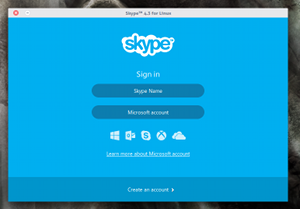
Once installed, you should be able to launch Skype and log into your account (Figure 2).
 Now let’s install the Skype Call Recorder. This will be necessary should you want to record calls for interviews. Unfortunately, installing the call recorder isn’t as straightforward as installing Skype. Here are the steps:
- Download the Skype Call Recorder .deb file
- Open a terminal window and change to the directory housing the downloaded file
- Issue the command “sudo dpkg -i skype-call-recorder-ubuntu_0.10_i386.deb” (NOTE: Check to make sure the release number on the command matches the downloaded file)
- Allow the installation to complete with errors
- To fix the installation errors, issue the command “sudo apt-get install -f”
At this point, you should now see the Skype Call Recorder application in your desktop menu.
Setting Up Hardware
It should go without saying that not all hardware is created equal and not all hardware is supported in Skype for Linux. I have an older Logitech QuickCam Pro 9000 that works flawlessly as a video camera. For a microphone, I use my CAD E100S mic running through a Focusrite Scarlet 2i2. The mic is overkill for Skype, but I also use it for podcasting and audiobook narration (plus, it sounds fantastic).
You may need to venture into the Skype settings window to select the hardware to be used. Here’s how.
For Audio:
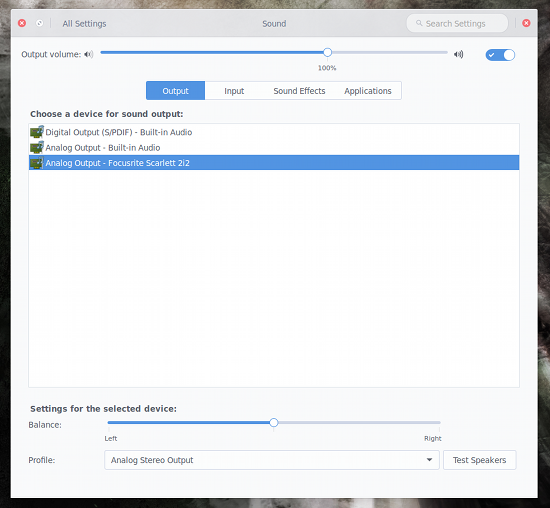
Most likely your system is using PulseAudio. Because of that, you will need to select your hardware in the Sound Settings window of your desktop (as the only option within Skype for audio devices will be PulseAudio). You can click on the sound icon in your notification area and select Sound Settings. From this window, make sure to select the proper input and output devices (Figure 3).
For Video:
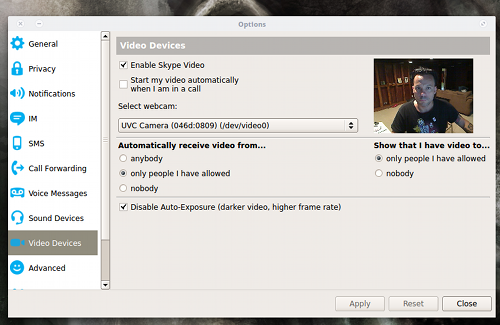
As for video hardware, you actually have the ability to select the hardware from within the Skype settings window. Do the following:
- Open Skype
- Log into your account
- Click on Skype > Options
- Click on Video Devices
- From the Select Webcam drop-down, select the correct camera (a live preview should appear when you’ve selected the correct camera—Figure 4)
Recording Calls
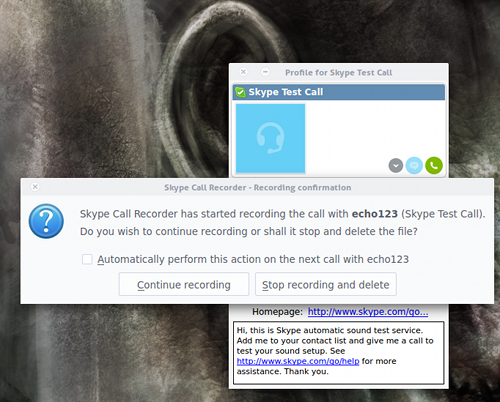
Once you have Skype up and running properly, it’s time to start recording calls. After you’ve logged into Skype, open up the Skype Call Recorder. As soon as you place a call, the application will pop up asking if you want to continue recording or if you want stop recording (Figure 5).
I will give you fair warning about the Skype Call Recorder. If you want high-quality recordings you need to click on the Skype Call Recorder icon in the notification area, select Open preferences, click on the File Format tab, and set the following:
- File format: Ogg Vorbis
- Ogg Vorbis quality: Quality 7
- Stereo mix: Set at local 50%, remote 50%
So far, the above settings have resulted in the best quality (without creating files too large in size). By default, the Stereo mix will be set such that the local voice will be in one channel and the remote voice in another. For anything like podcasting, this can be offputting, so set it such that the voices are equal on both channels.
You should now have Skype running like a well-oiled machine, including the ability to record audio calls at a high enough quality that they can be used as podcast interviews and the like. Although for some, Skype may not be the ideological choice for an open source platform, it is the most widely used VOIP system. And, if you want to be able to keep in contact with friends and family who happen to use Skype, you can now do so.


