If you’re a Linux system administrator, chances are you’ve got more than one machine that you’re responsible for on a daily basis. You may even have a bank of machines that you maintain that are similar — a farm of Web servers, for example. If you have a need to type the same command into several machines at once, you can login to each one with SSH and do it serially, or you can save yourself a lot of time and effort and use a tool like ClusterSSH.
ClusterSSH is a Tk/Perl wrapper around standard Linux tools like XTerm and SSH. As such, it’ll run on just about any POSIX-compliant OS where the libraries exist — I’ve run it on Linux, Solaris, and Mac OS X. It requires the Perl libraries Tk (perl-tk on Debian or Ubuntu) and X11::Protocol (libx11-protocol-perl on Debian or Ubuntu), in addition to xterm and OpenSSH.
Installation
Installing ClusterSSH on a Debian or Ubuntu system is trivial — a simple sudo apt-get install clusterssh will install it and its dependencies. It is also packaged for use with Fedora, and it is installable via the ports system on FreeBSD. There’s also a MacPorts version for use with Mac OS X, if you use an Apple machine. Of course, it can also be compiled from source.
Configuration
ClusterSSH can be configured either via its global configuration file — /etc/clusters, or via a file in the user’s home directory called .csshrc. I tend to favor the user-level configuration as that lets multiple people on the same system to setup their ClusterSSH client as they choose. Configuration is straightforward in either case, as the file format is the same. ClusterSSH defines a “cluster” as a group of machines that you’d like to control via one interface. With that in mind, you enumerate your clusters at the top of the file in a “clusters” block, and then you describe each cluster in a separate section below.
For example, let’s say I’ve got two clusters, each consisting of two machines. “Cluster1” has the machines “Test1” and “Test2” in it, and “Cluster2” has the machines “Test3” and “Test4” in it. The ~.csshrc (or /etc/clusters) control file would look like this:
clusters = cluster1 cluster2
cluster1 = test1 test2
cluster2 = test3 test4
You can also make meta-clusters — clusters that refer to clusters. If you wanted to make a cluster called “all” that encompassed all the machines, you could define it two ways. First, you could simply create a cluster that held all the machines, like the following:
clusters = cluster1 cluster2 all
cluster1 = test1 test2
cluster2 = test3 test4
all = test1 test2 test3 test4
However, my preferred method is to use a meta-cluster that encompasses the other clusters:
clusters = cluster1 cluster2 all
cluster1 = test1 test2
cluster2 = test3 test4
all = cluster1 cluster2
By calling out the “all” cluster as containing cluster1 and cluster2, if either of those clusters ever change, the change is automatically captured so you don’t have to update the “all” definition. This will save you time and headache if your .csshrc file ever grows in size.
Using ClusterSSH
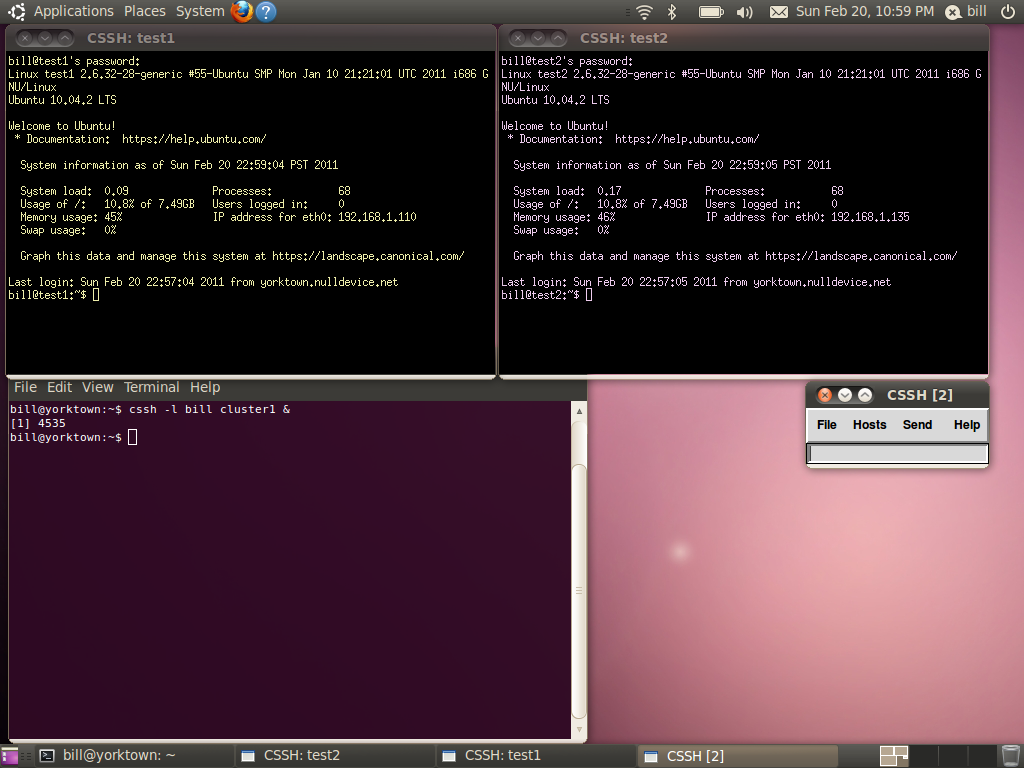
Using ClusterSSH is similar to launching SSH by itself. Simply running cssh -l <username> <clustername> will launch ClusterSSH and log you in as the desired user on that cluster. In the figure below, you can see I’ve logged into “cluster1” as myself. The small window labeled “CSSH [2]” is the Cluster SSH console window. Anything I type into that small window gets echoed to all the machines in the cluster — in this case, machines “test1” and “test2”. In a pinch, you can also login to machines that aren’t in your .csshrc file, simply by running cssh -l <username> <machinename1> <machinename2> <machinename3>.
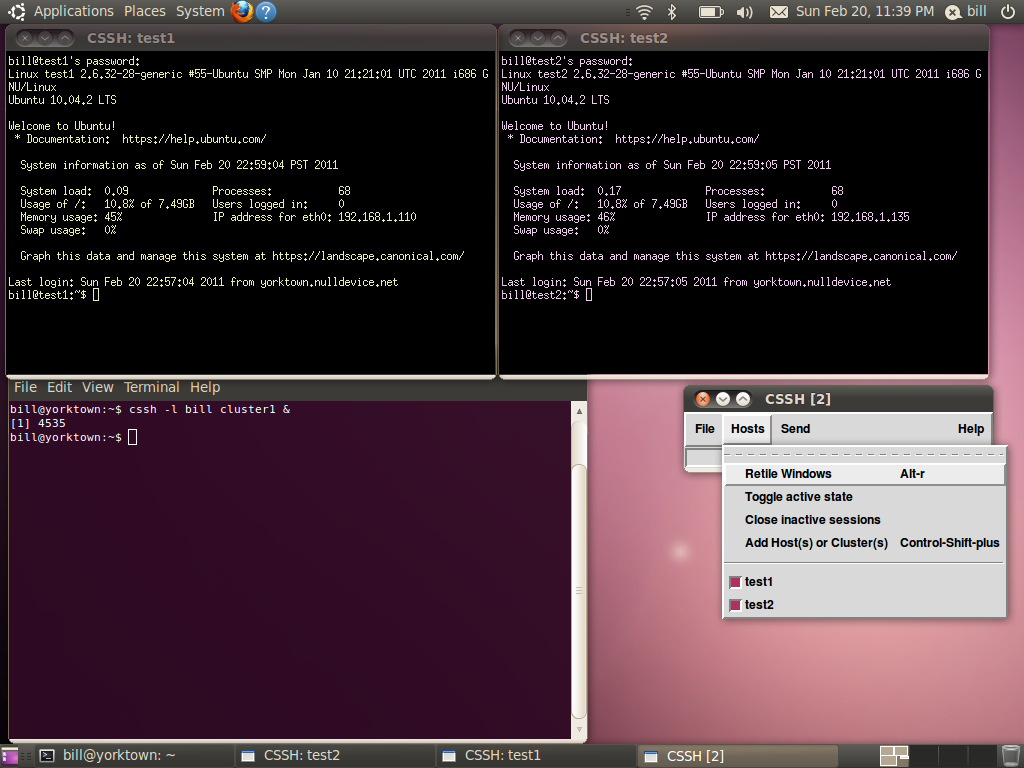
If I want to send something to one of the terminals, I can simply switch focus by clicking in the desired XTerm, and just type in that window like I usually would. ClusterSSH has a few menu items that really help when dealing with a mix of machines. As per the figure below, in the “Hosts” menu of the ClusterSSH console there’s are several options that come in handy.
“Retile Windows” does just that if you’ve manually resized or moved something. “Add host(s) or Cluster(s)” is great if you want to add another set of machines or another cluster to the running ClusterSSH session. Finally, you’ll see each host listed at the bottom of the “Hosts” menu. By checking or unchecking the boxes next to each hostname, you can select which hosts the ClusterSSH console will echo commands to. This is handy if you want to exclude a host or two for a one-off or particular reason. The final menu option that’s nice to have is under the “Send” menu, called “Hostname”. This simply echoes each machine’s hostname to the command line, which can be handy if you’re constructing something host-specific across your cluster.
Caveats with ClusterSSH
Like many UNIX tools, ClusterSSH has the potential to go horribly awry if you aren’t very careful with its use. I’ve seen ClusterSSH mistakes take out an entire tier of Web servers simply by propagating a typo in an Apache configuration. Having access to multiple machines at once, possibly as a privileged user, means mistakes come at a great cost. Take care, and double-check what you’re doing before you punch that Enter key.
Conclusion
ClusterSSH isn’t a replacement for having a configuration management system or any of the other best practices when managing a number of machines. However, if you need to do something in a pinch outside of your usual toolset or process, or if you’re doing prototype work, ClusterSSH is indispensable. It can save a lot of time when doing tasks that need to be done on more than one machine, but like any power tool, it can cause a lot of damage if used haphazardly.


