The full power of digital photography lies in knowing how to manipulate RAW images. When you shoot RAW you get the highest-quality images, and the most editing headroom for repairs and enhancements. Raw Therapee is a wonderful cross-platform RAW image processor. Use it for noise reduction, pulling details out of shadows, fine-grained sharpening, color adjustment, color management, contrast, luminance, brightness, gamma, and hue corrections, convert to black and white, exposure corrections, distortion, chromatic aberration, and vignetting repairs, apply lens correction profiles, and about a skillion more features.
Raw Therapee is not a raster graphics editor like Krita or GIMP, and you cannot use it to add text to an image, combine images, or do surgical fixes such as red-eye correction. When you make changes, for example contrast, color, sharpness, or any other element, they are applied to the whole image. When you have processed an image in Raw Therapee, you can import it into Krita or GIMP for more surgical editing.
Raw Therapee is fast and efficient. It displays thumbnails of all images in a directory. Double-click the one you want to work on, and it opens in its own tab. All editing is non-destructive, your changes are immediately previewed, and no changes are made until you send your images to the processing queue. Your originals are always preserved unchanged, and your edited images are saved in the converted/ directory inside your original image directory. Or, in any other directory that you prefer.
Raw Therapee supports RAW, TIFF, PNG, and JPEG image file formats. One of its most useful features is sidecar files. These are plain text files that record the tools you used on an image and their settings. These have a .pp3 extension, so an image named mypuppy.jpg is paired with a sidecar file named puppy.jpg.pp3. You can re-use these files by importing them into other images. Raw Therapee comes with a good batch of presets contained in .pp3 files.
Que Bella Luna
Photographing the moon is great fun, and you can get good pics with modest cameras. The basic steps to getting good moon photos are:
- A good solid tripod
- A zoom lens or telescope
- Fast shutter speed.
The Earth and moon are both moving very fast, and the moon is so far away the tiniest camera movement is magnified. Fortunately it is bright, so you can use a high shutter speed at low ISO. Figure 2 shows the original image taken with a Canon 7D and the Canon 100-400mm zoom lens at 400mm.
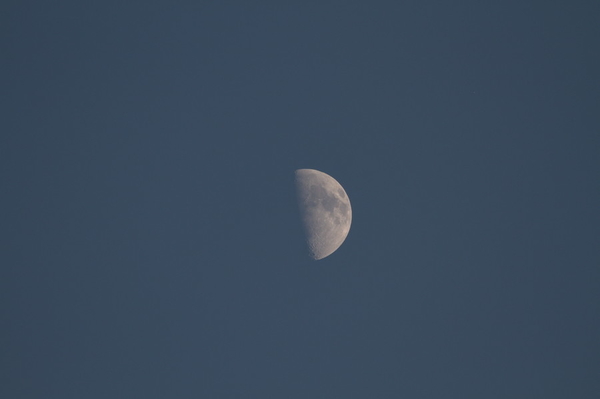
When you take into account the 1.6x crop factor of the 7D’s APS-C sensor, this is the equivalent of an image captured with a 640mm lens. And the moon is still small, so it’s going to take some cropping and enlarging to make it look like anything.
Look on the right control panel in Raw Therapee for the Transform tab. This is the one with the little scissors and protractor. Expand the Crop menu, click the Enabled checkbox, and drag your cursor over your image to select the crop area. Drag the corners to change the dimensions, and move the whole crop grid with Shift+cursor. The Crop menu includes a nice complement of composition guides and fixed ratios. Your image will not be cropped until it moves through the processing queue, so use the zoom tool at the bottom to enlarge your image view.
 You can see the width and height of your crop in the Crop dialog, so if you need to reduce your image size just scroll down a little to the Resize controls.
Take a look at the Navigator panel on the left side. This displays your image with crop and zoom frames, color values, and editing history.
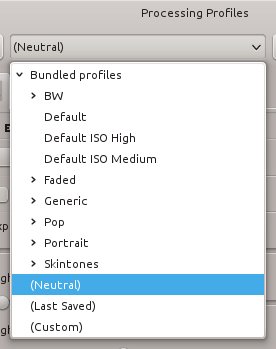
A good first stop is the Processing Profiles menu to apply some of the presets just to see what they do (figure 3).
Let’s use the Neutral profile, and then apply noise reduction and sharpening.
Noise Reduction
Noise reduction is always a balancing act between losing details and creating a pleasing smoothness. Raw Therapee’s noise reduction is very good at reducing noise without losing a lot of details. Go to the Details tab, and check the Noise Reduction checkbox to enable it. Select the Lab method, because this separates luminance from the color channels. Set the Luminance Detail slider to zero, and play with the Luminance slider. The Luminance slider applies smoothing and loses 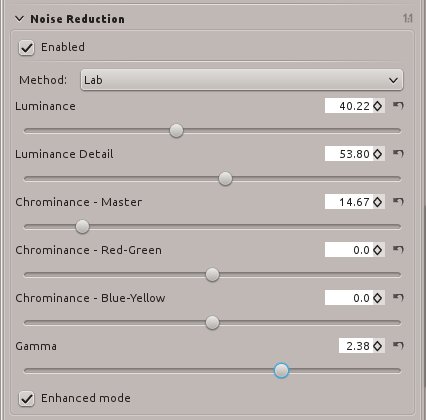 details, so when you have a nice level of smoothness adjust the Luminance Detail slider to bring out details.
Play around with the Chrominance channels to see how they affect your image. Chrominance-Master affects all color channels equally. Chrominance-Red-Green affects the red channel, and Chrominance-Blue-Yellow operates on the blue channel. You may find that one of these channels has more noise, so you can tailor settings per channel.
Adjusting Gamma usually has a nice dramatic brightness effect. Smaller gamma values are applied to shadows, while higher gamma values enhance brighter tones.
Use Enhanced Mode because this runs the noise reduction algorithms twice and usually produces a nicer result.
Sharpening
Now we can apply a little sharpening. Try the Unsharp Mask first, because it usually gives the best results. A smaller Radius value brings out small details better. Haloing is often a side effect of a small radius value, so if you get halos increase the radius.
The Amount slider determines the level of sharpening, which you can see as you move the slider. There is one gotcha with sharpening, and that is that Raw Therapee applies sharpening before resizing. This can make your sharpening look wrong, so you might want to apply sharpening as a separate step after you have applied your other changes.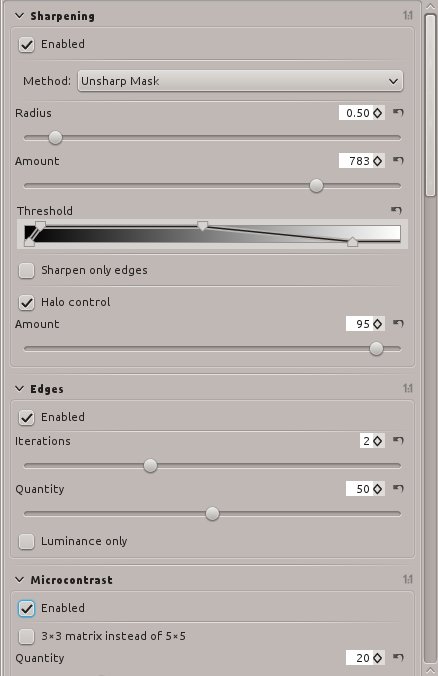
The Threshold slider is a wonderful tool for applying sharpening in the tonal range where it does the most good. The left pair of sliders controls darker tones, and the right pair apply to lighter tones. Usually the default setting looks good, but it costs you nothing but a little time to experiment. A good way to see what any of the controls do is to set them to extremes, to make it obvious what changes they’re making.
Try the Sharpen Only Edges setting on simple images without a lot of fine detail, because this applies sharpening only to areas of contrasting pixels and not areas of uniform tones. If you have a lot of details, like my moon photo, then edge sharpening most likely won’t look as sharp.
Halo control is rather interesting; when you’re pixel-peeping at high zoom it looks fakey, but when you step back to a normal viewing size it sometimes makes your photo look more realistic. Remember that mathematical fidelity and how we perceive images are often dissimilar, so tweak it to suit your own taste.
There are two more settings that apply to edges: Iterations and Quantity. These are independent from the Sharpen Only Edges setting. On some images, like my moon pic, enabling Edges adds a nice crisp clarity.
Enabling Microcontrast can bring out even more fine detail. It can also make your image look a little noisier.
Processing Queue
That’s enough messing around with this moon photo. When you’re ready to apply your changes click the little icon with two gears, down underneath your image. This puts it in the processing queue, which should already be open in its own tab (figure 6).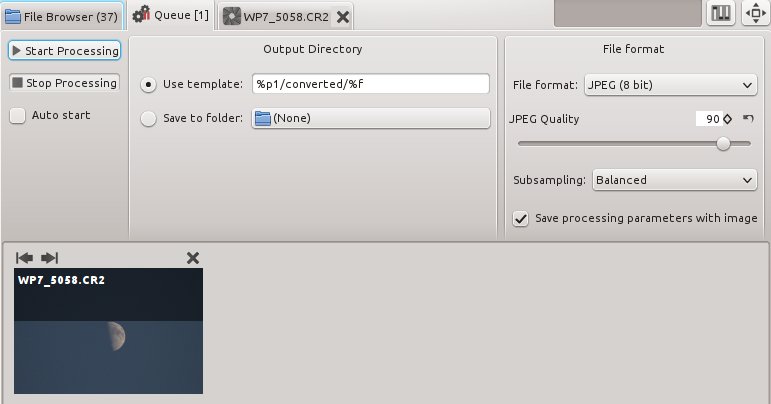
You can set your output file location here, and file type. Click the Start Processing button, and behold figure 7, our glorious moon photo.
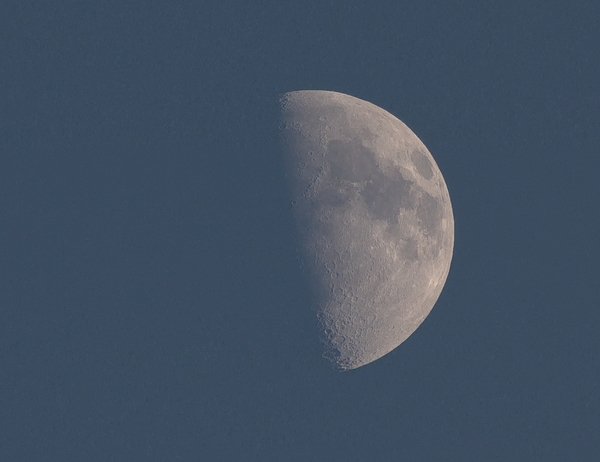
Not bad for a Web JPG.
Advanced photo editing is always complex. The good news is it costs you nothing but time to study and experiment. Check out these resources to learn more, and the Raw Therapee manual at Rawpedia is an excellent guide.
A RAW Feast on the Linux Darktable (Photo Editor)
Move Over GIMP, Here Comes Krita
RAW Magic In Digikam: Understanding RAW Photo Settings
How to Remote Control Your Camera with Darktable on Linux
Professional Graphics Creation on Linux
Build A Serious Multimedia Production Workstation With Arch Linux


