
At some point in your Linux administration career, you are going to edit a configuration file, write a Bash script, code, take a note, or any given task associated with text editors. When you do, you will turn to one of the popular text editors available to the Linux platform.
-
vim
-
nano
These are two tools that might strike fear in the hearts of newbies and put seasoned users at ease. They are the text-based editors that Linux administrators turn to when the need arises…and it will arise. To that end, it is in the best interest to every fledgling Linux user to get to know one (or both) of these editors. In this article, I’ll get you up to speed on using each, so that you can can feel confident in your ability to write, edit, and manage your Linux configuration files, scripts, and more.
Nano
Nano has been my editor of choice for a very long time. Because I don’t code nearly as much I used to, I typically have no need of the programming power found in vi. Most often, I simply need to create a Bash script or tweak a configuration file. For that, I turn to the simplicity of Nano.
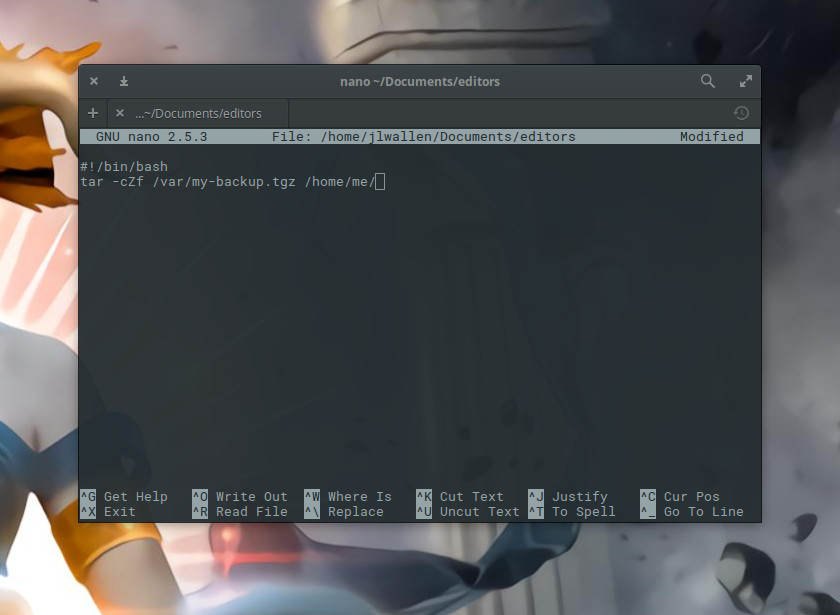
Nano offers text editing without the steeper learning curve found in vi. In fact, nano is quite simple to use. I’ll walk you through the process of creating a file in nano, editing the file, and saving the file. Let’s say we’re going to create a backup script for the folder /home/me and we’re going to call that script backup_home. To open/create this file in nano, you will first open up your terminal and issue the command nano backup_home. Type the content of that file into the editor (Figure 1) and you can quickly save the file with the key combination [Ctrl]+[o].
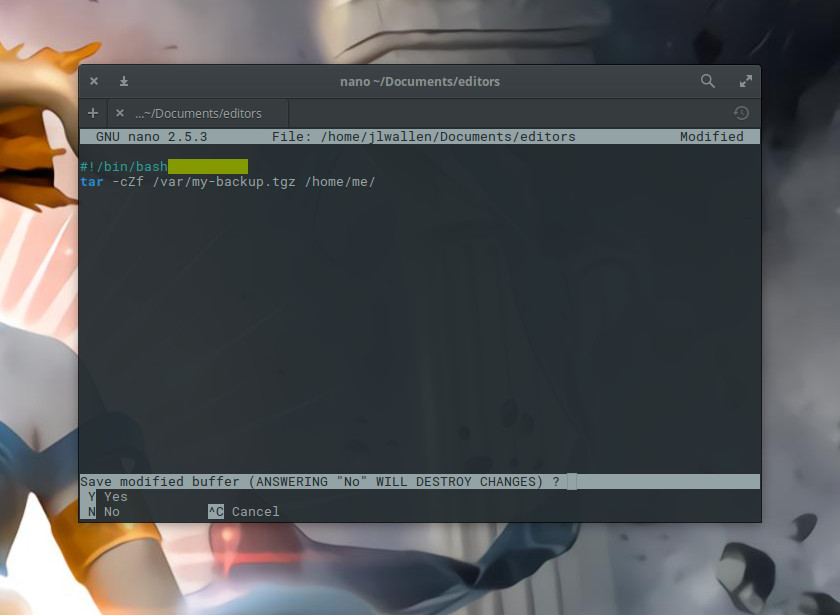
The [Ctrl]+[o] combination is for “write out”. This will save what you’ve written so far and allow you to keep working. If, however, you’ve completed your work and want to save and exit, enter the key combination [Ctrl]+[x]. If you’ve made any edits since you last did a write out, nano will ask if you want to save your work before exiting (Figure 2).
Once you’ve saved work in nano, it will do some color coding, depending on the type of file you’ve written (in this example, we’ve written a Bash script, so it is applying the appropriate syntax highlighting).
You will also note, at the bottom of the window, a row of commands you can use with nano. Some of the more handy key combinations I use are:
-
[Ctrl]+[c] – print out the current line number
-
[Ctrl]+[k] – cut a line of text
-
[Ctrl]+[u] – uncut a line of text
-
[Ctrl]+[r] – read in from another file
A couple of notes on the above. The cut/uncut feature is a great way to move and or copy lines within nano. When you cut a line, it copies it to the nano buffer, so when you uncut, it will copy that line at the current cursor location. As for the read in tool, say you have another file on your local drive and you want the contents of that file to be copied into the current file you have open in nano.
For example: The file ~/Documents/script consists of code you want to add to your current script. Place your cursor where you want that new script to be placed, hit [Ctrl]+[r], type in ~/Documents/script, and hit the Enter key. The contents of script will be read into your current file.
Once you’ve completed your work, hit the combination [Ctrl]+[x] and, when prompted, type y (to save your work), and you’re done.
To get more help with nano, enter the combination [Ctrl]+[g] (while working in nano) to read the help file.
vim
If you’re looking for even more power (significantly so), you’ll turn to the likes of vim. What is vim? Vim stands for Vi IMproved. Vim is the evolution of the older vi editor and is a long-time favorite of programmers. The thing about vi is that it offers a pretty significant learning curve (which is why many newer Linux users immediately turn to nano). Let me give you a quick run-down of how to open a new document for editing, write in that document, and then save the document.
The first thing you must understand about vi is that it is a mode-oriented editor. There are two modes in vi:
-
Command
-
Insert
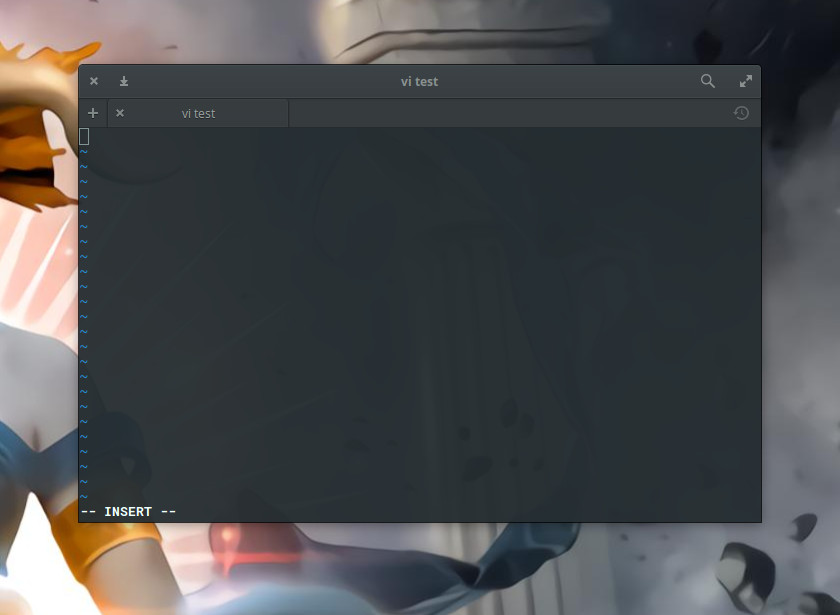
The vi editor opens in command mode. Let’s start a blank file with vi and add some text. From the terminal window, type vi ~/Documents/test (assuming you don’t already have a file called test in ~/Documents…if so, name this something else). In the vi window, type i (to enter Insert mode — Figure 3) and then start typing your text.
While in insert mode, you can type as you need. It’s not until you want to save that you’ll probably hit your first stumbling block. To save a file in vi, you must exit Insert mode. To do this, hit Escape. That’s it. At this point vi is out of Insert mode. Before you can send the save command to vi, you have to hit the key combination [Ctrl]+[:].
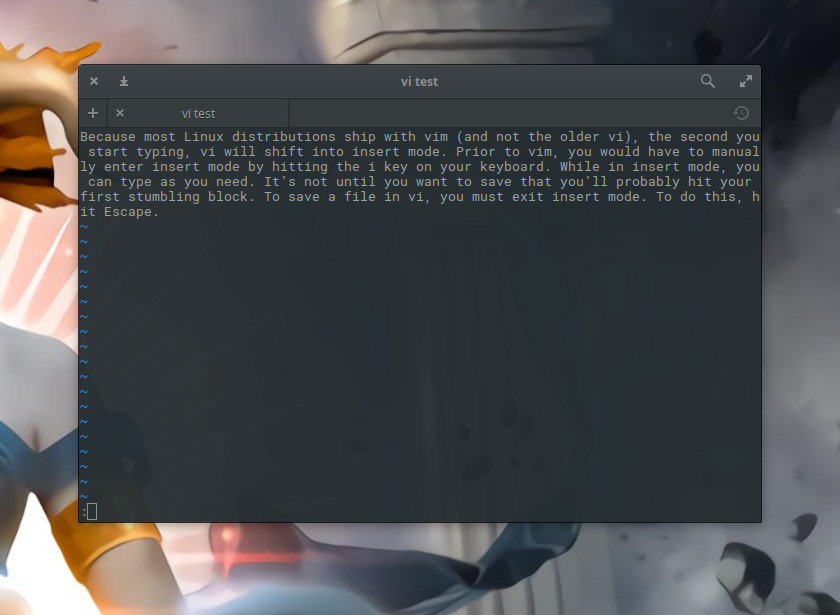
You should now see a new prompt (indicated by the : character) at the bottom of the window (Figure 4) ready to accept your command.
To save the file, type w at the vi command prompt and hit the Enter key on your keyboard. Your text has been saved and you can continue editing. If you want to save and quit the file, hit [Ctrl]+[:] and then type wq at the command prompt. Your file will be saved and vi will close.
What if you want to exit the vi, but you haven’t made any changes to your open file? You can’t just type q at the vi command prompt, you have to type q!.
Finally, if you’re in command mode and you want to return to insert mode, simply type i and you’re ready to start typing again.
Some of the more useful vi commands (to be used when in command mode, and after hitting [Ctrl]+[:]) are:
-
h – move cursor one character to left
-
j – move cursor one line down
-
k – move cursor one line up
-
l – move cursor one character to right
-
w – move cursor one word to right
-
b – move cursor one word to left
-
0 – move cursor to beginning of the current line
-
$ – move cursor to end of the current line
-
i – insert to left of current cursor position (this places you in insert mode)
-
a – append to right of current cursor position (this places you in insert mode)
-
dw – delete current word (this places you in insert mode)
-
cw – change current word (this places you in insert mode)
-
~ – change case of current character
-
dd – delete the current line
-
D – delete everything on the line to right of the cursor
-
x – delete the current character
-
u – undo the last command
-
. – repeat the last command
-
:w – save the file, but don’t quit vi
-
:wq – save the file and quit vi
You see how this can get a bit confusing? There’s complexity in that power.
Don’t forget the man pages
I cannot imagine administering a Linux machine without having to make use of one of these tools. Naturally, if you’re machine includes a graphical desktop, you can always turn to GUI-based editors (e.g., GNU Emacs, Kate, Gedit, etc.), but when you’re looking at a GUI-less (or headless) server, you won’t have a choice but to use the likes of nano or vi. There is so much more to learn about both of these editors. To get as much as possible out of them, make sure to read the man pages for each (man nano and man vi).
Advance your career with Linux system administration skills. Check out the Essentials of System Administration course from The Linux Foundation.


