
Author: Sukrit Dhandhania
I’m going to use aDesklets with Ubuntu Linux for this example, but it shouldn’t be too difficult to install aDesklets on other Linux distributions. Look up the installation instructions for your distribution at the aDesklets site’s documentation section.
Back to Ubuntu. Make sure your apt-get sources are up-to-date, then apt-get install adesklets. Once this gets through, you’re ready to populate your desktop with status meters, calender, icon bars, weather updates, and news tickers. Launch the aDesklets installer with the command adesklets_installer. You can check the project’s Web site for info on what each desklet does. By way of example, we’ll install two desklets, Calender and weather.
Calender desklet
In the aDesklets installer, select the Calender desklet, then click the Install button. Below that button is a text area where you can see how the installation goes. Once the process is through you can close the window. Now launch a terminal to launch the desklet:
# cd ~/.desklets/Calendar-0.5.3/# ./Calendar.py --nautilus
The installer will ask you if you want to register the Calender desklet or test it. Press t to test the desklet out. Minimize all your windows and see whether you have a calender waiting for you. If not, something went wrong; get back to the terminal and go through the README in the Calender directory to diagnose the problem.
If all went well, launch the desklet again from the terminal. This time press r to register the desklet. Now you can run it with the command adesklets --nautilus. Your fancy Calender desklet should be waiting for you on your desktop.
Weather update desklet
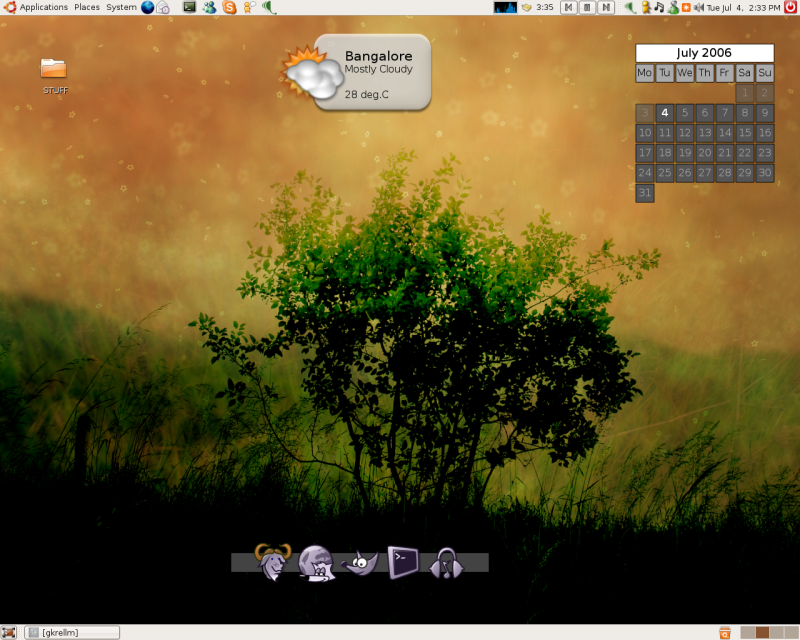
Another useful desklet, the weather widget, provides you with constant weather updates and predictions for your city. It uses Weather.com’s data to get the updates, so it requires a permanent connection to the Internet.
| Click to enlarge |
Run the aDesklets installer, and this time choose to install the “weather 0.0.4” package. Once that is done, launch your Web browser, visit http://www.weather.com, search for your city, and go to its weather updates page. For my city, Bangalore, I get directed to www.weather.com/outlook/travel/businesstraveler/local/INXX0012. Embedded in this URL is my city’s code, INXX0012. Note your city’s code, then launch a terminal window to edit the desklet’s configuration file.# cd ~/.desklets/weather-0.0.4
# gedit config.txt
Look for the line that says “location” and enter your city’s weather.com code next to it. The configuration for Bangalore looks like this:
'location': 'INXX0012',
Save the file and exit your editor. Time to test-drive the desklet. First, start the desklet in a terminal window:
# ./weather.py
Press t to test the weather desklet out. Check whether you can see it on your desktop. If you are satisfied, launch the desklet again and register it along with the Calender. The next time you launch aDesklets, both desklets should appear on your desktop.
You should be able to install most desklets from the list provided by the installer. Go through the README document that comes with each desklet; that will make installing and configuring it a lot easier.
If you happy with the way the desklets make your desktop look and want them there permanently, add them to your desktop’s startup. GNOME users can click on the System menu, then go to Preferences, and then Sessions. Click on the Startup Programs tab and click the Add button. Enter the command adesklets --nautilus. KDE users can add the same command into the file ~/.kde/Autostart. Now when you log in you desktop will display your favourite desklets automatically.


