Author: Nathan Willis
Combining multiple photographs taken at different exposures lets you create a single image with good highlight and shadow detail. Tone-mapping applications like Qtpfsgui are the traditional way to do this, but tone-mapping is slow, difficult to use, and can produce strange visual artifacts. A new tool on the scene is easier, faster, and produces nicer results: Enfuse.
Enfuse is recent project from the developers of the panorama apps Hugin and Enblend. It is part of the Enblend package, but has not yet made it into the stable release for Linux. You can download precompiled betas of Enblend for Windows and Mac OS X from panospace.wordpress.com; Linux users can follow the directions linked at that same page to compile the software. Compilation does not take too much time, and as long as you install the listed dependencies first isn’t tricky either.
What you get after the make install step is a binary called enfuse. The syntax for using it is simple: type enfuse -o outputfilename.jpg inputfile_1.jpg inputfile_2.jpg inputfile_3.jpg …, listing all of the input images (you can use wildcards if you want). By default Enfuse prints out verbose status messages as it goes along, which can help give you a feel for how the algorithm works. At the end, though, you will have to open up the resulting image in an image viewer yourself.
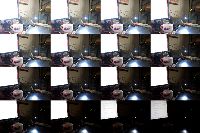
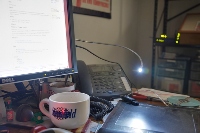
To provide an example, I took a series of bracketed shots aimed at the corner of my desk. Part of a computer monitor is visible in frame, as is an LED light aimed directly at the camera, a number of reflective surfaces, and a number of shadow areas both in the foreground and in the background.
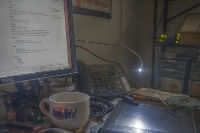
Running Enfuse — with no manual tweaking of the command-line switches and no adjustments made to any of the input images — I got the resulting fused image in less than four seconds. By comparison, Qtpfsgui took more than 20 seconds to generate each of its tone-mapped output images, and subjectively I found even the best of them inferior, even when I tweaked the algorithm’s settings.
How it works
Enfuse blends its input images using a process called exposure fusion, in which the algorithm examines the input images and grades each pixel on contrast, saturation, and “well-exposedness.” The images get added together, with each input image weighted differently at each pixel, depending on its score.
The reason it works is that overexposure and underexposure score poorly on all three of the criteria. Overexposed areas are washed-out, all white — meaning no contrast and no saturation. Underexposed regions are all black — again, no contrast and no saturation. “Well-exposedness” as the algorithm defines it just means values not close to zero or one (i.e., pure black and pure white).
The algorithm makes several improvements on this basic idea, accounting for things like multiple color channels and avoiding trouble at sharp edges. The original paper on the subject is interesting and is a quick read; it is available at the Enfuse page on the panotools.org wiki.
If you read carefully, you might have noticed that my description of the algorithm did not refer to the original scene at all. That distinction is what makes Enfuse so fast. High dynamic range (HDR) based tone-mapping apps always start by combining the input images into a reconstruction of the original scene, usually using the exposure information in the EXIF tags to properly arrange the input stack darkest to lightest. Only then can the HDR image be tone-mapped down into a regular TIFF or JPEG.
With exposure fusion, none of that is necessary. Each pixel of each image is graded on its individual merits alone.
Advanced usage
Naturally there are some instances where Enfuse’s default weighting scheme does not give you a pleasant-looking result. An image without much saturation, or with objects that you want to look near-black or near-white, might not score well. For those circumstances, you can adjust the weighting scheme on the command line.
The –w switch allows you to specify the relative importance of each of the scoring factors on a scale from 0 to 1. You specify values for contract, saturation, and “well exposedness” separately with –wContrast=x –wSaturation=y –wExposure=z. It takes some trial-and-error to determine what values work, but the fusion process is fast.
The Enfuse man page details several other switches, with which you can adjust the number of levels used for blending, contrast analysis, output scaling, and memory usage.
You can even use Enfuse to blend images with different depths of field, and thus create output images with both foreground and background objects in focus. That capability is useful for situations where lighting dictates setting a shallow depth of field in-camera. Be prepared for more manual tweaking of the –w switch variables, though, as this process puts a different spin on what makes a particular pixel worth weighting heavily.
I frequently see comments about HDR tone-mapping that express interest in the final product, but disappointment with the results. To be sure, you can do a lot of creative things with tone-mapping, especially if you are willing to put in the time to experiment with the various algorithms and their settings. But if you just want a good, normal-looking image that covers a wide dynamic range, Enfuse is the better option.
Category:
- Graphics & Multimedia


