
Author: Shashank Sharma
You only need to use two of the GIMP’s arsenal of tools to create your hackergotchi: the Create and Edit Paths tool (Tools -> Paths) and the Eraser (Tools -> Paint Tools -> Eraser).
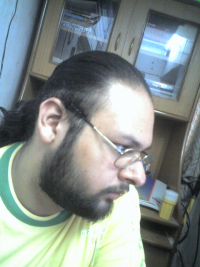
To begin, open your favorite image with GIMP. Here’s my original image.
I suggest you work with at least a 150% zoom. Right-click on your image, select View -> Zoom. Click on Other and enter the zoom percentage you are comfortable with.
The next step is to mark the outline of your head using the Paths tool. Press B or click Tools -> Paths. Start from any point on your face, then keep clicking the boundary of your face to draw an outline, like this.
Once you have a selection around your face, press Shift-Q to Toggle Quick Mask, as shown here.
Next, use the Eraser tool (Tools -> Paint Tools -> Eraser) to delete your head from the picture. As you can see here, your head won’t actually disappear. This is just an intermediary step. We are still two steps away from a hackergotchi.
Once done, turn off the Toggle Quick Mask by pressing Shift-Q again. Click on Select -> From Path, to select your head’s outline. Copy this selection (Edit -> Copy) and then select Edit -> Paste as new.
The final step is to resize your head. Click Image -> Scale Image and downgrade your head to 100×100 or 80×80 pixels. Voilà — your personal home-made hackergotchi!


