
Author: Tom 'Stomfi' Russell
To customize Dyne:II, copy CD’s dyne folder to the root folder of a hard or pen drive, then boot the CD to activate this “dock.” You can also save a “nest” image for your home and variable files, which may be either on the same partition as the dock or a different one.
When the system reboots, a GUI startup window called the Dynebolic splash screen gives access to configuration utilities to set up a nest and networking. Once the dock is activated, the CD will eject. This version of Dyne:II automatically logs the user in as root, which is necessary to perform the steps in this article.
| Static IP networking |
|---|
|
What if you’re not using DHCP to assign your system an IP address? As long as the lspci utility sees your card, you can use the trusty shell toolkit to get your network up.
In a terminal, type Add the fully qualified domain name of your search provider and your nameserver to /etc/resolv.conf; for example, Finally, set the default route to the gateway. First find out what its IP number is, then see if you can ping it with the command |
Dyne comes with a software development kit (SDK) that you can access by the shell script dynesdk. The script takes various arguments, one of which lets you download files from the Internet to populate a development folder. Others perform various functions — mount new software modules, rebuild the compressed system files, and create a new CD-ROM image.
To download the software development kit (SDK) you must have a working Internet connection from Dyne:II. DHCP should work out of the box, but remember this is a live CD so all drivers may not be available. Dyne:II does give you the ability to add your own compiled drivers; you can find the instructions on the Dynebolic Web site in the section “Including your own kernel modules.”
To set up the SDK, open a terminal by right-clicking on the GUI desktop and making the proper choice on the context menu. At the command prompt, type dynesdk -h to get a listing of all the SDK command options and arguments. Enter dynesdk mksdk to create and populate an SDK folder. The command will download all the SDK files into your dock under a new folder called SDK.
Now you need to populate the SDK/cdrom folder with the files on the CD-ROM. Put the disc back in and mount it with a command like mount /dev/hdc /mnt/cdrom (change hdc to suit your system). Copy everything on the CD into the /dyne/SDK/cdrom folder. In /dyne/SDK/cdrom/dyne/modules you will find all the “squashed” dyne modules that have been expanded into the /opt folder in the live system.
To create a new module for your own software additions, first make a new folder called “modules” in the SDK folder. Change to this folder and create one for your own additions. Each module folder contains a list of required folders like bin, etc, lib, share, man, and a mandatory file named VERSION which doesn’t need to contain anything, it just has to be there for the Dyne SDK to work.
Once you have created your package file tree and the VERSION file, use the SDK to add it to the live system with the command dynesdk mount. This will mount your module in /opt so that you can add files and test them against the running system. Depending on what versions of system libraries Dyne:II is using, you may find that binaries compiled on another system will work. If you do it this way, sometimes you may have to copy libraries into your lib folder and create a wrapper to make your application use them, like this one called Xcdroast in my /opt/XCDRoast/bin:
#!/bin/sh

OLDLDP="$LD_LIBRARY_PATH"

export LD_LIBRARY_PATH=$LD_LIBRARY_PATH:/lib:/usr/lib:/usr/X11R6/lib/:/usr/local/lib:/opt/XCDRoast/lib

export PATH="$PATH:/opt/XCDRoast/lib/xcdroast-0.98/bin"

/opt/XCDRoast/bin/xcdroast -l /opt/XCDRoast/lib/xcdroast-0.98

export LD_LIBRARY_PATH=$OLDLDP
Keep running this file. Check the errors and copy each missing library file from the source system into the lib folder until it works.
Another way to make sure an application will work under Dyne is to compile the application on the Dyne:II system, in this example using the configure option -prefix=/opt/XCDRoast to let configure know that missing but needed libraries are installed in /opt/XCDRoast/lib. You can temporarily add this path to /etc/ld.conf and run the command ldconfig to do this.
Once your addition is working, you can add it to the ISO with the following SDK commands:
dynesdk squash will create a squashed dyne module with the name of your module folder in your dock under SDK/cdrom/dyne/modules.
dynesdk mkiso will generate a new Dyne:II ISO with your additional module in the SDK folder.
Reboot at this stage and remove the CD so that you can log into your “normal” system to burn the ISO. Then reboot with your new CD and test it out.
Your new application won’t be in the Dyne:II menu, so you will have to fire it up from a terminal. To get around this and without changing any really important files, I hacked the following solution.
Create a module folder called usermenu. In it, create a lib subfolder and a VERSION file. In the lib folder create a file called user.applist and add your applications using the format in this example:
Begin | EXTRAS

Begin | CDBURNER

XCDRoast | Burn CDs | /opt/XCDRoast/bin/Xcdroast | | | Stomfi

End | CDBURNER

Begin | SCREENANIMATE

KillHack | Stop Screen Animation | /opt/shacks/bin/stopscrn.sh | | | Stomfi

Begin | ANIMATIONS

anemone | anemone | nice -n 15 /opt/shacks/lib/anemone -root | | | Stomfi

bouncingcow | bouncingcow | nice -n 15 /opt/shacks/lib/bouncingcow -root | | | Stomfi

End | ANIMATIONS

End | SCREENANIMATE

End | EXTRAS
You can use a blank line to space items out on the menu. The bar or pipe symbol delimits the menu fields for the Dyne:II menu builder. They must all be there. If the application runs in a terminal, put the word terminal in the fourth field.
You must change one of the startup files and remake initrd to get this hack to work, and you will have to remember to change them again if you download a newer version of the SDK. The startup file to change is SDK/startup/lib/wmaker.sh. These are the target lines:
LINE=`cat /lib/dyne/dyne.applist`

#Following 3 Lines added by stomfi. check /opt/usermenu/lib/user.applist and include my menu items

if [ -e /opt/usermenu/lib/user.applist ]; then

LINE=`cat /lib/dyne/dyne.applist /opt/usermenu/lib/user.applist`

fi
Remake initrd with the command dynesdk mkinitrd. When you see the message
“cdrom/dyne/initrd is not a block special device — Proceed anyway (y,n),” respond with “y.” Squash the new usermenu module with dynesdk squash. Redo the ISO with dynesdk mkiso.
If you are going to burn the new ISO and use your nest and dock, you won’t see the changes on your system, as Dyne:II will use the existing initrd and module files in the dock /dyne folder and the nest will use the old menu. Therefore, before you reboot to do the burn, copy /dyne/SDK/cdrom/dyne/initrd to /dyne/initrd, and copy /dyne/SDK/cdrom/dyne/modules/yourapp.dyne and usermenu.dyne to /dyne/modules. Reboot, burn, and reboot back to your newest Dyne:II CD. Use a terminal to copy the file /etc/WindowMaker/WMRootMenu to /root/GNUstep/Defaults/WMRootMenu. When you right-click, you should see your new menu.
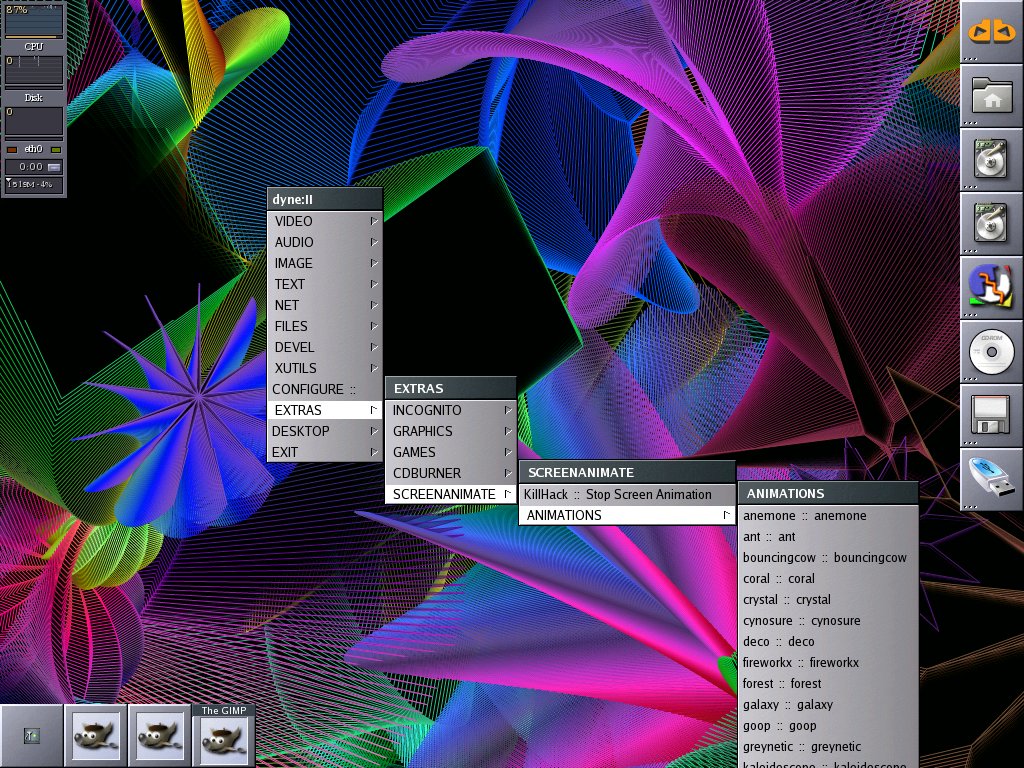
Here is a picture of the finished product with the noof xscreensaver hack running in the root window.
| Click to enlarge |
If you follow these instructions, you will have created two systems — a bootable live Linux CD and a Dyne dock on a drive partition, both with your own Dyne software module included.
The Dyne modules that you create can be put into a /dyne/modules dock directory and will be active at the next boot. They provide users with new software without any installation issues.
Different modules can be kept in a Dyne dock on separate machines, activating each special function machine from a Dyne boot CD.
Linux, open source, and the Dyne:II customizable CD can help you showcase applications in a portable, freely distributable way. With the inclusion of a CD burner due in the final release, Dyne:II is a live CD that is really live. Boot your Dyne:II CD on any PC (or Xbox), do your thing as a user or developer, create a new live CD, remove all your traces, and leave.
Category:
- Linux


