
Author: Joe 'Zonker' Brockmeier
The Debian project has a lot to do when it comes to writing an installer. Some have suggested that Debian should adopt the Anaconda installer, but Debian developers have said this isn’t feasible for a number of reasons, including the number of architectures supported by Debian, and the fact that Anaconda requires about 64MB or more of RAM to run. The stated requirements for Fedora Core 4 indicate that 192MB of RAM is the minimum for graphical installation. Since Debian targets machines with 32MB and up, Anaconda is a bit too chunky for those systems.
Debian’s GUI installer is a front-end for the Debian installer itself, and right now it is not available for all of Debian’s platforms. Sarge, for example, is available for x86, PowerPC, Alpha, Itanium, MIPS, S/390, SPARC, and other platforms. Etch may support fewer, or different, platforms, but it’s still likely to be available for more than just x86, PowerPC, and AMD64, which are the platforms that receive the most attention from other distributions, and the ones for which test images of the GUI installer are available. I tested the x86 installer.
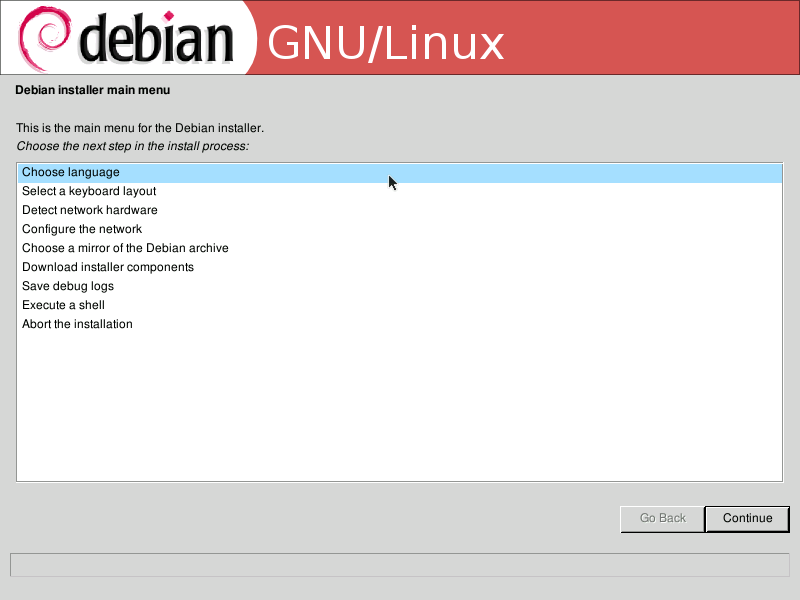
When you first boot the new installer, you’ll see a screen with the Debian logo, and an invitation to press F1 for help or Enter to boot. After booting, you choose the language you’d like to continue the install in. There are quite a few choices here: Greek, German, Czech, Hebrew, Hindi, Swedish, and many more. Unfortunately, I’m qualified to test the installer only in English, so I can’t vouch for the installer’s operation using non-Latin character sets or right-to-left languages.
|
Debian GUI installer: Expert mode – click to enlarge |
Network configuration
After choosing the language, keyboard mapping, and so on, the next step is network configuration. One thing that may displease some users is the installer’s automatic use of DHCP to set up the network during the install, rather than allowing users the alternative of configuring network settings manually. According to the installer FAQ the developers did this to try to assist newer users who may not be familiar with setting up their network configurations, which is a good thing.
If you do not have a running DHCP server on your network, the installer allows you to configure network settings manually once the DHCP request times out. If you’re feeling brave, you can also run through the install in expert mode, where you’ll be given the choice of using DHCP or doing it manually. More on expert mode in a bit.
I didn’t see any options for users who are connecting via dial-up. Of course, trying to download the necessary packages via dial-up would require a great deal of time. I used the mini-CD installer, so it’s possible that the installer would not need a network connection for users who install from a full set of Debian CDs.
Forward and back again
One thing that annoys me about many software installers (GUI and otherwise) is that they’re one-way affairs; if you make a mistake during step three, you’re powerless to go back and correct it without restarting the install process. I’m happy to say that the Debian installer does not suffer from this affliction. If you get to the middle of the installation process and find that you’d like to go back and re-configure something, you can easily do so. This is especially important for inexperienced users, since it makes it much easier to correct mistakes.
I did notice, however, that if you back out of a step you may lose your changes. For instance, I tried leaving the disk partitioning section to go back and correct an earlier setting, but when I returned to disk partitioning, I found that the partitions I had already defined were gone. If you write your partitions to disk and then go back, you will not need to redefine the partitions — but if you don’t write the changes, you will need to redefine the partitions.
Speaking of disk partitioning, the Debian installer still needs some work to be easy for new users. For example, it doesn’t seem to have any features for shrinking an existing Windows partition to make room for Linux. Since a lot of newer Linux users want to dual-boot at first, this is something the installer should handle.
One thing I do like about the installer is that it allows users to partition a disk using percentages of available disk space, rather than by how many gigabytes that you want to use — though that’s an option as well.
I also tried out the automatic partitioning options. The installer offers to partition the disk as a workstation or server, or a single partition for all files. If you choose workstation, the installer carves the disk into three slices: a root partition, swap space, and a home partition. If you choose the server, it carves the disk up into a root partition, swap, /usr, /var, /tmp, and /home.
Expert vs. typical install
Debian’s GUI installer has a normal installation mode, which is used by default, and an expert mode. The expert mode allows the user to choose which modules will be loaded during the install, configure network settings manually, and even choose whether to install Debian stable, testing, or unstable.
The expert mode, however, really is for experts. Most of the time, a so-called expert mode is usually just a euphemism for “more options,” but the Debian installer expert mode actually requires that the user have a decent understanding of the Debian installation process.
For example, after configuring networking and selecting the desired Debian repository, users are prompted to decide which installer components they would like to download. Many users will have no idea whether they need or want to use the “esoteric CDROM drivers,” “EVMS module for debian-installer,” or if they should load the “debconf preseed module.”
While expert mode isn’t suitable for many users, it does provide some interesting options for users who have special needs or a fair amount of Debian experience under their belt. In addition to the options I’ve already mentioned, users can choose to download the Debian-Edu profile for the installer, a Linux Terminal Server Project installer module, and a module that allows users to continue the installer from another machine over SSH.
The GUI portion of the installer takes you through the initial Debian install process, but drops back into the normal text-mode configuration program (base-config) after the install. The base-config utility, which you can re-run later if you want to reconfigure your system, handles setting up users, configuring APT, package installation, and a few other tasks. For other Linux distributions, these tasks are also handled by the installer, so users who are new to Debian may be surprised to be dumped into text mode after starting off in the GUI installer. It would be nice if there were a graphical mode for the base-config portion of the install as well.
Final thoughts
Overall, the new graphical installer shows promise. It’s a welcome addition for Debian, and it shows that the project is focusing more on attracting newer Linux users in addition to experienced ones.
However, if the graphical installer ends up being a GUI shell that essentially replicates the text-mode installation, it will still be intimidating for a number of users. Debian developers should create a (more) simplified installer that masks most of the complexity of installation and gives users a simplified install for the greenest computer users. I’d love to see the Debian developers come up with a graphical installer and setup utilities that rival easy-to-use utilities like the Xandros installer, or even the installer for Mac OS X.
There is, of course, plenty of time for the GUI installer to be tweaked, polished, and finished for use with Etch. The current timeline calls for Etch to be released around December 2006.
Category:
- Linux


