
Author: Joe Barr
Getting started with FlightGear
For most of us, the best way to install FlightGear is to use the version included in our distribution of choice. In Ubuntu Edgy, that’s 0.9.10-2, and that’s what I have used while writing this article. You can also grab a tarball, or check out the latest from CVS, and build it from scratch, but beware, it may require a serious effort to build.
Before you bother installing FlightGear, however, make sure your system meets the minimum hardware requirements. The bottom line is that you need 3D acceleration. For Linux users, the best bet seems to be an Nvidia card with 3D enabled. I’ve heard tales of woe on the IRC channel from those trying to run FlightGear on Linux with ATI cards.
| A brief history of FlightGear |
|---|
Curtis Olsen provided this account of FlightGear’s beginnings:
Olsen added that he’s been “a Unix/Linux fanatic since the day I first saw ‘multitasking’ on a Unix box in college.” “I’ve done my personal development of FlightGear in Linux since day one, but *very* early in the process we had Windows ports, and Mac ports, and SGI ports, and Sun ports, etc.” Today, more than a dozen developers have commit privileges. Olsen told me that “We’ve had literally hundreds of people contribute code, graphics, 3D models, hardware, and all sorts of other stuff over the years. I used to make a sincere attempt to track and log these contributions, but it just became overwhelming and I gave up.” Even though the project has grown, Olsen says that he still contributes code to the project:
|
Once installed, you’ll have a FlightGear root directory somewhere on your system. In Ubuntu, it’s at /usr/share/games/FlightGear, but this may vary depending on the distribution. You’ll need to know where it’s located if you want to do things like tweak the joystick or keyboard bindings, add aircraft, or add scenery. I’ll refer to those directories starting with FlightGear, and leave it to you to figure out where FlightGear lives on your system.
You don’t have to be an experienced pilot in order to enjoy FlightGear, but it certainly helps if you understand the basics, including aircraft nomenclature. At a minimum, you’ll want to know the difference between an aileron, elevator, rudder, flap, and stabilizer. You might also want to peruse this PDF containing a flight school tutorial to help you with the basics.
The FlightGear.org Website has links to other user documentation as well: a FAQ, a manual, cheat sheet, and a wiki.
In addition to those resources, FlightGear users also have a mailing list and a #flightgear channel on irc.flightgear.org for real time assistance. As seems the norm for open source projects in active development, the formal documentation sometimes lags behind the current version of the software, making those last two sources of information even more valuable.
Setting up your joystick
Although you can control FlightGear completely with keyboard and mouse, a joystick is best. I purchased a Saitek Cyborg Graphite USB joystick not long after beginning to use FlightGear and I’ve never regretted spending the money. FlightGear has stock configurations for a number of joysticks from different vendors located in the FlightGear/Input/Joysticks directory. To see if your joystick comes with a pre-built configuration, look in the specific vendor offerings to see if there is a match for the model you have.
Your own particular brand and model joystick may or may not be included as one of the pre-built joystick control files that come with FlightGear. If it is, simply hack the joysticks.xml file in the FlightGear root directory to point at the pre-built file. By default, joysticks.xml contains a line like this:
<js n="0" include="Input/Joysticks/Local/joystick_0.xml"/>
Simply replace the included path to point at your specific joystick vendor and model, like this:
<js n="0" include="Input/Joysticks/Saitek/Cyborg-Gold-3d-USB.xml"/>
If you don’t find a configuration file for your joystick, or if the one you find is not to your liking, FlightGear provides a couple of tools to allow you to build your on configuration. For example, enter js_demo at the command line and you’ll see something like the following:
Joystick test program.
~~~~~~~~~~~~~~~~~~~~~~
Joystick 0: "Cyborg Graphite"
Joystick 1 not detected
Joystick 2 not detected
Joystick 3 not detected
Joystick 4 not detected
Joystick 5 not detected
Joystick 6 not detected
Joystick 7 not detected
+--------------------JS.0----------------------+
| Btns Ax:0 Ax:1 Ax:2 Ax:3 Ax:4                |
+----------------------------------------------+
| 0000 -0.0 -0.1 +0.0 +0.0 +0.0   .    .    .  |
Note that the columns for five axis are numbered from zero to four. As I lean the joystick handle left and right, I can see the value listed under Axis 0 changing. When I bend it forward and back, the same thing happens under Axis 1. The throttle lever on the base of my Cyborg functions as Axis 2, and the cap on top of the joystick as Axis 4. The point being, now I know how each is seen by FlightGear, so I can assign them — from zero to four — the way I want them in the configuration file.
But how are the buttons identified? Press a button and a value appears in the Btns column displays a binary number equivalent to 1, 2, 4, or 8. Number those four values in sequence from zero to three and you have the button’s number for FlightGear. When I squeeze the trigger, for example, the value in the Btns column changes to 0001, so I know that the trigger is button zero. If the value in the Btns column changed to 0010, the equivalent to 2, FlightGear sees the button as button 1.
If all you need to do is hack a pre-existing configuration, you now have all the information you need to do so, simply by changing the axis or button values to match your desires. But if you need to build a joystick file completely from scratch, you’ll need to run fgjs as well.
The fgjs command will take you through a dialogue asking you to assign an axis or button to a long list of operations. You probably won’t have enough axis or buttons to handle them all, so for many of them you’ll have to simply skip them. You do that by pressing a button when asked for an axis, or by moving the joystick on an axis when asked for a button.
The program asks you to confirm each assignment as you go. When it’s finished, it creates a jsX.xml file in the working directory, with the X indicating which joystick it’s for. Copy that file into the FlightGear/Input/Joysticks/Default directory as joystick.xml and you’re all set.
One final word of caution regarding your joystick, if you use one. Don’t blame the joystick or its configuration if your aircraft drifts to left while taking off, or turns to the left while in flight. It’s the realism of the simulator, and it’s more pronounced in propeller-driven craft, like the default Cessna 172 you probably were flying on your maiden flight. I’ve seen this drift explained both as the result of propeller torque or a slip-stream effect, but I don’t know which if either is correct. But it’s not the joystick.
If you don’t have a joystick, you can still fly, using the keyboard and mice bindings given in keyboard.xml and mice.xml in the FlightGear root directory. Hack them if you like.
Page 2: Taking your first flight, and FlightGear screenshots…
First flight
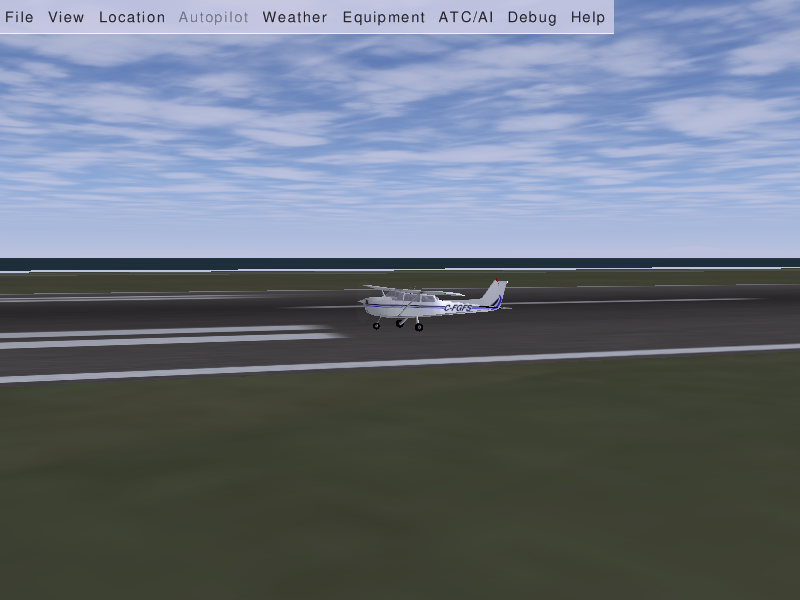
FlightGear has roughly a zillion command-line arguments, but all you need to do to start with the default settings is enter fgfs in a terminal. In a few seconds, you’ll find yourself in a Cessna 172, with the engine running, at the start of runway 28R at San Francisco International Airport. Open the throttle, pull back on the stick as the Cessna gathers speed down the runway, and in no time at all you’re flying, just like the Cessna you see in Figure 1. Don’t be discouraged if you crash. It’s the norm for newbies.
| Figure 1: Taking off at SFO | |
| Figure 2: Candlestick Park | |
| Figure 3: Golden Gate bridge | |
| Figure 4: A-10 Warthog | |
| Figure 5: Passenger jet | |
| Figure 6: Paraglider |
The default view is of the cockpit, and you really can’t see too much of what’s around you and beneath you in that view. Hit the V key and you can cycle through various other views available: from the side, from behind, from the tower, and so on.
Your default aircraft and airport are selected in the preferences.xml file in the FlightGear root directory. It’s easy to change either one. I found that the Cessna 172R was easier to fly, so I edited my preferences file to start off in it, by changing this line:
<aircraft>c172p</aircraft>
To this:
<aircraft>c172r</aircraft>
If you’re like me, though, you’ll be trying so many different aircraft as you learn your way around the simulator that it just makes more sense to specify the plane you’re going to fly at the command line instead in preferences.xml. If you’re Jonesin’ for a Gatling gun, for example, you could fly an A-10 Warthog instead of a Cessna by starting the simulator with fgfs --aircraft=A-10.
To see what aircraft are available to you to fly, start FlightGear with the --show-aircraft option. And if you don’t find what you’re looking for there, search the Website for additional aircraft and download to your heart’s content. I grabbed an archive with 125 aircraft for FlightGear from here, but it may be gone before you grab it. If it is, you can still select the aircraft one at time from here.
After downloading, enter the FlightGear/Aircraft directory, use sudo unzip to decompress the downloaded file. Each plane will have its own subdirectory in the Aircraft directory, and once they do you can specify that craft from the command line. By the way, FlightGear includes parasails, balloons, Soar planes, and more.
Where to fly
The FlightGear Website suggests a few interesting places to fly other than San Francisco, including Death Valley, Idaho, the Dead Sea, and the Grand Canyon. To do so, you need to do two things: specify the airport desired and have the required scenery installed.
By default, the only scenery included with FlightGear is the San Francisco area. But the entire world is available, either through purchase on DVD or by download from the Internet in 10×10 degree (longitude and latitude) chunks. I’ve found the easiest way to grab the chunks I want is by using the graphical download facility. The chunks are more than 100MB, so it might be worthwhile to buy the DVD.
To add the chunks to FlightGear, enter the FlightGear/Scenery directory and enter tar xzf chunkfile.name. The data in the chunk you downloaded will be put in the Objects and Terrain sub-directories, but might still be compressed. That’s fine. Leave them like that and FlightGear will take care of decompressing them as needed.
With the scenery in place, all you need to do is specify the airport’s ICAO (International Civil Aviation Organization) code on the command line, very similarly to how you specify a plane: --airport=KTKI, or whatever the code may be. Some airfields may not be assigned an ICAO code, and FlightGear uses the 3-letter FAA LID (Location ID) code for them. If you’re not sure of what the ICAO or FAA LID code is for an airfield, here’s one way to find it.
Enter the FlightGear/Airports directory and enter gunzip apt.dat.gz. Then use grep to find the airport in the expanded apt.dat file. I wanted to fly along the north shore of Oahu in Hawaii, for example, so I searched for the Dillingham airfield like this:
grep Dillingham apt.dat
1     74 1 0 PDLG Dillingham
1     14 0 0 PHDH Dillingham
I learned PDLG was for an airfield in Alaska, not Hawaii, but PHDH was exactly the field I wanted, so I started FlightGear with fgfs --airport=PHDH and a few minutes later I was Haleiva dreaming and heading towards Waimea Bay.
But remember, FlightGear more than just US scenery, it has global scenery as well. My next airport selection was RPLB, Subic Bay International, in the Philippines. Once I had the right chunk downloaded and installed, I was flying out of Olongapo and up the coast to San Miguel, in Zambales.
Other features
We haven’t even scratched the surface on FlightGear’s capabilities, but it would take a book to cover them all. Multi-player flight, for example, is available for Linux users, so you can fly with your friends. Here is the command line I use to fly an A-10 in multiplay mode:
fgfs --multiplay=out,10,mpserver01.flightgear.org,5000 --multiplay=in,10,192.168.1.151,5000 --callsign=K1GPL --aircraft=A-10
I only had to type that once before I got tired of doing that, so I made an alias for it and saved it in .bashrc. Now I all have to enter is fly-a10.
The IP address in the --multiplay=in option is my desktop address on the LAN. Change it to your own IP address — be sure and use the internal IP address if you’re behind a router — and change the callsign to whatever you like, and you’re there.
You can verify your presence at this page, which shows all the current planes in multiplay mode. To learn more about multiplay mode, read this HOWTO.
FlightGear uses the actual time at whatever location you’re starting from. You can have it use real weather data, too, if you like, by adding --enable-real-weather-fetch to the command line.
You can also use command-line options to “record” and “playback” your FlightGear sessions. Use --generic=file,out,20,flight.out,playback.xml to record a flight, and --generic=file,in,20,flight.out,playback.xml --fdm=external to play it back. During playback, you’ll need to specify the same command-line options for aircraft, time, and location that you used when recording.
FlightGear has lots of new features in CVS that aren’t in the stable version yet. Upcoming releases will bring things like “just-in-time” realtime scenery retrieval and display, a dynamic cockpit view which makes you feel as if you are inside an airplane rather than being the airplane, and more. Just take a look at the announcements section of the FlightGear Website for the past few weeks to see what I mean. As Olsen told me, he has trouble keeping up with everything that’s going on, but it sure is fun.
Conclusion
It’s been a long time since I’ve been as impressed with any open source project as I am with FlightGear. I started playing with it after reading a comment about it on a local LUG mailing list. Prior to that, I hadn’t even been aware that it was available in Ubuntu Dapper.
I tried it then, at version 0.9.9, and liked it. Version 0.9.10-2, which comes with Ubuntu Edgy, has a lot of new features which make it even better. Now I can’t wait to get the features I know are in CVS. If you’ve ever wanted a great flight simulator for your Linux box, you don’t have to wait any longer. It’s here and it’s hot.
Category:
- Games


