
Author: Joe Barr
First, you’ll need a machine to serve as a dedicated NAS box. An old PC will work just fine. All it really needs to have is an Ethernet connection, wired or wireless, and a disk drive. Even a USB key drive or CompactFlash card can be used for storage, but I went with a standard IDE drive. I used my usual test box to house FreeNAS for this review, and it was more than sufficient.
The ISO for version 0.68 is only about 38MB — nowhere near the size of a full Linux distro. I downloaded the file and burned a CD, then was ready to install FreeNAS. The first boot from the CD failed due to an argument between the BIOS and FreeNAS over power management, but after disabling that BIOS feature, I was off and running.
The second boot went quickly, and I was soon looking at the FreeNAS console — all text, mind you, none of that sissy GUI stuff here. Well, not unless you count the webGUI, which serves as the primary interface between user and FreeNAS. More on that later.
The console told me the LAN IP address FreeNAS was using (192.168.1.250) and how it was connected. The connection was shown as “lan -> nve0”, which is not the way you see Ethernet devices described in Linux. My guess is that in BSD-speak, the “nv” stands for an Nvidia driver for the network card, the e stands for Ethernet, and the 0 the device number. Not intuitive, perhaps, but not entirely cryptic, either.
The console offers a number of choices:
- Assign interfaces
- Set LAN IP address
- Reset webGUI password
- Reset to factory defaults
- Reboot
- Ping host
- Install on HD/CF/USB key
- Shell
- PowerOff system
I began by choosing to install FreeNAS on the hard drive. The installer then asked if I wanted to use a single UFS partition on the drive, or two partitions. If you select the first option, FreeNAS will take over the entire drive for itself, and you’ll have to use another drive for storage. The second option, for two partitions, creates both a system partition and a storage partition on the drive. Those are the only choices.
The actual installation took no time at all. I then removed the CD and rebooted from the hard drive. Before proceeding past this point, I recommend that you download the 43-page FreeNAS Setup and User Guide and read it. It’s filled with good things to know about FreeNAS. If you just don’t read documentation, at least download it and have it ready for use when you’re puzzled as to what to do next.
When the system booted, the console appeared, showing the same nine options as it had before. Following the instructions in the guide, I set the name of the Ethernet interface (nve0, as described above; yours will no doubt be different). FreeNAS wants a reboot after that change, so I complied and then continued by setting the IP address. I chose DHCP to handle the address, but it may be wiser to specify a static address so that you can add the FreeNAS box to your /etc/hosts files on the other systems on the LAN.
That done, FreeNAS said I could access the machine via the webGUI, so I turned my back on the console and went back to my regular desktop machine.
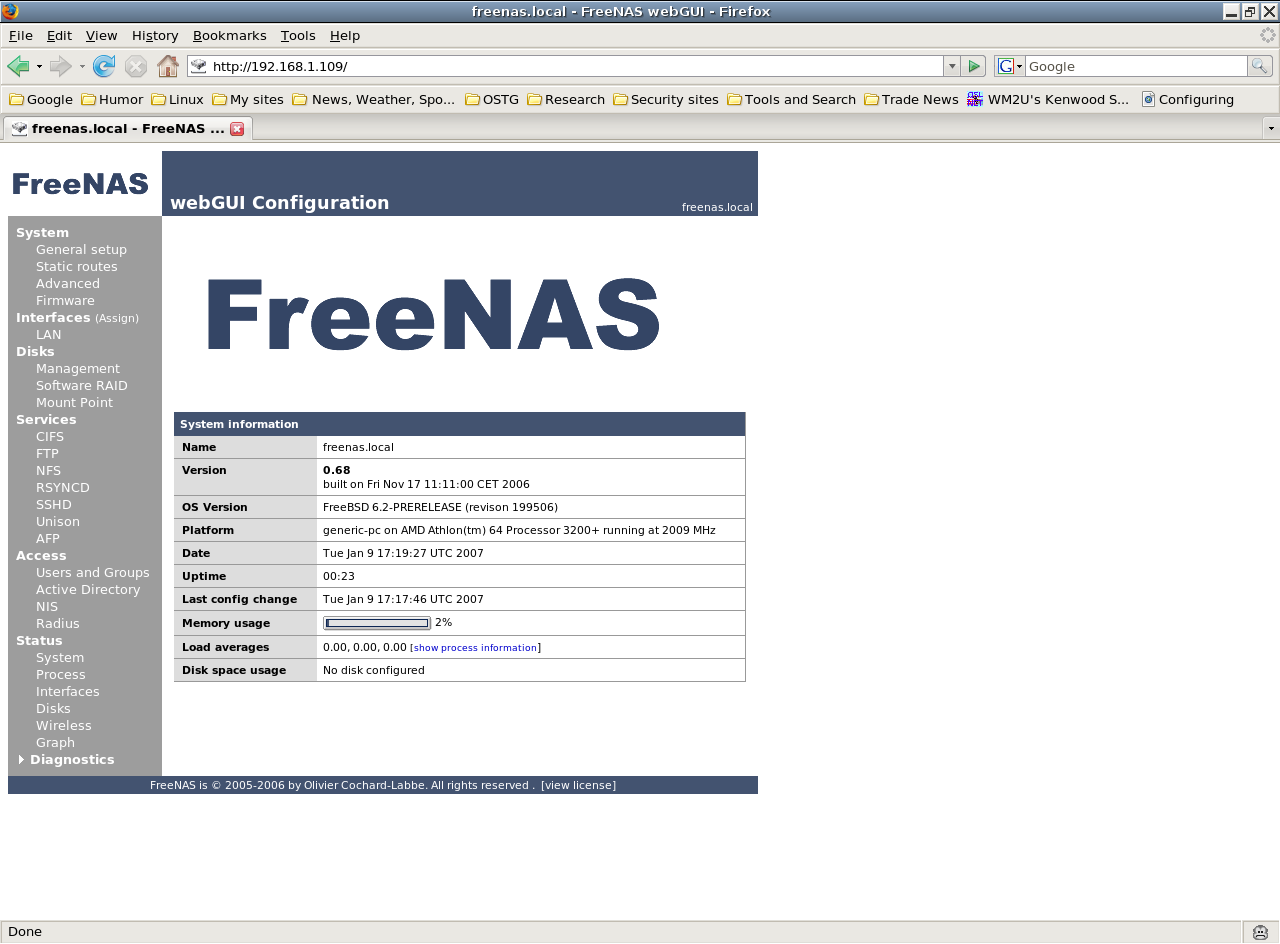
| FreeNAS GUI config |
Still following the installation instructions in the manual, the first order of business at the webGUI was disk management. The installation option I chose, to create two partitions on the drive, took care of the UFS formatting, but I still needed to add the drive and name the mount point.
As you can see in Figure 1, the webGUI is clean and easy to read. The only thing I found peculiar about it was its use of icons to indicate whether you want to add, edit, or delete something. Each icon is a small circle, containing a + sign, or an e, or an x. After first blink, I correlated each of those to the action desired.
To add a drive to be used for storage, I first clicked on Disks -> Management, then clicked on the icon with the plus sign in it. Only one drive was listed as a possibility, so I selected it and — based on the manual — chose UFS.
That done, I set a mount point by first clicking on Disks -> Mount Point, then adding a mount point on the previously added drive. If you chose the two-partition drive during installation, be sure to specify partition 2 on this screen, then give the mount point a name and description, and you’re good to go. Note that when adding the drive and assigning the mount point, you need to click a second time to actually apply the change.
With the disk management a done deal, you need only to add a user and group, and enable the services you need. Click on Access -> Users and Groups, then on the Groups tab. Add a group by giving it a name and description, then add a user by providing a name, password, and group affiliation. I checked the box to enable full shell access as well, so I could more easily poke around on the FreeNAS box to see how things were organized.
Adding services follows the same scheme as adding drives, users, and groups. I selected only FTP, SSH, and rsync, but CIFS (Samba), NFS (Network File System), Unison (File Synchronization), and AFP (Apple Filing Protocol) are also available.
Actually using those three services is straightforward, with the only caveat being that you are not automatically delivered to the proper directory. There are no home directories associated with FreeNAS user accounts, so you need to specify the mount point you set up earlier.
I named my mount point FreeNAS-Data, for example. In order to use FTP to send or retrieve data, I first needed to change to the /mnt/FreeNAS-Data subdirectory. Ditto for rsync.
To try out FreeNAS, I backed up the home directory on my desktop machine. All I needed to do is enter the following at the command line:
rsync -avr /home/warthawg 192.168.1.109:/mnt/FreeNAS-Data
That’s pretty much all it takes in order to use FreeNAS to keep your important data on the LAN safely backed up. It’s easy to use and easy to set up, even for Linux users like me who are not familiar with BSD.
FreeNAS is capable of much more as a LAN backup and storage box than I’ve described here, and even more features are planned. The developers plan to work on a version that includes user authentication and system monitoring.
Category:
- Storage


