
Author: JT Smith
How might you use graphics in your video? Depending on the project, you might want to add a title or credits for your work, or you might display a person’s name and title below their image, or insert a watermark in the video so viewers know where it comes from.
You can also use this feature to obscure part of a picture, such as information on a picture ID, with a black bar, or fuzzy up a screengrab from the video itself in the GIMP, crop it to cover the area you don’t want to show, and insert it into the video.
Using images in Kino
Let’s start with images. Kino accepts images in JPEG, SVG, GIF, TIFF, PNG, and bitmap formats for superimposed graphics. You can get these from any source — just make sure that the image is sized appropriately before you import it into your video, as Kino itself won’t let you resize a graphic. A typical fullscreen (as opposed to widescreen) video in Kino is 720×480; if you wanted to insert a title bar at the bottom of such a video, you’d want to have something that’s wide enough, but not too tall.
Kino does allow for transparency, so if you want a graphic on the screen that’s not fully opaque, you can use a PNG or GIF with transparency. However, I’d recommend using PNG or SVG files because they tend to handle transparency better than GIF.
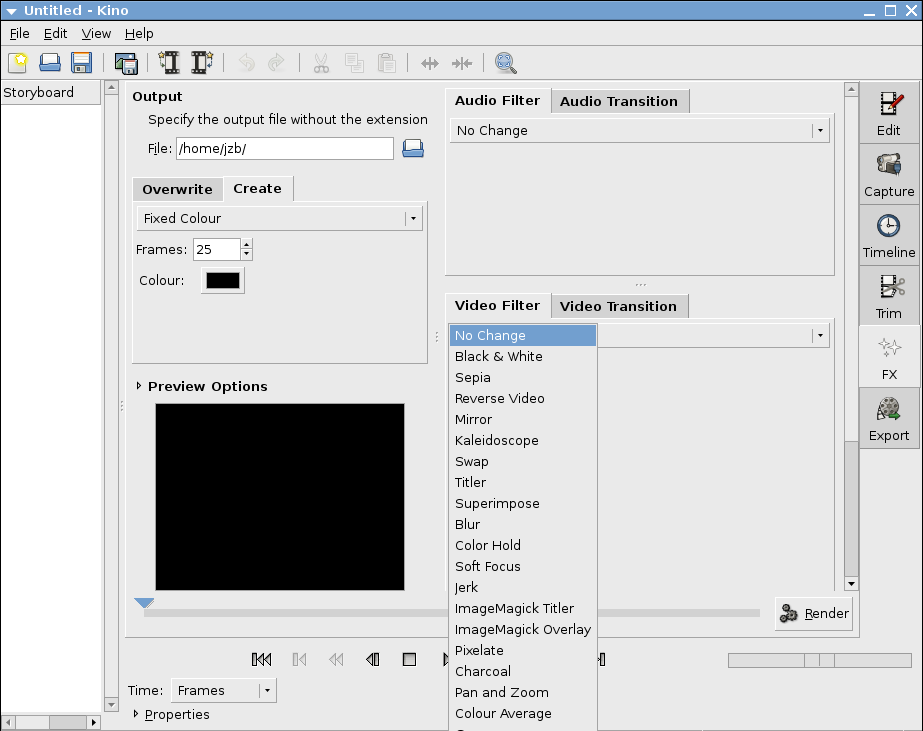
Once you have the graphic you want to use, and perhaps some video to add it to, you can go to the FX tab as shown in Figure 1. You’ll see two sets of tabs on the right side — one for audio, the other for video. The Video Filter tab has several options; in this case you’re going to want to try Superimpose.
|
Figure 1 – click to view |
Once you select Superimpose, you’ll be able to select an image and set up the image’s relative position. When you select an image, you’ll see its placement in the preview area to the left of the Video Filter tab. The odds are that the default position — right smack in the middle of the video — is not going to be what you want.
To adjust the position, click on the small triangle next to Position and Animation, under the Video Filter tab, as shown in Figure 2. Note the Initial Position and Final Position. If you want, the image can be moved from right to left, top to bottom, or one of several other combinations. You can also fine-tune the X and Y offsets for the image if the Initial Position controls don’t put the image exactly where you’d like it.
Once an image is aligned with the video properly, you should choose how many frames it will be displayed on. On the left side, Kino has two tabs — Overwrite and Create. To superimpose an image on existing video, choose Overwrite. Here you can set the first and last frames for the image’s display. If you want to display an image from the beginning to end of a video, choose 0 and the video’s last frame. If you want to display an image for part of the video, set the appropriate entry and exit points. If you want to add multiple images, you’ll have to do it one at a time.
Once you’re set, hit Render. This will take anywhere from a few seconds to several minutes, depending on the speed of your computer and the amount of video you’re working with. If you’re just adding an image to a few seconds of video, it’ll be over in a flash. If you’re adding an image to a couple of hours of video, go get some coffee, call a few friends, and pick up War and Peace, because it will take a while. Even on my high-end workstation, an Athlon X2 4200+ dual core CPU with 4GB of RAM, it can take a few minutes to add a superimposed image to two minutes of video.
|
Figure 2 – click to view |
After you’ve rendered the video with your image, look at the finished product. Like it? Great. If not, you can undo the addition — but Kino has a little weirdness here. For some reason, you can’t undo the rendering operation in the FX tab — you have to switch to the Edit tab before you can undo a change you made in FX.
In addition to superimposing images on video, you can also render video from still images. For example, if you fire up Kino and have no video at all, you can still add images and render video from them. If you wanted to, you could use this feature to make a video slideshow from photos or (if you have a lot of free time) create animated movies by inserting a sequence of images and telling Kino to put them all together.
Inserting titles
While Kino does a good job of superimposing images, its titles are not professional quality. I haven’t been able to coax it into producing titles that look good enough for late-night public access cable, much less any sort of professional project. Added title text tends to look pixelated and blotchy.
If you’re just slipping in credits or a title page, you should whip up the graphics in the GIMP or Inkscape and insert them using the Superimpose FX feature rather than trying to use the Titler feature. However, I’ll discuss the Titler feature briefly just in case it’s of interest — and with any luck it will improve in future versions of Kino.
To add text, go to the Video Filter tab and select Titler from the drop-down menu. Here you’ll be able to choose the font, color, text outline, and background for the text.
In Kino 0.9, which is the most recent stable version in Ubuntu, the way Kino’s interface is set up, you might miss the remainder of the options. You’ll notice a scrollbar to the left of the Video Filter tab. Scroll down, and you’ll see Position and Animation. Click the triangle next to that text, and you’ll see several additional options.
By default, Kino plops the text smack in the middle of the screen. If you want to adjust the position, you can use the offset and position controls to wiggle the text to where you want it. The offset and animation controls work exactly the same as the Superimpose controls. Once you’re happy with the placement, click Render and you’re off to the races.
If you’re really patient, you could use these techniques to add subtitles to videos, though I wouldn’t want to try to add them to more than a few minutes of video this way.
Kino isn’t, by any stretch of the imagination, on par with proprietary video editing packages for other platforms. But for users who want to do video production using Linux and FOSS tools, it’s capable of more than you might think at first glance.


