
Author: Joe Barr
My desktop machine includes three IDE drives and an ATAPI CD-ROM drive. I have Debian installed on hda, SUSE on hdc, and my /home directory on hdd. Backing up directly to CD would be too slow and too cumbersome for me, so the first thing I needed was some new hardware.
In the past I’ve researched tape drives and found that for a decent drive, I would also have to add a SCSI controller. Those two items can be pretty pricey. I opted for a less expensive configuration.
I decided to go with a removable IDE drive, connected via USB. I bought a 3.5-inch hard disk enclosure with USB 2.0 connectivity on eBay. It cost roughly $45, including shipping. With three drives to backup, I needed a large-capacity IDE drive to hold all the data. It turns out I already had one, just waiting for me to use. I raided the stash of goodies I’ve been hoarding to build a killer MythTV box and found a 250GB Hitachi DeskStar — just what the doctor ordered. I got it on sale at Fry’s Electronics a couple of months ago for $189.
I have the mechanical skills of a three-toed sloth, but I still managed to cobble together the drive and the enclosure, neither of which came with directions. Four screws hold the faceplate on the enclosure, and four more hold the drive in place inside. Even I was able to puzzle it out.
The most difficult part was the stiffness of the IDE cable running between the faceplate and the drive. In hindsight, I recommend connecting the power and data cables from the faceplate to the drive before screwing the drive in place inside the enclosure. I also recommend not forgetting to slide the top of the enclosure back in place before reattaching the faceplate.
I connected the USB cable to the enclosure and the PC and powered on. Using the SUSE partitioning tool, I created an ext3 filesystem and formatted it on the Hitachi drive, using the default maximum start and stop cylinders. That worked, but there was a problem. My great big 250GB drive yielded only 32GB.
One of my OSTG cohorts asked if had clipped the drive for 32GB max, but I had done no such thing. All I did was check to see how the drive was strapped out of the box. It was set to Cable Select, which was fine with me, so I left it like that. His question worried me, though, because I had never heard of a 32GB clip thingie before.
I called Hitachi support to find out what was up with that. Their tech support answered quickly. When I explained what was going on, he agreed that it sounded like it was clipped to limit its capacity. This functionality allows these big honkers to be used on old systems which simply cannot see that much space. Without it, the drive would be completely unusable on those machines.
I asked why in the world they would ship 250GB drives configured for a max of 32GB by default, and he denied that they had. He asked where I got the drive, then suggested that Fry’s had “clipped” it for some reason. There are jumper settings to limit the capacity, but my drive had not been jumpered that way. Perhaps Fry’s sold me a returned drive that a customer had “clipped”, then returned the jumpers to their original position. We’ll never know.
The tech told me how it should be jumpered for Cable Select without reducing capacity.
I opened the USB enclosure, pulled out the drive, and found it was already jumpered as he described. Undaunted, I pressed on.
On the Hitachi support page for the drive, I found a downloadable tool which would allow me to regain the lost capacity. A couple of hours later, after removing a floppy drive from another system and installing it on my desktop box, I was ready to copy the image I downloaded from Hitachi to a diskette. Remember the dd command? It still works.
I had to try about 20 diskettes — old diskettes, very old — before I found one I could copy the image to and then actually boot from. But finally it worked. Unfortunately, the Hitachi software could not do its magic while the drive was masquerading as a SCSI beast inside the USB enclosure.
Out came my hda drive in the desktop, the one with Debian on it, and in went the Hitachi. Once I booted from the diskette in that arrangement, it took only about 2 minutes to reset the drive’s full capacity. Out came the Hitachi, back in went the original, and back into the enclosure went the Hitachi. I quickly created a 250GB partition on it and formatted it as ext3 using the SUSE partition tool. Finally, the hardware half of the equation was ready.
The software
| Click to enlarge |
There are a lot of choices for Linux backups listed on Freshmeat.net. I wanted something easier to use than a Perl script, and I didn’t want to shell out the big bucks for a proprietary solution. What I found was a very nice KDE app called KDar. Its whole function in life seems to be making Dar (short for disk archive, similar to tar) user-friendly. I fell in love with it at once.
KDar has a lot going for it. You can select the data to be included or excluded by directory or file name, you can do differential backups, choose the type of compression you want to use, if any, and also slice the archive into handy-sized chunks to fit your backup media. A known bug in the current version (1.3.1) prevents the restoration of individual files or directories from an archive at present, but that may be fixed in the next release.
Installation
The first step is to install dar. I grabbed the latest tarball (2.1.5) from the project page and compiled it. The configure script told me I needed to install zlib before building dar, so I did just that. You may or may not need to do the same, or you might need to install other packages, based on what is currently on your system. It took a long five minutes to make dar and finish its installation.
Next came KDar itself, which demanded that I install the development packages for XFree-86, Qt 3, and KDE 3 before it would compile. Once those requirements were met, I was off to the races. Be sure to use the --disable-debug option when you configure the KDar build. If you don’t, performance will suffer and you’ll be scrolling lines in the console for an hour or longer after creating a good-sized archive.
Next: The actual backup
Backing up isn’t hard to do, when you have KDar to do it for you. I began by creating an archive for my Debian drive.
KDar asked me to name the archive, then to specify the top-level directory containing the data you want to backup. From SUSE, Debian’s / partition looks like /debian, so that’s what I entered.
Next I was asked if this was a differential backup. If it had been, I would have needed to check that box and enter the name of the last archive created. But it wasn’t, so I just moved on to the next page.
The first item to enter there was the directory name where the archive would be put. I entered /usbdrive, then selected basic logging. I skipped the slicing option, since I wouldn’t be creating CDs from the archive. I wanted more speed and felt like I was rich with space on the backup, so I selected no compression rather than choosing to use bzip2 or gzip. Since there were no files or directories I wanted to exclude, I ignored those options as well.
| Click to enlarge |
Prior to starting the archive process KDar gives you the option of saving the archive profile just created, so you don’t have to enter it all over again the next time you run the same backup. Also, in a nice touch, you can export the dar commands and save them as well. I can hear cron calling me now. “Oh Joe, don’t you think it’s time we backed things up again?” Now I can answer that call with a dar script.
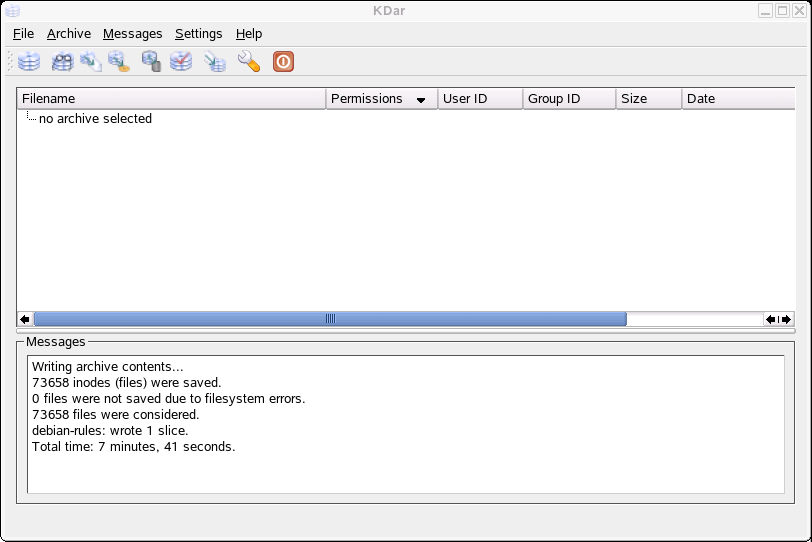
It took about 6 or 7 minutes to backup the first drive. The SUSE drive took a little longer. Not only is it larger, but there were directories and files I wanted to bypass, so filtering ate some cycles. I consider those to be pretty fast backups, so my excuses for not backing up on a regular basis are dwindling to nothing. That’s probably a good thing.
Probable user error
I lost the first two archives I created, and I’m still not positive how I did it. Most likely, I unplugged or turned off the drive before unmounting it. I love the convenience of the USB drives, but I’m still not sure just how solid the technology is on Linux.
For one thing, my Hitachi drive is seen as a SCSI device, which it’s most definitely not. That situation reminded me of an interview with Linus Torvalds a couple of years ago, when he railed about how silly it was to refer to CD-ROM drives as being SCSI. I wrote Linus and asked him if this were more of the same. He clarified things a bit when he replied:
It’s not pure IDE, it’s a USB interface, and the USB storage stuff uses
the generic “SCSI” layer.That’s actually pretty misnamed these days, since it’s not so much a
generic SCSI layer any more, as just a generic mid-level block device
layer, and SATA disks, in addition to USB, also uses it.
I had also bugged KDar’s author, Jonathan Burchill, about another matter I had brought on myself, when I forgot that I had powered off the USB drive. I still got a directory listing when I asked for one on /usbdrive, and that was enough to fool me into thinking it and the computer were actually talking. Silly me.
I asked Torvalds about that as well, going so far as to say it reminded me of the old days when I would change diskettes and still get the directory from the old previous one. I probably shouldn’t squawked about it using that particular example. He got on me pretty quick for that, saying:
That implies that you didn’t unmount it before powering it down, which is
bad (it’s like removing a floppy without unmounting it). If you really
want to use it that way, then try supermount or some of the other
“on-the-fly” mount utilities.Or do you mean that the disk just powered down on its own, and is just
sleeping? If so, everything is fine, and it should come right back up when
it’s needed. “It’s not dead, it’s just sleeping.”
In closing, I want to thank Burchill for the great software and for his assistance during my review. He tells me that it’s possible that a new release — version 3.0 — will be out within the next few weeks. He wrote:
Incidentally, KDar is at release 1.3.1, but an upcoming release (3.0.0) is
based on major changes to the archiving library, libdar. This version
will support a “cancel operation” feature, and a new progress dialog for
archive creation. CVS works currently if you want to have a preview of
what’s to come.
In the end, decent hardware and good software conspired to overcome user errors, and the software is only going to get better. So go ahead, laugh at me. I’ve got a well and recently backed-up system. Do you?


