
Author: JT Smith
OpenOffice.org Presenter
“But you can’t do PowerPoint in Linux!” is often given as a reason not to give up Windows and its problems. This is technically a true statement, since “PowerPoint” is a Microsoft trademark, but you can certainly do slide presentations in Linux using OpenOffice.org Presenter. You can also use OOo to view and edit PowerPoint slides — and even save presentations you create with OOo in PowerPoint format so Windows-using associates can play them back on their machines.
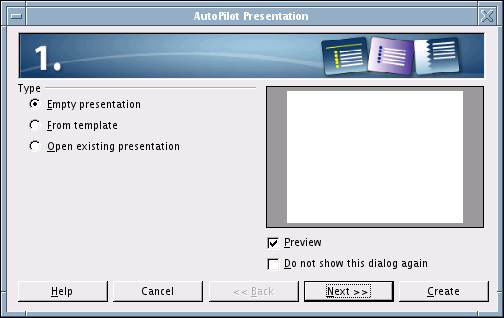
| Autopilot Presentation — click to enlarge |
The first step in creating a presentation with OOo is to click on the “seagull” icon in the control panel at the bottom of your computer screen. From the menu this brings up, choose “Impress.” That gives you a utility that guides you through the process of creating a (hopefully) impressive presentation.
There are “Autopilots” for all OOo functions; esentially templates that take most of the work out of formatting a document, spreadsheet or presentation. Most people we’ve watched creating documents don’t use the Autopilot function unless they’ve created their own custom document template, a topic covered quite well in the “Help” index mentioned earlier, but the Autopilot is helpful for graphically-challenged folks (like this author) who need to create slides from time to time.
| Modify Slide — click to enlarge |
This is another moment when clicking on things to see what happens is easier than reading about what to click. If you don’t like a choice you’ve made, click “Back” and make a different one. You can always change your slides later, anyway, so a mistake here is not crucial. In any case, after a few clicks you’ll come to a screen that gives you a number of slide layout choices:
Talented artists can start with a blank screen and create their own; the rest of us are probably better off — especially at first — using some of the built-in layout options. As you can see, there are plenty of them.
So we chose one, and you can see that it has simple instructions on it. To put in our own words, we click where it says “Click” and those words disappear so we can type in our own:
We can add more bullet points without thinking; a new one comes up every time we hit our “Enter”‘ key, until our slide looks like this:
It’s time to save this file and start making our next slide. We save our presentation the same way we save any other work we’ve done: Either with “Ctrl-S” or by clicking the “File” selection in the top left-hand corner of our screen and selecting “Save” from the menu. We can choose a file format, but for the moment it’s best to use the default “.sxi” format, this is only our first slide, and we’re going to make more.
We start our next slide by looking down at the bottom left of the slide we’ve just made. We see a little tab that says “Slide 1” and click to its right.
| That gives us Slide 2, but we don’t need to use the same layout. |
By clicking on the “Slide 2” Tab with our right mouse button, we bring up the same template selections we had earlier, and we can choose a new one. Maybe, since we’ve decided we’d rather go sailing, we’ll choose a blank slide and fill it with a nice picture of a sailboat. We insert, place, and size the image exactly the same way we did in a “Writer” document, and we get a slide that looks like this:
| Text Dialog Box — click to enlarge |
| We can add text over the image by clicking on the “T” to the left of our slide. |
That will put a blinking black cursor right in the middle of our picture, but if we type a word or two, then right-click on one of the words and click “Text” on the menu that gives us, we get a new dialog box that lets us put the text where we want it — and do other things like animate it if we’re so inclined.
With text added, our number two slide now looks like this:
We can change text color, size, and general appearance by clicking on our friend the “Text” icon, then highlighting our text by holding the left mouse button down while we pass our cursor over it, then picking text changes from the row of buttons at the top edge of our working window:
We have many text options we can choose. Again, click around and try things. You can always do “Ctrl-Z”‘ or select “Undo” from the “Edit” menu if you don’t like your last round of changes. Nothing is permanent until you do “Ctrl-S” or use the “File” menu to do a “Save” or “Save As” — and even then, you can open the file later and make everything different if you have a sudden inspiration while you’re out sailing.
You can now make all the slides you want by repeating the above steps. After you get a few simple presentations under your belt, experiment with fancier ones. OOo will do all kinds of special effects, including animated transitions between slides. The sky and your imagination are the only limits.


