
Author: Nathan Willis
You can download version 1.1 of GMIC from its project page at University College London (UCL). GMIC is just one of a handful of software projects developed by UCL’s Centre for Advanced Spatial Analysis. The GMIC package is licensed under the LGPL, although you have to fill in a demographic survey form in order to get the download link. GMIC requires Java 1.4.2 or later.
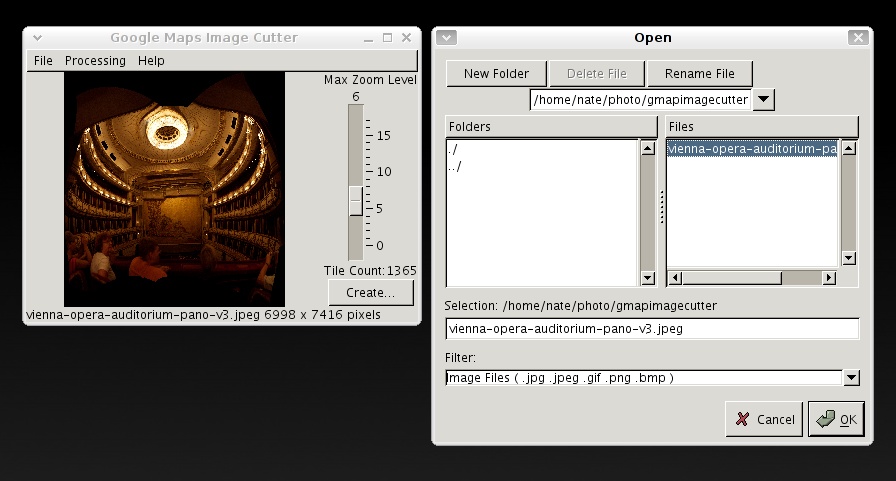
| GMIC in action. Click to enlarge. |
The package contains a Java .jar file, a shell script wrapper, and a readme.txt file with instructions for use. Usage is trivial, though — all you do is launch the application with the shell script, open up the image file that you want to tile, and click the Create button.
GMIC will create a fully “zoomed out” view of your image at 256×256 pixels — the size of a single tile in Google Maps. And it will make 256×256 tiles of the full resolution image to serve as the fully “zoomed in” view. It automatically calculates how many zoom steps there are between the two.
Each zoom represents a 4x magnification factor, meaning four times as many tiles must be creates for every successive zoom level. Thus four zoom levels (say for a 2048×2048 image) requires 1 + 4 + 16 + 64 = 85 tiles. You can force GMIC to make extra zoom levels by adjusting the slider on the right side of the preview window, blowing up the original image beyond its original size, but of course you don’t gain additional quality.
When you click Create, GMIC renders 256×256 tile sets for the maximum, the minimum, and each intermediate zoom level. All of the images are saved inside a new folder named after the original image, and a similarly-named HTML file is created containing the necessary Google Maps code. You can open it right inside any browser, and zoom and pan your way around the image at will.
GMIC is fast; in my first test it generated 1,365 tiles from a 6998×7416 image in less than 20 seconds. Compared to the time it takes Hugin to remap, stitch, and blend the original, that’s nothing.
Web it up
You can view Google Maps of your images from your hard disk as-is, but in order to publish them on your Web site, you must use a Google Maps API key. You can sign up for a free Google Maps API key on the Google Web site, as long as you have an active Google account.
| Image zoomed in to 100 percent. Click to enlarge. |
The terms of service dictate that you not charge visitors to use the Google Maps you create, so don’t get any ideas about striking it rich. API keys are also limited in the number of geocode requests available per day — but GMIC does not use the geocoder, so there is no need to worry.
As the signup page indicates, Google has very particular rules about the URLs associated with each Google Maps API key, so be sure to them read carefully. In short, you can associate an API key with a domain name (such as example.org), or a particular host name (such as www.example.org), or even a directory (such as www.example.org/blog), but you need to be as broad as possible. If you sign up with the URL example.org, both www.example.org and pictures.example.org are OK, but if you sign up with www.example.org, pictures.example.org won’t work.
Once you have your API key, copy and paste it into the HTML file generated by GMIC. It goes inside the first >script< tag, replacing the word PUTAPIKEYHERE in the src element.
With the API key in place, you can upload the directory of tile images and the HTML to your Web server. Voilà: you have shared your creation with the world.
GMIC’s HTML pages are extremely bare-bones: just the image and the Google Maps controls. For a basic Web site, you can cut the relevant parts out and paste them inside other HTML. But if you want to embed an GMIC image into a blog or content management system, be forewarned that you may be looking at some work.
In WordPress, for instance, it is difficult to embed JavaScript inside a single post. The WordPress documentation has an extensive write-up on working with JavaScript, but if you can get away with putting the GMIC image on a separate page, do it. It is less hassle, and you get the entire browser window’s real estate in which to wow visitors with your image.
The last hurdle for the panoramic photo creator is sharing the image in some meaningful way. There are non-free viewers like QuickTime VR, and various Java applets, but harnessing the Google Maps API is so much simpler — it works on any platform, it doesn’t demand any special client-side plugins, and its controls are intuitive.
But don’t think that GMIC is only useful for sharing panoramas. Any situation where you want to publish an extremely large image online can take advantage of the Google Maps viewer — the larger the image, the more bandwidth you save by having it broken up into small tiles that are only served up as needed. Whether it is a panorama, a large map, or a high-res diagram, Google Maps Image Cutter makes putting it on the Web a snap.


