Author: Kurt Edelbrock
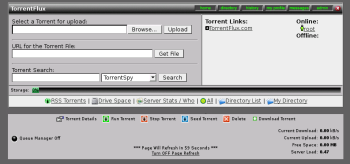
TorrentFlux is a BitTorrent client that runs on top of a server running Apache, MySQL, and PHP. It extends the functionality of traditional clients by operating almost entirely through a Web browser interface. It uses the BitTornado client in the background to manage the queuing, downloading, and seeding of torrent files. You can run TorrentFlux on your home machine and access it through a folder on a Web server. You can also install it on an external host to increase bandwidth and transfer speeds.
BitTorrent is a peer-to-peer file sharing protocol that allows users to transfer large files without a central distributor. Users download files in small pieces from a variety of sources scattered across the Internet. BitTorrent is especially popular for the distribution of Linux CD and DVD images, which can range in size from 700GB to as large as 4GB for DVD images. BitTorrent relies on users ‘seeding’ their files after they finish downloading them — that is, refraining from closing their client or deleting the data to allow other users to download portions of the file from them, which increases transfer rates across the board.
TorrentFlux is a persistent BitTorrent client — that is, if your Apache service is active, TorrentFlux will be active as well. This allows you to seed files without explicitly remembering to open a BitTorrent client, which is helpful if you use torrent file services that require a high share ratio — the amount uploaded divided by the amount downloaded — to use the tracker.
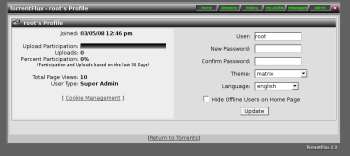
If your server is accessible to the outside world, you can allow other users to use TorrentFlux to download files by creating a username and password for them. This multiuser support is made even better through a variety of features, including file queuing and active download limitations. File queuing controls the order in which torrent files are downloaded, creating a first-come-first-served system for your users. You can also limit the number of active downloads per user in order to save bandwidth and maintain acceptable transfer speeds, and to stop specific users from hogging the server. You create, edit, and delete users through an easy-to-use administrative panel. You can also grant administrative status to multiple users.
You can add torrent files by typing in a URL, browsing for the file on your hard drive, or using the built-in search feature. Search can be expanded to include other Web sites and trackers by adding modules from the developer Web site. Also, users have the option of adding RSS feeds — lists of torrents on a certain topic, keyword, or genre — in order to quickly access sequential files and download updates. The interface is basic HTML, and you can use a variety of included stylesheets and images to change the theme or create your own.
Because TorrentFlux is flexible and offers myriad options, its logging system is essential to managing the server and keeping tabs on users. There are detailed logs for the server, as well as activity logs that record which users have been using the server and what they have been uploading and downloading. This is essential for administrators who worry about the potential for copyright violations.
You can easily retrieve files from the Web server via a browser using the built-in file explorer. Navigate to the files and folders you want, download them directly, or transfer them as a compressed .tar or .zip file. More advanced users can retrieve data through a protocol like FTP or SCP, which is especially useful for those who use remote hosting.
If users need to contact each other, they can send private messages to each other through the TorrentFlux interface.
Installation directions
To install TorrentFlux, you need to have Apache, MySQL, and PHP installed and configured. If you don’t have them already, you can get them all in Ubuntu by typing sudo tasksel install lamp-server; users of other distributions can use their package management systems., or you can download TorrentFlux by going to the developer site and selecting the .tar.gz file, or run wget http://www.torrentflux.com/torrentflux_2.3.tar.gz at the command prompt. Then navigate to the folder where the .tar.gz file resides, extract it, and copy it to the HTML folder for your Apache installation:
tar -zxvf torrentflux.tar.gz
mv torrentflux /var/www/torrentflux
Replace /var/www/torrentflux with the path to your HTML folder if it differs from this default. Next, create the MySQL database where TorrentFlux will keep all of your data. You can create a database named ‘torrentflux’ and dump in the SQL with phpMyAdmin, or you can execute the following from a command line (you need to do this from the Apache HTML directory i.e. /var/www/torrentflux):
mysqladmin create torrentflux
mysql torrentflux < sql/mysql_torrentflux.sql
Edit the config.php file and insert your MySQL information in the section labeled ‘YOUR DATABASE CONNECTION INFORMATION.’ You’ll need the address of your Web server (generally ‘localhost’), the name of the database (‘torrentflux’ if you followed the directions above), your username, and your password. When you get that taken care of, point your browser to the TorrentFlux directory (http://localhost/torrentflux) and you should be greeted by a login screen. Create your administrator account, and then you’re on your way to having an incredibly useful and powerful BitTorrent client.
Categories:
- Internet & WWW
- Graphics & Multimedia


