I have to admit I am an email junkie. I rely on my email client for keeping up with my work as well as my personal life. From my email client I require speed, power, and flexibility. When you think about email in Linux you think of three main players: Thunderbird, Evolution, and KMail. But there is a fourth player in the game, one that is as powerful, faster, and as user-friendly as all of the competition. That client? Claws Mail.
Claws Mail started out as the bleeding-edge version of the Slypheed email client. After a brief period Claws Mail evolved into an extension of Slypheed and finally became its own entity. Claws Mail is based on GTK+ and will run in nearly any Linux desktop.
Claws Mail has plenty of features:
- Multiple account support.
- Threaded email display.
- Powerful filtering tools.
- Mime attachment support.
- Usenet support.
- NNTP support.
- GnuPG support.
- Lables.
- Multiple MH folder support.
- Mbox import/export.
- Plugin support
- …and much more.
But why would you want to switch from your current email client to Claws Mail? Here is a short list of reasons to make the switch:
- Speed: Of the main Linux email clients Claws Mail is the fastest in all categories.
- Customization.
- Power: If you want serious configuration options you need to look away from Thunderbird and Evolution and adopt Claws Mail.
- Flexibility: Claws Mail offers both MH and mbox support. Instead of being limited to the slower, outdated mbox format, Claws Mail also supports the faster, more reliable MH mailbox format.
- Reliability: If you’ve ever had to do any archiving of email folders you know that some email clients don’t handle this well. Claws Mail has specific features that handle folder archiving.
- Searching: The Claws Mail search feature is far more powerful than either Thunderbird or Evolution. Not only can you search email, you can search (and recursively search) folders.
So now that your interest is piqued, let’s take a look at installing and using Claws Mail.
Getting and Installing
Claws Mail is most likely in your distribution’s repository so installation is a snap. You can install Claws Mail in one of two ways: Command line or using your distribution’s Add/Remove Software utility. Let’s take a look at both methods.
Command Line Installation
The first method of installation only requires a single command. Here are the steps.
- Open up a terminal window.
- If you are using a Fedora or another distribution that requires root access for installation su to the root user (using su command and giving the root user’s password.)
- For rpm-based distributions issue the command yum install claws-mail and for deb-based distributions issue the command sudo apt-get install claws-mail (You will have to enter your user password to continue).
- If there are any dependencies to approve, do so by clicking ‘y’ (no quotes).
- If necessary click ‘y’ (no quotes) to approve the installation of Claws Mail.
GUI Installation
If you tend to lean toward the GUI install tools, the installation of Claws Mail is simple.
- Open up your Add/Remove Software utility (such as Synaptic or gpk-application).
- Search for ‘claws-mail’ (no quotes).
- Select the resulting Claws Mail entry.
- Click Apply to install.
That’s it. You’re done. Claws Mail is installed.
First Run and Basic Configuration
When you first run Claws Mail (You will find the entry for Claws Mail in the Internet menu in the GNOME Applications menu) you will have to walk through a very user-friendly Account Wizard. This wizard is typical fare for setting up an email account. You should have zero issue with this.
Once you have finished up the Account Wizard Claws Mail will start up and you are ready to start checking your email.
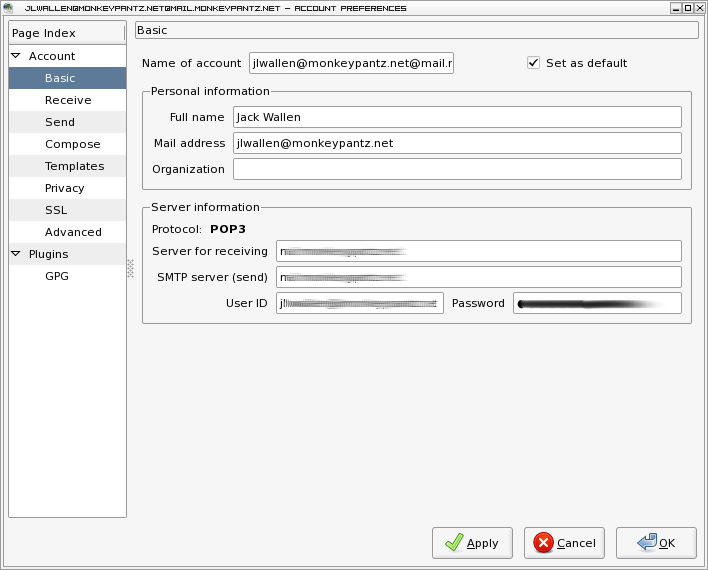
 Let’s take a look at the basic configuration options with Claws Mail. If you go to the Configuration menu you will see a number of entries. You can further configure your email account by click the “Preferences for current account…” entry. This window (see Figure 1) allows you to configure more advanced options than the Account Wizard allows.
Some of the options you will find are:
- Sending/Receiving options: Secure authentication, receiving size limits, remove message from server, and more.
- Composing options: Signature, auto-set addresses, spell check dictionaries.
- Templates: Configure templates for sending, replying, and forwarding (we’ll examine this more closely in a moment).
- Privacy: Set the GPG options for this account.
- SSL: Configure SSL use and certificates.
- Advanced: Default ports and folders.
- Plugins: Any plugins you have enabled that are account specific (such as GPG).
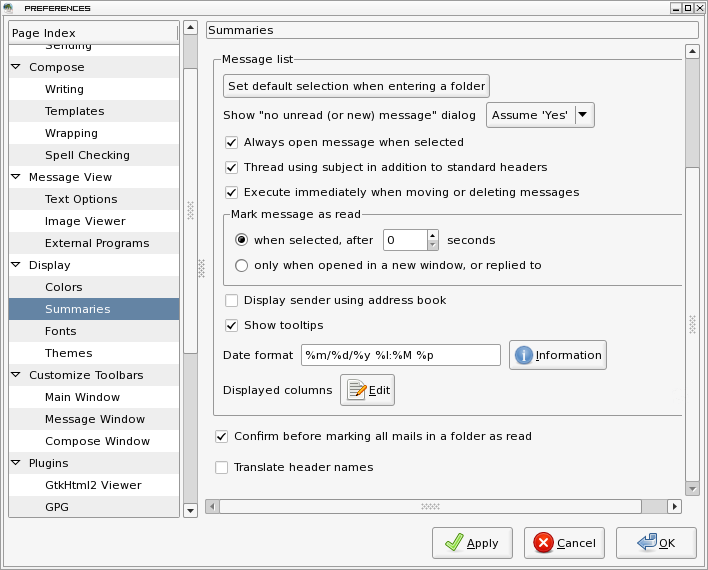
 In that same menu you will find the Preferences entry. This entry is for global preferences. In other words, anything you configure in here will effect all of the accounts you have within Claws Mail. Figure 2 shows the options available in the global Preferences window. In this window you will find a good deal of possible configuration options. This is where the bulk of your configuration will take place.  Much of this configuration is self-explanatory. Some of it might elude you.
Let’s take a look at a few of the configuration options that might not make sense or be easily found at first glance.
Summaries
In this section there are a couple of options to take care of. One of the first you will want to change is the date. By default Claws Mail uses a more European date format (YYYY/MM/DD). If you grew up in the United States this format is a bit tough to get used to. To change this click on the Display section and then on the Summaries sub-section. Within the Summaries you will need to scroll down where you will see the Date format field. The format is as such:
- %a – Abbreviated weekday
- %A – Full weekday name
- %B – Full month name
- %c – Preferred date and time for locale.
- %C – Century number.
- %d – Day of the month.
- %H – The hour using 24 hour clock.
- %I – The hour using 12 hour clock.
- %j – Day of the year.
- %m – The month.
- %M – The minute.
- %p – AM or PM.
- %S – Seconds.
- %w – Day of the week.
- %x – Preferred date for locale.
- %y – Last two digits of the year
- %Y – Full year.
- %Z – Time zone
Obviously you could configure some fairly complex date/time to be displayed. My date/time of choice is simply:
%m/%d/%y %I:%M%p
which will appear like:
07/17/09 3:36
Of course the above configuration is not critical to using Claws Mail, but it will make knowing when an email arrived a bit easier.
Templates
 This is one of the configuration options that perfectly illustrates how Claws Mail will suit power users as well as new users. What the templates feature does is allow you to create templates for various actions (Reply, Forward, Compose) that can make your life easier as well as make your emails far more easy to follow for readers. If you go back to the “Preferences for current account…” window click on the Templates entry (see Figure 3). In this window you will see three tabs: Compose, Reply, and Forward. Each window creates a template for each respective action. Say you want to pre-format every reply so that the reply includes the original senders name, the quoted text of the original email, and your full name. To accomplish this you would use some pre-formatted strings. The steps to creating a template are simple:
- Decide what action you want to create a template for.
- Click on that actions tab and then click the “Use template…” check box for that action.
- Configure your quotation mark should you want to use one (the default is “>” – no quotes).
- Create your template.
Click OK
In Figure 3 you can see a reply template set up so that each reply would look like:
in  a recent message ORIGINAL_SENDER said something similar to:
>>QUOTED_TEXT
to this ACCOUNT_USER_FULL_NAME says:
REPLY
Where ORIGINAL_SENDER is the full name of the original sender of the email.
QUOTED_TEXT is the text quoted from the original email (each line will begin with the “>>” string (no quotes).
ACCOUNT_USER_FULL_NAME is the full name of the person sending the reply (in this case, me).
REPLY is the text of the reply.
There are a lot of strings you can use. Some of them include:
- %d – Date
- %A – Email address of sender
- %N – Full name of sender
- %s – Subject
- %Q – Quoted message body
- %m – Message body without signature.
- %X – Cursor position.
- n – New line
The Cursor Position tag is an interesting one. With this you can dictate where you will begin typing your reply. This means you can place pre-formatted text after your reply without having to manually place your cursor. So if you wanted something like:
To this message from ORIGINAL_SENDER on TODAY’S_DATE
QUOTED_MESSAGE
SENDER says:
BEGIN_TYPING_HERE
Your thoughts?
A template for this would look something like:
To this message from %N on %dn
%Q
n
%af says:n
%X
n
Your thoughts?
You can get much more complex with this system and include regular expressions and more. From within this window click the Information button to learn about all the available strings you can use.
Final Thoughts
We have only scratched the surface of the power that is Claws Mail. Install this application and see for yourself how powerful and user-friendly an email client can be.


