
Author: Cory Buford
In my job as a systems engineer, I have handled various storage implementations for our enterprise clients. These may be in the form of direct-attached storage (DAS), network-attached storage (NAS), storage area network (SAN), or Internet Small Computer System Interface (iSCSI) systems. In these implementations, clients generally use proprietary storage products from vendors such as EMC, Dell, Hewlett-Packard, and EqualLogic. Many of these devices work just like ordinary servers with multiple hard disks and an operating system. Some use Unix and Linux as base operating systems, so I began to explore the possibility of using that kind of operating system on ordinary servers to turn them into storage boxes. I found Openfiler, which supports most storage protocols and can save you $5,000 or more by providing enterprise-level storage absolutely free for any box that meets the minimum requirements.
Openfiler is a CentOS- and rPath-based network operating system developed by Xinit Systems in 2003. It is designed to convert x86-64 systems into a complete NAS or SAN supporting up to 60TB. With Openfiler’s Web-based management system, you can easily create and manage storage systems using protocols such as Network File System (NFS) 3, SMB/CIFS (Server Message Block/Common Internet File System), Web-based Distributed Authoring and Versioning (WebDAV), HTTP/ 1.1, File Transfer Protocol (FTP), and iSCSI. You can also configure storage using Redundant Array of Inexpensive Disks (RAID) levels such as 0, 1, 5, 6, and 10. Openfiler can even be integrated with authentication mechanisms such as Lightweight Directory Access Protocol (LDAP), Active Directory, Network Information Service (NIS), and Hesiod for secure storage access.
Like other enterprise storage systems, Openfiler provides snapshots for easy storage recovery. However, it also offers one feature not normally seen on even proprietary storage — support for uninterruptible power supply (UPS) integration. Thus, Openfiler provides the same functionality, performance, and availability as proprietary storage, without the high cost.
Openfiler’s minimum system requirements are a 1GHz processor, 512MB of RAM, 1GB of disk space for its operating system (OS), and an Ethernet card. For better performance, a 1.6GHz processor, 1GB of RAM, 2GB of OS disk space, Gigabit Ethernet, and a RAID controller are recommended. Of course, you must also include the disks that will be used as storage. I recommend at least a RAID 5 configuration, either hardware or software, on storage systems, so a minimum of three hard disks would be necessary. With the price of a 1TB Serial Advanced Technology Attachment (SATA) hard disk having fallen to less than $200 nowadays, a three-disk RAID 5 configuration is a good option. You can get a decent four-port SATA RAID controller with RAID 5 support for a little more than $100. If you plan to use a Fibre Channel host bus adapter (HBA), check the hardware compatibility list first.
You can download the Openfiler ISO CD image or, if you prefer, the VMware appliance, from the developer’s site. You can find further details on both bare-metal and virtualization installation on Openfiler’s system requirements page.
Installation

Openfiler installation is straightforward and just like a Red Hat Enterprise Linux (RHEL) or CentOS installation. However, make sure you manually configure the hard disk partition when it comes to that portion of the process. If you let the installer configure the hard disk partition, it will distribute the filesystems if multiple disks are available. If you plan to put Openfiler on just one of the disks and let the other local disks be assigned as storage volumes, you must manually configure the partitions. Just enter the necessary information, such as root password, time zone, and so forth. It is also a good idea to assign Openfiler a static IP address during installation rather than a dynamic address so you can easily access the Web-based management after installation.
After you enter all the necessary information, Openfiler will proceed with the installation without requiring you to configure or choose packages. The test system I used for this article was an Athlon X2 4400 dual-core system with 2GB of memory and three 250GB SATA disks. Openfiler itself runs on a VMware Workstation virtual machine with three 6GB virtual hard disks. Although this scenario precludes hardware RAID, I configured two of the virtual disks to use a software RAID 1 setup.
Openfiler configuration and management

To access Openfiler’s Web-based management, you can use any browser, and the format “https://hostname:446.” As you can see, Openfiler uses a Secure Sockets Layer (SSL) session and port 446. You will be presented with a login screen where you will need to use the default username of “openfiler” and default password of “password.” You should change the default administrator username and password in the top of the Web GUI, where the Systems menu is listed, before you create the network storage.
To create storage volumes, first go to the Volumes tab. Since the disks are not yet configured, configure them by clicking Block Devices. Here, you can select the physical disk, designated on my system by sda, sdb, and sdc. I am using sdb and sdc, so I click on them and configure. A disk can be a physical disk or an array member. Since I plan to use software RAID 1, I select the “member of an array” option.
Once both sdb and sdc are set as array members, you can proceed to software RAID configuration. You can choose RAID 0, 1, 5, 6, or 10. Since there are only two disks, I use RAID 1, and I check sdb and sdc to be members. If you have spare disks, you can also set them as “spare” rather than “member.” Once you’ve finished the configuration, just wait for the RAID group to be 100 percent synchronized.
In the Volumes section, go to the menu options on the right and select the Add Volume option, which allows you to add created volumes, and select the newly created RAID 1 to create a logical volume. When creating a logical volume, you can choose XFS, ext3, and iSCSI filesystems. Since I want to test SMB, WebDAV (NAS), and iSCSI (SAN), I created two logical volumes: a 1GB XFS volume for SMB and WebDAV, and a 2GB iSCSI volume. Note that you cannot create shares for iSCSI volumes — only for XFS or ext3 volumes.
Once the logical volume is created, you can create SMB and WebDAV shares. Go to the Shares tab, choose the logical volume you created, and create a shared folder on it. You can then share that folder using SMB, NFS, WebDAV, and rsync. Before sharing the folder using one of those protocols, make sure its corresponding service is enabled under the Services tab. In addition, make sure you have at least one network access list to tell the storage system what network, or network host, will have access to its storage resources. If you don’t list a network entry, the Openfiler storage systems will deny any network access to the storage. To enter the network access list, you must go to the System Section, go to its networking settings, and enter the network segment or host.
I set the local subnet 192.168.100.0/24 to have access to the storage shares that I will create. There are two options when sharing a resource: Public Access and Controlled Access. Use Public Access when you want access to be based on the network access list only. Use Controlled Access when you want to use authentication mechanisms such as LDAP and Active Directory and you want per-user or -group access. I chose Public Access. Check the local subnet you configured and allow read/write (RW) access using SMB and WebDAV.
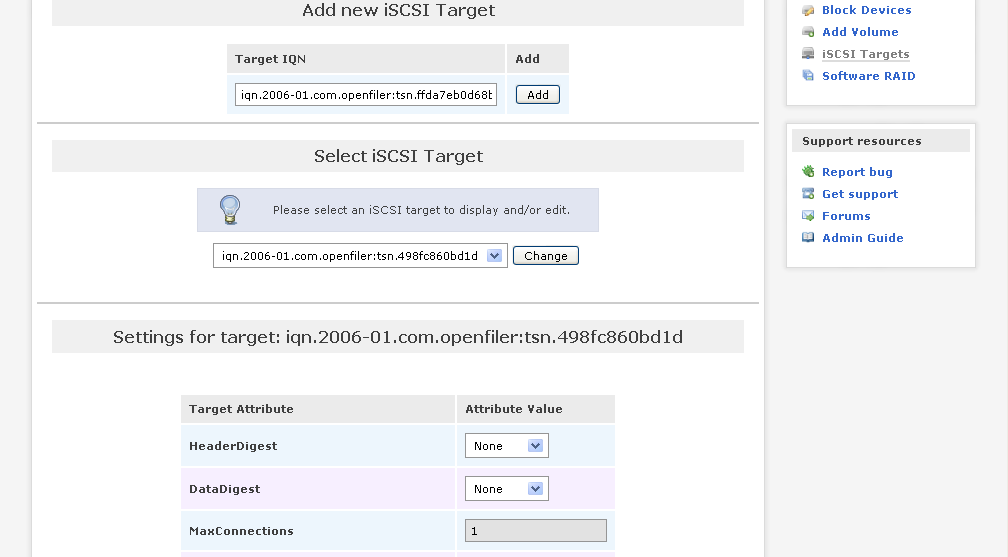
Next, configure the iSCSI volume. Ensure that the service iSCSI Target is enabled. Under the Volumes tab, go to iSCSI Target and add Openfiler as a target. Here you can change some iSCSI settings, but we will leave them as is. Finally, go to logical unit number (LUN) mapping to bind the iSCSI volume you created.
That’s all it takes for configuration. With a few simple steps, you can easily set up enterprise storage using Openfiler. If you need assistance, check Openfiler’s online manual or forum. An administrator guide is also available, but it costs about $88. Subscription-based technical support ranges from about $148 to $3,427. With Openfiler’s ease of use, you should not need technical support unless you deploy the software on a mission-critical application and want someone to assist you around the clock. However, even with such support, Openfiler is still likely to cost much less than proprietary storage hardware.
Connecting to storage
Once you have created and shared volumes, clients can connect to them. I tested SMB connectivity by mapping the shared folder. To map it, you must follow this format: \host/physicalvolumename.logicalvolumename.sharedfolder. For example, it you need to access the shared folder store1nastest1, use \192.168.100.50store1.nas.test1.
For WebDAV, you must follow a different convention. For the same shared folder as SMB, you must enter this address on the browser: https://192.168.100.50/mnt/store1/nas/test1.
For the iSCSI volume, you need an iSCSI initiator installed on the client machine. When I tried to connect from a Windows client, I downloaded the latest iSCSI initiator for Windows and installed it. You then enter the iSCSI target address of 192.168.100.50. Since I didn’t change any Openfiler iSCSI settings, I use the default settings. Log on to the target address and, once connected, check Windows disk management. You should see that the 2GB iSCSI volume is available.
The iSCSI protocol uses SAN technology, which means the iSCSI volume is seen as an ordinary disk in which you can perform any normal disk operations. By contrast, NAS protocols such as SMB are file-based, meaning that you can manipulate the files but not the volume.
Openfiler, your enterprise storage solution
Overall, Openfiler’s features and capabilities make for an impressive enterprise storage solution. With server hardware — including a Pentium 4 or above, four SATA disks, a RAID controller, and Gigabit Ethernet — costing less than $1,000, anyone can have a decent storage system that supports both NAS and SAN. With support for authentication mechanisms, you can easily control and manage access to your storage and even integrate UPS support — something not commonly found even on proprietary storage systems. Finally, with the snapshot feature, you can easily recover your storage when something goes bad.
Thus far, on my network, Openfiler seems reliable and performs its job well.
Categories:
- Networking
- Storage


