
Author: Bruce Byfield
Why create a third-party installer for GNU/Linux? After all, the operating system has its own package systems for software installation, notably dpkg and RPM. The answer is that independent software vendors (ISV) often believe that such installers are easier to support than the native package systems. Often, GNU/Linux support is secondary for ISVs, so creating their own installers seems quicker and easier than mastering a variety of different package systems and ensuring that the correct one is used during installation. Also, third-party installers are closer to their experience on Windows, where Macrovision’s InstallShield is widely used.
Moreover, for ISVs that support a variety of operating systems, tools like InstallBuilder and Install Anywhere have the advantage of allowing installers for each platform to built from a single source, which simplifies workflow and the maintenance of project files. InstallBuilder creates installers for Windows, Mac OS X, GNU/Linux, AIX, Solaris, IRIX, and different versions of FreeBSD and HP-UX. Its GNU/Linux support is particularly extensive, and includes x86, x64,and PowerPC, as well as output to an RPM package. Install Anywhere has similar support, as well as an option for creating a general Java installer. As cross-platform support becomes increasingly widespread, the appeal of such single-source solutions is likely to increase.
Comparing the defaults
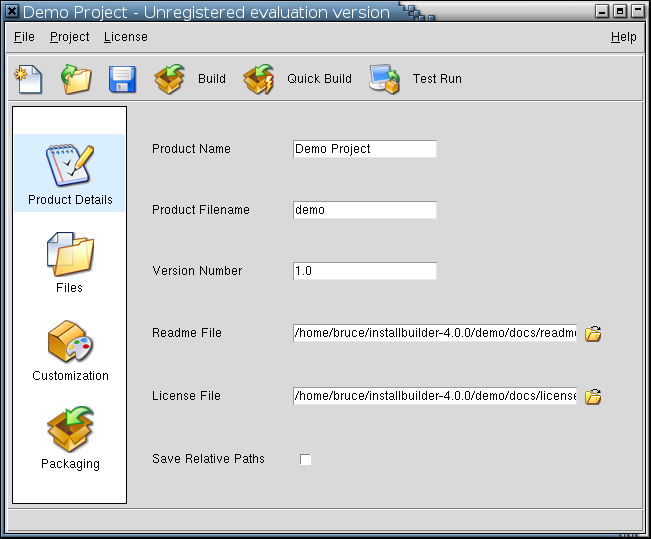
InstallBuilder – click to enlarge |
InstallBuilder’s and Install Anywhere’s default settings are similar. InstallBuilder opens in a single window, with icons down the left, while Install Anywhere defaults to a wizard with a series of windows, but the order in which options are presented is almost identical: both start with project information and continue through the files to be installed and customization to the build options. If InstallBuilder seems more intuitive, that may be largely due to the fact that Qt widgets seem more familiar to a regular GNU/Linux user. Certainly the Install Anywhere wizard is not difficult to navigate, especially since it includes notice of what the next step is, and allows users to move forward and backward as needed.
To begin working with either program, users either begin a new project or open an existing one. Install Anywhere has a small advantage in that it offers a variety of project templates. Unfortunately, however, although some templates, such as a console project, are self-explanatory, the interface fails to explain the difference between a basic and typical template. InstallBuilder seems better organized, since its initial section includes links to the installer’s readme and license file, as well as the version number.
Once a project’s basic characteristics are defined, both programs move on to the files that the installer will add to a system. However, where Install Anywhere gives a simple dialog for selecting files, InstallBuilder is more diverse. Not only does InstallBuilder offer options for including different files for different operating systems, but it also includes a more comprehensive set of options for manipulating files, including ones for adding a menu item or a desktop shortcut for files — but only for Windows installations. I wonder why the same options aren’t included for at least the KDE and GNOME desktops.
Install Anywhere Wizard – click to enlarge |
The two programs diverge considerably in customization. The sequence of the windows in the Install Anywhere wizard includes only options for setting the main Java class and classpath for the about-to-be-created installer. By contrast, InstallBuilder offers four tabs’ worth of options for the installer. From the User Interface tab, you can select the graphics used for the installer, as well as the default language options. The Installer tab includes details of where and how the installer adds files to your system (rather chillingly, the option to require the installer to run only with root privileges is unchecked by default) and the Script tab lists the paths to the pre and post install and uninstall scripts used by the installer. The Platform tab concludes InstallBuilder’s build process with options for customization for each operating system, as well as the default permissions for Unix installations. Users should note, though, that you need to click on each icon to set the individual operating system settings — a detail that is easy to overlook from the interface.
Outputting a project to platform-specific installers is just a matter of clicking a button in either program. Install Anywhere gives the option of whether to include a Java Virtual Machine with the installer, thereby avoiding the issue of whether users already have one installed, but InstallBuilder includes the option of doing a test build first. InstallBuilder also displays build messages by default, while Install Anywhere shows only a progress bar by default, and, when it does display messages, does so in a jagged green script on a black background that is difficult to read.
The main advantage of Install Anywhere’s wizard over InstallBuilder is that you can set preferences for the program, including the color scheme and checks for updated versions. Overall, while Install Anywhere’s wizard is more than adequate for building a third-party installer, it lacks options compared to InstallBuilder.
Install Anywhere’s advanced designer
However, the wizard is only half the story for Install Anywhere. From any window in the wizard, as well as from the preferences menu item, you can switch to Advanced Designer mode. When you do, the comparison with InstallBuilder is suddenly reversed. Instead of offering only a limited set of options like the wizard, the Advanced Designer almost overwhelms users with choices. Even the interface is intimidating at first because of the sheer number of options that are available compared to the wizard or to InstallBuilder.
Install Anywhere Advanced Designer – click to enlarge |
Once you start working with the Advanced Designer, though, you will soon realize that it is more straightforward than it appears. Many option fields have defaults entered so that you can ignore them if you choose, while users who do want to customize will soon appreciate the fine-grained controls.
For example, on the Project tab, you can choose to have the installer generate a log file and a response file for multiple installations. Even more importantly, you can choose which steps you want to include in the installation process, and whether to give those who use the installer the option of different install sets. You can also choose a variety of ready-made actions for scripts during the installation process, as well as the messages that they display. Furthermore, all these options are accompanied by a comprehensive and clearly written Web-based help system. Possibly, some users could ask for more, but I suspect that most will find Install Anywhere’s advanced designer close enough to definitive as makes no difference.
Choosing an install builder
However you run them, both InstallBuilder and Install Anywhere create and compile a third-party installer with a minimum of effort. Which you choose depends entirely on your needs and preferences.
Install Anywhere’s wizard is the simplest option, but some may find it too simple. InstallBuilder seems to strike the surest balance between ease of use and a well-rounded set of options. However, if you want to control the process as closely as possible, then Install Anywhere’s Advanced Designer mode should be your choice.
Some, of course, will question the need for a third-party installer in the first place, especially when the native package systems have recently reached acceptable levels of sophistication and ease of use. Those who ask such a question may be mollified somewhat by InstallBuilder’s option to create an RPM package (DEB packages, unfortunately, are not an option).
In the end, even if you prefer not to use proprietary products, both Install Anywhere and InstallBuilder are still worth downloading for a look. Their graphical, single-source approach to preparing for software installation is overdue for use in free software projects, regardless of whether you prefer third-party installers or native package systems.


