
This Linux Foundation Platinum Sponsor-Contributed article from Hitachi is about how to use TensorFlow.js and Node-RED for use with image recognition applications.
Using TensorFlow.js and Node-RED
TensorFlow.js is a JavaScript implementation of the TensorFlow open source machine learning platform. By using TensorFlow.js, learning and inference processing can be executed in real-time on the browser or the server-side with Node.js. Node-RED is a visual programming tool mainly developed for IoT applications.
According to a recent InfoQ article on 2020 JavaScript web development trends, TensorFlow.js is classified as “Early Majority”, and Node-RED is classified as “Early Adopters” in their adoption cycles. And they are becoming increasingly popular with open source software developers.

In this article, we’ll take a look at what you can do with these two trending open source software tools in combination.
Creating a sample image recognition flow with Node-RED
Our objective will be to create a flow within Node-RED to recognize an object in an image, as depicted in the screenshot below.
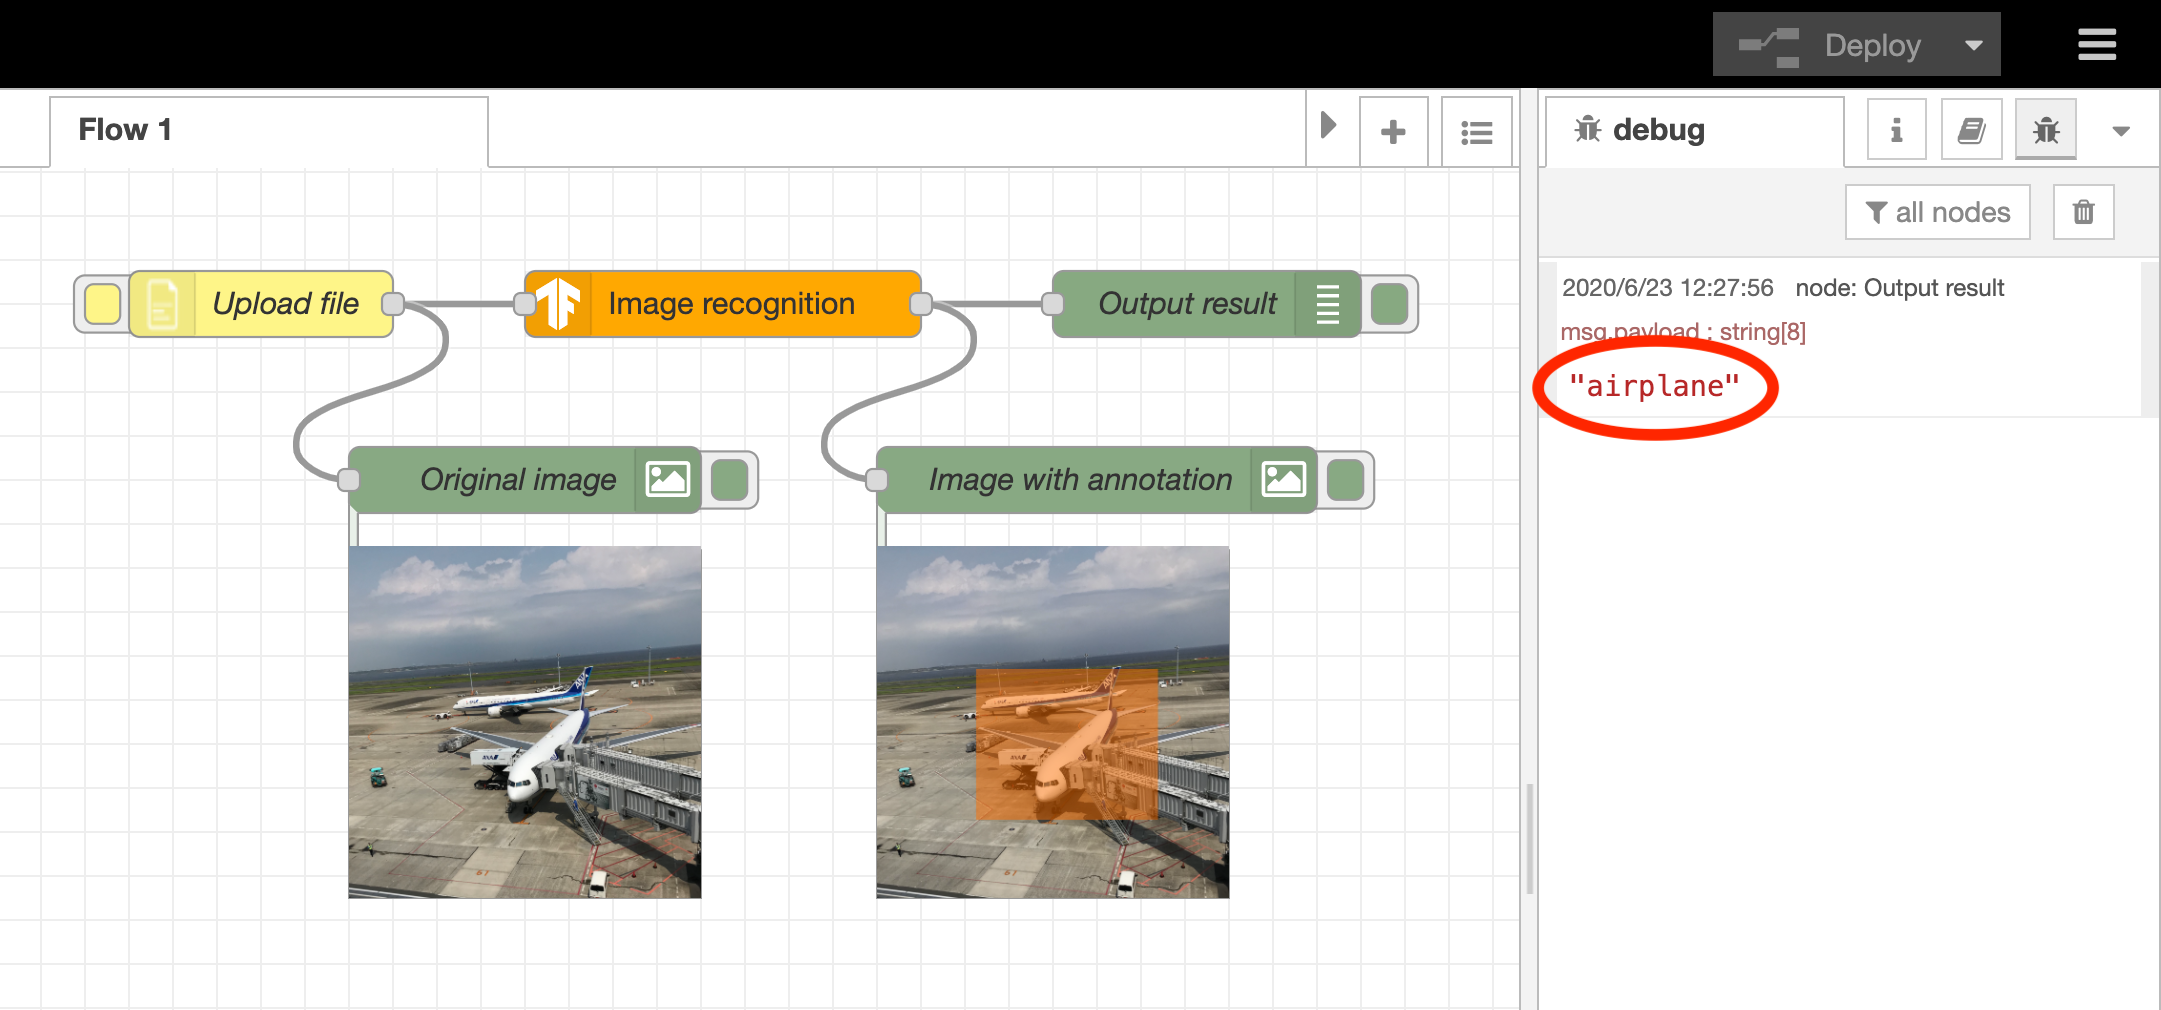
This flow can be observed after you upload a file from a browser using the yellow node component. The bottom left of the user interface displays the uploaded image in the “Original image” node. In the orange “Image recognition” node, the TensorFlow.js trained model is used to run Analyze for what is in the uploaded image (an aircraft). Finally, we will use the green “Output result” node in the upper right corner to output what is seen in the debug tab on the right. Additionally, an image annotated with an orange square under the [Image with annotation] node is displayed, and it’s easy to see what part of the image has been recognized.
In the following sections, we will explain the steps for creating this flow. For this demo, Node-RED can run in the local environment (in this case, a Raspberry Pi) and also in a cloud environment — it will work regardless of platform choice. For our tests, Google Chrome was chosen for use with the Node-RED web user interface.
Installing a TensorFlow.js node
The Node-RED flow library has several TensorFlow.js-enabled nodes. One of these is node-red-contrib-tensorflow, which contains the trained models.
We’ll begin with installing the TensorFlow.js node in Node-RED. To install the node, go to the top-right menu of the flow editor. Click “Manage Palette” -> Go to “Palette” tab -> Select “Install” tab. After that, enter “node-red-contrib-tensorflow” in the search keyword field.
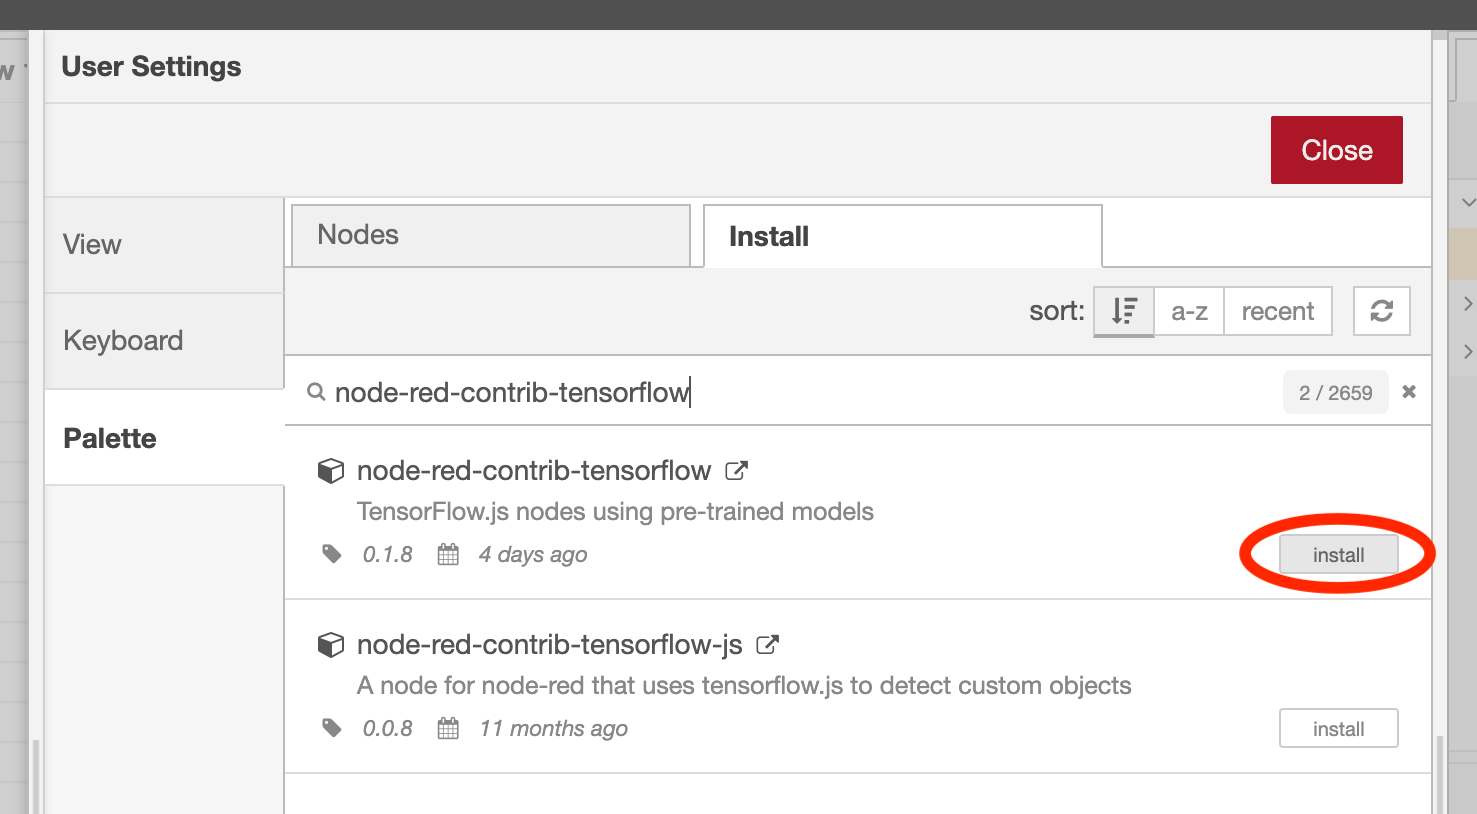
As shown in the image above, the TensorFlow.js node to be used is displayed in the search results. Click the “install” button to install the TensorFlow.js node. Once the installation is complete, orange TensorFlow.js nodes will appear in the Analysis category of the left side palette.
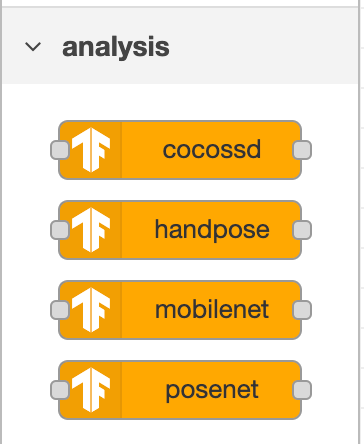
Each TensorFlow.js node is described in the following table. These are all image recognition nodes, but they can also generate image data with annotation and perform other functions like image recognition, or offline, which is necessary for edge analytics.
| # | Name | Description | Annotated Image | Offline Use |
| 1 | cocossd | A node that returns the name of the object in the image | YES | MAY |
| 2 | handpose | A node that estimates the positions of fingers and joints from a hand image | NONE | CAN’T |
| 3 | mobilenet | A node that returns the name of the object in the image | NONE | MAY |
| 4 | posenet | A node that estimates the positions of arms, head, and legs from the image of a person | YES | MAY |
In addition, the following nodes, which are required to work with image data in Node-RED, should be installed in the same way.
– node-red-contrib-browser-utils: A node that uploads image files and audio files from the flow editor
– node-red-contrib-image-output: A node that displays an image on the flow editor
After installing node-red-contrib-browser-utils, you should see the file-inject node, microphone node, and camera node in the input category. Also, once you have installed node-red-contrib-image-output, you should see the image node in the output category.
Creating a flow
Now that we have the necessary nodes let’s create the flow.
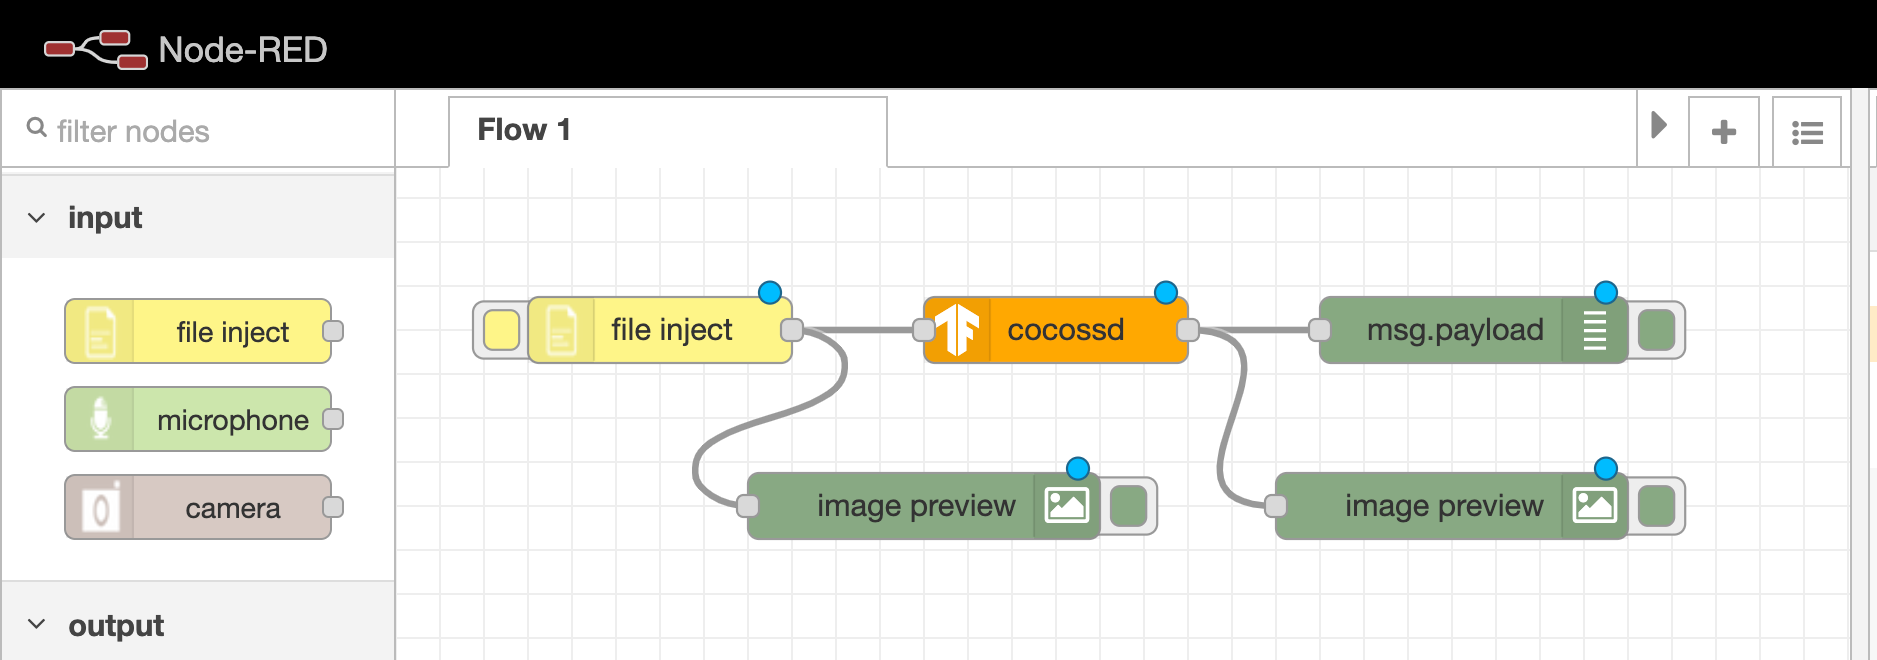
From the palette on the right, place a yellow file inject node, an orange cocossd node, and a green debug node (which will be renamed to msg.payload when placed in the workspace) and connect the ports of each node with “wires”.
To check the image data flowing through the wire, place two image nodes (named image preview when placed on the workspace) under the flow. To output the image data from the file inject node and debug node respectively, connect to the output port, as shown in the illustration.
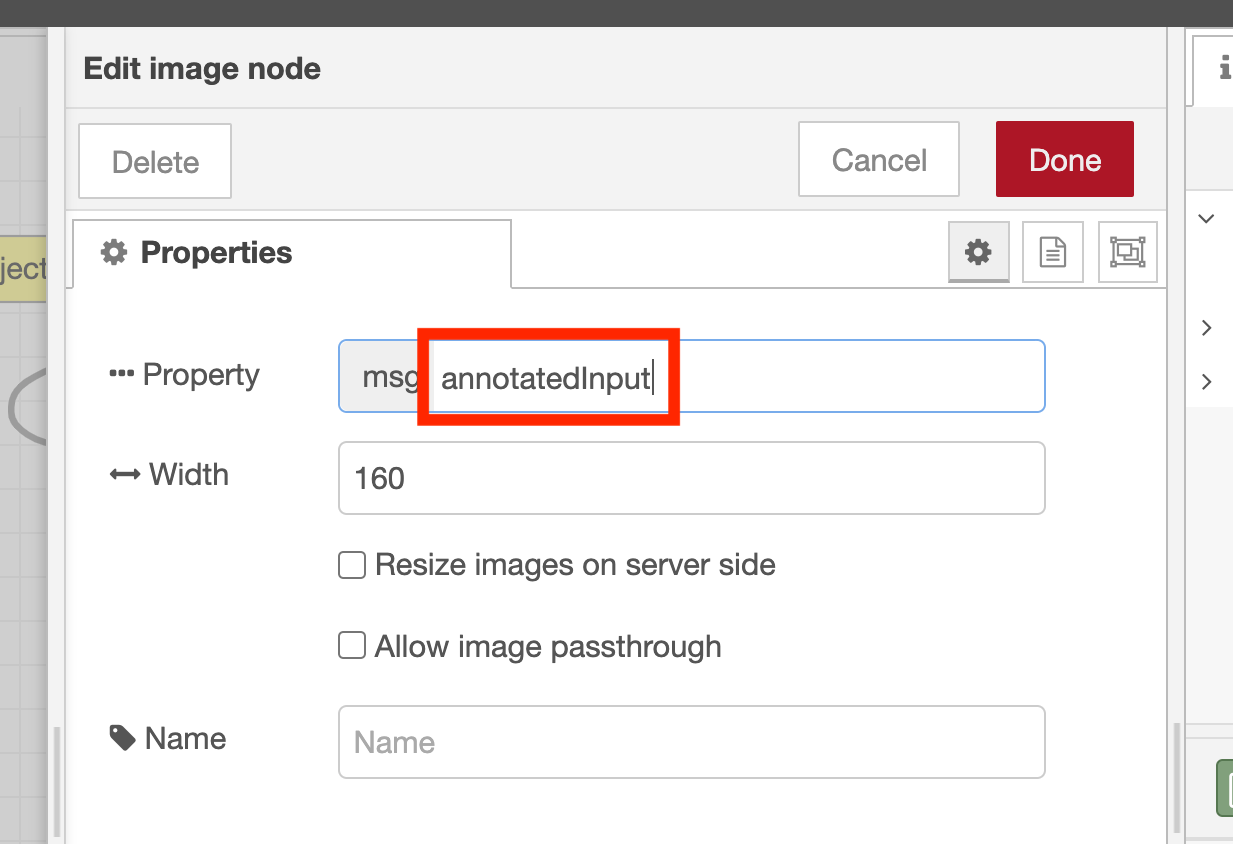
Only the image preview node on the right side specifies the image data variables to be displayed, so it is necessary to change the node settings. To change the settings, double-click the image preview node to open the node properties screen. On the node property screen, the image data stored in msg.payload is displayed by default. By changing this to msg.annotatedInput as shown in the screenshot below, the image preview node will display the annotated image.
Give each node an appropriate name, press the red deploy button on the upper right, and then click the button on the left side of the file inject node to upload the sample image file of the airport from your PC.
As shown, an image with orange annotation on the aircraft is displayed under the “Image with annotation” node. Also, you can see that the debug tab on the right side correctly displayed “airplane”.
Feel free to try this with images you have at your disposal and experiment with them to see if they can be recognized correctly.
About the author: Kazuhito Yokoi is an Engineer at Hitachi’s OSS Solution Center, located in Yokohama, Japan.

