
Author: Dmitri Popov
To demonstrate VMX Builder’s capabilities, let’s create an Ubuntu 6.10 (Edgy Eft) VM.
First, you have to install VMX builder. Point your browser to the VMware Utilities Homepage and download two packages: Core files (the download link is at the top of the page) and VMX Builder. Install the Core files packages first and VMX Builder after that. You also need to download the ISO image of Ubuntu 6.10 from Ubuntu’s Web site.
Create a new folder (e.g. “Ubuntu 6.10 VM”) for your VM and move the downloaded ubuntu-6.10-desktop-i386.iso image in it. Launch VMX Builder and press the Create New Virtual Machine button. Select the folder you’ve just created and give your virtual machine a name (e.g. “Ubuntu 6.10”). VMX Builder then creates a new VM and opens it in the main window.
Under the Options tab, you can configure the VM’s settings. Some of these settings, such as the Shared Folders feature, work only if you run the final VM in VMware Workstation, but you must at least specify the Host Product (Target Platform: Player, Version: 1.x) and Guest OS (Guest OS Family: Linux, Version: Ubuntu) settings in the General section. You can leave the rest of the settings at their defaults.
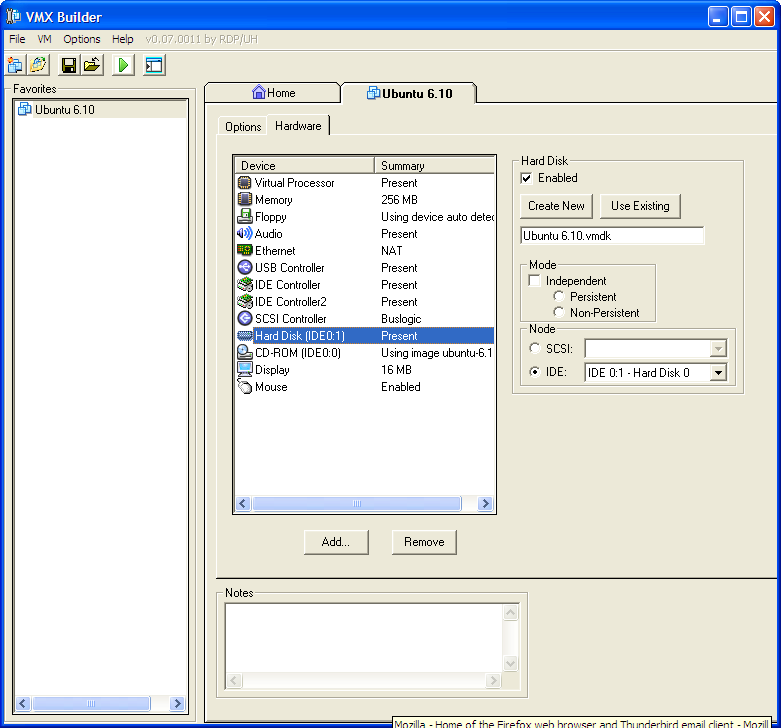
Next, you have to configure the hardware part of your VM. By default, VMX Builder includes the required hardware components, such as Virtual Processor, Memory, IDE Controller, Display, and Mouse. However, you have to configure the existing hardware and add other components manually. You might want to add a USB controller, network and sounds adapters, a hard disk, and a DVD/CD-ROM drive. To add a hardware component, press the Add button and select the item you want to add.
| Click to enlarge |
Once you’ve added a component, you have to configure it. For example, when you add a network adapter, you have to configure the network connection type. You can choose between three available connection types: Bridged, Host-Only, and NAT. Which one to choose depends on your network setup, but in many cases the NAT type works just fine. Enabling the NAT connection allows the VM to use the host’s IP address.
When you add a USB component, make sure that the Enable USB check box is ticked. If you want your virtual machine to automatically mount USB devices, tick the “Automatically Connect Devices when guest has focus” check box.
Adding a hard disk to your VM also requires some work. First of all, you have to create a disk image. To do this, press the Create New button, choose the path (the Ubuntu 6.10 VM folder would be an obvious choice), select the adapter type (IDE), and set the desired size. In the Disk Type section, choose Single Growable virtual disk. This creates a single disk image, which will “grow” as needed. Choose the VMware type library from the Creation Method (note that you must have VMware Player installed on your machine in order to use this method). Press OK to close the dialog window and create the disk image file. In the Node section, select the IDE option, then select IDE 0:1 from the drop-down list.
Finally, you have to add a DVD/CD-ROM drive. Since you are going to install Ubuntu from the downloaded ISO image, you have to configure the CD-ROM drive accordingly. In the Connection section, select the Use ISO image option and point it to the ubuntu-6.10-desktop-i386.iso image.
This is pretty much it. Save your VM and press the Launch Virtual Machine button to test your creation. If everything was set up properly, your VM should boot from the ISO image, and you can install Ubuntu onto the specified disk image.
Dmitri Popov is a freelance writer whose articles have appeared in Russian, British, German, and Danish computer magazines.


