Prestashop is one of the most powerful open source ecommerce tools you will ever have the privilege of using. Last year I decided to test the waters of selling books directly from my web site. To do this, I turned to Prestashop and was amazed at how much power and flexibility it offered. From digital downloads, weekly specials, standard and mobile themes, templates, modules ─ you name it, Prestashop can do it.
The core of Prestashop is free (there are paid modules to extend the functionality as well as a hosted, cloud-based version of the tool). But if you want to host your own Prestashop in-house, you can. The system requirements are fairly basic:
-
Supported operating system: Windows, Mac and Linux
-
Web server: Apache 1.3, Apache 2.x, Nginx or Microsoft IIS
-
PHP 5.2+ installed and enabled
-
MySQL 5.0+ installed with a database created.
I want to walk you through the process of getting Prestashop up and running on the Linux platform. I will demonstrate on Ubuntu 14.04 ─ but the steps are easily transferrable to other distributions. I will assume you already have the requirements met (in particular … the LAMP portion). The Prestashop installer does not create the database for you, so you will have to do that manually. There are a number of ways this can be done ─ my preference is using the PhpMyAdmin tool.
Let’s begin the process.
Database creation
Creating the database through PhpMyAdmin is simple:
-
Point your browser to the PhpMyAdmin install on the server that will hold the Prestashop instance.
-
Click on the Databases tab.
-
Enter the name of the database to be created (Figure 1).
-
Click Create.

If you prefer creating databases from the command line, do the following:
-
From a terminal window, issue the command
sudo mysql -u root -p
-
Hit Enter
-
Type your MySQL root password and hit enter
-
Type the command
create database shop ;
-
Hit Enter.
Your database should now be ready to use.
Download and install
With the database ready, you need to download the latest version of Prestashop and move it to the Apache document root. For our instance, that document root will be /var/www/html. Once you’ve downloaded the .zip file, move it to /var/www/html, change into the document root (using a terminal window and the command
cd /var/www/html
) and then unzip the package with the command
sudo unzip prestashop_XXX.zip
(where XXX is the release number). This will create a new directory in the document root called prestashop.
The remainder of the installation will be done through your web browser. So point the browser to http://ADDRESS_OF_SERVER/prestashop> and start walking through the installation wizard.
Web based install
The first step in the wizard is to select your language. From the language drop-down, make the appropriate selection and click Next. At this point you will need to agree to the licenses (there are more than one) and click Next. At this point, you will find out what all needs to be corrected for the installation to continue.
The most likely fixes necessary are the installation of the GD library, the mcrypt extension, and adding write permissions to a number of folders. Here are the quick fixes:
-
To install the GD library, issue the command
sudo apt-get install php5-gd
-
To install the mcrypt extension, issue the command
sudo apt-get install php5-mcrypt
-
Enable mcrypt with the command
sudo php5enmod mcrypt
-
Use the command
sudo chmod -R ugo+w
on the directories (within the /var/www/html/prestashop directory) /config, /cache, /log, /img, /mails, /modules, /themes/default-bootstrap/lang/, /themes/default-bootstrap/pdf/lang/, /themes/default-bootstrap/cache/, /translations/, /upload/, /download/
Once you’ve made those corrections (if necessary), hit the Refresh these settings button again and you should see all is well (Figure 2).

Store information
In the next window (Figure 3), you must enter information about your store. Pay close attention to the Main Activity drop-down. If you’re going to offer digital downloads, you’ll want to select the Download option (so you don’t have to manually add that feature later).

Fill out the information and click Next to continue on.
Database configuration
In the next window (Figure 4), you must enter the information for the database you created earlier. Enter the information and click Test your database connection now. If it returns Database is connected, you are good to go ─ click Next.

Once you click Next, all of the database tables will be created. This step can take some time (depending upon your hardware). Allow it to finish and you will be greeted with a new window with a number of different links. You can click to manage your store, view your store, find new templates or modules, and even share your successful installation on Facebook, Twitter, etc.
You will, most likely, want to head on over to the back office. However, you cannot actually visit the back office until you’ve done the following:
Once you’ve renamed the admin folder, the URL for the Prestashop back office will be http://ADDRESS_TO_SERVER/prestashop/ADMIN_FOLDER> (where ADDRESS_TO_SERVER is the URL or IP address of the server and ADMIN_FOLDER is the new name for the admin folder). Go to that address and log in with the administration credentials you created during the Store Information setup. You will find yourself at the Prestashop Dashboard (Figure 5), where you can begin to manage your ecommerce solution!

If you’re in need of a powerful ecommerce tool, look no further than open source and Prestashop. With this powerhouse online shopping solution, you’ll be selling your products and services with ease.

 Kdenlive is powerful multi-track video editor, which supports DV, AVCHD and HDV editing. The developer has announced that the Kdenlive will be a part of the KDE Applications family, starting with the 15.04 branch.
 The ClusterStor SDA is built on Seagate’s successful ClusterStor family of high performance storage solutions for HPC and Big Data, providing unmatched file system performance, optimized productivity and the HPC industry’s highest levels of efficiency, reliability, availability and serviceability. Taking full advantage of the Lustre file system, Seagate ClusterStor is designed for massive scale-out performance and capacity, with the ability to support from hundreds to tens-of-thousands of client compute nodes delivering data intensive workload throughput from several GB/sec to over 1TB/sec.
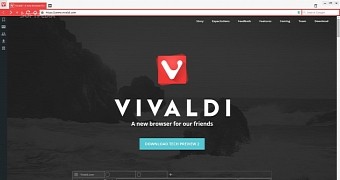 Vivaldi is a new web browser based on Chromium that is built by an Opera founder. It’s aimed mostly at power users, but it can be used by anyone. A new update has been released and the developers have added some new features.

 Companies are always looking for Linux talents and 2015 is following the same rising trend. The Linux job market is now opened to people who have Linux in their background more than ever, so this is a good time to get some form of training in this regard.