Open source software isn’t just proliferating within technology infrastructures around the world, it is also creating profound opportunities for people with relevant skills. Organizations of all sizes have reported widening skills gaps in this area. Linux tops the list as the most in-demand open source skill, according to the 2018 Open Source Jobs Report. With this in mind, In this article series, we are taking a closer look at one of the best new ways to gain open source and Linux fluency: the Introduction to Open Source Software Development, Git and Linux training coursefrom The Linux Foundation.
This story is the third in a four-part article series that highlights major aspects of the training course. The first article in the series covered the course’s general introduction to working with open source software, with a focus on such essentials as project collaboration, licensing, legal issues and getting help. The second article covered the course curriculum dedicated to working with Bash and Linux basics.
Working with commands and command-line tools are essential Linux skills, and the course delves into task- and labs-based instruction on these topics. The discussion of major command-line tools is comprehensive and includes lessons on:
Tools for creating, removing and renaming files and directories
There is a Labs module that asks you to set the prompt to a current directory and encourages follow up by changing the prompt to any other desired configuration. In addition to being self-paced, the course focuses on performing meaningful tasks rather than simply reading or watching.
Overall, the course contains 43 hands-on lab exercises that will allow you to practice your skills, along with a similar number of quizzes to check your knowledge. It also provides more than 20 videos showing you how to accomplish important tasks.
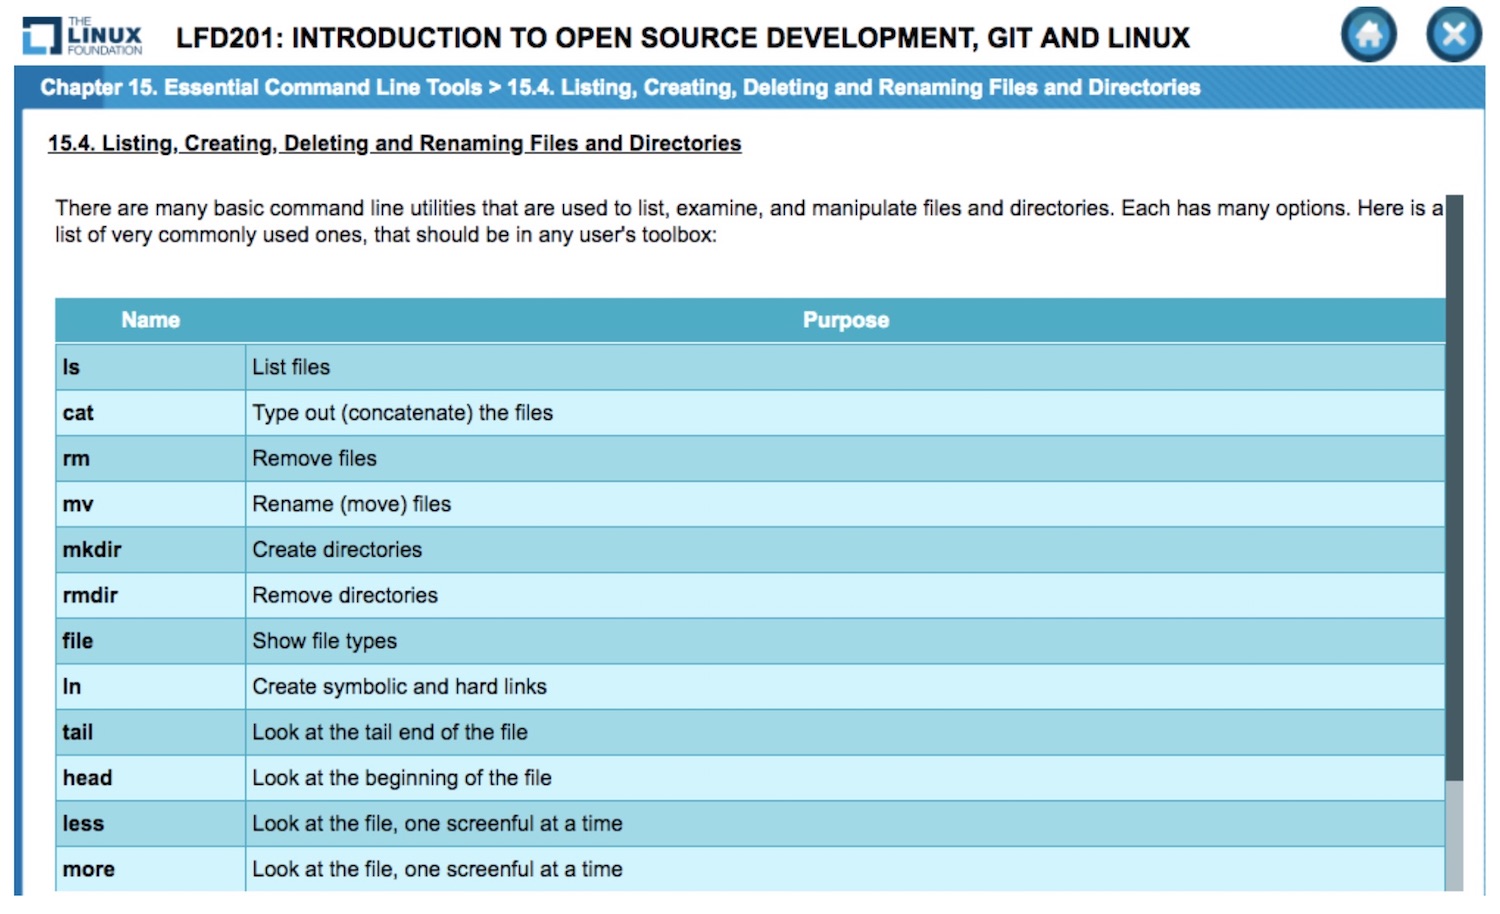
As you go through these lessons, keep in mind that the online course includes many summary slides, useful lists, graphics, and other resources that can be referenced later. It’s definitely worth setting up a desktop folder and regularly saving screenshots of especially useful topics to a folder for handy reference. For example, here is a slide that summarizes the handy utilities that any user should have in his or her toolbox:
Commonly used command-line utilities.
With the groundwork laid for working with the command line and command line tools, the course then comprehensively covers working with Git, including hands-on learning modules. We will explore the course’s approach to this important topic in the next installment in this series.
O’Reilly conducted a recent survey[1] of operations professionals, and the results offer useful information and insights to empower your career planning.
Scripting languages are the most popular programming languages among respondents, with Bash being the most used (66% of respondents), followed by Python (63%), and JavaScript (42%).
Go is used by 20% of respondents, and those who use Go tend to have one of the higher median salaries at $102,000, similar to LISP and Swift. This could be related to the types of companies that are pushing these programming languages. Google and Apple, for example, are very large companies and, as noted, salary and company size are related.
And what about the operating system in which respondents work? Linux tops the charts at 87% usage. Windows is also used frequently (63%), often as a mix between workstations and servers, and in some cases as a front end for Linux/Unix servers.
Canonical has just recently announced that Ubuntu 18.10, code named ‘Cosmic Cuttlefish’, is ready for downloading at the Ubuntu release site. Some of the features of this new release include:
the latest version of Kubernetes with improved security and scalability
access to 4,100 snaps
better support for gaming graphics and hardware including support for the extremely fast Qualcomm Snapdragon 845
fingerprint unlocking for compatible systems (e.g., Ubuntu phones)
The new theme
The Yaru Community theme — the theme for Ubuntu 10.18 — is included with Ubuntu 18.10 along with a new desktop wallpaper that displays an artistic rendition of a cuttlefish (a marine animal related to squid, octopuses, and nautiluses).
Co-founder of RunDeck, Damon Edwards kicked off his London DevOpsDaystalk with a familiar and painful story, about an unnamed organization that took on the latest technologies — the cloud, Docker, microservices, Kubernetes — only to scramble in the complexity when something breaks.
First, a bridge call happens that just generates a lot of questions. The lead dev escalates it to the Scrum Master. It can’t be figured out. The questions get bigger and bigger and now everyone is on the phone and on a growing ticket — network engineers, business managers, app managers, lead developers, a site reliability engineer (SRE), system administrators, middleware managers, SVP, Chief of Staff, two technical VPs, more middleware folks… the list goes on.
Eventually, the whole network is down, so the operations team is focusing on that. Somebody else realizes the original outage was all because of a changed firewall.
When developing applications based on Docker, being able to find specific information in the logs and save this data to file can speed up the troubleshooting and debugging process. Here are some tips on using log options, tail and grep to find what you are looking for in docker containers’ log data.
Let’s talk about Android for a moment. Yes, I know it’s only Linux by way of a modified kernel, but what isn’t these days? And seeing as how the developers of Android have released what many (including yours truly) believe to be the most significant evolution of the platform to date, there’s plenty to talk about. Of course, before we get into that, it does need to be mentioned (and most of you will already know this) that the whole of Android isn’t open source. Although much of it is, when you get into the bits that connect to Google services, things start to close up. One major service is the Google Play Store, a functionality that is very much proprietary. But this isn’t about how much of Android is open or closed, this is about Pie. Delicious, nutritious … efficient and battery-saving Pie.
I’ve been working with Android Pie on my Essential PH-1 daily driver (a phone that I really love, but understand how shaky the ground is under the company). After using Android Pie for a while now, I can safely say you want it. It’s that good. But what about the ninth release of Android makes it so special? Let’s dig in and find out. Our focus will be on the aspects that affect users, not developers, so I won’t dive deep into the underlying works.
Gesture-Based Navigation
Much has been made about Android’s new gesture-based navigation—much of it not good. To be honest, this was a feature that aroused all of my curiosity. When it was first announced, no one really had much of an idea what it would be like. Would users be working with multi touch gestures to navigate around the Android interface? Or would this be something completely different.
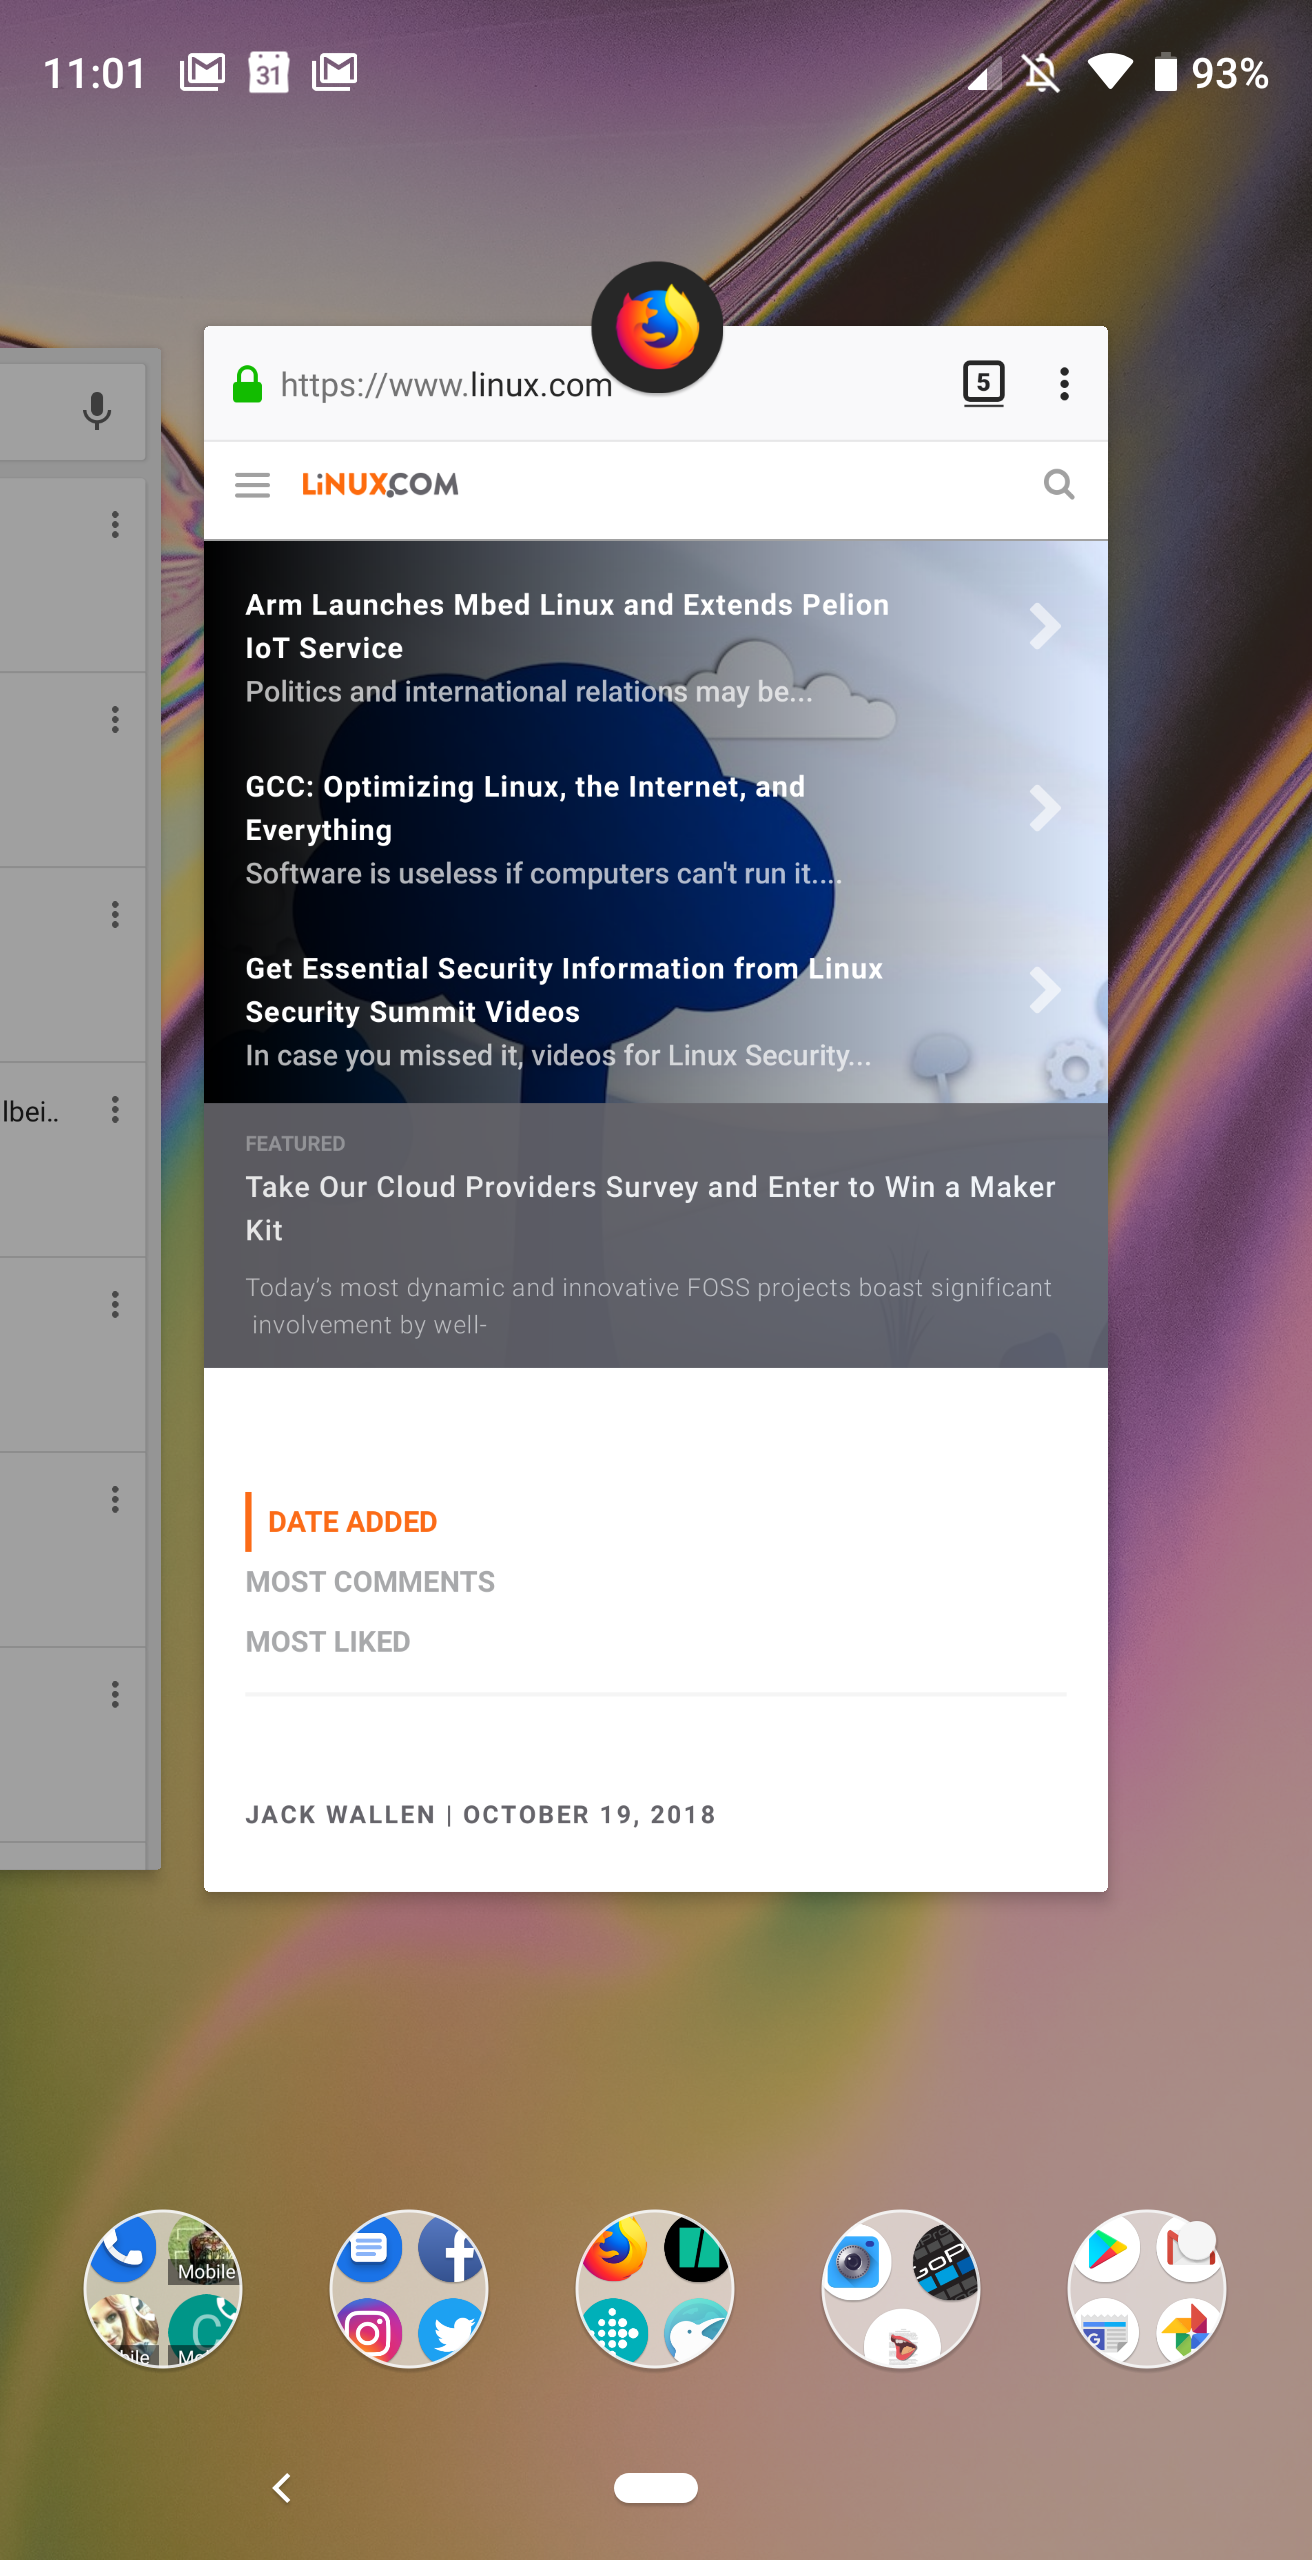
Figure 1: The Android Pie recent apps overview.
The reality is, gesture-based navigation is much more subtle and simple than what most assumed. And it all boils down to the Home button. With gesture-based navigation enabled, the Home button and the Recents button have been combined into a single feature. This means, in order to gain access to your recent apps, you can’t simply tap that square Recents button. Instead, the Recent apps overview (Figure 1) is opened with a short swipe up from the home button.
Another change is how the App Drawer is accessed. In similar fashion to opening the Recents overview, the App Drawer is opened via a long swipe up from the Home button.
As for the back button? It’s not been removed. Instead, what you’ll find is it appears (in the left side of the home screen dock) when an app calls for it. Sometimes that back button will appear, even if an app includes its own back button.
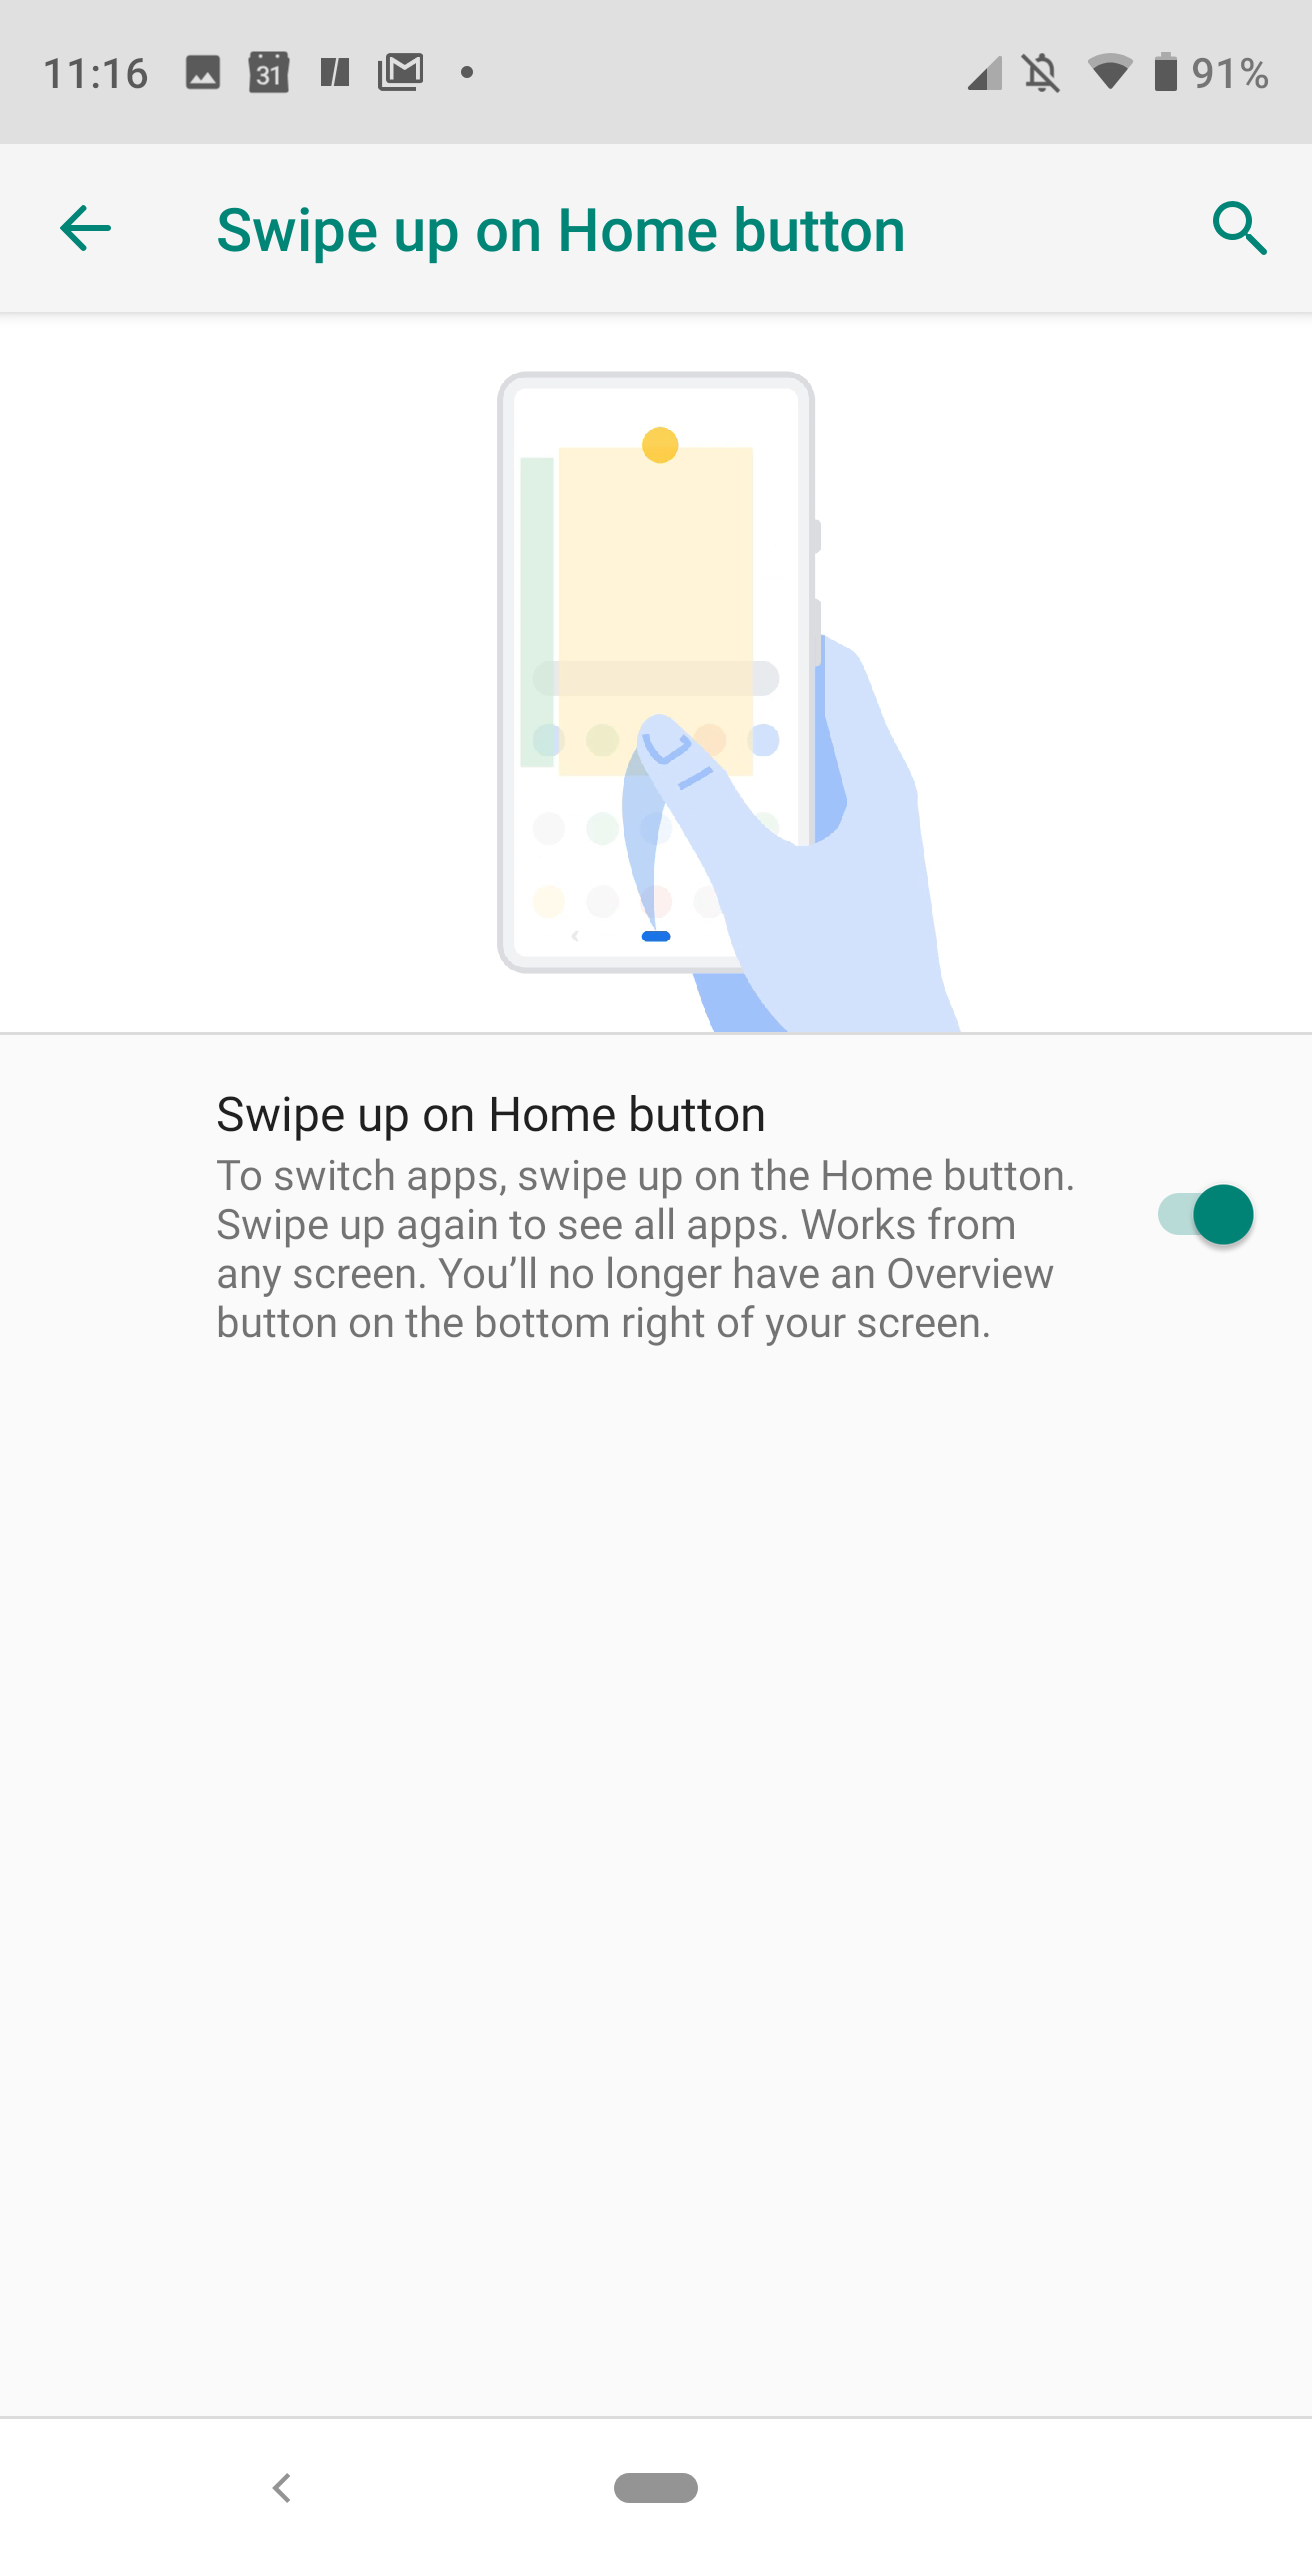
Figure 2: Disabling gesture-based navigation.
Thing is, however, if you don’t like gesture-based navigation, you can disable it. To do so, follow these steps:
Open Settings
Scroll down and tap System > Gestures
Tap Swipe up on Home button
Tap the On/Off slider (Figure 2) until it’s in the Off position
Battery Life
AI has become a crucial factor in Android. In fact, it is AI that has helped to greatly improve battery life in Android. This new feature is called Adaptive Battery and works by prioritizing battery power for the apps and services you use most. By using AI, Android learns how you use your Apps and, after a short period, can then shut down unused apps, so they aren’t draining your battery while waiting in memory.
The only caveat to Adaptive Battery is, should the AI pick up “bad habits” and your battery start to prematurely drain, the only way to reset the function is by way of a factory reset. Even with that small oversight, the improvement in battery life from Android Oreo to Pie is significant.
Changes to Split Screen
Split Screen has been available to Android for some time. However, with Android Pie, how it’s used has slightly changed. This change only affects those who have gesture-based navigation enabled (otherwise, it remains the same). In order to work with Split Screen on Android 9.0, follow these steps:
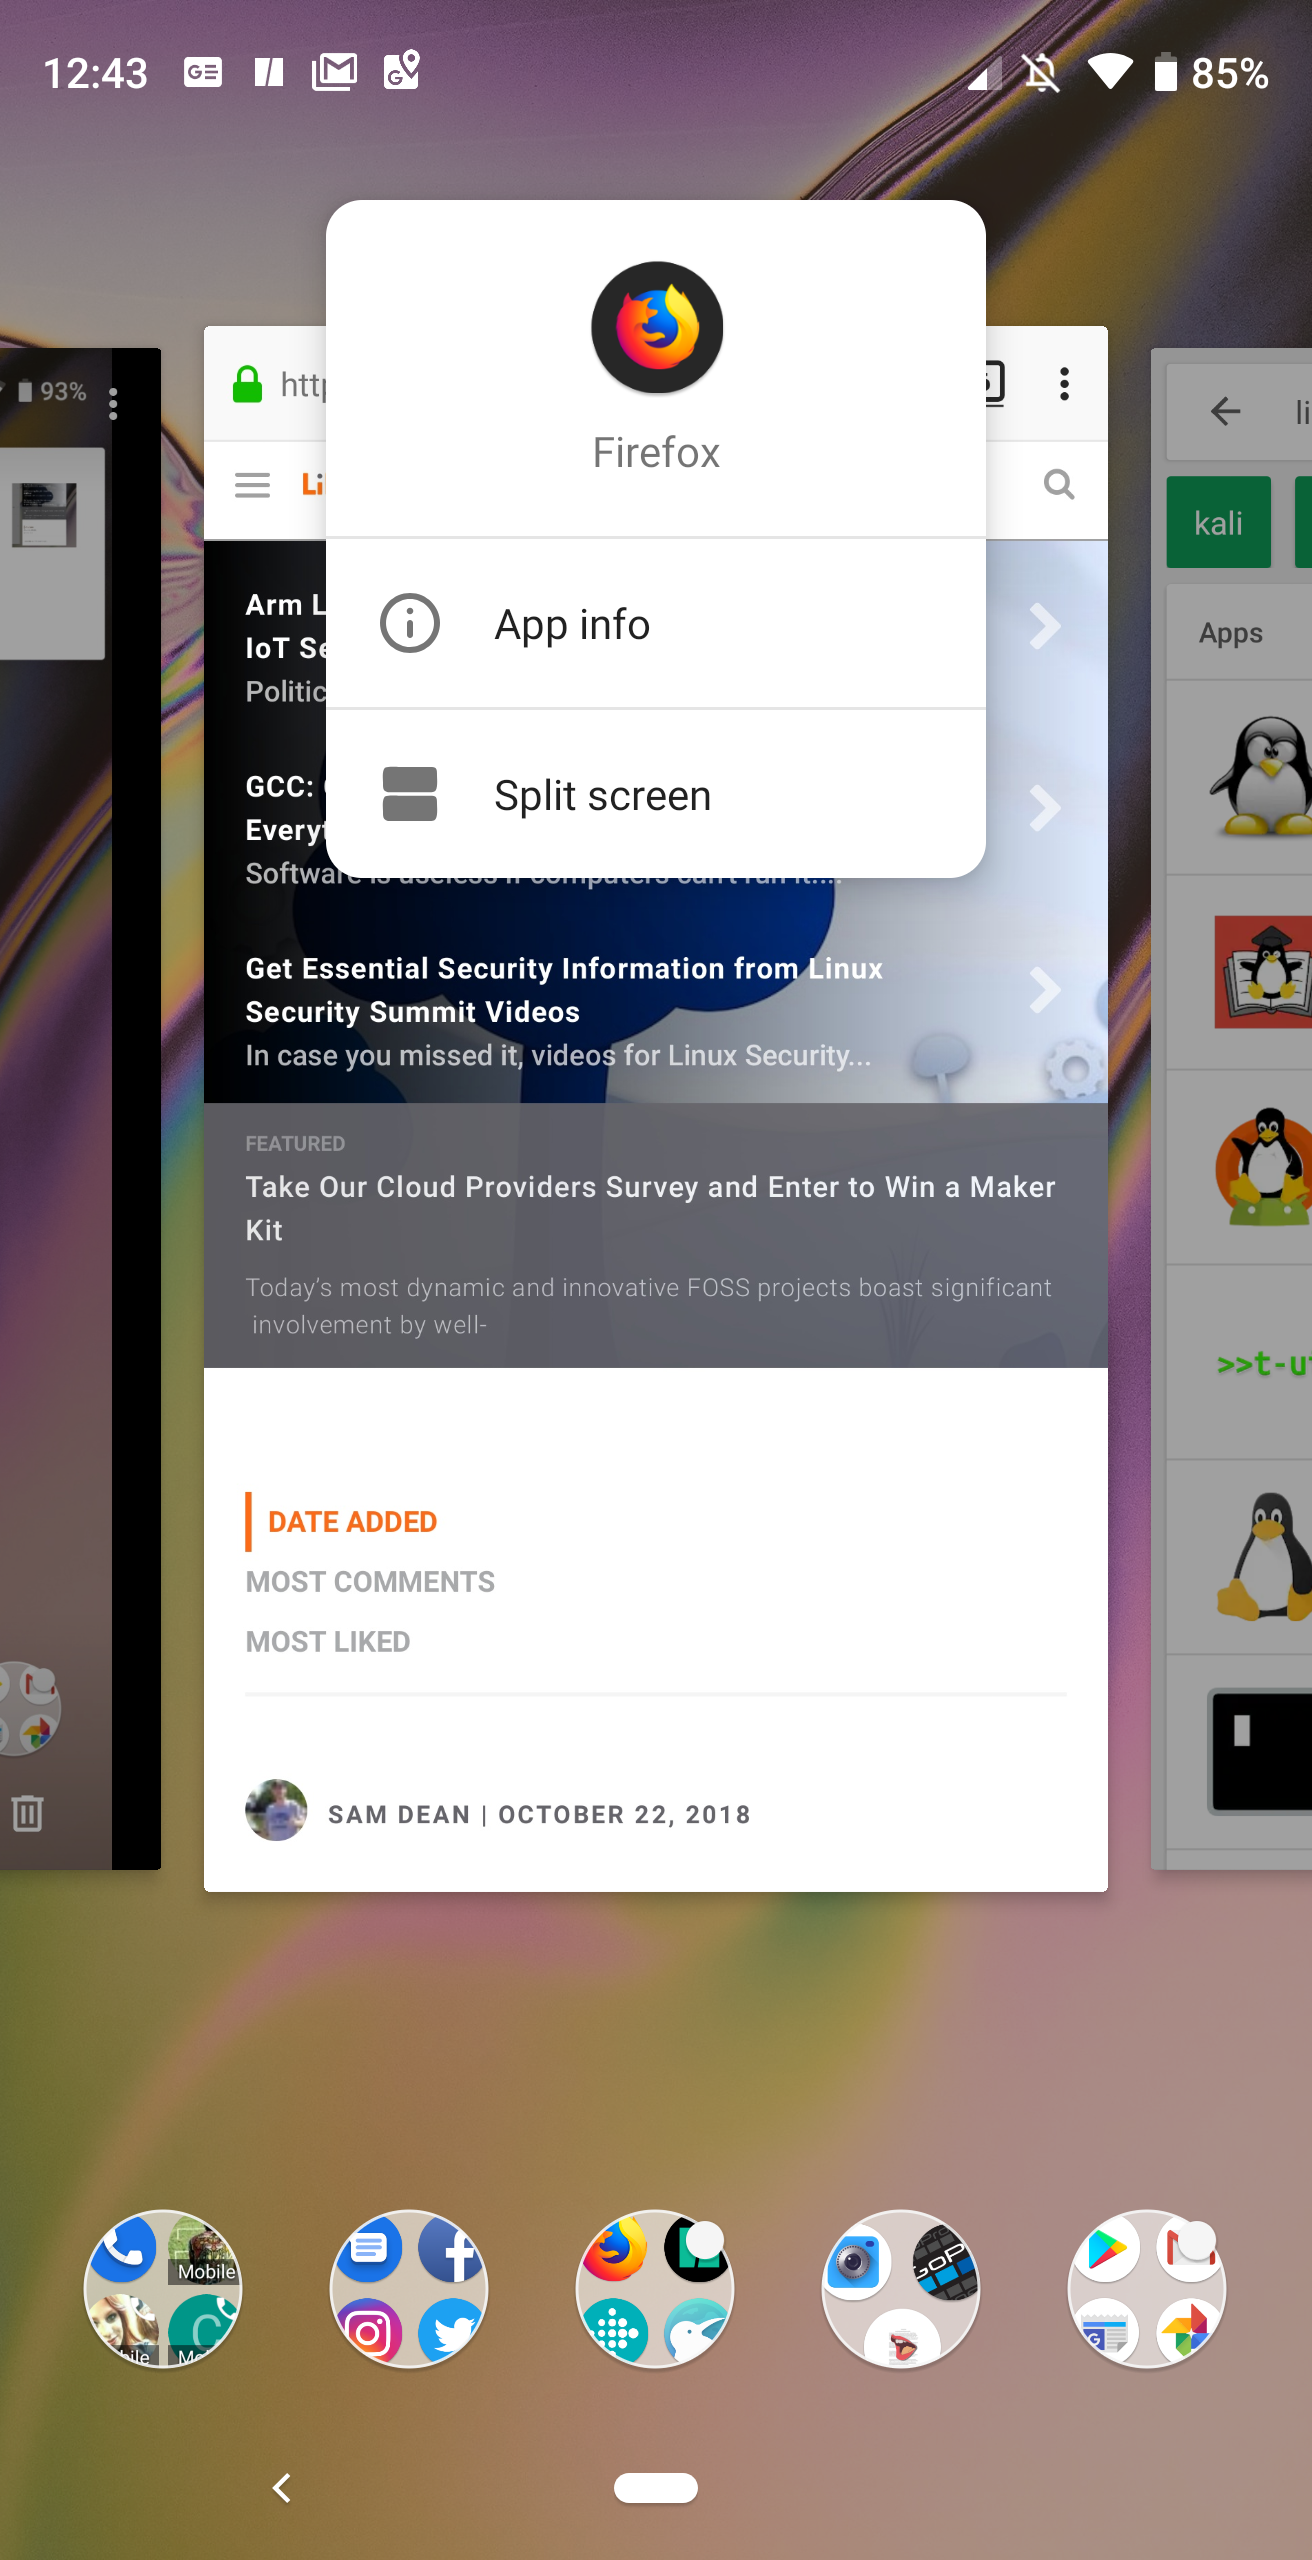
Figure 3: Adding an app to split screen mode in Android Pie.
Swipe upward from the Home button to open the Recent apps overview.
Locate the app you want to place in the top portion of the screen.
Long press the app’s circle icon (located at the top of the app card) to reveal a new popup menu (Figure 3)
Tap Split Screen and the app will open in the top half of the screen.
Locate the second app you want to open and, tap it to add it to the bottom half of the screen.
Using Split Screen and closing apps with the feature remains the same as it was.
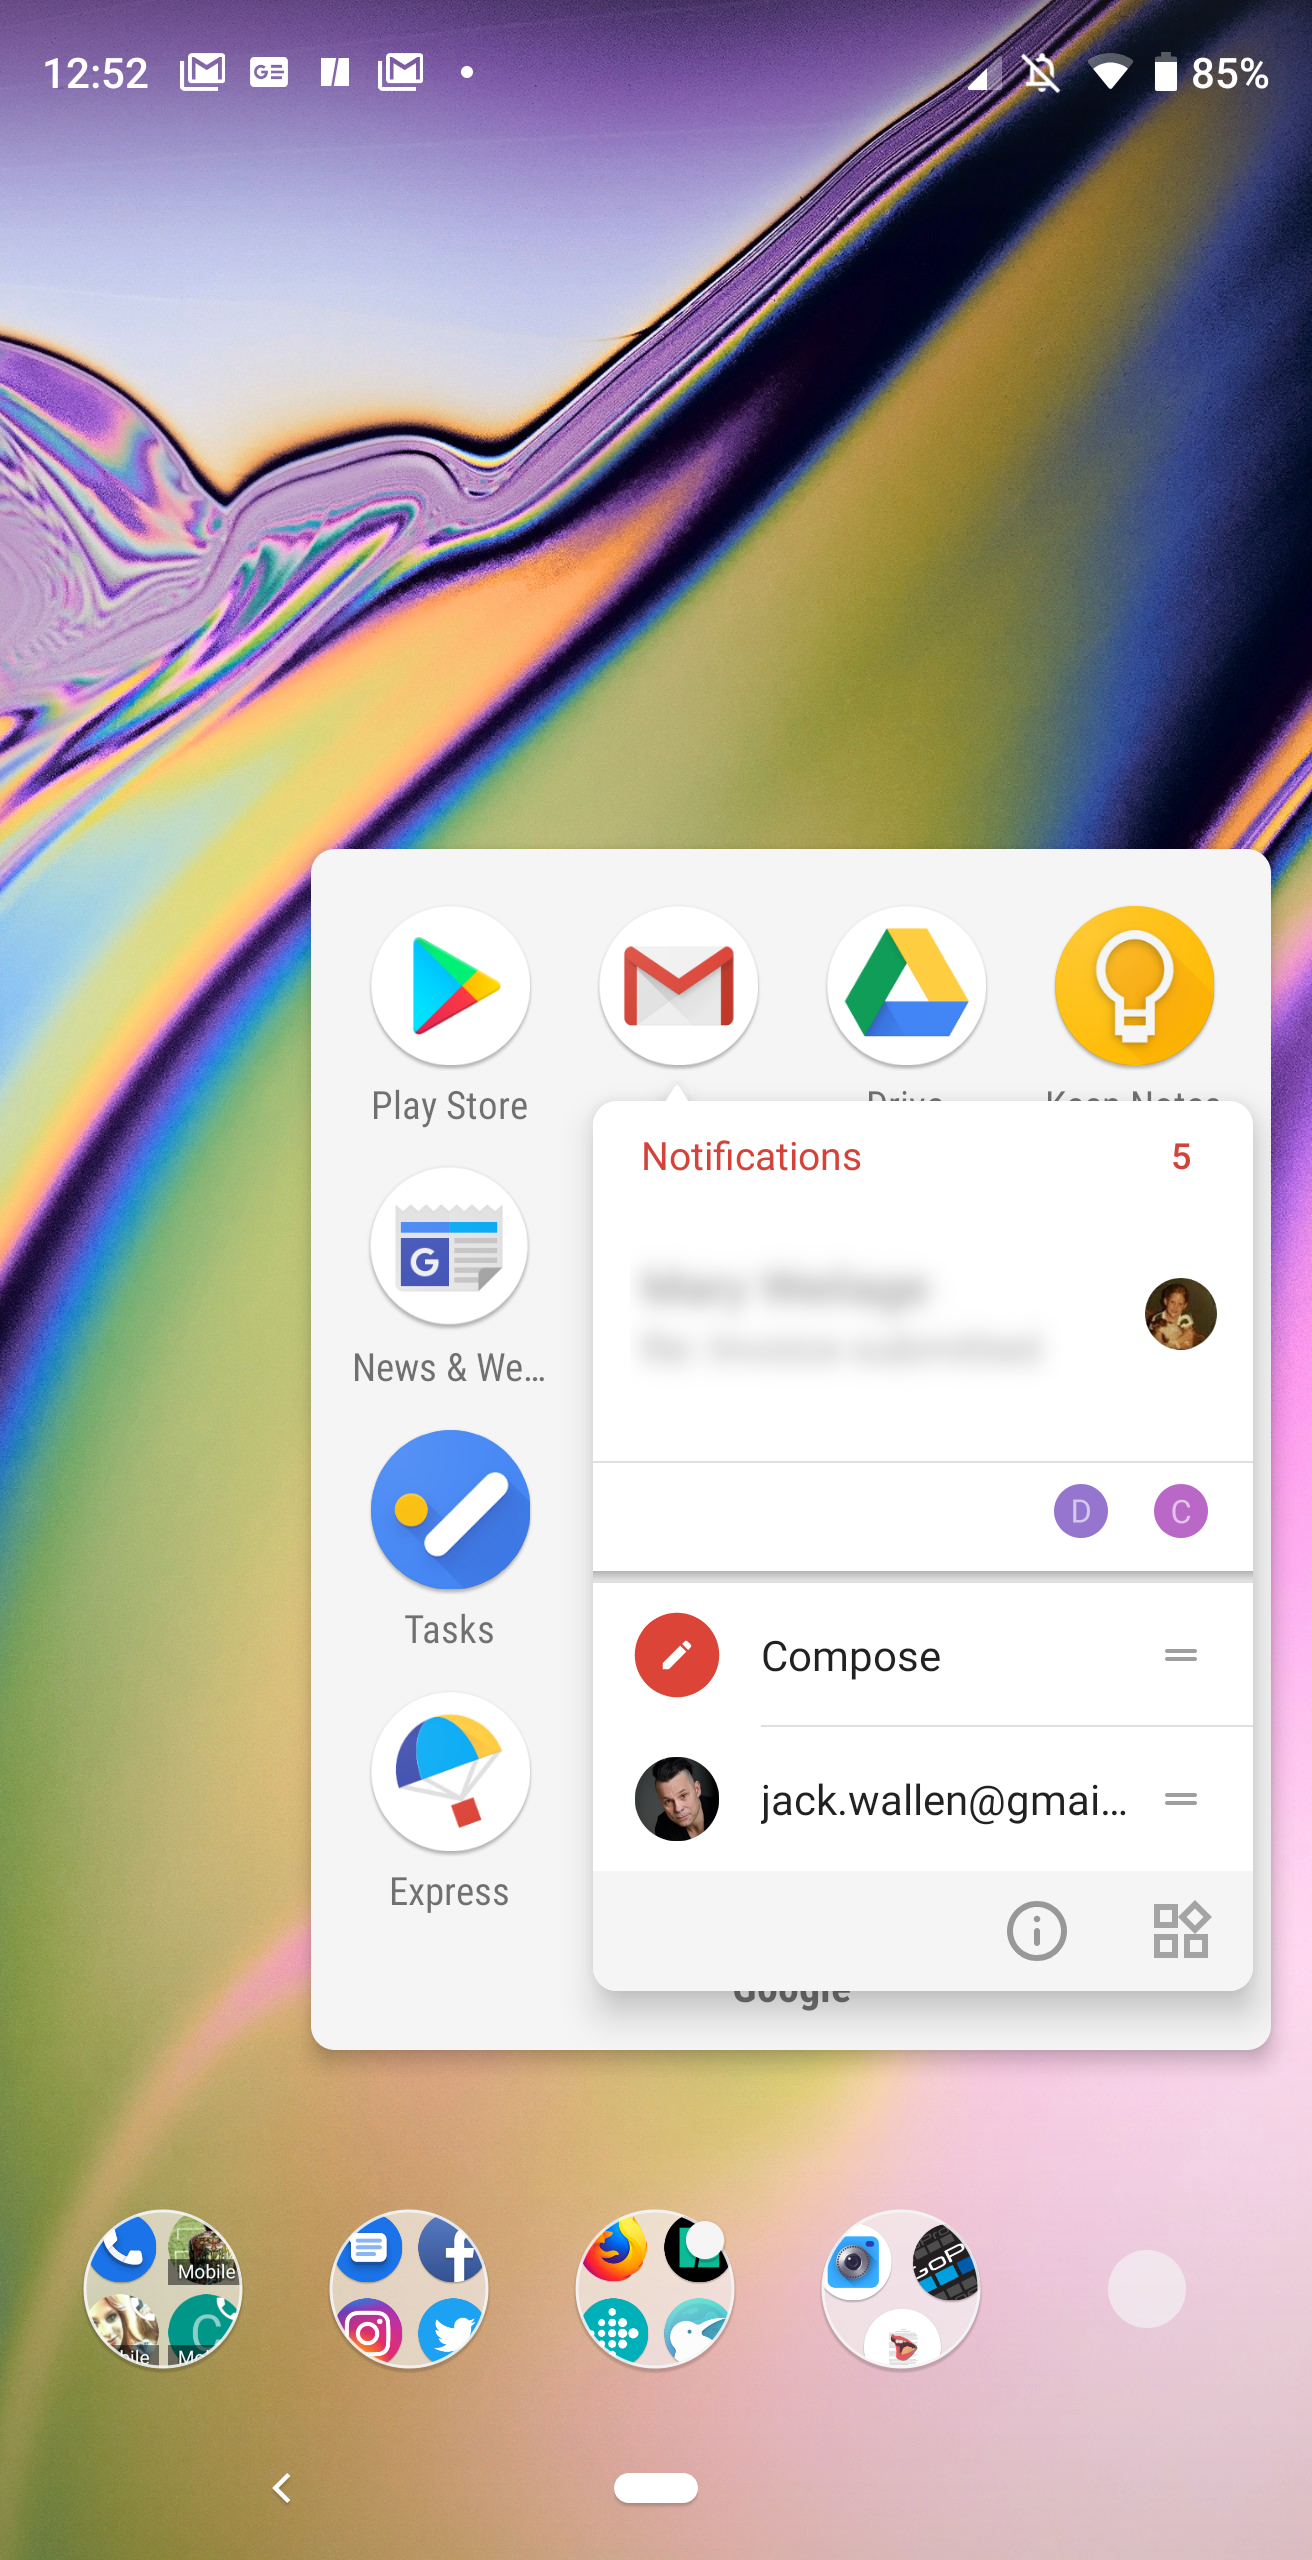
Figure 4: Android App Actions in action.
App Actions
This is another feature that was introduced some time ago, but was given some serious attention for the release of Android Pie. App Actions make it such that you can do certain things with an app, directly from the apps launcher.
For instance, if you long-press the GMail launcher, you can select to reply to a recent email, or compose a new email. Back in Android Oreo, that feature came in the form of a popup list of actions. With Android Pie, the feature now better fits with the Material Design scheme of things (Figure 4).
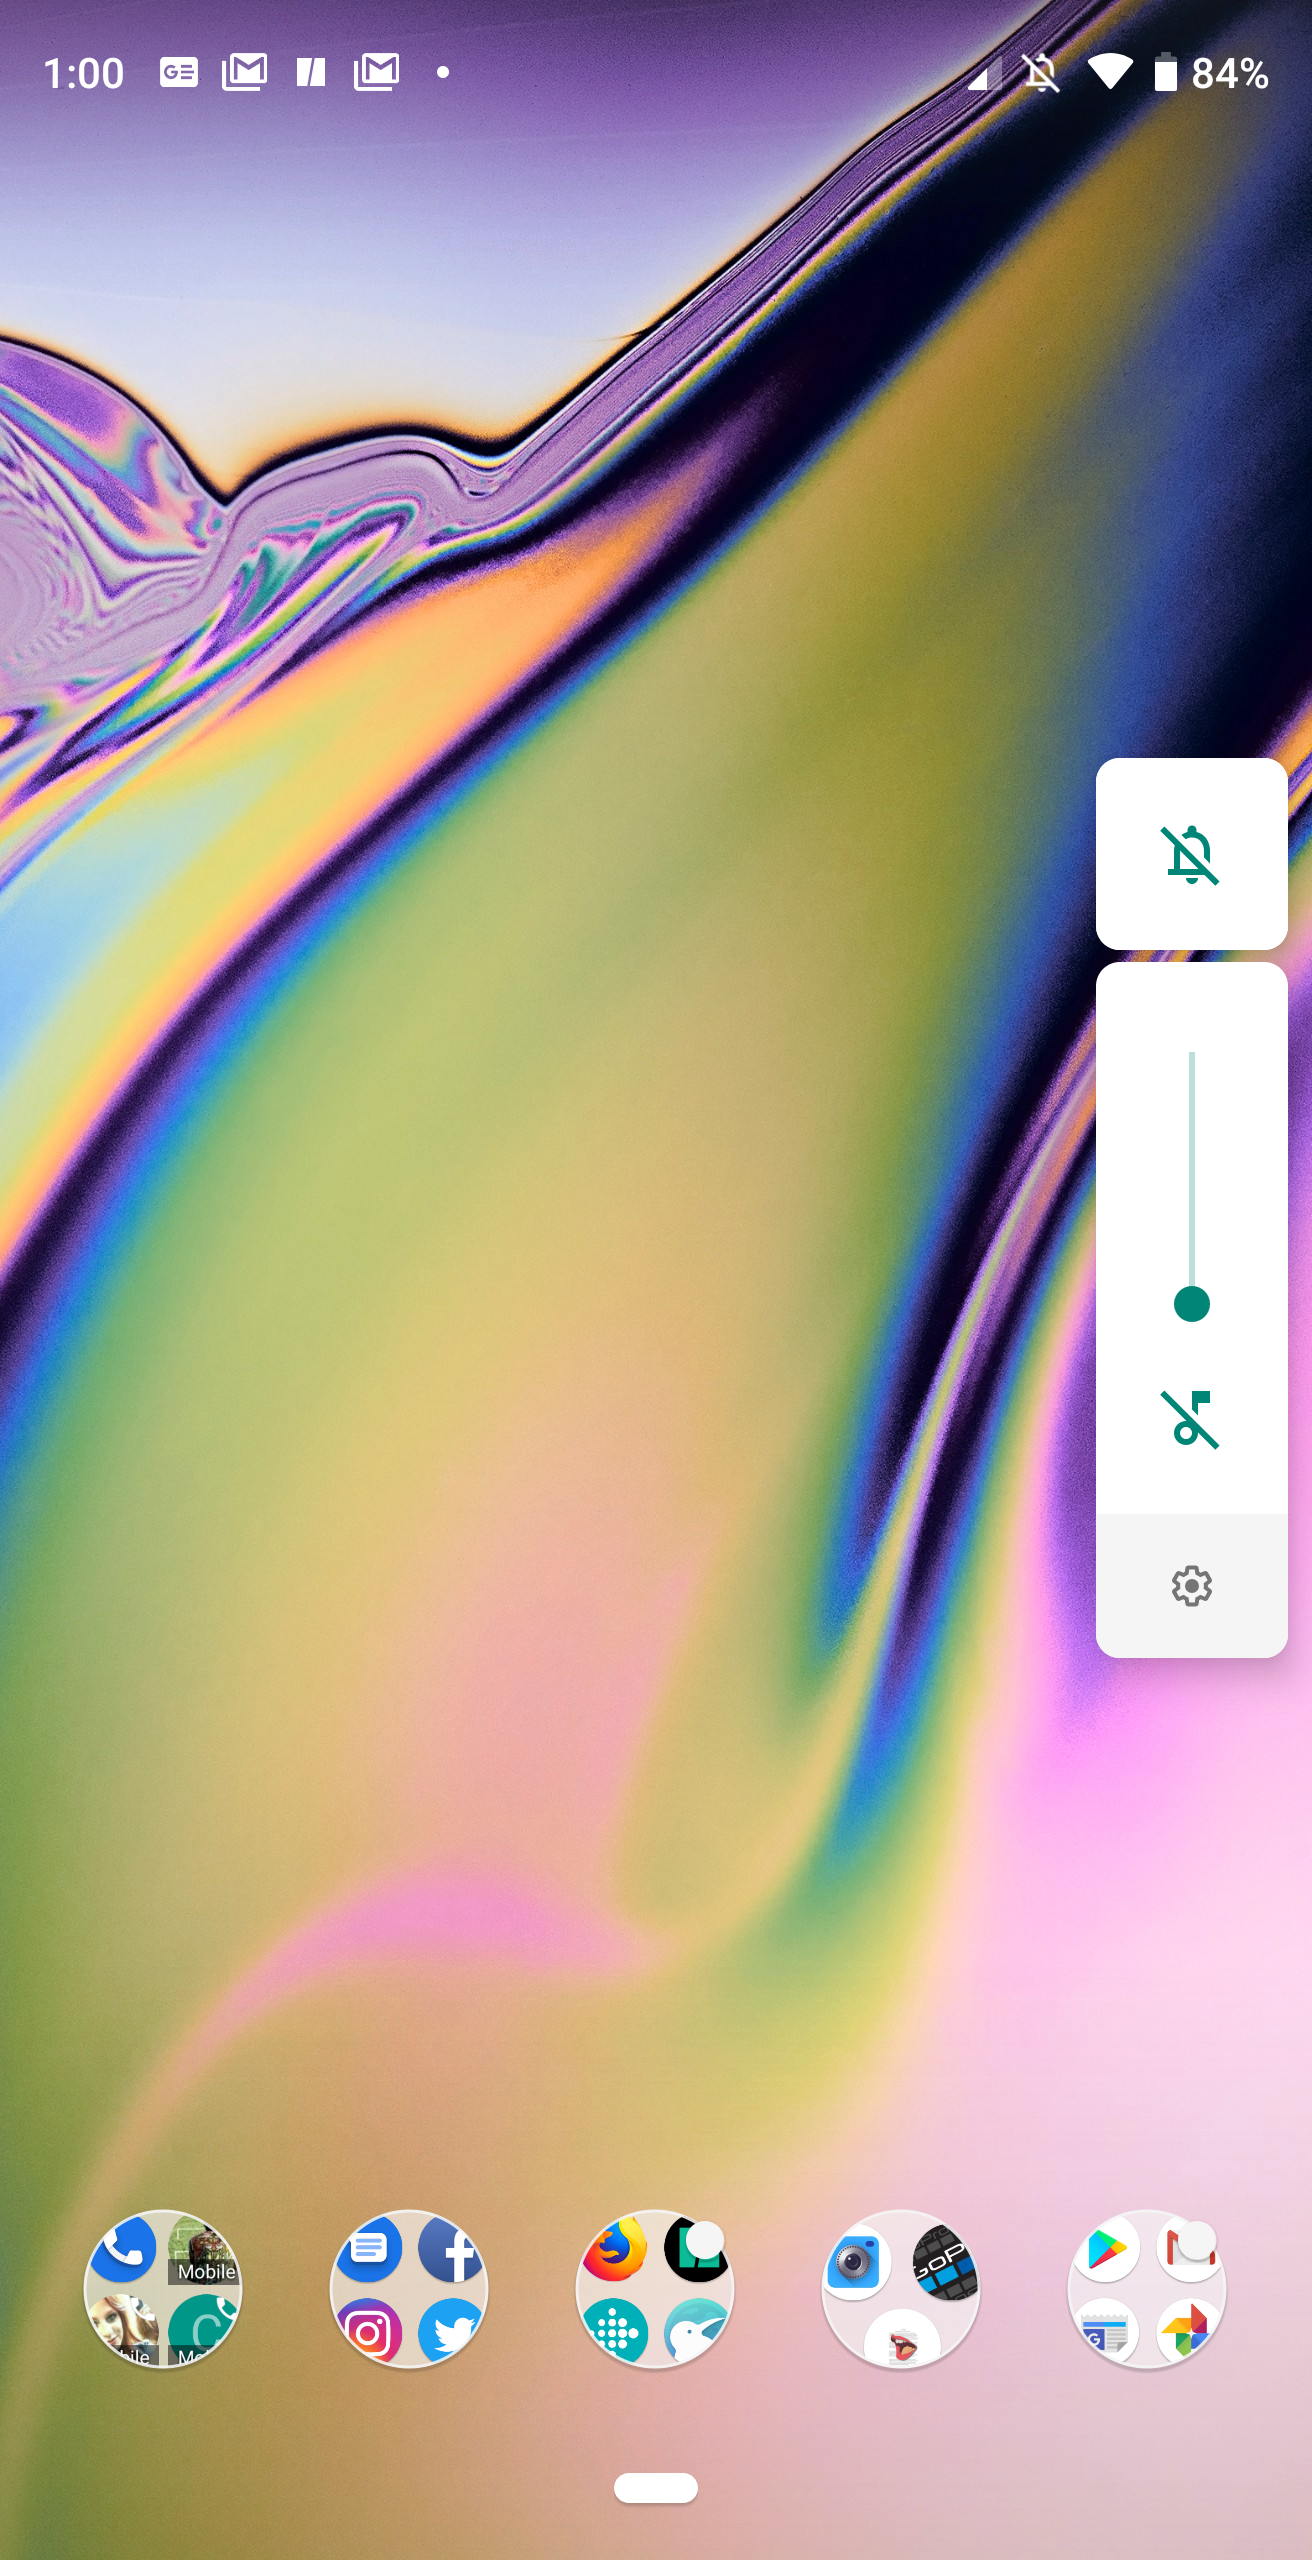
Figure 5: Sound control in Android Pie.
Sound Controls
Ah, the ever-changing world of sound controls on Android. Android Oreo had an outstanding method of controlling your sound, by way of minor tweaks to the Do Not Disturb feature. With Android Pie, that feature finds itself in a continued state of evolution.
What Android Pie nailed is the quick access buttons to controlling sound on a device. Now, if you press either the volume up or down button, you’ll see a new popup menu that allows you to control if your device is silenced and/or vibrations are muted. By tapping the top icon in that popup menu (Figure 5), you can cycle through silence, mute, or full sound.
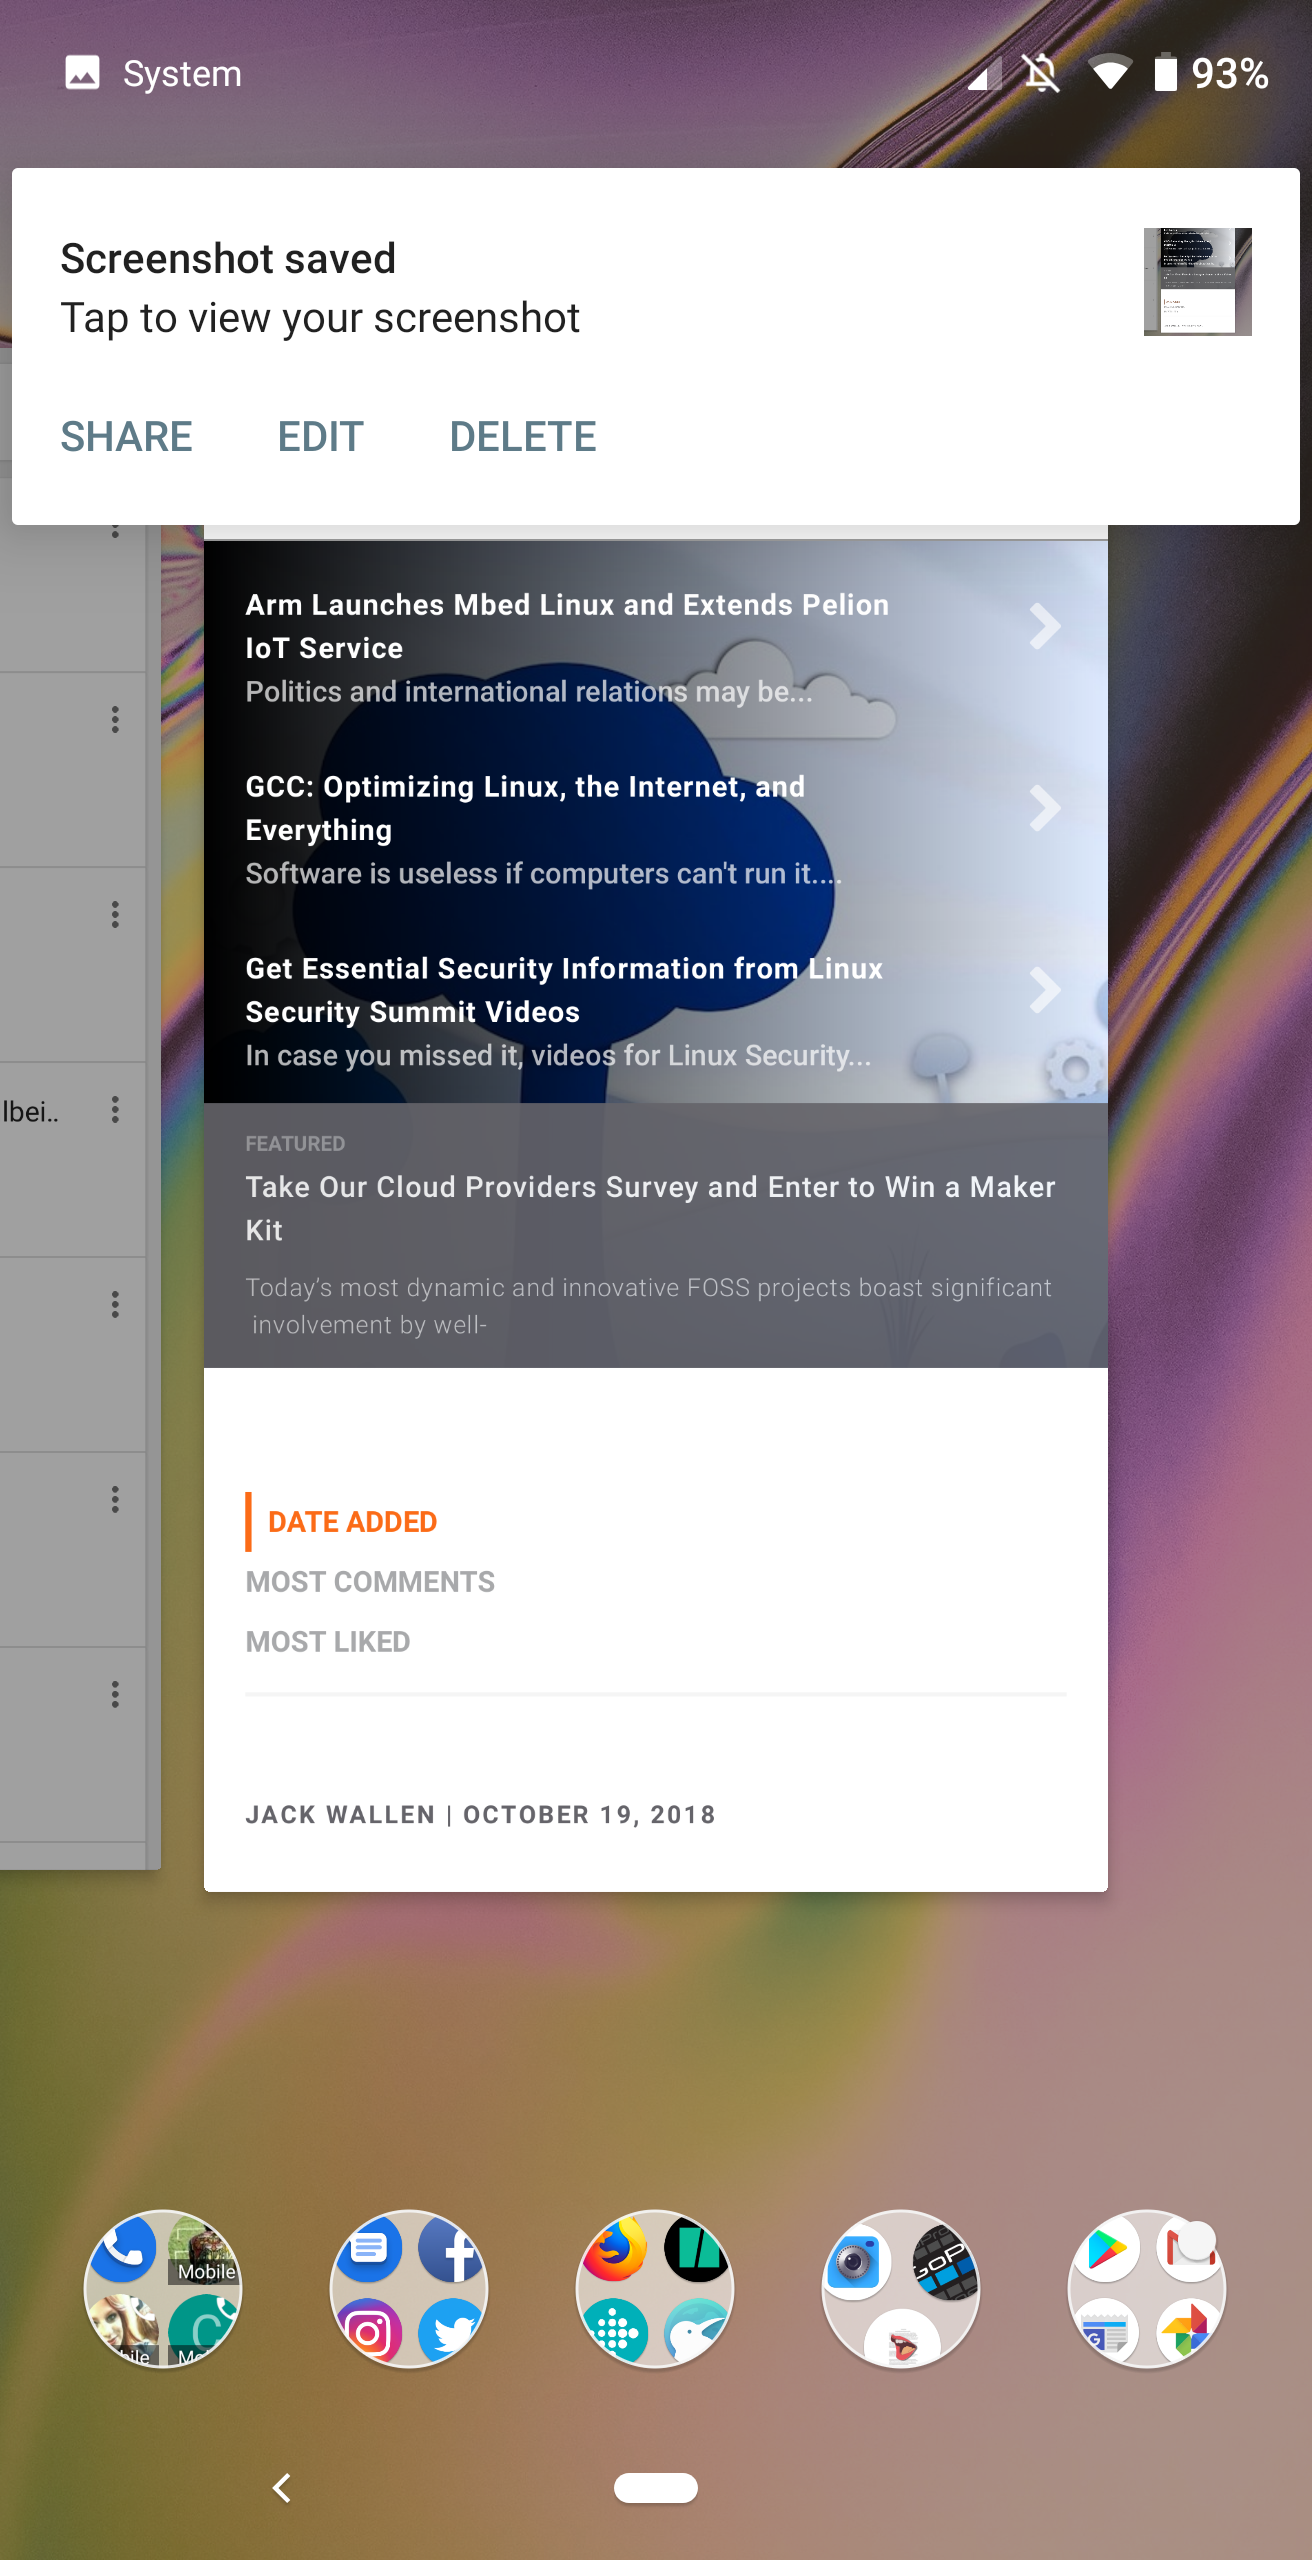
Screenshots
Because I write about Android, I tend to take a lot of screenshots. With Android Pie came one of my favorite improvements: sharing screenshots. Instead of having to open Google Photos, locate the screenshot to be shared, open the image, and share the image, Pie gives you a pop-up menu (after you take a screenshot) that allows you to share, edit, or delete the image in question.
Figure 6: Sharing screenshots just got a whole lot easier.
If you want to share the screenshot, take it, wait for the menu to pop up, tap Share (Figure 6), and then share it from the standard Android sharing menu.
A More Satisfying Android Experience
The ninth iteration of Android has brought about a far more satisfying user experience. What I’ve illustrated only scratches the surface of what Android Pie brings to the table. For more information, check out Google’s official Android Pie website. And if your device has yet to receive the upgrade, have a bit of patience. Pie is well worth the wait.
Technology systems are difficult to wrangle. Our systems grow in accidental complexity and complication over time. Sometimes we can succumb to thinking other people really hold the cards, that they have the puppet strings we don’t.
This is exacerbated by the fact that our field is young and growing and changing, and we’re still finding the roles we need to have to be successful. To do so, we borrow metaphors from roles in other industries. The term “data scientist” was first used in the late 1990s. In 2008 or so, when data scientist emerged as a job title, it was widely ridiculed as a nonjob: the thought that people who just worked with data could be scientists, or employ the rigors of their time-honored methods, was literally laughable in many circles. …
Likewise, the term “architect” didn’t enter popular usage to describe a role in the software field until the late 1990s. It, too, was ridiculed as an overblown, fancy-pants misappropriation from a “real” field. Part of the vulnerability here is that it hasn’t always been clear what the architect’s deliverables are. We often say “blueprints,” but that’s another metaphor borrowed from the original field, and of course we don’t make actual blueprints.
So, we will define the role of the architect in order to proceed from common ground. This is my tailored view of it; others will have different definitions. Before we do that, though, let’s cover some historical context that informs how we think of the role.
Issue is only a privilege escalation flaw but it impacts a large number of systems.
Linux and BSD variants that employ the popular X.Org Server package –almost all do– are vulnerable to a new vulnerability disclosed on Thursday.
The vulnerability allows an attacker with limited access to a system, either via a terminal or SSH session, to elevate privileges and gain root access. It can’t be used to break into secure computers, but it is still useful to attackers because it can quickly turn simple intrusions into bad hacks.
Modern stateless applications are built and designed to run in software containers like Docker, and be managed by container clusters like Kubernetes. They are developed using Cloud Native and Twelve Factorprinciples and patterns, to minimize manual intervention and maximize portability and redundancy. Migrating virtual-machine or bare metal-based applications into containers (known as “containerizing”) and deploying them inside of clusters often involves significant shifts in how these apps are built, packaged, and delivered.
Building on Architecting Applications for Kubernetes, in this conceptual guide, we’ll discuss high-level steps for modernizing your applications, with the end goal of running and managing them in a Kubernetes cluster. Although you can run stateful applications like databases on Kubernetes, this guide focuses on migrating and modernizing stateless applications, with persistent data offloaded to an external data store.
Every time you open a webpage on your computer, data packets are sent and received on your network interface. Sometimes, analyzing these packets becomes important for many reasons. Thankfully, Linux offers a command line utility that dumps information related to these data packets in output.
In this article, we will discuss the basics of the tool in question – tcpdump. But before we do that, it’s worth mentioning that all examples here have been tested on an Ubuntu 18.04 LTS machine.
Linux tcpdump command
The tcpdump command in Linux lets you dump traffic on a network. Following is its syntax in short: