This week in Linux and open source news, The Linux Foundation’s Hyperledger Project to help China get greener, an old Linux vulnerability surfaces, and more! Read on to stay in the OSS know!
1) IBM and Energy-Blockchain Labs announced a blockchain-based trading platform for “green assets” that’s based on Hyperledger.
3) Gates’ Radiant Earth Project hopes to “encourage the creation of more open source technologies and innovation that can help ‘solve societies’ most pressing issues.'”
Arch Linux has never been known as a user-friendly Linux distribution. In fact, the whole premise of Arch requires the end user make a certain amount of effort in understanding how the system works. Arch even goes so far as to use a package manager (aptly named, Pacman) designed specifically for the platform. That means all that apt-get and dnfknowledge you have doesn’t necessarily roll over.
Don’t get me wrong; Arch Linux is a fantastic distribution. However (and that “however” is significant), it’s certainly not a distribution for anyone even moderately new to the world of Linux. Case in point: When you boot up an ISO of Arch Linux, you wind up at a Bash prompt, where you then walk through the numerous steps (as outlined in the Installation guide) to get Arch Linux installed. In the end, you will be rewarded with a fine-tuned Linux distribution that will serve your needs well. On top of that, by the time you’ve installed Arch, you will know more about your operating system than you would have before.
But what about those who want the benefits of Arch Linux, but don’t want to have to go through the unwieldy installation? For that, you turn to a distribution like Manjaro. This take on Arch Linux makes the platform as easy to install as any operating system and equally as user-friendly to work with. Manjaro is suited for every level of user—from beginner to expert.
The big question, however, is why would you want to give Manjaro a try? With so many Linux distributions available, is there anything particularly compelling about this platform to woo you away from your current daily driver (or to simply test out what this Arch-based distribution is all about)? Let’s take a look.
32- and 64-bit friendly
While many distributions are dropping support for 32-bit architecture, Manjaro continues to support the aging platform. This means that all of your older hardware can still make use of this Arch-based operating system with the latest-greatest releases of software. This will become more crucial in the future, when more Linux distributions stop supporting 32-bit hardware.
Rolling Release
Manjaro (currently on its 17th iteration) is a rolling release distribution. What does that mean? For those that do not know, a rolling release distribution effectively means everything is updated frequently, even the core of the system, so that there is no need for point-based releases. This also means your machine will always have the latest-greatest stable software. Due to the frequency of the updates, they are also smaller. Some consider this a superior update delivery method, as there is less chance of software breakage.
Choose your desktop
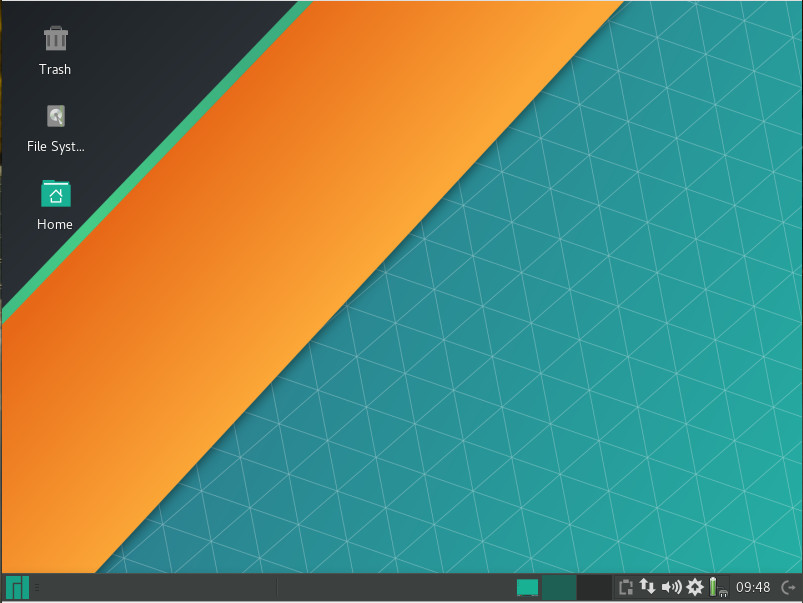
At the moment, you can choose between the Xfce, KDE, or GNOME. All three editions follow similar design concepts and offer a very clean and professional look (Figure 1).
Figure 1: The Xfce version of Manjaro keeps things clean and simple.
The Net edition provides a base installation without a pre-existing display manager, desktop environment, or any desktop software. With this particular release, you can customize it to perfectly meet your needs.
There are also community editions that include spins based on the following desktops:
The Manjaro developers have done a fantastic job of making Xfce, GNOME, and KDE versions look and feel the same. The biggest difference, for me, is that both the KDE and GNOME takes on the distribution are a bit more elegant and modern than Xfce (which might sway you one way or another).
Software
Beyond Manjaro’s ability to make Arch easy, one of the most impressive aspects to be found on this desktop Linux distribution is the collection of included software. Yes, you’ll find the standard productivity software:
LibreOffice
GIMP (XFCE version only)
Inkscape and Krita (KDE version only)
File managers and other standard desktop tools
Firefox (all three versions)
Thunderbird (KDE and XFCE versions)
Evolution (GNOME version)
But beyond the basics, you’ll also find the likes of:
Avahi SSH Server and Zeroconf Browser
Steam
Bulk Rename
Catfish File Search
Clipman
HP Device Manager
Orage Calendar
Htop
GParted
Yakuake (KDE version only)
Octopi CacheCleaner (KDE version only)
Along with those packages, Manjaro offers an easy to use Add/Remove Software tool (Figure 2) that allows you to install software from a vast collection of titles.
Figure 2: The Manjaro Add/Remove Software tool.
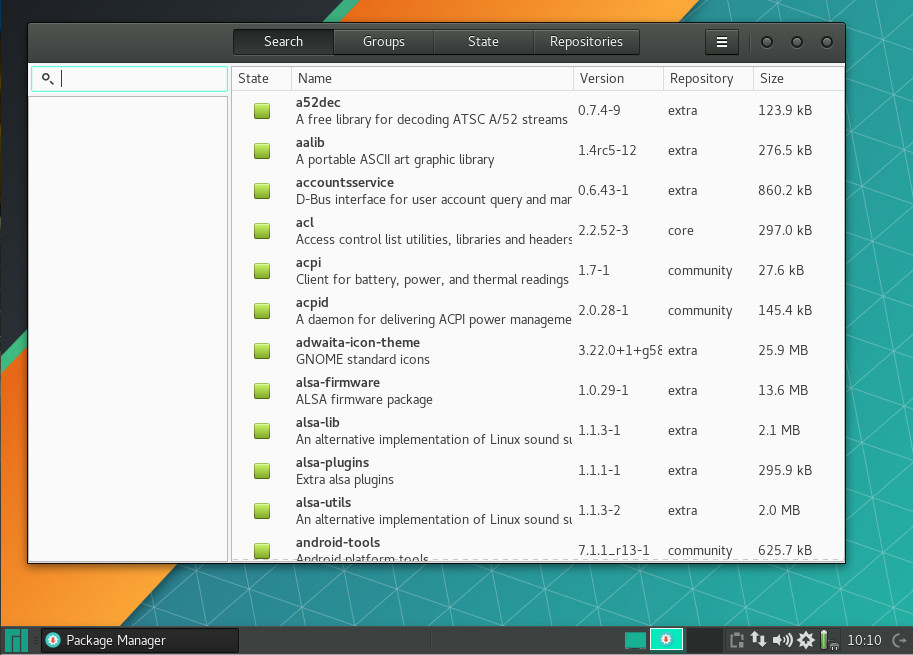
Understand, the pre-installed package listing will vary, depending on which desktop environment you’ve chosen to install. For example, the KDE version of Manjaro will lean heavy on KDE applications and the GNOME version will lean on GNOME software. You will find, however, that all three official desktop iterations do include LibreOffice, so your productivity is covered, regardless of environment.
The package manager GUI is as simple to use as any: Open the tool, search for what you want to install, select the software, and click Apply. Updates are just as easy. When an update has arrived, you will be notified in the system tray. Click the notification and okay the installation of the upgrades.
Settings Menu
One nice touch for Xfce spin of Manjaro is the Settings menu. Click on the Main menu and then click Settings in the right side of the menu to reveal an impressive amount of options available to configure (Figure 3). Figure 3: The Manjaro Settings menu offers a wide collection of configuration options. 
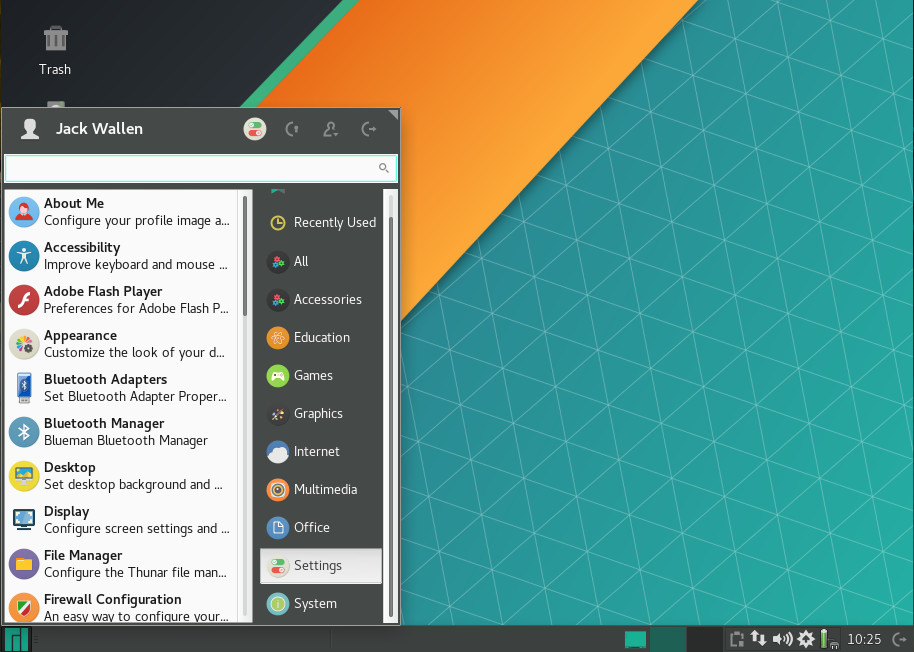
With the KDE and GNOME flavors of Manjaro, you work with the standard tools of that particular desktop environment, for a bit more cohesive feel. If you’ve used a recent releases of either KDE or GNOME, you’ll feel right at home. The GNOME iteration also includes the Dock To Dash extension, for those that prefer a more “dock-like” approach to the desktop.
Media
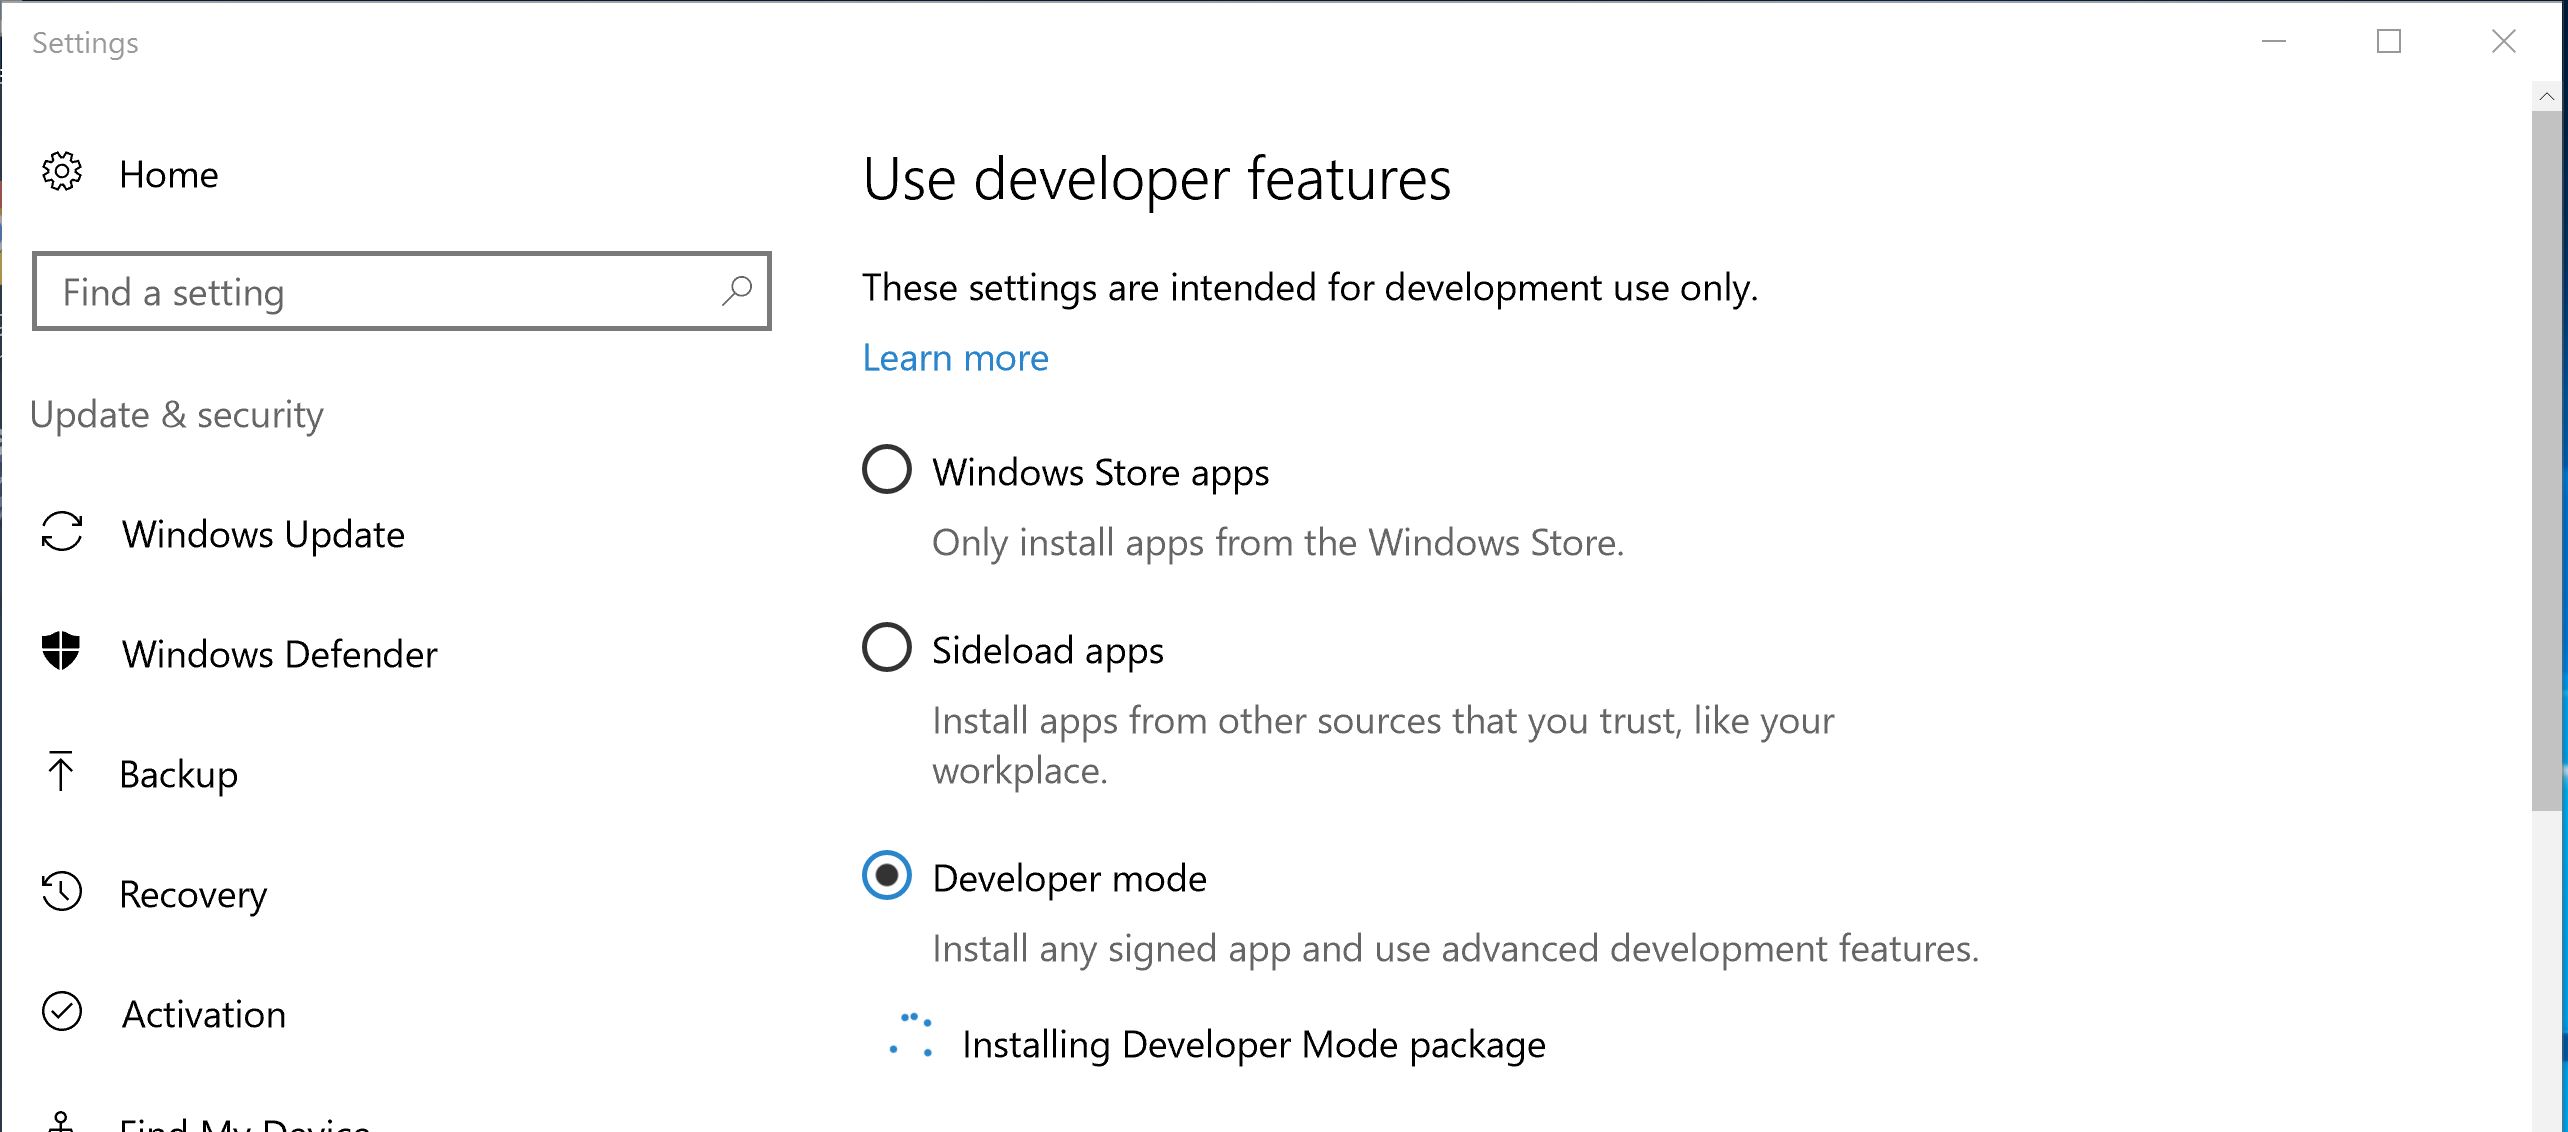
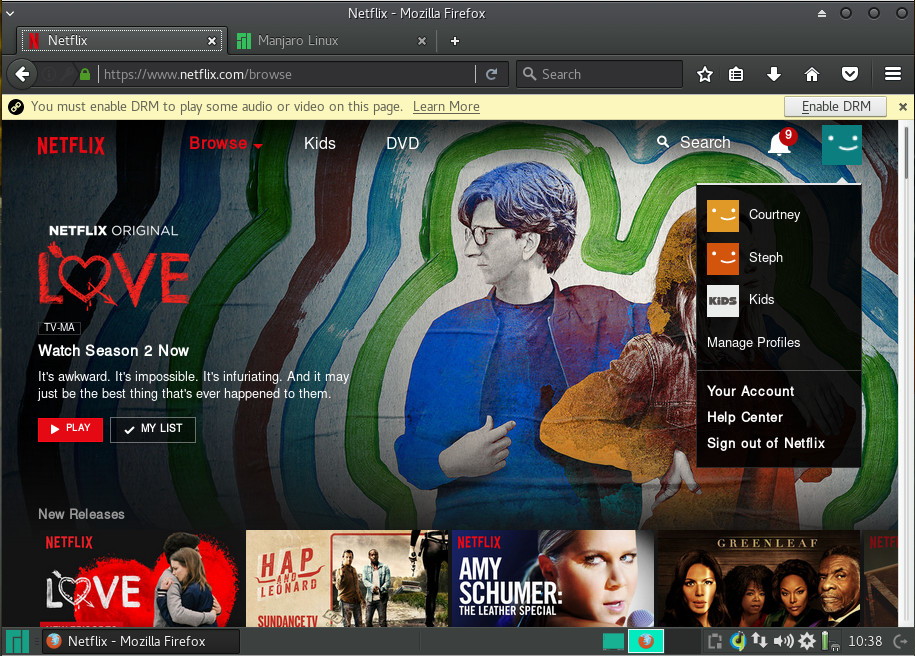
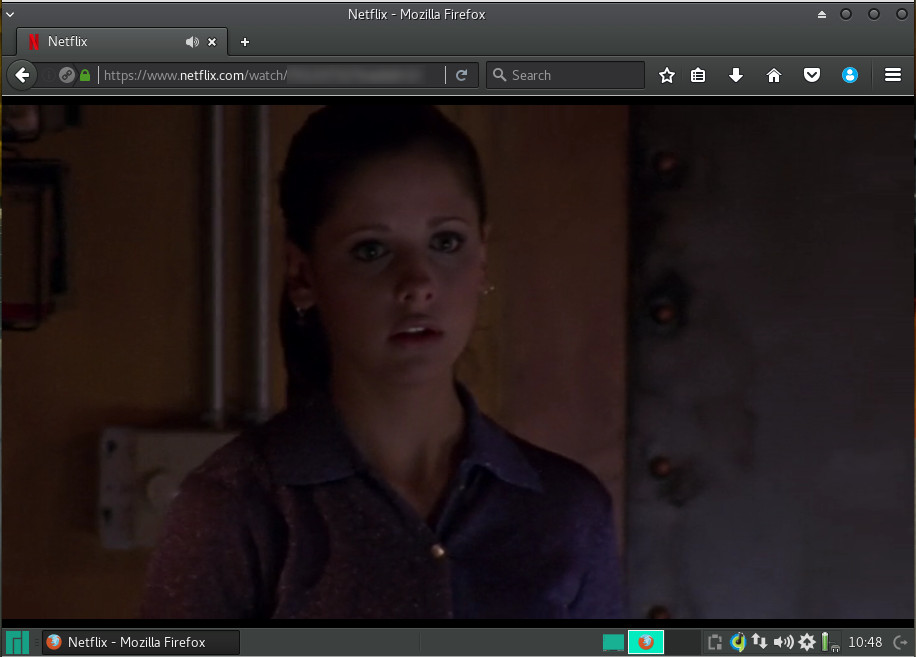
I was pleasantly surprised that Manjaro was able to play MP3s out of the box with one of its media players. The Xfce edition of Manjaro ships with both Guayadeque and Parole media players. Of the two, only Guayadeque was able to play MP3 files out of the box. YouTube videos play without issue and Netflix only requires the enabling of DRM (Figure 4) and the installation of the Random Agent Spoofer extension.
Figure 4: Enabling DRM for Netflix.
Once you’ve taken care of those two issues, Netflix plays seamlessly (Figure 5).
Figure 5: Catching a little Buffy The Vampire Slayer on Netflix.
Performance
As for performance, you can opt for any of the official editions of Manjaro and expect incredible speed. Running as a VirtualBox guest with 3GB of RAM, Manjaro ran as smoothly and quickly as the host Elementary OS Loki with a remaining 13GB of RAM available. That should tell you all you need to know about the performance of Manjaro. As a whole, there is absolutely nothing to complain about with regards to Manjaro performance. It’s quick, smooth, and reliable. The GNOME, KDE, and Xfce are flawless.
Who’s it for?
In the end, I think it’s safe to say that Manjaro Linux is a distribution that is perfectly capable of pleasing any level of user wanting a reliable, always up-to-date desktop. Manjaro has been around since 2011, so it’s had plenty of time to get things right… and that’s exactly what it does. If you’ve been looking for the ideal distribution to help you give Arch a try, the latest release of Manjaro is exactly what you’re looking for.
Learn more about Linux through the free “Introduction to Linux” course from The Linux Foundation and edX.
It’s no secret that Linux dominates the cloud, whether it’s a private cloud running on OpenStack or if it’s AWS or Microsoft Azure cloud. Microsoft itself admits that one out of three machines run Linux in Azure cloud. However, as more customers were running Linux, they needed the ability to manage their Linux systems, and Windows 10 lacked Linux tools and utilities.
Microsoft tried to add UNIX capabilities to its own PowerShell, but it didn’t work out as expected. Then, they worked with Canonical to create a Windows Subsystem for Linux. This allowed users to install Linux inside Windows 10, offering native integration, which meant users would be literally running Ubuntu command-line tools in Windows.
However, not everyone uses Ubuntu. In the Linux world, different distributions use different tools, utilities and commands to perform the same task. Officially, Microsoft is sticking to Ubuntu, as it’s the dominant cloud OS. But that doesn’t mean you can’t run your choice of distro. There is an open source project on GitHub that allows users to not only install a few supported distros on Windows, but also easily switch between them.
To start, we need to install Windows Subsystem for Linux on Windows.
Install Linux Bash for Windows
First, you need to join the Insider Build program to gain access to pre-release features such as WSL. Open Update Settings and then go to ‘Advanced Windows Update option’. Follow the instructions and join the Insider Build program. It requires you to log into your Microsoft account. Once done, it will ask you to restart the system.
Once you’ve rebooted, go to Advanced Windows Update optionpage and choose the pre-release update and select the Fast option.
Then, go to Developer Settings and choose Developer mode.
Once done, open ‘turn windows features on and off’ and select Window Subsystem for Linux beta.
You may have to reboot the system. Once rebooted, type ‘bash’ in the Windows 10 search bar, and it will open the command prompt where you will install bash — just follow the on-screen instructions. It will also ask you to create a username and password for the account. Once done, you will have Ubuntu running on the system.
Now every time you open ‘bash’ from the Start Menu of Windows 10, it will open bash running on Ubuntu.
The switcher we are about to install basically extracts the tarball of your chosen Linux distribution into the home directory of WSL and then switches the current rootfs with the chosen one. You can download all desired, and supported, distributions and then easily switch between them. Once you switch the distro and open ‘bash’ from the start menu, instead of Ubuntu, you will be running that distro.
Let’s get started.
Install Windows Subsystem for Linux Distribution Switcher
It’s time to install a switcher that will help us in switching between distributions. First, we need to install the latest version of Python 3 in Windows. Then, download the switcher folder from GitHub. It’s a zip file, so extract the file in the Downloads folder. Now open PowerShell and change the directory to the WSL folder:
cd .DownloadsWSL-Distribution-Switcher-master
Run ‘ls’ command to see all the scripts available. You should see this list:
Debian 8 is now installed. Now, let’s start using Debian. If you want to use Fedora, first quit the Debian bash session, by typing exit.
Now go back to PowerShell and enter the WSL directory as explained above:
cd .DownloadsWSL-Distribution-Switcher-master
Let’s download Fedora:
py.exe .get-source.py fedora
And then install it:
py.exe .install.py fedora
When you install a distribution, the ‘bash’ automatically switches to that distribution, so if you open ‘bash’ from Start Menu, you will be logged into Fedora. Try it!
Ok! Now how do we switch between installed distributions? First, you need to quit the existing ‘bash’ and go back to PowerShell, cd to the WSL Switcher directory, and then use ‘switcher’ script to switch to the desired distribution.
py.exe .switch.py NAME_OF_INSTALLED_DISTRO
So, let’s say we want to switch to Debian
py.exe .switch.py debian
Open ‘bash’ from Start and you will be running Debian. Now you can easily switch between any of these distributions. Just bear in mind that WSL itself is a beta software; it’s not ready for production so you will come across problems. On top of that, WSL Distribution Switcher is also an “under development” software so don’t expect everything to work flawlessly.
The basic idea behind this tutorial is to get you started with it. If you have questions, head over to the GitHub page and do as we do in the Linux world: ask, suggest, and contribute.
Learn more about Linux through the free “Introduction to Linux” course from The Linux Foundation and edX.
This article is paid for by Amdocs, a Platinum-level sponsor of Open Networking Summit, to be held April 3-6, and was written by Linux.com.
Open Networking Summit 2017 kicks off next week and one major topic under discussion there will be the newly formed Open Network Automation Platform (ONAP) project. ONAP is quickly becoming the de facto standard platform for network automation, supporting network functions virtualization and software-defined networks (NFV/SDN) quick adoption, says Alla Goldner, an Amdocs Director of Technology, Strategy and Standardization and a member of the ONAP Technical Steering Committee (TSC) at The Linux Foundation.
Alla Goldner, Amdocs Director of Technology, Strategy and Standardization
“ONAP is a new open source project that combines open source ECOMP and OPEN-O into a single harmonized effort to standardize a management and automation platform for NFV and SDN,” Goldner explained.
Such a standard frees operators to potentially escape the dreaded “dumb pipes” fate so many had feared and instead innovate their way to powerful differentiators and higher profits as well as effectively deal with industry disruptors, or become disruptors themselves.
ONAP is already heavily favored by telecom titans that had initially set out on their own to achieve the same Olympian accomplishment, first through proprietary means and then through separate open source projects.
AT&T originally designed ECOMP and partnered with Amdocs to bring it to fruition. Orange and Bell Canada joined in to support it and it was supposed to become an open source project at the beginning of this year. Meanwhile, the Open-O project was backed by operators like China Mobile, China Telecom and Hong Kong Telecom, as well as several vendors including Ericsson and Intel, among others.
The end goal of these efforts was not to achieve an open networking harmonized automation standard wherein costs could be cut, resources could be smartly realigned, and innovation could be moved into overdrive. Thus the merger of these two projects, ECOMP and OPEN-O, into one joint effort, ONAP, was a logical and important outcome.
“Network management is very complex,” Goldner said, “and that complexity can’t be resolved unless there is a standard for all to work with – and ONAP is becoming the de facto standard.”
Here, Goldner gives us some additional insights into the project’s impact on NFV and SDN in advance of Open Networking Summit.
Linux.com:How does adopting ONAP as a standard help all operators and vendors to innovate?
Alla Goldner:A standard makes it faster and cheaper to innovate. The ECOMP platform consists of more than 8 million lines of code. There is a big group of vendors and operators all trying to develop and implement new innovations across a large mix of platforms, many of them proprietary, which then requires further work in the way of integration and orchestration. This is not an efficient, effective, cheap or easy way to bring innovations to market.
ONAP as a de facto standard removes all these obstacles so that operators and vendors alike can focus on creativity and innovation.
Linux.com:You said that ONAP is becoming that de facto standard. How are you measuring support for the project right now as the TSC works on merging, and developing, ONAP code?
Alla Goldner:There is significant enthusiasm and support for ONAP now. There are 23 members already, both platform vendors and Service Providers, while the list of operators contains some of the biggest names in the space, including AT&T, Bell Canada, China Mobile, China Telecom, and Orange. Given this significant momentum, critical mass is either already there or it soon will be. With critical mass comes significant commitment and investment in quickly maturing the standard and surrounding technologies.
Standardizing and automating the underlying NFV/SDN also enables the operator to make adjustments at any time. Eventually this means operators can easily escape vendor lock-in, which reduces costs and enables more flexibility in switching or replacing network hardware, software, or processes.
Open Networking Summit April 3-6 in Santa Clara, CA features over 75 sessions, workshops, and free training! Get in-depth training on up-and-coming technologies including AR/VR/IoT, orchestration, containers, and more.
Linux.com readers can register now with code LINUXRD5 for 5% off the attendee registration. Register now!
This article was sponsored by Amdocs, founding member of ONAP. Find out how Amdocs is leading ONAP early adopters and accelerating NFV/SDN service innovation here, and watch leading service providers and the Linux Foundation discuss what open network automation means for the industry.
The internet is a harsh mistress. Sites go down, change without notice, or even just disappear entirely. The web — are you sitting down? — is not 100 percent reliable. This means that testing a project that has external dependencies, things can fail that aren’t even your bugs. What’s a software testing engineer to do?!uo
Make your own internet, that’s what. Or at least a network layer mocking system to take care of that outbound traffic, so there are no third party downtime network issues or other constraints that break your test. The software engineering team at the LinkedIn social networking service announced in a blog post Friday that they have done just that, building a new internet mocking tool called Flashback to remove that uncontrolled variable from the testing equation.
An outside observer watching a software developer work on a small feature in a real project would find the process to look less like engineering and more like a contrived scavenger hunt for knowledge new and old.
The problem is that we scatter what we learn and teach to the winds. A quick comment on a pull request transfers knowledge from one head to another, but then falls off the radar. A blog post covers some lesson learned while working on a project, but then never gets touched again after it’s written. A StackOverflow link is passed through Slack, and then disappears into the back scroll.
We can do better. In this article, I will explain how to get started on a more systematic way of cultivating knowledge. It’s something that won’t take you more than a few minutes a day at first, but it’ll pay off in massive volumes.
CoreOS and OpenStack have a somewhat intertwined history, which is why it’s somewhat surprising it took until today for CoreOS’s Tectonic Kubernetes distribution to provide an installer that targets OpenStack cloud deployments.
The founders of CoreOS originally worked at Rackspace, alongside the founders of OpenStack, and CoreOS executives have been a common sight at OpenStack events and even on the keynote stage. In fact, in April 2016, CoreOS CEO Alex Polvi gave a very well-received keynote demo of a project called Stackanetes, which enables Kubernetes to deploy an OpenStack cloud.
…HPE’s goal with The Machine is to build a large pool of persistent memory that application processors can just access.
“We want all the warm and hot data to reside in a very large in-memory domain,” Wheeler said. “At the software level, we are trying to eliminate a lot of the shuffling of data in and out of storage.”
Removing that kind of overhead will accelerate the processing of enormous datasets that are becoming increasingly common in the fields of big data analytics and machine learning.
There seems to be a phase that OSS projects go through where as they mature and gain traction. As they do it becomes increasingly important for vendors to point to their contributions to credibly say they are the ‘xyz’ company. Heptio is one such vendor operating in the OSS space, and this isn’t lost on us. 🙂
It helps during a sales cycle to be able to say “we are the a big contributor to this project, look at the percentage of code and PRs we submitted”. While transparency is important as is recognizing the contributions that key vendors, focus on a single metric in isolation (and LoC in particular) creates a perverse incentive structure. Taken to its extreme it becomes detrimental to project health.
In this day and age mobile app development has become decidedly mainstream. As more and more people do everything from ordering food to paying their bills from their smartphones, the need for creating great applications will not go away anytime soon. However, app development can be a long and arduous process, one that’s subject to all kinds of human errors. To that end, it’s now become fairly commonplace to automate certain test scenarios in order to avoid mistakes and decrease time consumption.
If you’re a budding programmer looking to make the most out of automated tests, you’ll need the following tools for starters:
1. A testing framework that comes with a set of APIs to build UI tests (we recommend Appium)
Once these are in place, we recommend setting up Appium to begin the automation process. Appium uses WebDriver and DesiredCapabilities, and you will need npm, the default package manager for Javascript runtime environment Node.js in order to install it. Installing npm on Linux can be done using brew, the OS package manager for Linux, and requires a bit of coding:
1. First of all – required dependencies. Paste the command below to terminal:
This procedure will take around 25 minutes. After the successful node installation you can install Appium through: npm install -g appium
Now it’s time to download and set-up Android SDK. This one’s easier, as all you need to do is follow instructions step-by-step and select the necessary packages for your chosen Android versions.
As far as Android Emulators go, we prefer using Genymotion. It’s fast and easy to use and offers a whole lot of functionalities, including GPS support and real-time Wi-Fi connections. In order to get it up and running, you’ll first need to install Virtualbox via the Ubuntu Software Center on your workstation. Then download Genymotion and run the following commands:
chmod a+x ./genymotion-2.7.2-linux_x64
./genymotion-2.7.2-linux_x64
You’ll need a virtual device user ID and password, both of which can be obtained by registering with the Genymotion website. After that, just click start and you’re good to go.
Now it’s time to add an IDE into the mix. If you use Maven be sure to add Selenium, TestNG and Appium to your dependencies. Be sure to also create a folder where your .apk file will be stored.
Finally, for analysis of the application’s UI you should use UIAutomatorviewer. It’s a part of the Android Studio you previously set up and allows you to inspect the UI of an application and examine things like layout hierarchy and the properties associated with the application’s controls. There are many advantages to using UIAutomatorviewer, including its independence of screen resolution and its ability to use external buttons.
That concludes our brief guide on how to set-up an environment for automating Android application testing on Linux. Keep in mind that any app worth its salt needs to be properly tested before hitting the market if it has any chance of competing in the ridiculously crowded app landscape of today, so implementing a successful automation strategy may save you lots of time and money in the process.