If you operate within the open source galaxy or the tech industry in general, you’ve likely run across the phrase “cloud-native” with increasing frequency — and you may be wondering what all the buzz is about.
Cloud-native refers to the model in which applications are built expressly for and run exclusively in the cloud — rather than designed and run on-prem, as enterprises historically have done. Cloud computing architecture, which leans heavily on open source code, promises on-demand computing power at lower cost, with no need to spend excessively on data center equipment, staffing and upkeep. Creating cloud-native applications and services is the natural next step for developers accustomed to working entirely in the cloud.
But enterprise-level cloud-native applications require a platform like Cloud Foundry to get up and running in the cloud. Platforms drastically reduce the resource drains associated with “snowflake” infrastructure, and in fact, they automate and integrate the concepts of continuous delivery, microservices, containers and more, to make deploying an application as easy and fast as possible — in any cloud you want, meaning you can operate in a truly multi-cloud environment.
On March 29 at 11 a.m. PST, join Pivotal’s Bridget Kromhout and Michael Coté for a free webinar that will take a deep dive into how cloud-native is the wave of the future and get answers to questions like:
What is the cloud-native approach? How will it benefit your software product team?
How does cloud-native enable cloud application platforms like Cloud Foundry to standardize production, accelerate cycles and create a multi-cloud environment?
Which companies are cloud-native? What lessons can we take from their new model?
Join Cloud Foundry and The Linux Foundation for “Better Software Through Cloud Platforms Like Cloud Foundry” on Wednesday, March 29, 2017 at 11:00am Pacific. Register Now! >>
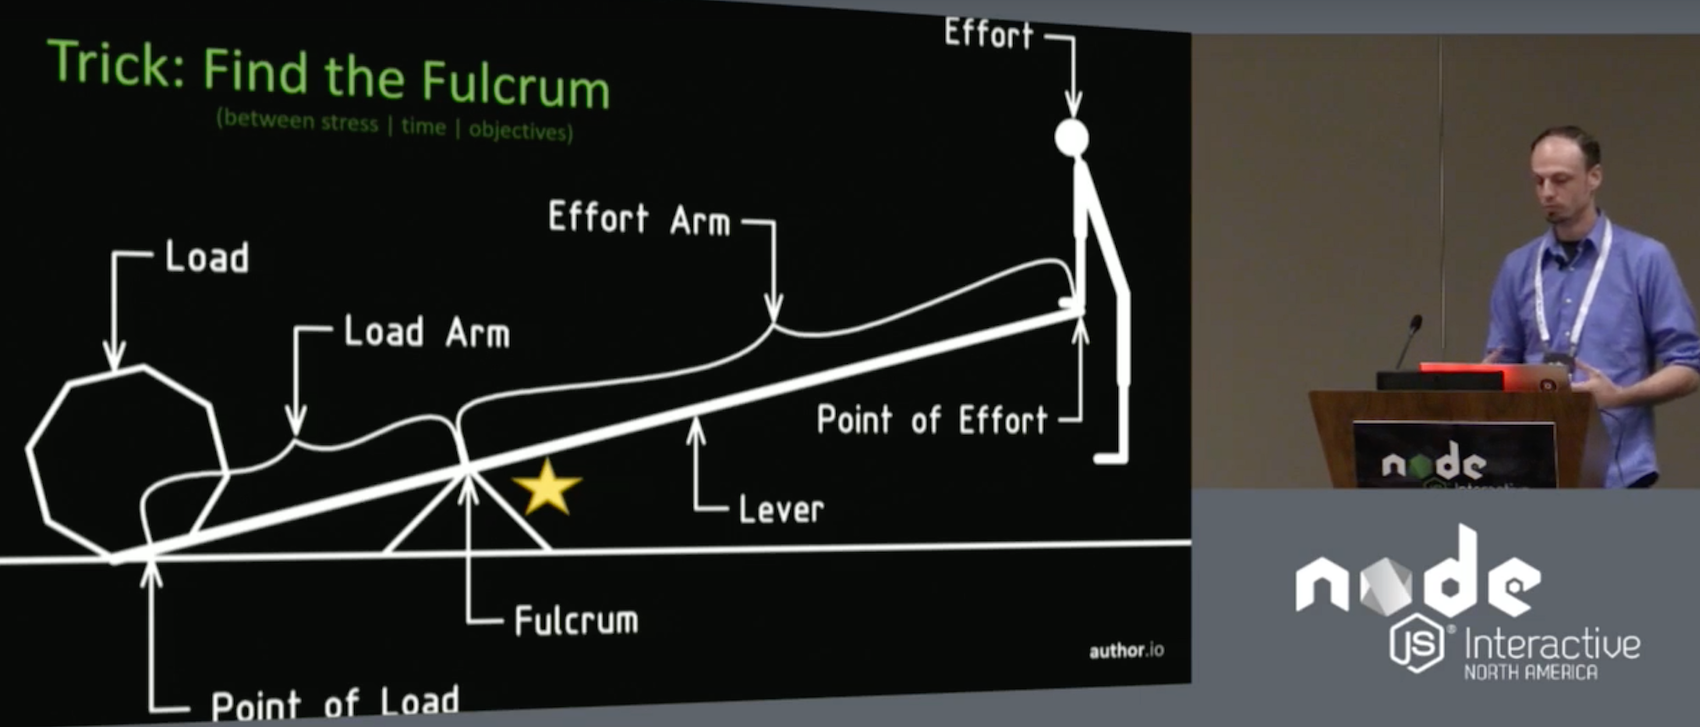
In his talk at Node.js Interactive, Butler said there are two things that stand in the way of achieving a state of development nirvana: one is the time spent coding and thinking about code, and the other is stress.
pm2 is a process manager for Node.js applications, it allows you to keep your apps alive and has a built-in load balancer. It’s simple and powerful, you can always restart or reload your node application with zero downtime and it allows you to create a cluster of your node app.
In this tutorial, I will show you how to install and configure pm2 for the simple ‘Express’ application and then configure Nginx as a reverse proxy for the node application that is running under pm2.
Nirvana, in this plane of existence at least, is a state of contentment, according to Corey A. Butler, creator of the Fenix Web Server and Author.io, a venture that provides software and services for developers. In his talk at Node.js Interactive, Butler said there are two things that stand in the way of achieving a state of development nirvana: one is the time spent coding and thinking about code, and the other is stress. Of course, you can never reach a state of perfect contentment, because you will always have to spend some time coding, and there will always be a certain degree of stress in your work.
Butler, however, says that you can control your workflow to such an extent as to make your time spent coding at least a little more enjoyable. However, there are also forces that oppose changes in workflow, too. For one thing, workflows tend to become invisible over time, turning into something few people think about and never think of changing. Additionally, as creatures of habit, humans tend to oppose change per se. And, many think people developers are smart. Developers tend to think so, too, and it may be true, but that doesn’t mean the workflows they have devised are smart.
Butler advises developers to “target continual change” to overcome these problems. By experimenting with different workflows, and then experimenting some more, you are less likely to fall into the rut of a suboptimal workflow.
This became apparent to Butler while creating NVM for Windows. NVM for Windows is a Node Version Manager for… well, Windows. Because the Node environment is constantly changing, Butler set himself the task of creating something that could handle that.
Butler’s expectations for the NVM, as with any other version manager, were that he would be able to save time — that is, reduce the time spent coding. This characteristic is what gave NVM use and value, but, he says, it is not what made it popular. Instead, NVM for Windows’ popularity, Butler reckons, stemmed from the fact that, because it included a graphical installer, it reduced stress.
The lesson that Butler learned from this is that it is often a small, nitpicky thing that contributes most to your overall stress. You should always look for the small annoying things and try and solve those, he says.
This idea is related to why people choose certain technology. The main motivator in preferring one tool or technology over another, says Butler, is trust. This means people don’t necessarily use the best technology, but will use the one they think they can rely on. Butler recommends piggybacking your own products off of technologies that people already trust. This approach led him to develop the node-windows, node-mac, and node-linux.
Because different developers trust different operating systems, each of the three projects allows developers to set up background daemons and services to run native Node scripts. Butler says this approach combines the trust a developer has in their operating system of choice, with the trust they have in their ability to code in Node. It also alleviates the stress of having to understand the intricacies of how each of these operating systems work.
However, Butler attributes his most recent steps toward contentment to Fenix, a visual web server he developed for setting up and deploying static websites on Windows and Mac. For one thing, Fenix allows you to deploy websites simply, quickly and visually. And, because Fenix also comes with a sharing system, it has allowed Butler to create libraries and projects alongside other developers by sharing quick links to websites running the code. Fenix afforded an instant infrastructure and sharing. It gave the team faster feedback loops and was much more intuitive for people who were not back-end developers. This reduced time and stress and boosted trust. Because Butler and his team spent less time on infrastructure and administration, they were able to spend more time on unit testing and documentation.
In other words, it brought them closer to development nirvana.
If you’re interested in speaking at or attending Node.js Interactive North America 2017 – happening October 4-6 in Vancouver, Canada – please subscribe to the Node.js community newsletter to keep abreast of dates and deadlines.
The Intel Edison is a physically tiny computer that draws a small amount of power and breaks out plenty of connections to allow it to interact with other electronics. It begs to be the brain of your next electronics tinkering project, with all the basics in a tiny package and an easy way to connect other things you might need.
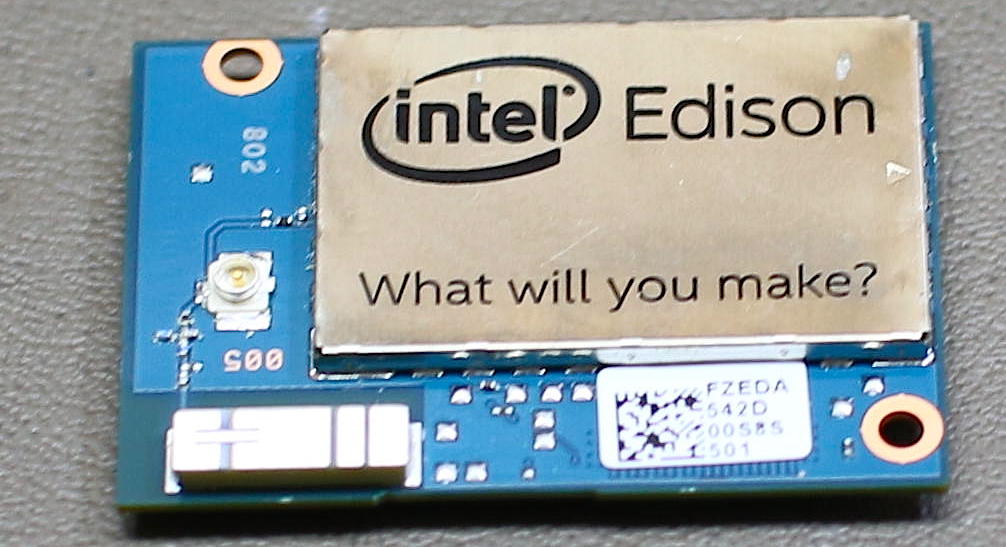
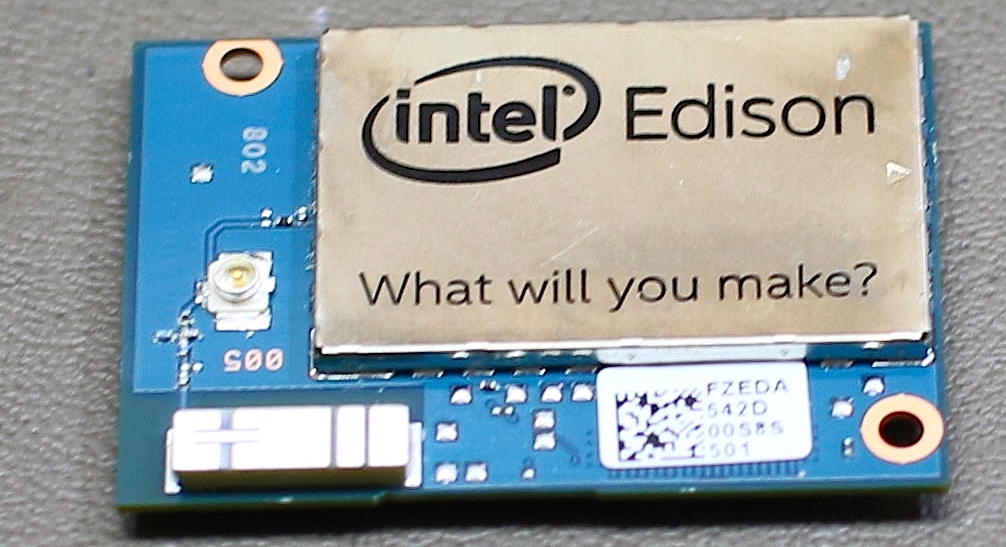
The Intel Edison measures about 1×1.5 inches but packs a dual core Atom CPU, 1GB of RAM, 4GB of storage, dual band WiFi-n, and Bluetooth (Figure 1). On the bottom of the machine is a small rectangular connector that breaks out GPIO pins, TWI, SPI, and other goodies and allows the Edison to get its power from somewhere. The Edison costs about $50, plus whatever base board you plan to power the Edison from.
Figure 1: Intel Edison board.
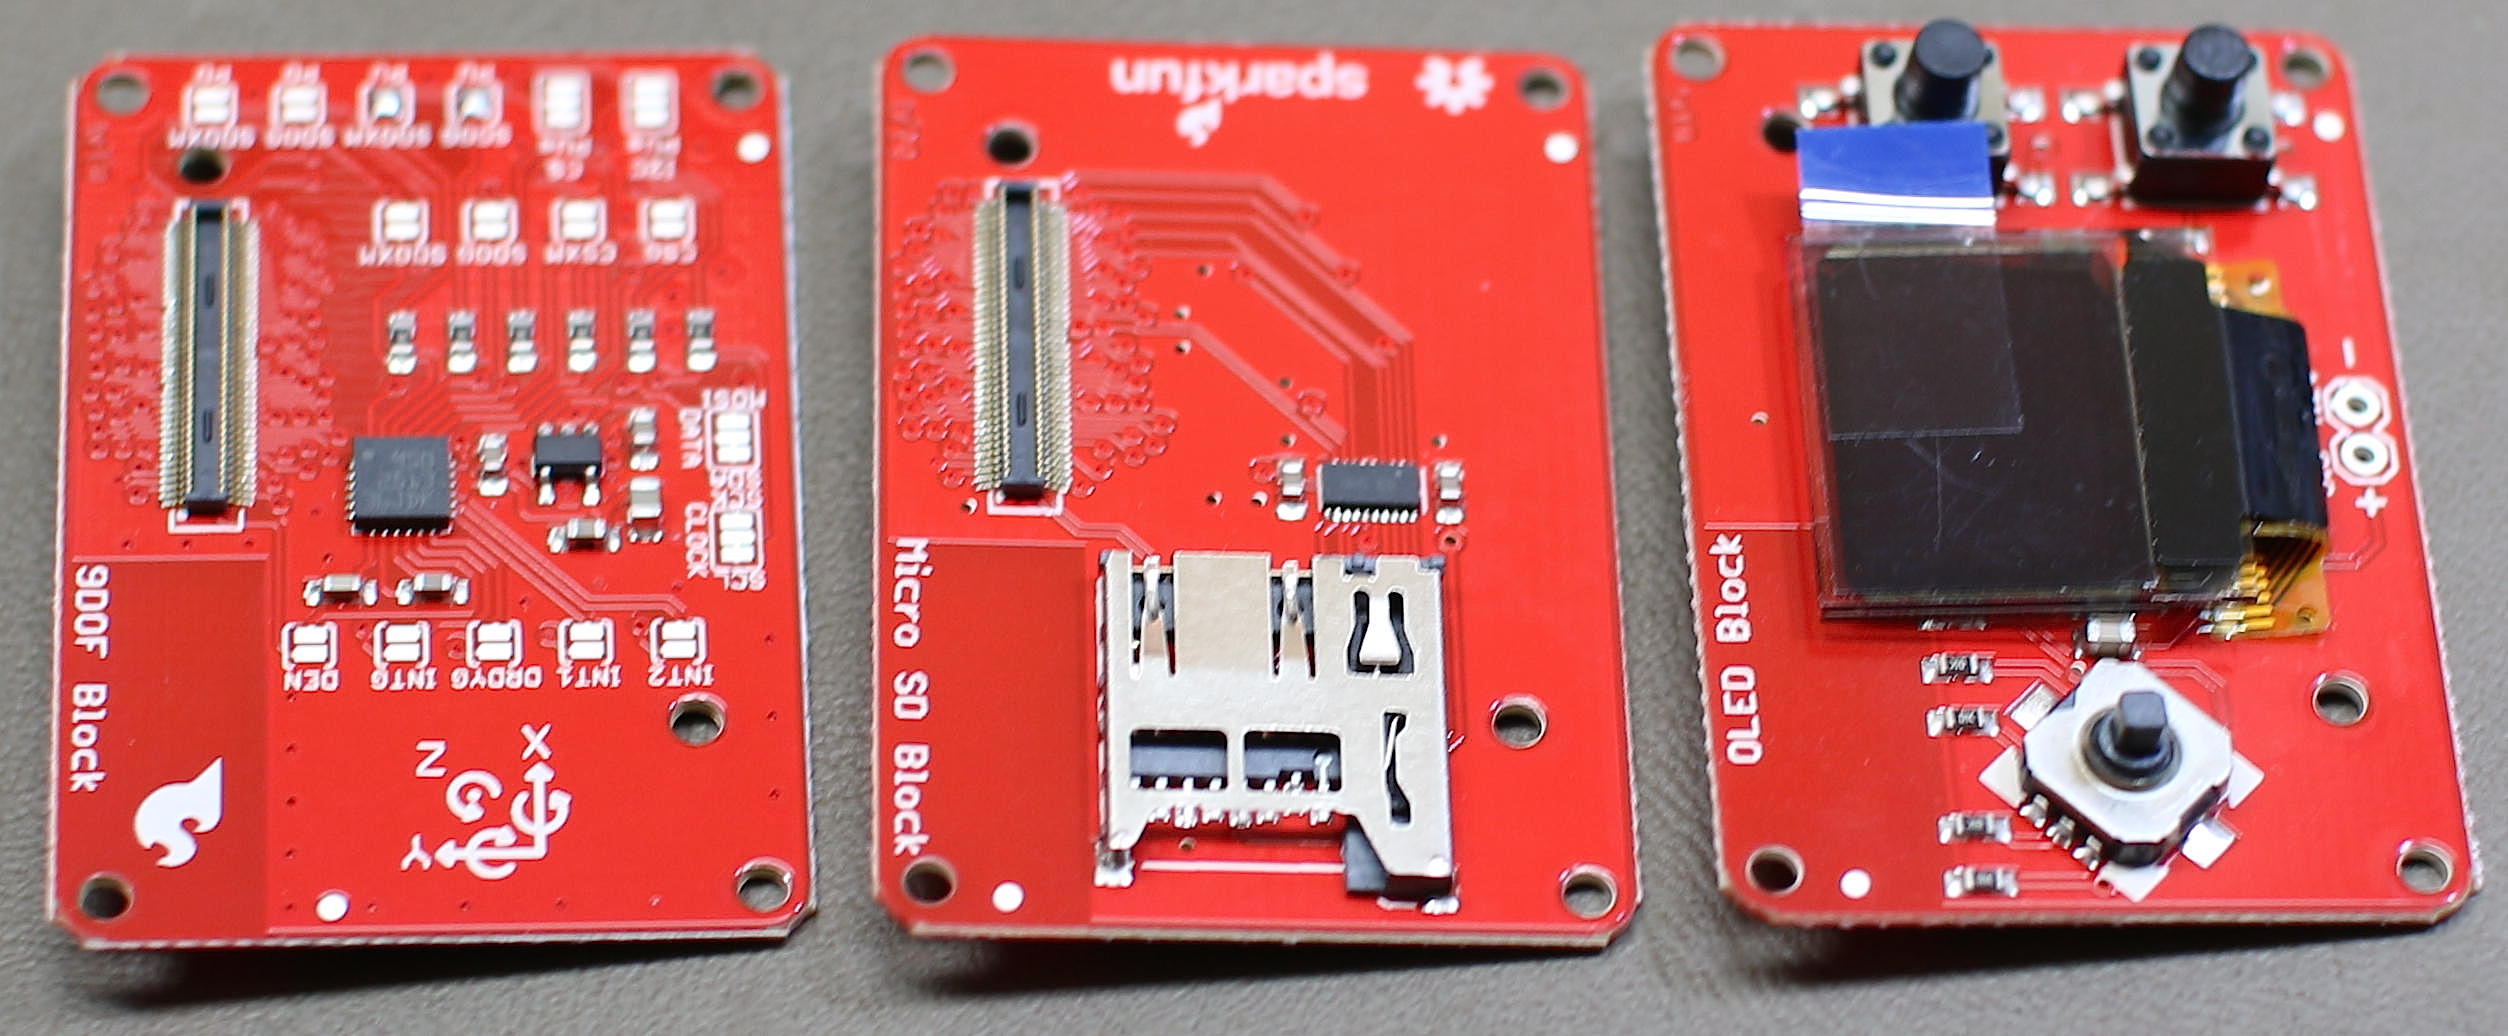
Although the little header on the bottom of the Edison helps keep things tiny, it is not the easiest thing to deal with when prototyping. SparkFun Electronics has created a collection of small break out boards for the Edison, called “Blocks” (Figure 2). Each block provides a specific feature such as an accelerometer, battery, or screen. Most blocks have an input header on one side and an output header on the other side so you can quickly stack blocks together to build a working creation. One example block that has no output is the OLED screen, because if you stacked another block above the screen you wouldn’t be able to see it anymore.
Figure 2: Blocks.
Unlike platforms such as Arduino which operate their GPIO and other pins at 5 or 3.3 volts, the Edison runs them at 1.8v. So you might need to do some voltage level shifting if you need to talk to higher voltage components from the Edison. Note that there is no HDMI or composite video on the Edison. It is fairly straightforward to connect a small screen and drive it from the Edison using SPI if you need that sort of thing.
Getting Started
The Edison does not come with an easy way to directly power it up. You have to connect the Edison using its small header to something that can offer it power. In this series, I will be using the SparkFun base block to power the Edison.
The console is a great place to start to see if the Edison is up and running. Connect the micro USB labeled console on the Base Block breakout to your desktop Linux machine and check dmesg to see something like the below to discover where the console is. The Base Block has power, TX, and RX LEDs on board so you can get some feedback from the hardware if things are working. If things go as they should, you will be presented with a root console to the Edison. There is no default password, you should just get right onto the console.
$ dmesg|tail...FTDI USB Serial Device converter now attached to ttyUSB0$ screen /dev/ttyUSB0 115200Poky (Yocto Project Reference Distro) 1.7.2 edison ttyMFD2edison login: rootroot@edison:~# df -h/dev/root 1.4G 446.4M 913.5M 33% /.../dev/mmcblk0p10 1.3G 2.0M 1.3G 0% /homeroot@edison:~# cat /etc/release EDISON-3.0Copyright Intel 2015
The 4GB of on chip storage is broken up to allow a generous file system in the home directory and a good amount of space for the Edison itself to use for the Yocto Linux installation and applications in /usr. You can also switch over to running Debian on the Edison fairly easily.
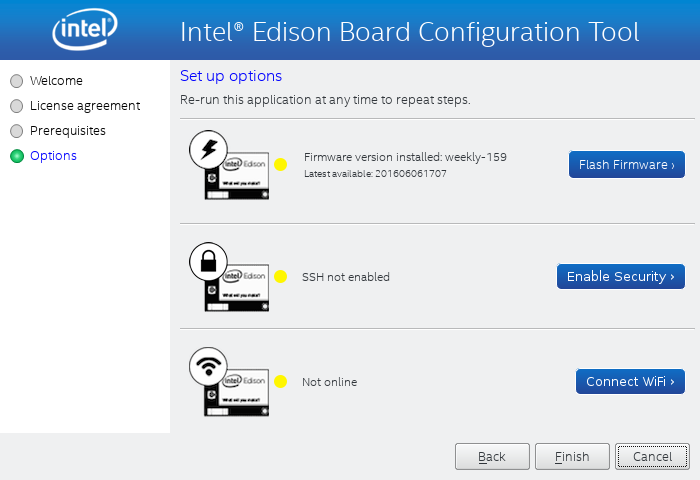
It is always a good idea to make sure you are running the newest version of the firmware for a product. There are many ways to update the Yocto Linux image on the Edison, but the Intel Edison Setup wizard is a good starting point (Figure 3).
Figure 3: Intel Edison configuration.
The Intel Edison Setup wizard can be used for many useful things such as updating the Linux distribution on the Edison, setting the root password, and connecting the Edison to WiFi.
$ tar xzvf Intel_Edison_Setup_Lin_2016.2.002.tar.gz$ cd Intel_Edison_Setup_Lin_2016.2.002$ ./install_GUI.sh...$ su -l# ./install_GUI.sh
The wizard lists supported operating systems as the 64-bit versions of Ubuntu 12.04, 13.04, 14.04, and 15.04. I was using 64-bit Fedora Linux and decided to proceed anyway.
Moving ahead, I found the Edison not detected. So I connected the USB OTG port and nothing changed. Clicking back and next in the GUI showed the versions of the Edison that was connected. So, it seems that the wizard doesn’t poll for a connected Edison, you have to force it to retry. The firmware update download is in the range of 300MB in size. I attempted to update the firmware as a non-root user, which did not work. Running the Intel Edison Setup as root allowed the Yocto image to update. So there must have been some permission issue trying to do the firmware update as a regular user.
After updating the firmware click “Enable Security” to set a hostname for the Edison and set the root password. The last option will let you set up the Edison to connect to your WiFi. Connecting to WiFi is very simple, the Edison will scan for networks and you’ll need to enter your WiFi password to complete the setup. At this stage, you will either have to check your DHCP server records or use the console on the Edison to find out the IP address it was given. Once you know that, you can ssh into the Edison over WiFi.
The Yocto Linux image for Edison was using opkg for package management. This will come in handy as the default image is quite cut down, and you will likely find yourself wanting to install an additional sprinkling of your favourite GNU/Linux software.
One thing that can make or break the experience of Linux on a small machine is the storage speed. Many Raspberry Pi machines limp along on a budget SD card until the card finally gives up. The Edison comes with 4GB of onboard storage and I used Bonnie++ to get an idea of how quickly you can interact with that storage.
The Linux kernel will use RAM to try to cache data so that processes run faster. To test the storage rather than the RAM cache, Bonnie++ tries to use files that are twice the size of your RAM. Unfortunately, the /home partition is only 1.3GB and the Edison has 1GB of RAM, so I couldn’t use filesystem storage twice the RAM size. This means the sequential input performance results shown below are likely incorrect as they would be coming from a RAM cache instead of off flash storage. The block level write performance at almost 19mb/s is quite impressive.
As shown below, it takes around 5 seconds to create 1000 files in the home directory on the embedded flash storage.
edison:~$ cat ./test.sh#!/bin/bashmkdir dcd ./d/for i in `seq 1 1000`; do touch file$idonesyncedison:~$ time ./test.shreal 0m4.928suser 0m0.230ssys 0m0.660s
I tried to use the OpenSSL 1.0.1e compile and run that I have used on other machines in the past to test CPU performance. Although this is a very old version of OpenSSL, it is the same version that I have used on many other boards allowing some direct comparison of the hardware performance. Compiling OpenSSL took almost 20 minutes and, unfortunately, did not link a working output executable.
I downloaded the latest sysbench to test the relative performance of the Edison. Testing was done at commit f46298eb66c05c753c152a24072def935104d806. As I was not really interested in database performance I disabled it using the –without-mysql configure option. It is interesting that the Edison is around twice the speed of a Raspberry Pi 2 on CPU tests but is slower in RAM testing.
Machine
CPU
Memory
Intel Core i5 (M 430 @ 2.27GHz)
7,337
31,612,673
Edison
520
1,179,654
Raspberry Pi 2
272
2,518,525
 $ ./configure  --without-mysql  && make
 $ ./src/sysbench cpu run
 $ ./src/sysbench memory run
For a raw test of CPU performance I expanded the Linux kernel file linux-4.9.10.tar.xz on all machines. The Core I5 M430 desktop machine took around 17 seconds, the Edison took 83 seconds, and the Raspberry Pi took 53 seconds. Going the other way and recompressing the Linux kernel tarball using gzip, the Core i5 took around 41 seconds, the Edison needed 3 minutes, and 27 seconds, and the Raspberry Pi 2 took 2 minutes and 52 seconds. Perhaps the compression tests are bound by both memory and CPU so the Edison and Raspberry Pi 2 are closer overall.
Power
Given the small physical size of the Edison, it will fit right into mobile applications running off battery power. I connected only the SparkFun Base Block and provided power via USB to the console port on the base block. Using a USB power meter the Edison used 0.12A with rare peaks to 0.16A during boot. Once booted, things settled at around 0.06A at idle. Both of these readings were at 5.16 volts. So, at idle the Edison used a little over 0.3 watts of power, including the rather bright blue power LED on the base board. Note that the idle reading was taken with Edison connected to WiFi.
Running sysbench cpu with two threads increased power usage up to 0.1 amps, so somewhere over half a watt.
A conservative estimate for a single AAA battery is 0.8 amp hours. Using four AAA to get into the voltage range, you might expect the Edison to run for a few hours at idle or closer to one hour if you are loading the CPU. Using LiPo batteries should give you a smaller lighter footprint with decent runtime on the Edison.
Wrap up, next time around
Although the Raspberry Pi 2 and 3 machines are fairly small, the Edison takes things to a new level with a footprint about 1/6 the size of a Pi. Having onboard storage on the Edison is great, and with WiFi and Bluetooth on board you should have connectivity under control. The stackable blocks take away the fiddly wiring and you can build quite a bit of functionality into the size of a matchbox.
Next time, we will start to dig into what we can do with some of the other SparkFun Blocks and how to use them from Yocto Linux on the Edison.
Learn more about Linux through the free “Introduction to Linux” course from The Linux Foundation and edX.
IBM unveiled its “Blockchain as a Service” today, which is based on the open source Hyperledger Fabric, version 1.0 from The Linux Foundation.
IBM Blockchain is a public cloud service that customers can use to build secure blockchain networks. The company introduced the idea last year, but this is the first ready-for-primetime implementation built using that technology.
The blockchain is a notion that came into the public consciousness around 2008 as a way to track bitcoin digital-currency transactions.
Hello! Today we’re going to talk about a debugging tool we haven’t talked about much before on this blog: ftrace. What could be more exciting than a new debugging tool?!
I’ve known that ftrace exists for about 2.5 years now, but hadn’t gotten around to really learning it yet. I’m supposed to run a workshop tomorrow where I talk about ftrace, so today is the day we talk about it!
Written in Rust, Weld can provide orders-of-magnitude speedups to Spark and TensorFlow.
The more cores you can use, the better — especially with big data. But the easier a big data framework is to work with, the harder it is for the resulting pipelines, such as TensorFlow plus Apache Spark, to run in parallel as a single unit.
Researchers from MIT CSAIL, the home of envelope-pushing big data acceleration projects like Milk and Tapir, have paired with the Stanford InfoLab to create a possible solution. Written in the Rust language, Weld generates code for an entire data analysis workflow that runs efficiently in parallel using the LLVM compiler framework.
In December, Docker released as open source the code for containerd, which provides a runtime environment for Docker containers. By open sourcing this component of the Docker stack, the company wanted to assure users, partners, and other actors in the container ecosystem that the core container component would remain stable, and that the community would have a say in its advancement.
Our expert panel included: Andi Mann, Chief Technology Advocate at Splunk; Marc Priolo, Configuration Manager, Urban Science; Mark Dalton, CEO at AutoDeploy; and, our very own Anders Wallgren and Sam Fell.
During the episode, the panelists discussed what is Value Stream Mapping and how it relates to DevOps, best practices for Value Stream Mapping, how it can help scale your DevOps adoption, and more. Continue reading for their best practices and insights.