This week in open source and Linux news, a talk on diversity in tech sparked a pithy article for The New Stack via Darryl Taft, The Linux Foundation consolidates two projects to form ONAP, and more. Keep reading for a curated look at the top OSS headlines of this past week.
1) “Diversity in Open Source” talk at Open Source Leadership Summit tackled the challenges women and minorities still face in the tech industry. Darryl Taft comments.
If you happen to administer one or more OpenLDAP servers, you know that they can be a challenge to work with. Working with LDAP itself can be a bit tricky; to that end, many opt to go the phpLDAPadmin route (which is an amazing tool for individual servers). However, when you’re managing numerous LDAP servers, you don’t want to have to log in and out of various instances of that tool. If that’s the case, what do you do? There’s one particular piece of software that does an outstanding job of managing multiple LDAP servers: Apache Directory Studio. Apache Directory Studio is part of the Apache Directory project that strives to increase LDAP awareness, comfort and adoption to bring forth what we call the Modern LDAP Renaissance. The project includes:
Apache Directory Server — an extensible and embeddable directory server
Apache LDAP API — an enhanced LDAP API
Apache Mavibot — a Multi Version Concurrency Control (MVCC) BTree
Apache Kerby — a Java Kerberos binding
Apache Fortress — a standards-based Access Management System
And, of course, the Apache Directory Studio, which is a tool intended to be used with any LDAP platform. I am going to walk you through the process of installing Apache Directory Studio as well as how to connect it to a working LDAP instance. I will demonstrating how to connect Apache Directory Studio to an OpenLDAP server on a separate virtual machine. I will assume you already have your OpenLDAP server up and running.
Installing Apache Directory Studio
I will be demonstrating the installation of Apache Directory Studio on an instance of Ubuntu Linux 16.04. If you are using a different distribution, you will have to adjust accordingly.
The first thing you must know is that Apache Directory Studio is a graphical application written in Java. To that end, you must first install the Java JDK8. To do this, follow these steps:
Open up a terminal window
Add the necessary repository with the command sudo add-apt-repository ppa:webupd8team/java
Update apt with the command sudo apt update
Install Java by issuing the command sudo apt install oracle-java8-installer
Accept the license agreement
Set the Java environment variables with the command sudo apt install oracle-java8-set-default
That’s it. You can now test to ensure Java is installed with the command javac -version(Figure 1).
Figure 1: Testing to make sure Java has been installed.
Now you can move on to downloading and running the Apache Directory Studio. There is no actual installation from this point on. Instead, you download the file, unpack it, and run the executable. Because there is no installation process, you will want to save the file in a location that is convenient and offers your user read/write/execution privileges. Here are the steps:
Unpack the downloaded file with the commandtar xvzf ApacheDirectoryStudio-XXX.yyy.tar.gz(where XXX is the release number and yyy is either 32 or 64 bit)
Change into the newly created ApacheDirectoryStudio directory with the command cd ApacheDirectoryStudio
Start the software with the command ./ApacheDirectoryStudio
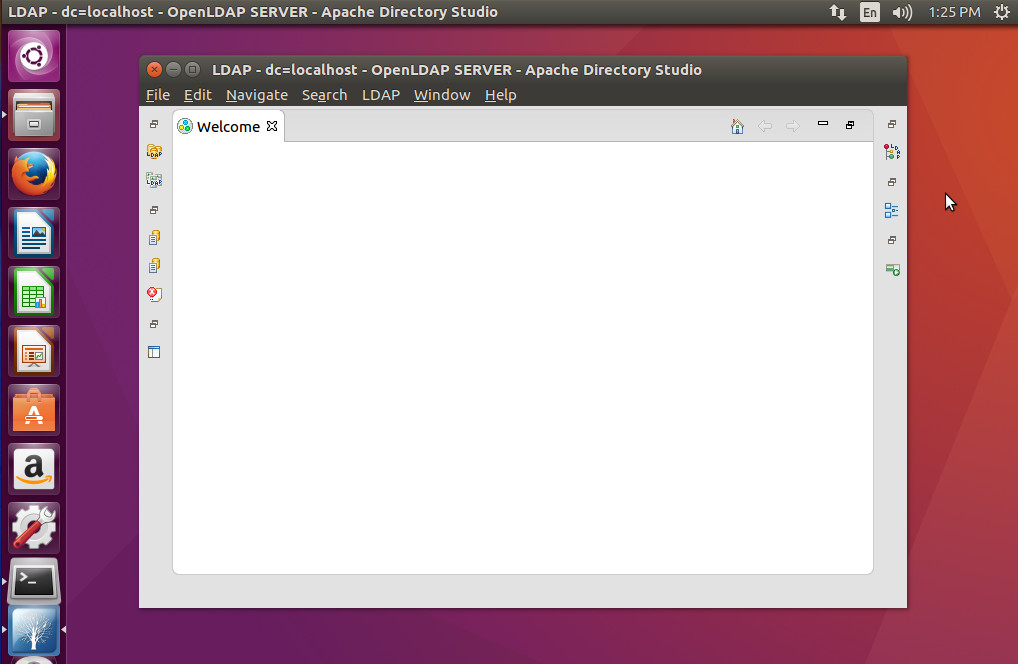
At this point, you should now see the Apache Directory Studio main window (Figure 2).
Figure 2: The Apache Directory Studio main window ready to work.
Connecting to an LDAP server
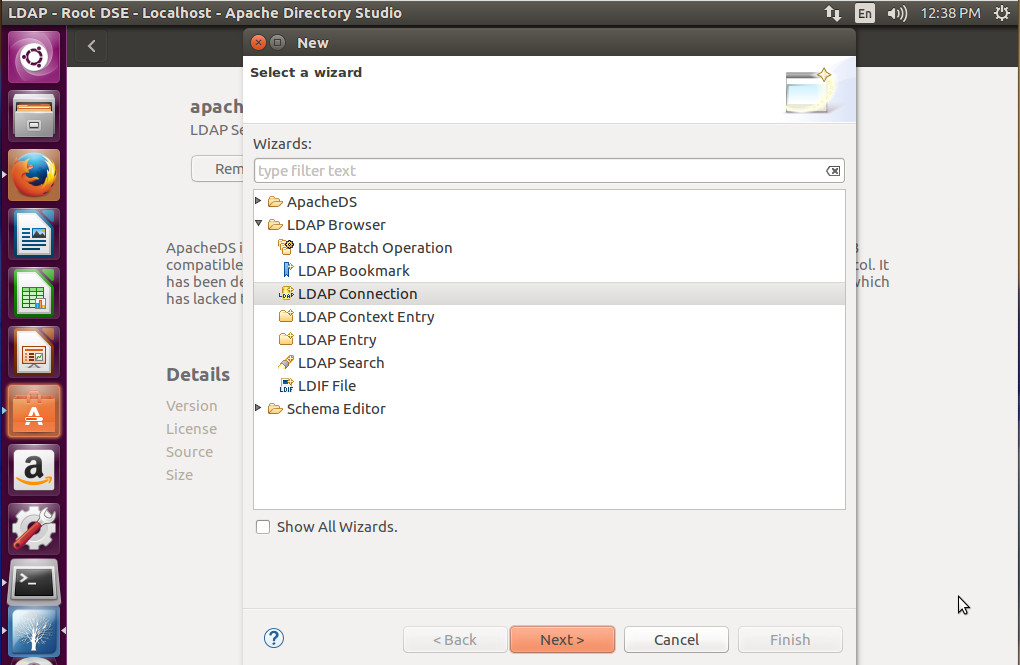
You are now ready to connect Apache Directory Studio to your LDAP server. Click File > New and then select LDAP Connection (Figure 3).
Figure 3: Starting the LDAP Connection wizard.
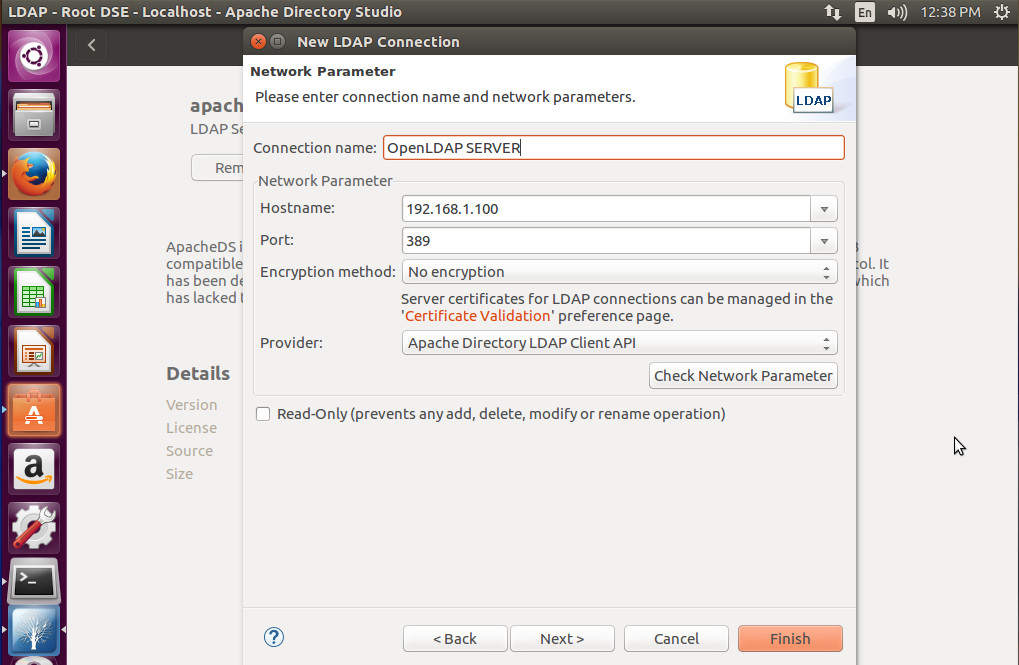
In the next window (Figure 4), you must enter the information for your LDAP server. Give it a name, enter the hostname (or IP address), port number, select the encryption method, and the provider. Once you’ve filled out that information, click Check Network Parameter to make sure everything is working properly.
Figure 4: Setting up your LDAP configuration.
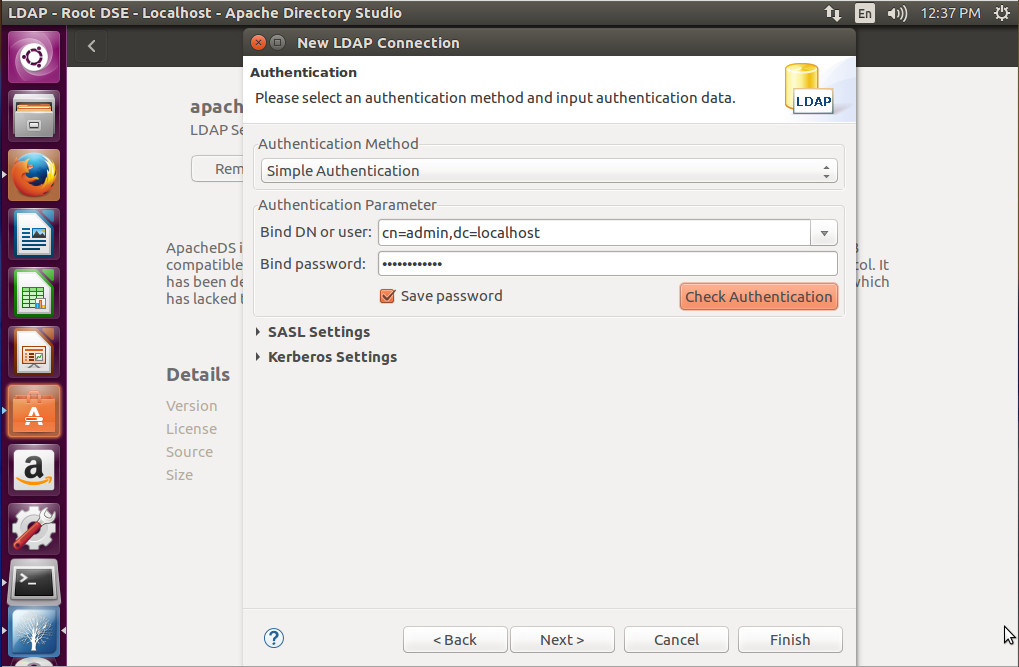
Click Next and you will then be required to fill out the authentication information for your connection (Figure 5). Select the Authentication Method, Bind DN or user, Bind password, and then click Check Authentication.
Figure 5: Filling out the authentication requirements for your LDAP server.
If your LDAP server requires SASL or Kerberos to be configured, expand those options and fill them out. Once you’ve completed this window, click Next.
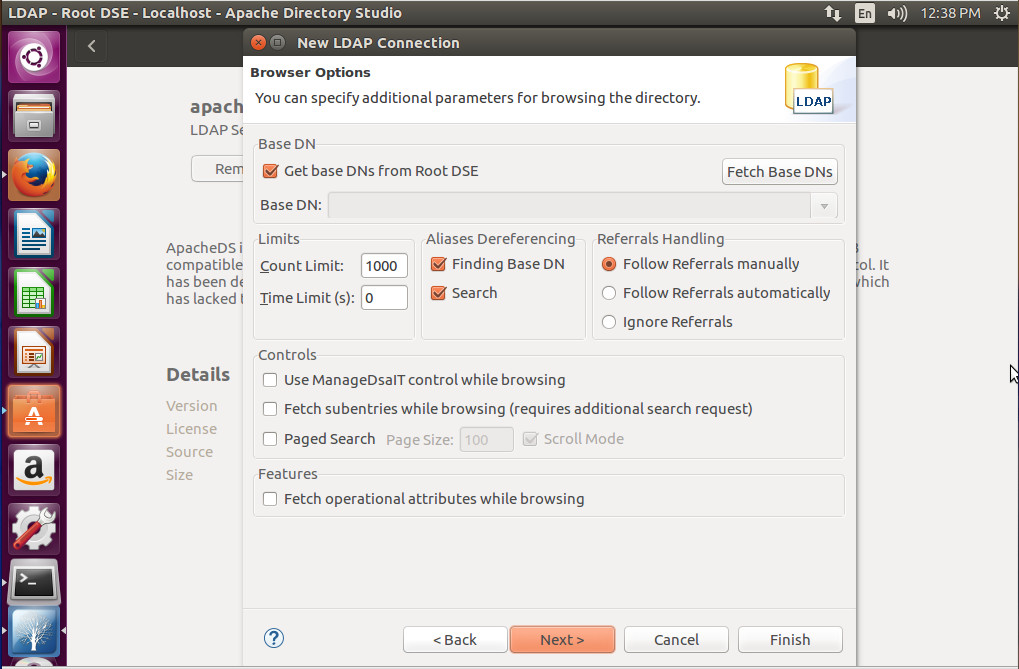
In the next window (Figure 6), you can specify additional parameters for browsing your LDAP directory. As with many of the other options, these will depend upon your needs and how your LDAP server was configured.
Figure 6: Additional options for your LDAP connection.
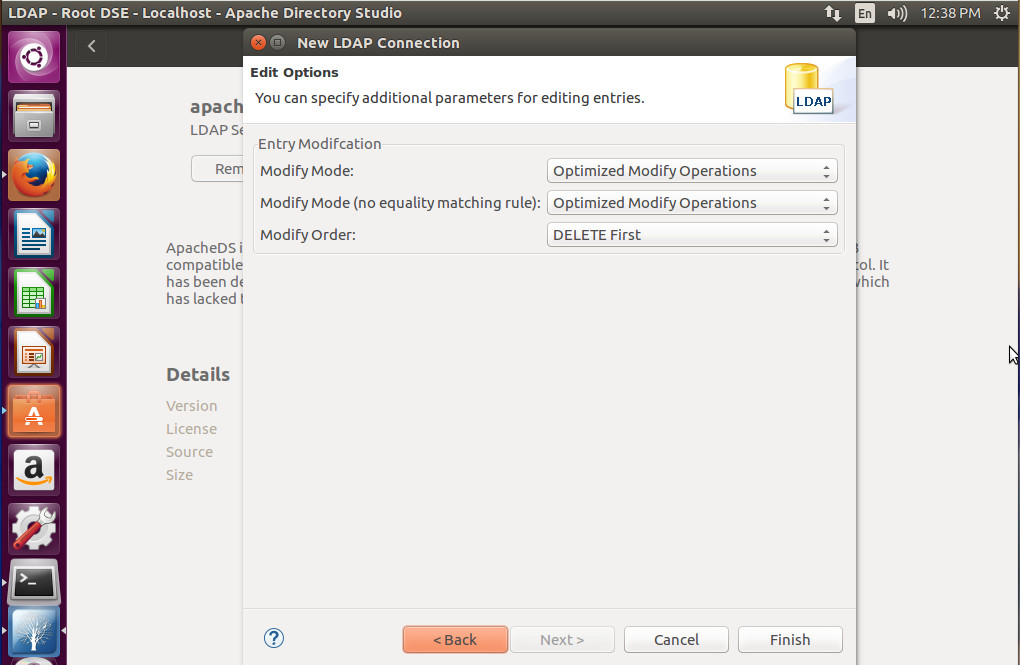
Finally you can specific parameters for editing entries on your LDAP server (Figure 7). Again, this will be determined by your needs and how you’ve setup your LDAP server.
Figure 7: The final window of the connection wizard.
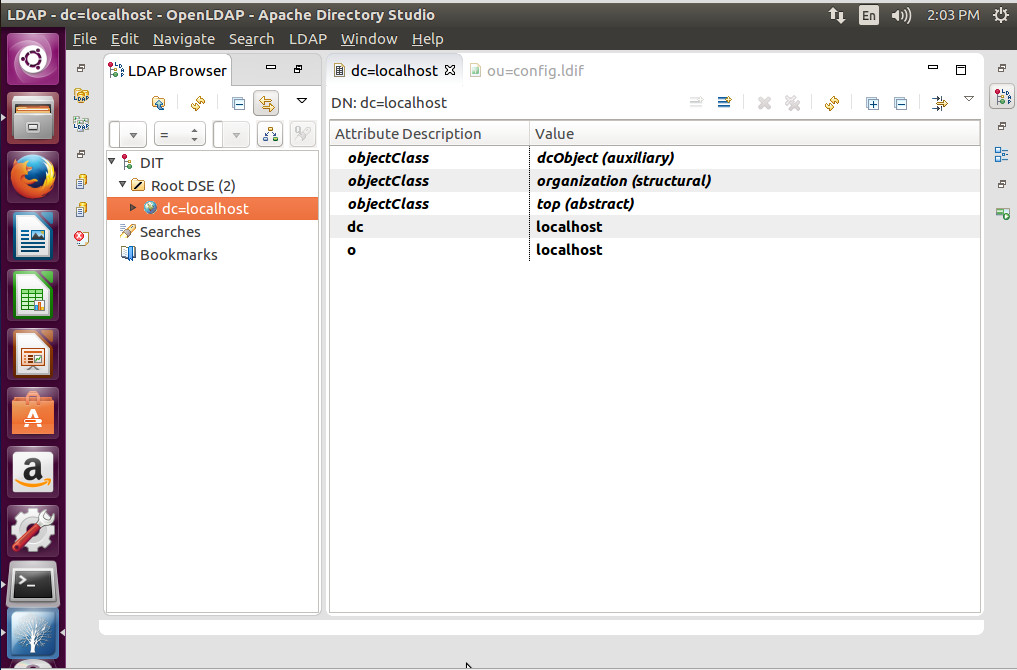
When the LDAP Browser window opens (Figure 8), you can then click on your dc entry and start working with LDAP.
Figure 8: A successful LDAP connection.
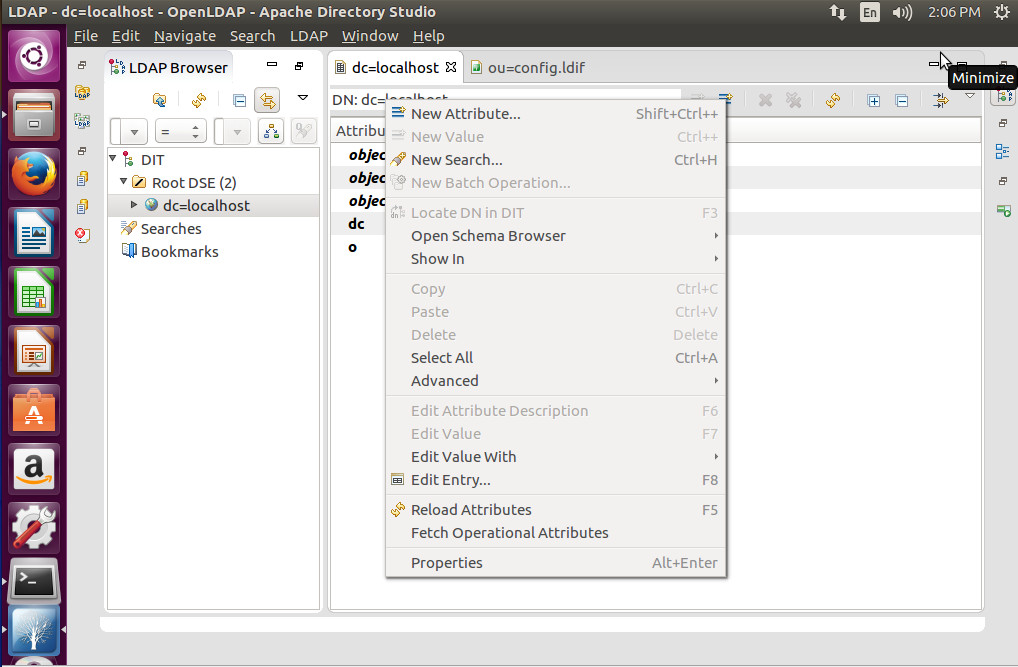
To work with LDAP, you will right-click on the right pane and select the option you want to use (such as creating a new Attribute — Figure 9).
Figure 9: Creating a new Attribute in Apache Directory Studio.
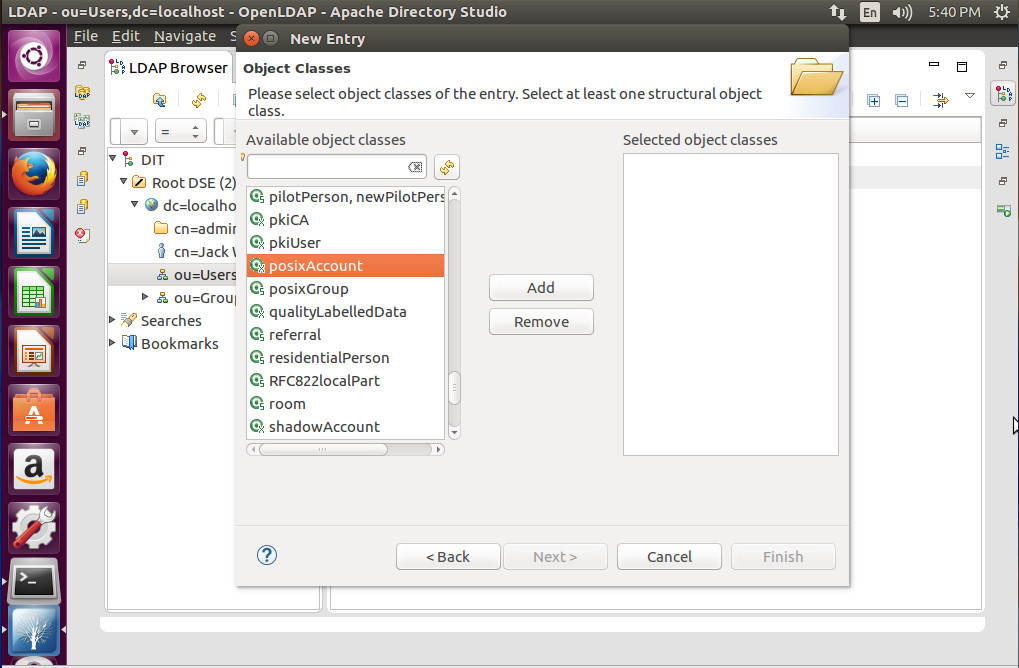
Expand thedc=entry (in the left pane) and you can then start adding Users and Groups. Click on Users and then right-click ou=Users, select New, and you can then create from a long list of available object classes (Figure 10).
Figure 10: Creating a new object with Apache Directory Studio.
There you have it. You’ve successfully, installed, connected, and used the Apache Directory Studio to work with your existing LDAP server. You can now connect Apache Directory Studio to any of your LDAP servers and manage them all from a single point of entry.
In most cases, when a machine crashes or fails, we lose whatever we had loaded into memory, which for some applications can result in quite a bit of time and effort to recover when the system comes back online. At LinuxCon Europe, Maciej Maciejewski, Senior Software Engineer at Intel, talked about how persistent memory can be used to retain its contents after a power failure.
Maciejewski started by talking about how this works from a hardware perspective, since the hardware to do this has been around for some time. The idea is that you can take a dual in-line memory module (DIMM), which normally holds DRAM memory. These DRAM-like chips can also retain data across power cycles, so if your machine goes out, crashes, whatever happens, you take this non-volatile DIMM out, and it contains all of your data. It doesn’t lose anything. At Intel, they are currently working on a product that will be able to get up to three terabytes of non-volatile memory.
The hardware is evolving, but it’s only part of the solution. Maciejewski explained how the software needs be easy to use if the product is going to be successful. A couple of years ago, the Storage Networking Industry Association (SNIA) formed a working group around non volatile programming, which came up with a standardized programming model that forms the base of the NVM Library that Maciejewski discussed. The NVM Library is actually a collection of libraries that can be used to develop software to take advantage of persistent memory.
libpmem – Basic persistency handling
libpmemblk – Block access to persistent memory
libpmemlog – Log file on persistent memory (append-mostly)
libpmemobj – Transactional Object Store on persistent memory
libpmempool – Pool management utilities
librpmem – Replication
One real-world example of an application that would benefit from persistent memory usage is an in-memory database, like Redis. Maciejewski mentioned that the obvious advantage is startup time. When you put all of the data into persistent memory and work with it directly, you aren’t working with a memory copy or loading from the disk into memory, so the start up is instant. With large datasets in the multiple terabyte range, going from hours to an instant is a big advantage.
Persistent memory usage is still a work in progress that will require time for adoption, but Maciejewski hopes that “this will revolutionize the computing that we have right now.”
To hear all the details and see the performance charts from the Redis example, watch the complete presentation below.
Interested in speaking at Open Source Summit North America on September 11 – 13? Submit your proposal by May 6, 2017. Submit now>>
Not interested in speaking but want to attend? Linux.com readers can register now with the discount code, LINUXRD5, for 5% off the all-access attendee registration price. Register now to save over $300!
If you love technology, you can find a space for yourself and connect with others around mutual interests, according to Avni Khatri, president of Kids on Computers (KoC), a nonprofit that sets up computer labs using donated hardware and open source software in areas where kids have no other access to technology.
During LinuxCon North America 2016, Khatri organized Kids Day, a day-long workshop that’s aimed at helping school-aged children get interested in computer programming. For Khatri, it’s also a way of furthering her dream of giving children unlimited access to education and helping them succeed in technology.
“The key is to find what you are passionate about and work in that space,” she said. “For me, Kids on Computers is that place. The organization has transformed my thoughts on how much impact I can have in the world. It’s shown me that a little can go a long way (though there is a lot more to do!), and I always have it within me to give.”
“Find your community and connect with them on a regular basis,” advised Khatri.
Although Khatri has been working with the KoC project since 2010, in her day job, she is Program Manager of the Knowledge and Technologies Group in the Massachusetts General Hospital Laboratory of Computer Science. There she helps build bioinformatics applications using open source software and hardware.
“My interests include studying different learning methodologies and researching and implementing different technologies and modalities to deliver learning content, said Khatri in an interview.
Before working at MGH, she was a Front-End Engineer on the Flex Force Tiger Team at Yahoo! Inc. “Engineers on the team are deployed to work in 3-6 month cycles on the highest priority projects at Yahoo! I was also co-president of the Southern California chapter of Yahoo! Women in Tech,” she said.
Khatri, who has a BS in Computer Science from Cal Poly Pomona, has been working on computers for a very early age. “I learned to program in BASIC when I was 11 and started working building database-backed web sites when I was 19,” she said.
She started contributing to open source while at Arsdigita back in 2000, where they developed a framework that allowed people to build community-based web sites easily and included standard packages that one would expect in groupware. The product eventually became OpenACS and Khatri was elected to the Technical Committee and became more involved. “I learned the value of FOSS and how it can help bridge and connect virtual and real-world communities,” she said.
Real world challenges for women in tech
Khatri thinks that one of the challenges women engineers in particular face is feeling alone. “Women engineers are in a significant minority on engineering teams and it can be hard to be the only woman on a team of 5 or 10 engineers,” she said.
Her dream is that everyone, especially kids, get unlimited access to education so that they can decide for themselves what their lives should be so they can improve their own lives and the lives of their communities. This aligns with the mission of KoC perfectly. “Because of my belief in the vision, I am able to focus on the organization and work my way through challenges that arise.”
When talking about inspiring and motivating others, Khatri advises: listen to them and be inclusive. Most of the time we don’t listen to learn, we listen to respond, but Khatri believes that “understanding people’s goals and seeing if you can help is one way to motivate and inspire them. I believe that everyone needs to find out what works for them and supporting people in their self-determined goals goes a long way towards retaining them as volunteers in a FOSS organization or anyplace.
Interested in attending Open Source Summit North America on September 11-13? Linux.com readers can register now with the discount code, LINUXRD5, for 5% off the all-access attendee registration price. Register now to save over $300!
Today, the OpenStack Foundation is launching the latest version of its platform that allows enterprises to run an AWS-like cloud computing platform in their data centers. Ocata, as the 15th release of OpenStack is called, arrives after only a four-month release cycle, which is a bit faster than its usual six-month cycle, which will resume after this release. The reason for this is a change in how the Foundation organizes its developer events over the course of a release cycle. Because of the shorter cycle, this new release focused more on stability than new features, but it still manages to squeeze a number of new features in as well.
I’ve previously written about the fact the Apache Software Foundation offers an exemplar of large-scale open source governance. Even with those supreme qualities, things can still go wrong. Apache offers some of the best protections for open source contributors but its mature rules can be manipulated by skilled politicians and/or determined agendas. What can we learn from their experience?
In a very small proportion of Apache projects, there have been issues that seem to arise from Apache’s rules and culture being intentionally gamed. They are a non-representative fraction of the work of Apache, but they provide valuable lessons on the way open source communities can be gamed.
Apparently, the xRAN Foundation is a new standards group that was formed in late 2016. Deutsche Telekom, a founding member, is hosting a press event at Mobile World Congress next week to introduce the group and explain its mission. Other initial members of xRAN include AT&T, SK Telecom, and Intel.
GCC has a rich set of features designed to help detect many kinds of programming errors. Of particular interest are those that corrupt the memory of a running program and, in some cases, makes it vulnerable to security threats. Since 2006, GCC has provided a solution to detect and prevent a subset of buffer overflows in C and C++ programs. Although it is based on compiler technology, it’s best known under the name Fortify Source derived from the synonymous GNU C Library macro that controls the feature: _FORTIFY_SOURCE. GCC has changed and improved considerably since its 4.1 release in 2006, and with its ability to detect these sorts of errors. GCC 7, in particular, contains a number of enhancements that help detect several new kinds of programming errors in this area. This article provides a brief overview of these new features. For a comprehensive list of all major improvements in GCC 7, please see GCC 7 Changes document.
There are cloud firewalls and there are cloud firewalls. While the underlying technology may be the same, there really are two types of products and use cases: One aims to protect the organization’s network and users, while the other protects cloud infrastructure and servers. Let’s contemplate the differences.
Cloud-based firewalls come in two delicious flavors: vanilla and strawberry. Both flavors are software that checks incoming and outgoing packets to filter against access policies and block malicious traffic. Yet they are also quite different. Think of them as two essential network security tools: Both are designed to protect you, your network, and your real and virtual assets, but in different contexts.
Learn how to work from anywhere and keep your data, identity, and sanity. DOWNLOAD NOW
If your systems administrators are remote workers, you may wish to establish a set of guidelines to help ensure that their workstations pass core security requirements. This will help reduce the risk that they become attack vectors against the rest of your IT infrastructure.
In this new blog series, we’ll lay out a set of baseline recommendations for Linux workstation security to help systems administrators avoid the most glaring security errors without introducing too much inconvenience. These are the same guidelines our own 100 percent remote team uses every day to access and manage the IT infrastructure for dozens of The Linux Foundation projects including Linux, Hyperledger, Kubernetes, and others.
Even if your systems administrators are not remote workers, chances are that they perform a lot of their work either from a portable laptop in a work environment, or set up their home systems to access the work infrastructure for after-hours/emergency support. In either case, you can adapt these recommendations to suit your environment.
You may read through this series and think it is way too paranoid, while someone else may think this barely scratches the surface. Security is just like driving on the highway — anyone going slower than you is an idiot, while anyone driving faster than you is a crazy person. These guidelines are merely a basic set of core safety rules that is neither exhaustive, nor a replacement for experience, vigilance, and common sense.
We’ll start with how to choose the right hardware, then discuss pre- and post- operating system installation guidelines, how to choose the best Linux distro, and a range of other best practices for working securely from anywhere on your Linux workstation. You can also download the entire set of recommendations as a handy guide and checklist.
Choosing the right hardware
We do not mandate that our admins use a specific vendor or a specific model, so this article will address core considerations when choosing a work system. Here are three things to consider:
- System supports SecureBoot (ESSENTIAL)
– System has no firewire, thunderbolt or ExpressCard ports (NICE-to-HAVE)
– System has a TPM chip (NICE-to-HAVE)
SecureBoot
Despite its controversial nature, SecureBoot offers prevention against many attacks targeting workstations (Rootkits, “Evil Maid,” etc.), without introducing too much extra hassle. It will not stop a truly dedicated attacker, plus there is a pretty high degree of certainty that state security agencies have ways to defeat it (probably by design), but having SecureBoot is better than having nothing at all.
Alternatively, you may set up Anti Evil Maid which offers a more wholesome protection against the type of attacks that SecureBoot is supposed to prevent, but it will require more effort to set up and maintain.
Firewire, Thunderbolt, and ExpressCard ports
Firewire is a standard that, by design, allows any connecting device full direct memory access to your system (see Wikipedia). Thunderbolt and ExpressCard are guilty of the same, though some later implementations of Thunderbolt attempt to limit the scope of memory access. It is best if the system you are getting has none of these ports, but it is not critical, as they usually can be turned off via UEFI or disabled in the kernel itself.
TPM Chip
Trusted Platform Module (TPM) is a crypto chip bundled with the motherboard separately from the core processor, which can be used for additional platform security (such as to store full-disk encryption keys), but is not normally used for day-to-day workstation operation. At best, this is a nice-to-have, unless you have a specific need to use TPM for your workstation security.
Now that we’ve discussed some basic hardware requirements for a secure Linux workstation, it’s time to consider your pre-boot environment. In the next post we’ll lay out a set of recommendations for your workstation before you even start with OS installation.
Whether you work from home, log in for after-hours emergency support, or simply prefer to work from a laptop in your office, you can use “A SysAdmin’s Essential Guide to Linux Workstation Security” to do it securely. Download the free ebook and checklist now!