
 Log data provides critical insights into software systems. However, in the age of ubiquitous computing, unifying logs from hundreds of data sources with different formats presents a big challenge. System administrators often deal with complex procedures to parse and analyze their services logs from the filesystem, and if we consider the mobile applications world, developers requires also to log multiple event from their users and of course on this scenario the complexity increase. The final goal is almost always the same: transform separate piece of information in a unified and accessible data stream for further analysis.
A tool as solution for this scenario must consider the following key points:
-
High Performance
-
Zero data loss
-
Flexible architecture: multiple inputs / outputs plugins
-
Reliable system
-
High Availability
Below we are going to talk about Fluentd, a production-ready open source data collector designed with these key features in mind. We will go through the installation process, basic setup, listen to events through the HTTP interface, and look at a simple use case of storing HTTP events into a MongoDB database. Finally, we will introduce our native Fluentd support made for the incoming Docker v1.8.
What Is Fluentd?
Fluentd is a high-performance data collector that allows you to implement an unified logging layer, it tries to structure data as JSON as much as possible, this allows to unify all facets of processing log data: collecting, filtering, buffering and outputting data logs across multiple sources and destinations.
Its pluggable and flexible architecture allowed the community to extend it functionality through more than 300 plugins that connect dozens of data sources and data outputs. Its built-in reliability through memory and file-based buffering to prevent inter-node data loss have made to be consider it one of the most professional and trusted tools on it purpose.
Fluentd is written in a mix of C and Ruby, where the critical performance pieces are in C, performance and flexibility are always in mind for it core developers.
Treasure Data open sourced Fluentd on 2011, and we are proud to say that it’s a critical part of our software stack. On our Big Data cloud service, we collects around 800k events per second and without Fluentd, it would be almost impossible.
Data Collection Matters
 Great solutions address real-world problems, this is a continuous issue that most of us face day to day (Figure 1).
Data collection needs to be done in the right way, Fluentd comes to the rescue (Figure 2).
Getting Started with Fluentd
Fluentd can be obtained in many ways. In this article, we will focus on its installation procedure through the Ruby Gems system.
1. Ruby version
Make sure your Linux distribution has Ruby >= 1.9.3 (OSX works, too)
2. Installation
Through the following command, the Ruby Gems system will download and install Fluentd and its dependencies:
$ gem install fluentd --no-ri --no-rdoc
3. Configuration
We are going to create a simple configuration file. Fluentd requires you to specify at least one input data source and a rule (match) instructing what to do with the data that comes in. For this example, we are going to use a HTTP interface that will wait for JSON messages and we are going to just print out the message to the standard output.
Please write the following content in a configuration file called in_http.conf:
<source>
  type http
  bind 0.0.0.0
  port 8080
</source>

<match *>
  type stdout
</match>

The source section specifies the input type; in this case, we will use the http plugin and we are going to listen for connections on all interfaces (bind 0.0.0.0) through the TCP port 8080.
In a terminal, just start Fluentd with your new configuration file:
$ fluentd -c in_http.conf
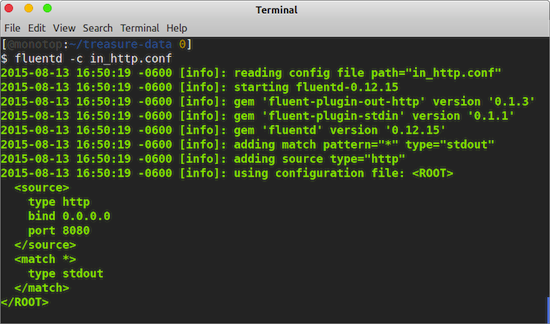 When it starts, Fluentd output should looks like what is shown in Figure 3.
4. Testing
Now that Fluentd is running, we are ready to start sending some events to the instance. Just open a new terminal window and issue two HTTP request with curl:
$ curl -X POST -d ‘json={“action”: “login”, “user”: 2}’ http://localhost:8080/
$ curl -X POST -d ‘json={“action”: “logout”,”user”:2}’ http://localhost:8080/
The commands above issue a POST request with a JSON message as it body. Then in the Fluentd terminal window, you will see the two events collected (Figure 4).
As you can see, each event collected contains a timestamp and the JSON message sent. Now we are going to move to the next step introducing the usage of Tags.
5. Tags
Fluentd can listen from multiple sources, but at the same time multiple events on the same source can be grouped through the application of Tags.
Eeach incoming event can be tagged before it gets into Fluentd or once it arrives.Continuing the HTTP example described earlier, we are going to send some events with pre-defined tags so we can perform a different action with them — all through a simple configuration:
<source>
  type http
  bind 0.0.0.0
  port 8080
</source>

<match print.tag>
  type stdout
</match>

<match skip.tag>
  type null
</match>
This time we have defined two match definitions, which means that events tagged with print.tag will be processed by the stdout output type. The others with the tag skip.tag will just be skipped through the null output type. Once you have updated the configuration file, make sure to restart Fluentd.
The goal here is that you understand that a Tag can define the action that will be executed over a specific event. As an example now we are going to execute three new HTTP requests with curl:
$ curl -X POST -d 'json={"action": "login", "user": 2}' http://localhost:8080/print.tag
$ curl -X POST -d 'json={"action": "update","user":2}' http://localhost:8080/skip.tag
$ curl -X POST -d 'json={"action": "logout","user":2}' http://localhost:8080/
The HTTP input type defines that a Tag can be added just appending it name to the URL. In this case, we added print.tag for the first command and skip.tag for the second one, for the last command there is no tag associated. If you issue the commands on the given order, the Fluentd output will looks as follows:
2015-08-13 21:02:44 -0600 print.tag: {"action":"login","user":2}
2015-08-13 21:02:57 -0600 [warn]: no patterns matched tag=""
The first command was matched and hence printed to the standard output. The second was skipped, and the last one raised a warning, because there no matching rules for that certain of event.
Stream Events into MongoDB
Now that we understand the basics of Fluentd, we are going to do an example of how to stream events into a MongoDB database. To achieve this we are going to install the MongoDB extension for Fluentd:
$ fluent-gem install fluent-plugin-mongo
Create a new configuration file called http_mongo.conf with the following content:
<source>
  type   http
  bind   0.0.0.0
  port   8080
</source>

<match mongo.tag>
  type           mongo
  host           localhost
  port           27017
  database       fluentd
  collection     test
  time_key       time
  flush_interval 2s
</match>
The configuration again will listen for events on the HTTP interface on port 8080 and Fluentd will match all events tagged with mongo.tag. All events matched will be delivered to a MongoDB instace located on localhost:27017, to a database called fluentd on a test collection; the data will be flushed every two seconds.
Assuming that you have a MongoDB instance running, you can restart Fluentd with the new configuration file:
fluentd -c http_mongo.conf
Let’s try to insert some data issuing some HTTP requests against Fluentd:
$ curl -X POST -d 'json={"action": "login", "user": 2}' http://localhost:8080/mongo.tag
$ curl -X POST -d 'json={"action": "logout","user":2}' http://localhost:8080/mongo.tag
From a different terminal window, start the mongo client to query your database:
$ mongo
MongoDB shell version: 2.6.3
connecting to: test
> use fluentd
switched to db fluentd
> db.test.find()
{ "_id" : ObjectId("55cd616cf5f008679b000001"), "action" : "login", "user" : 2, "time" : ISODate("2015-08-14T03:33:00Z") }
{ "_id" : ObjectId("55cd6174f5f008679b000002"), "action" : "logout", "user" : 2, "time" : ISODate("2015-08-14T03:33:08Z") }
>
Great, now our incoming records are being stored in our NoSQL database 🙂 .
Bonus Track: Fluentd & Docker
Docker containers aims to solve all your needs for development and production deployment, but the tools it packages have the same basic needs as any non-containerized application: it needs logging. Docker team is aware of this requirement and they have implemented a featured called logging drivers on Docker v1.6 (Figure 5).
The exciting news is that the Fluentd team has been working hard to implement native support of Fluentd inside Docker. That means that starting from the next Docker v1.8, you can unify all your containers logs using Fluentd smoothly (Figure 6).
 In our next post about Fluentd, we will cover more details about the Docker integration and how you can take the most of it. Fluentd is everywhere.
Final Comments
We have covered the basics of Fluentd, you can do much more with it, so we invite you to review our official documentation. Also, you are more than welcome to join and participate in our community. As I said, Fluentd is everywhere; it has been adopted by Google Cloud Platform, Nintendo, Change.org, Slideshare and many others; you are welcome to join us!
 Eduardo Silva is a principal Open Source developer at Treasure Data Inc. It currently leads the efforts to make logging ecosystem more friendly between Embedded and Cloud Services. He also directs the Monkey Project organization which is behind the Open Source projects Monkey HTTP Server and Duda I/O.
![]()
