
Whether you’re using the Evolution groupware client for work or personal email, you very well might need to add a layer of security to your communications. You might be transmitting company secrets or sensitive personal data—either way, having that extra insurance that your missive will arrive without having been read by prying eyes will go a long way toward bringing you peace of mind.
But, how do you achieve this? If you happen to use Evolution for email, you probably already have everything you need to make this happen. With just a tiny bit of work, you’ll have PGP and Evolution keeping that data secure. Let’s dive into the process of setting this up and using it. I’ll be demonstrating on Ubuntu GNOME 16.04, with the latest version of PGP and Evolution available to the platform.
Your PGP Key
As I said, Ubuntu GNOME 16.04 has everything you need, out of the box, to work with encryption in Evolution. The one thing you have to do is create a PGP key. You might already have one (in which case, you would only need export the key into Evolution—more on that in a bit).
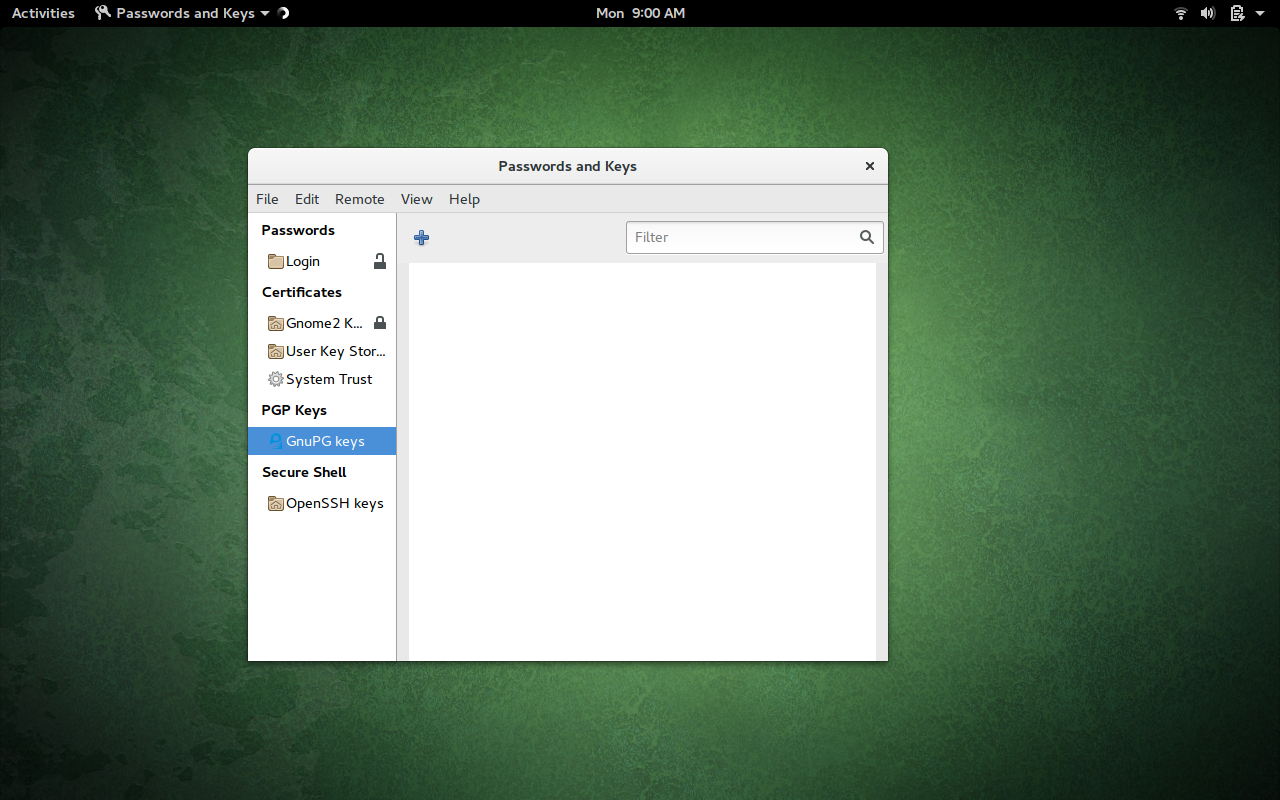
I will first walk you through the process of generating a key by using the built-in Seahorse GUI tool. If you open the GNOME Dash, and type seahorse, you should see Passwords and Keys. Click on that to open the app.
Once the app is open, click on GnuPG Keys (in the left navigation—Figure 1).
Click on the + button, select PGP Key from the list, and click Continue. You will then be asked for your full name and an email address. You can expand the Advanced Key Options, in order to configure the expiration date, comment, key strength, and encryption type (Figure 2).

Click the Create button, enter/verify a password for the key, and click OK. The key will begin to generate. One caveat to using Seahorse is that it gives you absolutely no indication the key is being generated. So, at this point, what you need to do is work. Type, open apps, move windows around. This is necessary to aid GPG in generating the random data necessary to create the key.
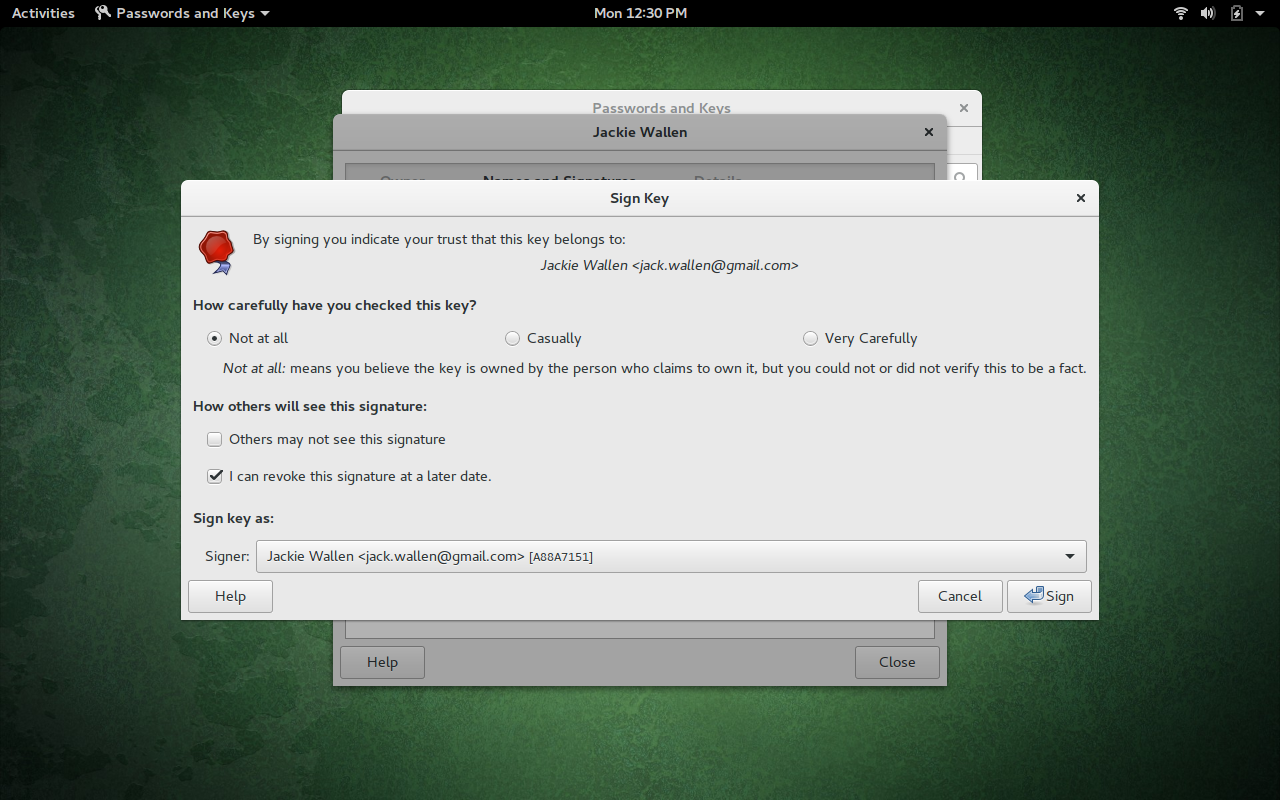
After the key generates, go back to the main window and select the key you just created. Right-click the new key and select properties. In the new window, select Names and Signatures. Click the Sign button and then, when prompted (Figure 3), select Casually, and then click Sign.
Once the key is signed, it is now ready to be used, for encryption, in Evolution.
Command-Line Keys
If you find that Seahorse doesn’t suit your needs, you can always create your GPG key through the command line. This is also quite simple. Let me walk you through the steps:
-
Open up a terminal window
-
Issue the command gpg2 –full-gen-key
-
Answer the presented questions (in most cases, the defaults will work fine)
-
Enter a passphrase for the GPG key
At this point, you will have to (as you did when using Seahorse) work on your desktop, so GPG can generate the random data it needs to create the key. What I have found works best is to open up LibreOffice (or any application that allows you to type) and start typing. Also move the mouse around, open up an app or two, and work.
Once the key is generated, you will see it automatically appear in Seahorse. You can then use the GUI app to sign the key (it’s the easiest method to ensure the key is usable with Evolution).
Importing Keys
If you already have a key for signing, you can import it into Seahorse by clicking File > Import. Navigate to where you’ve saved the key, select it, and then click Open. The key should then import and be immediately available to use. You will then have to sign the key (as instructed earlier) for it to work in Evolution.
Enabling your Key in Evolution
Now you’re ready to use the key in Evolution. To do this, follow these steps:
-
Open Evolution
-
Click Edit > Preferences
-
In Mail Accounts, select the account to be used
-
Click Edit
-
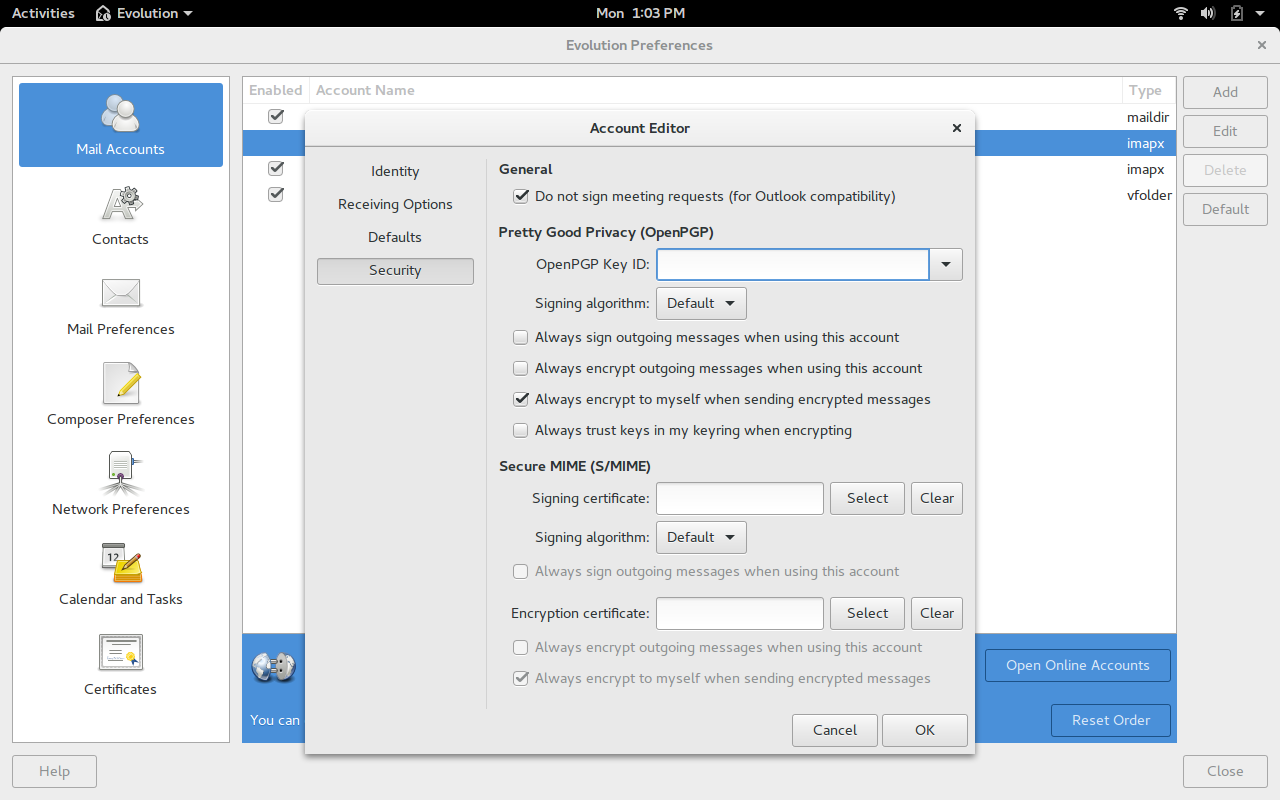
Click Security
-
In the OpenPGP Key ID field, enter the email address associated with the key you created (Figure 4) or click the drop-down and select the correct key
-
Click OK
That will associate the newly created key with your email address.
Encrypting Email
By default, outgoing email will not be encrypted. To encrypt your email, do the following:
-
Open Evolution
-
Create a new email
-
Click Options > PGP Encrypt
-
You can optionally click Options > PGP Sign (which will help the receiver know the key used can be trusted)
-
Send the email
Your encrypted email will then arrive in the sender’s inbox. Of course, in order for them to decrypt the email, they will have to have your key. To export your key, we’ll turn back to Seahorse. Here are the steps:
-
Open Seahorse
-
Right-click on the key to use and select properties
-
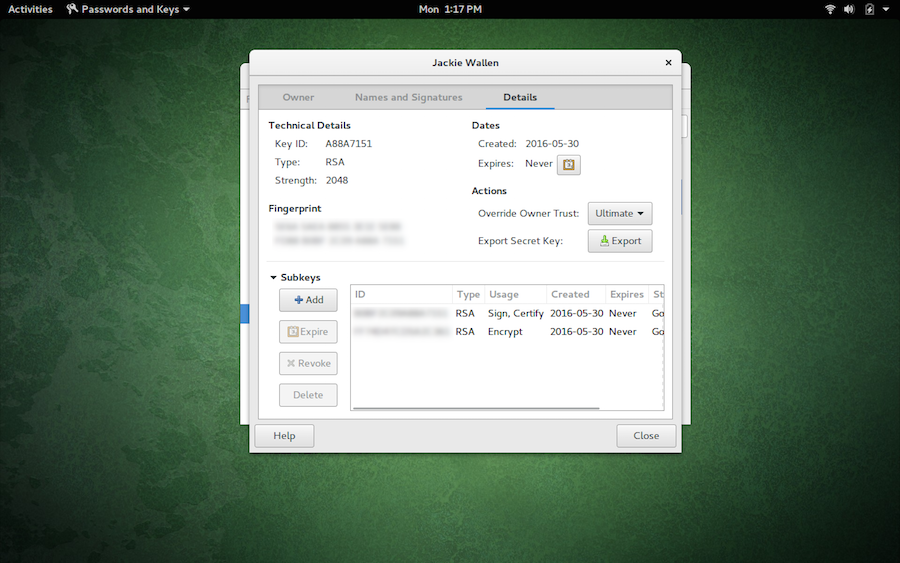
Select the Details tab
-
Click the Export button (Figure 5)
-
Give the key a name and click Export
-
When prompted, enter the passphrase associated with the key
Keep It Secure
If you’re using Evolution, you owe it to yourself (and those you communicate with) to make use of encryption and all its options. Yes, it does add a layer of complexity with your email, but the peace of mind you gain is worth every extra click.


